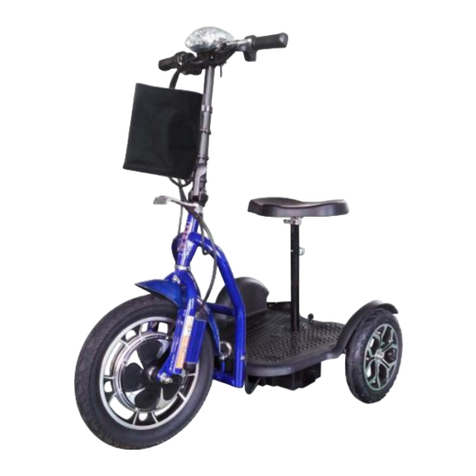
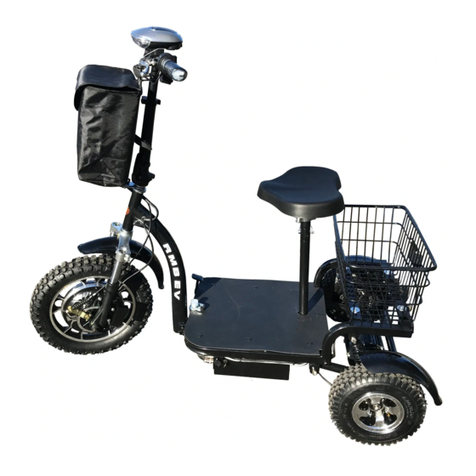
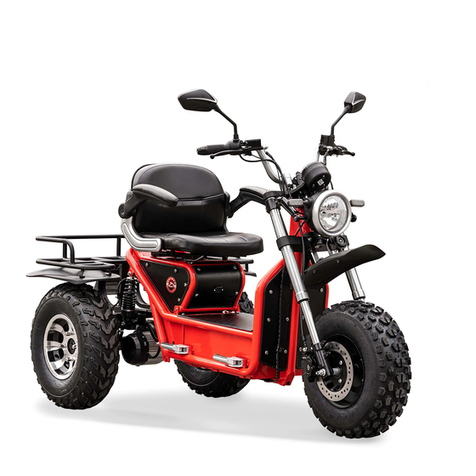
RMB EV Multi-Point User manual


Table of Contents
Technical Information-----------------------------------1
Warning Statement--------------------------------------2
Read Before Riding-------------------------------------3
List of Parts-----------------------------------------------4
Front Bar---------------------------------------------------6
Tool Kits In The Tool Bag------------------------------7
Assembling The Multi-Point---------------------------8
Charging The Batteries-------------------------------17
Charging The Batteries Outside Scooter---------18
Riding The Multi-Point--------------------------------20
Folding The Multi-Point-------------------------------24
Maintenance---------------------------------------------26
Wiring Diagram-----------------------------------------27
Trouble Shooting Guide------------------------------29

Warranty-------------------------------------------------31
Instructions for optional attachments-------------36

1
T
Te
ec
ch
hn
ni
ic
ca
al
l
I
In
nf
fo
or
rm
ma
at
ti
io
on
n
Multi-Point
Model No.
RMB Multi-Point
Product size
45 L x 27 W x 44 H inch
(115 x 68 W x 113 cm)
Type of motor
Permanent-magnet
brushless DC wheel motor
Motor power
500 w Wheel motor, 48 V
Battery type
sealed lead acid battery
Battery capacity
48 Volt, 12Ah
Charger
110V-240V, UL approved
Charging time
4-6 hours
Max. speed
Up to 16 MPH ( 26 km/h)
Single charge
Up to 31 MILES (50 km)
Max capacity
350 LBS (139kg)
Net weight
101 LBS (46 kg)

2
W
Wa
ar
rn
ni
in
ng
g
S
St
ta
at
te
em
me
en
nt
t
Multi-Point

3
R
Re
ea
ad
d
B
Be
ef
fo
or
re
e
R
Ri
id
di
in
ng
g
Multi-Point
WARNING
THE RMB MULTI-POINT IS NOT A TOY AND SHOULD
NOT BE OPERATED BY ANYONE UNDER 12 YEARS
OLD.
Safety Instructions:
(Please take note of the following before each ride)
•The maximum weight capacity is 350 lbs.
•Only one person at a time should ride.
•Always wear protective gear including knee and elbow pads and
an approved safety helmet when riding the Multi-Point.
•Before riding, be sure to check that all pivot points, locking
buttons, quick releases, and latches are secured properly.
•The power switch lock must be in the “off” position when the
Multi-Point is being charged.
•Do not use the Multi-Point when it is raining.
•Do not place the battery near heat or fire.
•Do not expose the charger to water or any moisture.
•Check if batteries are properly charged and installed.
•Charge Batteries after each use.
•Always ride on dry paved surfaces. Gravel, wet, extreme
incline, and uneven surfaces are a hazard.
C
Ch
he
ec
ck
k
i
if
f
a
al
ll
l
t
ti
ir
re
es
s
a
ar
re
e
p
pr
ro
op
pe
er
rl
ly
y
i
in
nf
fl
la
at
te
ed
d.
.

4
L
Li
is
st
t
o
of
f
P
Pa
ar
rt
ts
s
Multi-Point

5
L
Li
is
st
t
o
of
f
P
Pa
ar
rt
ts
s
Multi-Point
1 Multi-function Instrument
2 Foldable structure
3 Basket
4 Lamp bracelet
5 Connecting tube
6 Seat
7 Ring-pull steel pin
8 Seat post
9 Plastic base
10 Rear wheel
11 Battery
12 Dual-purpose lock bolt
13 Tri pod stands
14 Front fender
15 Controller
16 Motor
17 Front wheel

6
F
Fr
ro
on
nt
t
B
Ba
ar
r
Multi-Point
1 Brake lever
2 Lock mechanism switch
3 Horn switch
4 Multi-function Instrument
5 Key switch
6 USB port
7 Forward/reverse switch
8 Throttle

7
T
To
oo
ol
l
K
Ki
it
ts
s
I
In
n
T
Th
he
e
T
To
oo
ol
l
B
Ba
ag
g
Multi-Point
1 Screwdriver
2 Allen wrench (2.5mm)
3 Allen wrench (3mm)
4 Allen wrench (5mm)
5 Allen wrench (6mm)
6 Wrench (8 x 10mm)
7 Wrench (16 x 18mm)
8 Wrench (16 x 18mm)
9 charger

8
A
As
ss
se
em
mb
bl
li
in
ng
g
T
Th
he
e
M
Mu
ul
lt
ti
i-
-P
Po
oi
in
nt
t
Multi-Point
1. Unpack the Multi-Point carefully so that you
do not misplace any of the parts.
2. Place the Multi-Point on a flat, level surface.
3. Insert the two support stands into the
corresponding tubes at the base of the front
half of the scooter to form a tri pod. Secure
with wing nuts. Stand the front half of the
scooter upright (be sure to lock hand brake
after handlebars are attached).

9
A
As
ss
se
em
mb
bl
li
in
ng
g
T
Th
he
e
M
Mu
ul
lt
ti
i-
-P
Po
oi
in
nt
t
Multi-Point
4. Extend the handle bar tube to full upright
position, and slide it in to connect with the
front fork.
*Note: The tube shaft is intentionally off center to
allow handlebars to fold to the side. Be sure to
align release button to pivot on brake handle side

10
5. Ensure that the handlebar is facing front, the
brake on the left side and the throttle on the
right, then tighten the handlebar tube collar
A
As
ss
se
em
mb
bl
li
in
ng
g
T
Th
he
e
M
Mu
ul
lt
ti
i-
-P
Po
oi
in
nt
t
Multi-Point
clamp using the enclosed 5mm wrench.
6. Firmly connect wire harness to junction box
then slightly loosen junction box mounting
brackets and twist the junction box to the right
until it faces the rider. Re-tighten clamps.
7. Front half of scooter is now assembled

11
NOTE: Handle bar height adjustment. Handle
bar height can be easily adjusted by opening the
quick release on the handlebar tube to preferred
height, then firmly closing quick release.
A
As
ss
se
em
mb
bl
li
in
ng
g
T
Th
he
e
M
Mu
ul
lt
ti
i-
-P
Po
oi
in
nt
t
Multi-Point
8. Prior to assembling or disassembling the
Multi-Point, extend stands to the ground on a flat

12
surface and secure with wing nuts (B).
If you plan on using the Quick release system
often, you have two choices to conveniently
retain the stands with the scooter:
(1) To use stands as a foot rest, flip stands
upside down and secure wing nuts into
corresponding slots on stand shaft. (A)
A
As
ss
se
em
mb
bl
li
in
ng
g
T
Th
he
e
M
Mu
ul
lt
ti
i-
-P
Po
oi
in
nt
t
Multi-Point
(2) From position (B) loosen wing nuts and slide
stands up the support tube, turn 90 degrees so
the stand footings face the rear of the scooter.
Figure (C)

13
NOTE: If you do not plan on using the Quick
release system often and do not want to use the
foot rest option, it is recommended that you
remove the stands all together until such time
that you need them.
A
As
ss
se
em
mb
bl
li
in
ng
g
T
Th
he
e
M
Mu
ul
lt
ti
i-
-P
Po
oi
in
nt
t
Multi-Point
Assembling and disassembling the Multi-Point
using the Quick release system:

14
1. With power turned off, stand the front of the
scooter upright using the footing stands.
A
As
ss
se
em
mb
bl
li
in
ng
g
T
Th
he
e
M
Mu
ul
lt
ti
i-
-P
Po
oi
in
nt
t
Multi-Point
2. With seat attached to floor deck, grab seat with
both hands and place foot on tow hitch. Pull

15
back while applying pressure with your foot to tilt
floor deck up.
3. Place female end of floor deck onto male end
of front half. Secure with special bolt. (once
secure, rock back and forth to ensure full
insertion and re-tighten.)
A
As
ss
se
em
mb
bl
li
in
ng
g
T
Th
he
e
M
Mu
ul
lt
ti
i-
-P
Po
oi
in
nt
t
Multi-Point
4. The two power connector wires are fitted with

16
male to female plugs that have an alignment
notch. Take note when plugging in.
5. Plug the two power connecting wires into the
corresponding sockets on the battery box
respectively. Then zip tie the wire to the frame to
keep from getting caught on any debris when
riding.
A
As
ss
se
em
mb
bl
li
in
ng
g
T
Th
he
e
M
Mu
ul
lt
ti
i-
-P
Po
oi
in
nt
t
Multi-Point
To disassemble:
1. Turn off power.

17
2. Unplug the single power wire that connects the
front half of the scooter to the floor deck.
3. Reverse assembly steps and gently separate.
NOTE: In the rare instance the Quick Release
Mechanism becomes too tight to release easily,
turn the special screw upside down and screw in
using the outer threads. This will apply pressure
to release the mechanism.
C
Ch
ha
ar
rg
gi
in
ng
g
T
Th
he
e
B
Ba
at
tt
te
er
ri
ie
es
s
Multi-Point
●Before you ride the Multi-Point for the first time
you must charge the batteries for 4-6 hours or
Other manuals for Multi-Point
1
Table of contents
Other RMB EV Scooter manuals
