RoadPilot PRO User manual

OWNER’S MANUAL
Issue 1.720/07/2006

The technical data, information and illustrations contained in this publication were to the best of our knowledge correct at the time of going to
print. We reserve the right to change specifications, equipment, installation and maintenance instructions without notice as part of our policy of
continuous development and improvement.
No part of this publication may be reproduced, stored in a retrieval system or transmitted in any form, electronic or otherwise without prior per-
mission from RoadPilot Ltd.
No liability can be accepted for any inaccuracies or omissions in the publication, although every care has been taken to make it as complete and
accurate as possible.
© 2005 RoadPilot Ltd
RoadPilotTM and RoadPilot ProTM are a registered trade marks of RoadPilot Ltd.
RRooaaddPPiilloottLLiimmiitteedd
43 Riverside 2
Sir Thomas Longley Road
Rochester, Kent ME2 4DP
Tel - 0870 2401702
Fax - 0870 2401704
Email Sales - sales@roadpilot.com
Email Info - info@roadpilot.com
Email Tech Support - tech@roadpilot.com
Web - www.roadpilot.com

CONTENTS
1. General
1.1 Introduction . . . . . . . . . . . . . . . . . . . . . . . . . . . . . . . . . . . . . . . . . . . . . . . . . . . . . . . . . . 5
1.2 Warning . . . . . . . . . . . . . . . . . . . . . . . . . . . . . . . . . . . . . . . . . . . . . . . . . . . . . . . . . . . . . 5
1.3 How it works . . . . . . . . . . . . . . . . . . . . . . . . . . . . . . . . . . . . . . . . . . . . . . . . . . . . . . . . . 6
2. Operation
2.1 RoadPilot Pro display . . . . . . . . . . . . . . . . . . . . . . . . . . . . . . . . . . . . . . . . . . . . . . . . . . 7
2.1.1 Proximity indicator . . . . . . . . . . . . . . . . . . . . . . . . . . . . . . . . . . . . . . . . . . . . . . . . . . 7
2.1.2 Information display . . . . . . . . . . . . . . . . . . . . . . . . . . . . . . . . . . . . . . . . . . . . . . . . . . 8
2.1.3 Warnings given . . . . . . . . . . . . . . . . . . . . . . . . . . . . . . . . . . . . . . . . . . . . . . . . . . . . . 8
2.1.4 Multifunction display . . . . . . . . . . . . . . . . . . . . . . . . . . . . . . . . . . . . . . . . . . . . . . . . 9
2.2 Satellite status page . . . . . . . . . . . . . . . . . . . . . . . . . . . . . . . . . . . . . . . . . . . . . . . . . 10
2.3 Speedo page . . . . . . . . . . . . . . . . . . . . . . . . . . . . . . . . . . . . . . . . . . . . . . . . . . . . . . . .11
2.4 Tracking page . . . . . . . . . . . . . . . . . . . . . . . . . . . . . . . . . . . . . . . . . . . . . . . . . . . . . . .12
2.5 GPS page . . . . . . . . . . . . . . . . . . . . . . . . . . . . . . . . . . . . . . . . . . . . . . . . . . . . . . . . . . . 13
2.6 Camera page . . . . . . . . . . . . . . . . . . . . . . . . . . . . . . . . . . . . . . . . . . . . . . . . . . . . . . . 14
3. Miscellaneous Features
3.1 User reported locations . . . . . . . . . . . . . . . . . . . . . . . . . . . . . . . . . . . . . . . . . . . . . . 15
3.2 Store waypoint . . . . . . . . . . . . . . . . . . . . . . . . . . . . . . . . . . . . . . . . . . . . . . . . . . . . . . 15
3.3 Delete location . . . . . . . . . . . . . . . . . . . . . . . . . . . . . . . . . . . . . . . . . . . . . . . . . . . . . .16
3.4 Mileage Summary . . . . . . . . . . . . . . . . . . . . . . . . . . . . . . . . . . . . . . . . . . . . . . . . . . . 16
3.5 Laserpilot . . . . . . . . . . . . . . . . . . . . . . . . . . . . . . . . . . . . . . . . . . . . . . . . . . . . . . . . . . . .17
3.5.1 How it Works
. . . . . . . . . . . . . . . . . . . . . . . . . . . . . . . . . . . . . . . . . . . . . . . . . . . . . .
17
3.5.2 Operation
. . . . . . . . . . . . . . . . . . . . . . . . . . . . . . . . . . . . . . . . . . . . . . . . . . . . . . . .
17
4. Calibration & Setup
4.1 General setup . . . . . . . . . . . . . . . . . . . . . . . . . . . . . . . . . . . . . . . . . . . . . . . . . . . . . . . . 18
4.1.1 Volume . . . . . . . . . . . . . . . . . . . . . . . . . . . . . . . . . . . . . . . . . . . . . . . . . . . . . . . . . . 18
4.1.2 Contrast . . . . . . . . . . . . . . . . . . . . . . . . . . . . . . . . . . . . . . . . . . . . . . . . . . . . . . . . . 19
4.1.3 Units . . . . . . . . . . . . . . . . . . . . . . . . . . . . . . . . . . . . . . . . . . . . . . . . . . . . . . . . . . . . 19
4.1.4 Speedo type . . . . . . . . . . . . . . . . . . . . . . . . . . . . . . . . . . . . . . . . . . . . . . . . . . . . . . 20
4.1.5 Set Voice Warning . . . . . . . . . . . . . . . . . . . . . . . . . . . . . . . . . . . . . . . . . . . . . . . . . 20
4.1.6 Set Time . . . . . . . . . . . . . . . . . . . . . . . . . . . . . . . . . . . . . . . . . . . . . . . . . . . . . . . . . 21
4.1.7 Daylight Saving Time . . . . . . . . . . . . . . . . . . . . . . . . . . . . . . . . . . . . . . . . . . . . . . . . 21
4.1.8 Language . . . . . . . . . . . . . . . . . . . . . . . . . . . . . . . . . . . . . . . . . . . . . . . . . . . . . . . . 22
4.1.9 Country . . . . . . . . . . . . . . . . . . . . . . . . . . . . . . . . . . . . . . . . . . . . . . . . . . . . . . . . . 22
4.1.10 Information . . . . . . . . . . . . . . . . . . . . . . . . . . . . . . . . . . . . . . . . . . . . . . . . . . . . . . 23
4.1.11 Mode . . . . . . . . . . . . . . . . . . . . . . . . . . . . . . . . . . . . . . . . . . . . . . . . . . . . . . . . . . . 23
4.2 Warnings . . . . . . . . . . . . . . . . . . . . . . . . . . . . . . . . . . . . . . . . . . . . . . . . . . . . . . . . . . . 24
4.2.1 Range . . . . . . . . . . . . . . . . . . . . . . . . . . . . . . . . . . . . . . . . . . . . . . . . . . . . . . . . . . 24
4.2.2 Warn off heading location . . . . . . . . . . . . . . . . . . . . . . . . . . . . . . . . . . . . . . . . . . . 25
4.2.3 Show off heading location . . . . . . . . . . . . . . . . . . . . . . . . . . . . . . . . . . . . . . . . . . . 25
4.2.4 Auto range . . . . . . . . . . . . . . . . . . . . . . . . . . . . . . . . . . . . . . . . . . . . . . . . . . . . . . 26
4.2.5 Speed sensitive . . . . . . . . . . . . . . . . . . . . . . . . . . . . . . . . . . . . . . . . . . . . . . . . . . . 26
4.2.6 Early warning . . . . . . . . . . . . . . . . . . . . . . . . . . . . . . . . . . . . . . . . . . . . . . . . . . . . 27
4.2.7 Early warning speed sensitive . . . . . . . . . . . . . . . . . . . . . . . . . . . . . . . . . . . . . . . . 27
4.2.8 Show location type . . . . . . . . . . . . . . . . . . . . . . . . . . . . . . . . . . . . . . . . . . . . . . . . 27
4.3 Laser . . . . . . . . . . . . . . . . . . . . . . . . . . . . . . . . . . . . . . . . . . . . . . . . . . . . . . . . . . . . . . 28
4.3.1 Laser Warning Enable
. . . . . . . . . . . . . . . . . . . . . . . . . . . . . . . . . . . . . . . . . . . . . .
28
4.3.2 Laser Mute Speed
. . . . . . . . . . . . . . . . . . . . . . . . . . . . . . . . . . . . . . . . . . . . . . . . .
28
4.3.3 Laser Stealth Speed
. . . . . . . . . . . . . . . . . . . . . . . . . . . . . . . . . . . . . . . . . . . . . . .
28
4.3.4 Laser Warning Time
. . . . . . . . . . . . . . . . . . . . . . . . . . . . . . . . . . . . . . . . . . . . . . .
29
4.3.5 Laser Warn When GPS Offline
. . . . . . . . . . . . . . . . . . . . . . . . . . . . . . . . . . . . . . .
29
4.4 Mileage Manager . . . . . . . . . . . . . . . . . . . . . . . . . . . . . . . . . . . . . . . . . . . . . . . . . . . 30
4.4.1 Mileage data length . . . . . . . . . . . . . . . . . . . . . . . . . . . . . . . . . . . . . . . . . . . . . . . . .31
-ctd

CONTENTS ctd
4.5 Radar . . . . . . . . . . . . . . . . . . . . . . . . . . . . . . . . . . . . . . . . . . . . . . . . . . . . . . . . . . . . . . 32
4.5.1 Radar enable . . . . . . . . . . . . . . . . . . . . . . . . . . . . . . . . . . . . . . . . . . . . . . . . . . . . . 32
4.5.2 Radar mute speed . . . . . . . . . . . . . . . . . . . . . . . . . . . . . . . . . . . . . . . . . . . . . . . . . 33
4.5.3 Radar stealth speed . . . . . . . . . . . . . . . . . . . . . . . . . . . . . . . . . . . . . . . . . . . . . . . . 33
4.5.4 Warn when GPS offline . . . . . . . . . . . . . . . . . . . . . . . . . . . . . . . . . . . . . . . . . . . . . 34
4.5.5 X Band sensitivity . . . . . . . . . . . . . . . . . . . . . . . . . . . . . . . . . . . . . . . . . . . . . . . . . 34
4.5.6 K Band sensitivity . . . . . . . . . . . . . . . . . . . . . . . . . . . . . . . . . . . . . . . . . . . . . . . . . 34
4.5.7 Ka Band sensitivity . . . . . . . . . . . . . . . . . . . . . . . . . . . . . . . . . . . . . . . . . . . . . . . . . 34
5. PC Software Operation
5.1 System requirements . . . . . . . . . . . . . . . . . . . . . . . . . . . . . . . . . . . . . . . . . . . . . . . . 35
5.2 Installing software . . . . . . . . . . . . . . . . . . . . . . . . . . . . . . . . . . . . . . . . . . . . . . . . . . . 35
5.3 Connecting to RoadPilot Database . . . . . . . . . . . . . . . . . . . . . . . . . . . . . . . . . . . . 36
5.4 Mileage Manager . . . . . . . . . . . . . . . . . . . . . . . . . . . . . . . . . . . . . . . . . . . . . . . . . . . . 36
5.4.1 User interface . . . . . . . . . . . . . . . . . . . . . . . . . . . . . . . . . . . . . . . . . . . . . . . . . . . . 36
5.4.2 Using the filter . . . . . . . . . . . . . . . . . . . . . . . . . . . . . . . . . . . . . . . . . . . . . . . . . . . . 37
5.4.3 Totals . . . . . . . . . . . . . . . . . . . . . . . . . . . . . . . . . . . . . . . . . . . . . . . . . . . . . . . . . . 38
5.4.4 Export journeys . . . . . . . . . . . . . . . . . . . . . . . . . . . . . . . . . . . . . . . . . . . . . . . . . . . 38
5.4.5 Options . . . . . . . . . . . . . . . . . . . . . . . . . . . . . . . . . . . . . . . . . . . . . . . . . . . . . . . . . 38
5.4.6 Find addresses for journeys . . . . . . . . . . . . . . . . . . . . . . . . . . . . . . . . . . . . . . . . . . 39
5.4.7 Download data from RoadPilot Pro . . . . . . . . . . . . . . . . . . . . . . . . . . . . . . . . . . . . 39
5.4.8 Export points of a journey . . . . . . . . . . . . . . . . . . . . . . . . . . . . . . . . . . . . . . . . . . . 39
5.4.9 Show map for a selected point . . . . . . . . . . . . . . . . . . . . . . . . . . . . . . . . . . . . . . . 40
5.4.10 Editing journeys . . . . . . . . . . . . . . . . . . . . . . . . . . . . . . . . . . . . . . . . . . . . . . . . . . 40
5.4.11 Deleting journey . . . . . . . . . . . . . . . . . . . . . . . . . . . . . . . . . . . . . . . . . . . . . . . . . . 41
5.4.12 Changing journey type . . . . . . . . . . . . . . . . . . . . . . . . . . . . . . . . . . . . . . . . . . . . . . 41
5.5 Downloading other Databases . . . . . . . . . . . . . . . . . . . . . . . . . . . . . . . . . . . . . . . . . 41
6. Installation
6.1 Installing RoadPilot Pro . . . . . . . . . . . . . . . . . . . . . . . . . . . . . . . . . . . . . . . . . . . . . . . 42
6.1.1 Fitting the display unit
. . . . . . . . . . . . . . . . . . . . . . . . . . . . . . . . . . . . . . . . . . . . . . .
42
6.1.2 Positioning the GPS antenna
. . . . . . . . . . . . . . . . . . . . . . . . . . . . . . . . . . . . . . . . .
42
6.1.3 Electrical installation
. . . . . . . . . . . . . . . . . . . . . . . . . . . . . . . . . . . . . . . . . . . . . . .
43
6.2 LaserPilot Installation . . . . . . . . . . . . . . . . . . . . . . . . . . . . . . . . . . . . . . . . . . . . . . . . 44
6.2.1 Optimum locations for the LaserPilot
. . . . . . . . . . . . . . . . . . . . . . . . . . . . . . . . . .
44
6.2.2 Exterior mounting
. . . . . . . . . . . . . . . . . . . . . . . . . . . . . . . . . . . . . . . . . . . . . . . . .
44
6.2.3 Interior mounting
. . . . . . . . . . . . . . . . . . . . . . . . . . . . . . . . . . . . . . . . . . . . . . . . .
45
6.2.4 Multiple LaserPilots
. . . . . . . . . . . . . . . . . . . . . . . . . . . . . . . . . . . . . . . . . . . . . . . .
45
6.3 Radar installation . . . . . . . . . . . . . . . . . . . . . . . . . . . . . . . . . . . . . . . . . . . . . . . . . . . 46
6.3.1 Installation . . . . . . . . . . . . . . . . . . . . . . . . . . . . . . . . . . . . . . . . . . . . . . . . . . . . . . 46
6.3.2 Additional functions . . . . . . . . . . . . . . . . . . . . . . . . . . . . . . . . . . . . . . . . . . . . . . . . 47
6.4 Installation summary . . . . . . . . . . . . . . . . . . . . . . . . . . . . . . . . . . . . . . . . . . . . . . . . 47
6.5 Limitations of operation . . . . . . . . . . . . . . . . . . . . . . . . . . . . . . . . . . . . . . . . . . . . . 48
7. Appendix
7.1 G P S - how does it work . . . . . . . . . . . . . . . . . . . . . . . . . . . . . . . . . . . . . . . . . . . . . . . 49
7.2 Types of camera . . . . . . . . . . . . . . . . . . . . . . . . . . . . . . . . . . . . . . . . . . . . . . . . . . . . 50
7. 3 Update pricing . . . . . . . . . . . . . . . . . . . . . . . . . . . . . . . . . . . . . . . . . . . . . . . . . . . . . . 50
7.4 Use in more than one country . . . . . . . . . . . . . . . . . . . . . . . . . . . . . . . . . . . . . . . . 50
7.5 Trouble shooting . . . . . . . . . . . . . . . . . . . . . . . . . . . . . . . . . . . . . . . . . . . . . . . . . . . . . 51
7.6 Technical support . . . . . . . . . . . . . . . . . . . . . . . . . . . . . . . . . . . . . . . . . . . . . . . . . . . 52
7.7 Specification . . . . . . . . . . . . . . . . . . . . . . . . . . . . . . . . . . . . . . . . . . . . . . . . . . . . . . . . 52
7.8 Spares & accessories . . . . . . . . . . . . . . . . . . . . . . . . . . . . . . . . . . . . . . . . . . . . . . . . 52
7.9 Care & Maintenance . . . . . . . . . . . . . . . . . . . . . . . . . . . . . . . . . . . . . . . . . . . . . . . . . 53
7.10 Warranty . . . . . . . . . . . . . . . . . . . . . . . . . . . . . . . . . . . . . . . . . . . . . . . . . . . . . . . . . . . 53
7.11 Registration . . . . . . . . . . . . . . . . . . . . . . . . . . . . . . . . . . . . . . . . . . . . . . . . . . . . . . . . . 54
7.12 Index . . . . . . . . . . . . . . . . . . . . . . . . . . . . . . . . . . . . . . . . . . . . . . . . . . . . . . . . . . . . . . 56

Page 5
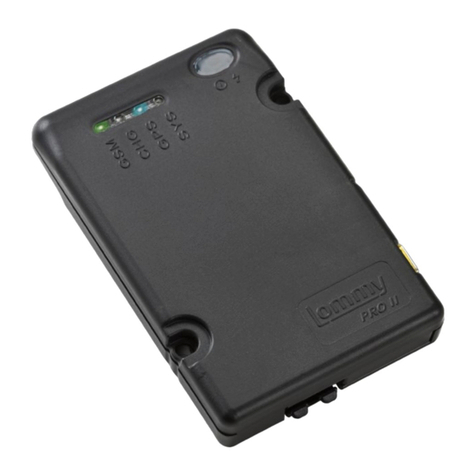
Fig 1.1 - RoadPilot Pro
1. General
1.1 Introduction
Thank you for purchasing RoadPilot Pro, which will
give you many years of quality service. Please read
this manual carefully before use or installation and
keep this manual for future reference.
In an era of innovation and technology, RoadPilot
leads the way allowing you to benefit from high
technology solutions today. RoadPilot Pro is the
latest in our range of accurate and reliable safety
devices that use satellite location technology to
identify your proximity to collision hot spot loca-
tions identified by road traffic authorities with
speed detection devices (SDD).
RoadPilot Pro uses the latest in second generation
satellite positioning technology along with the most
up to date and accurate database of the positions
of all speed cameras in the country. The advanced
touch screen display makes RoadPilot Pro very
easy to use and gives useful additional information
to make your driving experience easier and safer.
We at RoadPilot do not condone speeding. Anyone
who commits an offense whilst using a RoadPilot
product is deemed to have broken the law and will
have no recourse, legal or otherwise against
RoadPilot Ltd, its agents or representatives.
We operate a policy of continuous development
and reserve the right to alter and improve the
specification of their products without notice.
1.2 Warning
Once set up, RoadPilot Pro will automatically
inform you visually and audibly when you approach
any cameras, leaving you free to concentrate on
driving safely and legally. TThheeuunniittwwiillllnnoottppeerrmmiitt
aannyyuusseerraaddjjuussttmmeennttoofftthheesseettttiinnggsswwhhiilleetthheevveehhii--
cclleeiissmmoovviinngg..DDoonnoottaatttteemmppttttooaaddjjuussttaannyysseett--
ttiinnggssoonnyyoouurrRRooaaddPPiilloottPPrroowwhhiilleeddrriivviinnggaalloonngg,,aass
tthhiisswwiillllddiissttrraaccttyyoouuffrroommtthheerrooaadd,,eennddaannggeerriinngg
yyoouurrsseellffaannddootthheerrrrooaadduusseerrss..

1.3 How it works
Unlike speed camera detectors which work by detecting the radar or laser signal from the cameras,
RoadPilot Pro works by using the latest GPS (Global Positioning System) satellite technology, which pin-
points the position of your vehicle with incredible accuracy - typically within 15 metres. RoadPilot Pro
then correlates this position with it’s inbuilt database of camera positions across the country. If it detects
that you are approaching a camera and your vehicle is exceeding the speed limit, it will alert you both
audibly and visually, giving you sufficient time to reduce your speed.
The RoadPilot central database is updated daily with the latest speed camera positions. The CD-ROM
packaged with RoadPilot Pro contains easy to use software which allows RoadPilot Pro to be updated
with the latest information simply by connecting it to an internet-enabled PC. Refer to section 5 for
installation and operating instructions for the software.
In addition, if you come across a camera that is not currently on the database, you can update it with a
simple touch of the screen. When you next update your RoadPilot Pro , this information will be trans-
ferred to the RoadPilot central database.
Page 6
1. RoadPilot Pro accurately
calculates the position of the
vehicle using GPS satellites
2. It cross-refers the
vehicle’s position with the
location of any cameras nearby,
stored in its inbuilt database
3. If the vehicle is approaching a
camera, and is exceeding the camera’s
trigger speed, RoadPilot Pro warns
the driver, giving adequate time to
reduce speed safely.
Fig 1.2 - How RoadPilot Pro works

2. Operation
The very first time RoadPilot Pro is powered up, it
may take up to 45 minutes to initialise and to come
online. This is because it must try and locate
enough satellites (at least 4) in order to fix the
position of the vehicle. This is what is referred to
as the “cold start”. After this, it should only take a
few seconds to come online every time it is pow-
ered up (referred to as a “warm start”).
We recommend that you update the database
before you take RoadPilot Pro out on the road.
If the Mileage Manager function is active, the first
screen will invite you to select the mileage catego-
ry (see section 4.3) before proceeding.
2.1 RoadPilot Pro Display
RoadPilot Pro display (Fig 2.1) is divided into three
sections - the multifunction display area (1), the
proximity indicator (2) and the information display
(3).
The multifunction display area can show a variety
of user selectable information pages, which are
explored later in this section.
2.1.1 Proximity Indicator
The proximity indicator (Fig 2.2) is a series of bars
along the top of the display which show how close
the vehicle is to a speed camera. You can specify
the proximity alert range - i.e, how far from a cam-
era the vehicle must be before RoadPilot Pro will ini-
tiate an alarm (see section 4.2.1). The ten proximity
bars are fractions of that distance -
• One bar indicates that you are 1/10th of the way
from the proximity alert range to the camera
• Two bars indicate that you are 2/10th of the way
to the camera etc.
• All bars filled indicate that you are passing the
camera location.
Page 7
Fig 2.1 - RoadPilot Pro display
Fig 2.2 - Proximity indicator
(Assumes proximity alert range is selected at 1000
yards)

2.1.2 Information Display
The information display area on the right of the
screen (Fig 2.3) shows -
• Current compass bearing. The vehicle will need
to be moving in order for the unit to calculate the
bearing. If RoadPilot Pro has not yet achieved a
satellite position fix, the display will show OOFFFFLLIINNEE.
• Range to nearest camera or waypoint. This is in
kilometres/metres or miles/yards depending on
the units selected (see section 4.1.3).
This will change to show the speed limit
when the vehicle approaches a camera.
• The bearing to the nearest camera, indicated by
an arrow.
This will change to the Audio mute button
when the vehicle approaches a camera.
Touch this to silence the audible alarm.
• The current time (information supplied by the
satellites).
2.1.3 Warnings given
RoadPilot Pro features a voice synthesiser, enabling
it to give audible as well as visual warnings of
approaching alert situations. If this is disabled in
the Set Voice Warning option (see section 4.1.5), the
audio alert will be a sequence of beeps instead.
NOTE - Whether RoadPilot Pro alerts you to an
approaching camera will depend on the unit’s set-
tings (see section 4.2). However, the display will
always switch to the Camera page (see section 2.6)
when approaching a camera, waypoint or reported
location, regardless of whether the settings specify
an alert to be given in that situation or not.
If you are approaching a camera and RoadPilot Pro
does not switch to the camera page, it is probably a
new camera, and should be saved as a reported
location (see section 3.1).
A summary is shown in Fig 2.4.
See section 2.6 - Camera Page for more informa-
tion on visual alerts given.
Page 8
Compass bearing
Range to nearest camera
Camera bearing
GPS time
RANGE
700
yards
11:36:19
Fig 2.3 - Information display
30
Location
Type
Speed
Camera
Waypoint
Reported
Location
Radar
Device*
On Screen
Alert
Goes to camera
page : icon
shown relative to
car. C amera speed
limit displayed.
Goes to camera
page : icon
shown relative to
car.
Goes to camera
page : icon
shown relative to
car.
Goes to camera
page. Bar graph
shows radar
signal strength.
Audio Alert
(Beep)†
A series of high
beeps at 5/10 dis-
tance, increasing
in regularity as
range closes.
A series of “chirps”
at 5/10 distance,
increasing in regu-
larity as range
closes.
A series of low
beeps at 5/10 dis-
tance, increasing
in regularity as
range closes.
A series of high
beeps at 5/10 dis-
tance, increasing
in regularity as
range closes.
Audio Alert
(Voice)
“Warning.
Speed camera.
Speed limit x.
Slow down.”
“Warning.
Waypoint.”
“Warning.
Reported location.”
“Radar.”
* Optional Radar module must be fitted
† If voice alert is disabled
Fig 2.4 - RoadPilot Pro alert summary

2.1.3 Multifunction Display
To select a page on the multifunction display, sim-
ply touch the screen to bring up the main menu
(Fig 2.5).
NNOOTTEE- As a safety feature, the vehicle must be sta-
tionary before RoadPilot Pro will allow access to
any of the setup functions.
Touch the appropriate icon on the screen to select
the required page-
Satellite status page (section 2.2)
Speedo page (section 2.3)
Tracking page (section 2.4)
GPS page (section 2.5)
Camera page (section 2.6)
Setup page* (section 4)
Exit to previous page
Store new camera location† (section 3.1)
Store waypoint† (section 3.2)
Delete camera/location
¥
(section 3.3)
Mileage Summary (section 3.4)
*
Will only appear when the vehicle is stationary.
†
Will only appear when RoadPilot Pro is online.
¥ Will only appear when near to a camera or reported location
Page 9
Fig 2.5 - Main menu

2.2 Satellite status page
To select the Satellite status page, touch
this icon on the main menu.
The satellite status page (Fig 2.6) shows visually
the number of satellites visible relative to your cur-
rent position.
An accurate 3d position fix requires at least four
satellites to be visible in a good spread across the
sky. The radar-style display shows the visible satel-
lites and their positions relative to the vehicle.
Each satellite has an unique ID code, shown in the
centre of each satellite icon. The bars along the
bottom of the display show the signal strengths of
each satellite. The solid black bars indicate the
satellites being used for the position fix.
- satellites being used for the position
fix.
- satellites with a signal too weak to be used
for the position fix but known to be in view.
- satellites for which no signal is being
received but are known to be in view.
The display will also indicate the position fix mode
it is using -
• NNooNNaavv- No satellites are being detected.
• DDeeaaddRReecckkoonn- used for a short while to esti-
mate the position of the vehicle when no satel-
lites are visible.
• 11,,22aanndd33SSaattTTrraacckk- position fix using the stated
number of satellites. RoadPilot Pro resorts to
these modes if it is online then loses a satellite.
Altitude is still shown, but this is estimated.
• LLeeaassttSSqq22dd&&33dd- Used during startup to
enable a position fix prior to full online mode.
• 33ddFFiixx- At least four satellites are being used,
giving a 3D position fix (including altitude). This is
the most accurate position fix.
The large bar on the right of the display shows the
total signal strength. When selecting a location for
the antenna it is worth referring to this to ensure
that the location chosen receives the best signal.
Page 10
3D Fix
RANGE
700
yards
11:36:19
Fig 2.6 - Satellite status page

35
000527
0062. 8
ODO
TRIP
mph
000527
0062. 8
ODO
TRIP
35
mph
RANGE
700
yards
11:36:19
RANGE
700
yards
11:36:19
2.3 Speedo page
To select the Speedo page, touch this icon
on the main menu.
This page shows the following information -
• The speed of the vehicle
• Odometer (Mileometer)
• Resettable trip meter
The information can either be shown digitally (Fig
2.7), or as a traditional “car” style analogue display
(Fig 2.8). This can be selected on the Setup page
(see section 4.1.4).
To reset the trip meter, touch the reset
icon. The Odometer is not resettable using
RoadPilot Pro, but may be adjusted using
RoadPilot Pro settings program.
NNOOTTEE- The speed shown is calculated using GPS
data, which tracks how fast the vehicle is moving
across the ground (referred to as Speed Over
Ground), not from the vehicle’s speedometer. This
is more accurate than your car’s speedometer and
therefore there may be a slight difference between
the speed shown on RoadPilot Pro and on the vehi-
cle’s speedometer, and there may be a slight lag in
adjusting if the speed of the vehicle changes sud-
denly.
Page 11
Fig 2.7 - Speedo page (digital)
Fig 2.8 - Speedo page (analogue)

2.4 Tracking page
To select the Tracking page, touch this icon
on the main menu.
This page allows you to visually track the route
your vehicle has taken and retrace it if necessary -
very useful if you have got lost!
The display shows your vehicle as the triangle in
the centre (Fig 2.9). The route taken is shown as a
trail behind the triangle.
Note that the top of the screen represents the
direction that the car is travelling, so the trail will
orient itself as appropriate.
Touch this icon, to zoom in.
Touch this icon to zoom out.
Touch this icon to clear the track.
The currently selected scale is shown at the top of
the display.
Page 12
0 3.0miles
RANGE
700
yards
11:36:19
Fig 2.9 - Tracking page

2.5 GPS page
To select the GPS page, touch this icon on
the main menu.
The GPS page is a summary page which shows the
following information (Fig 2.10) -
• The vehicle’s current position as Latitude and
Longitude
• The current heading
• The vehicle’s speed
• The altitude
• The position fix mode (see section 2.2)
• The accuracy of the fix in ft/metres
• The date and time
All this information is calculated using
position data from the GPS satellites without inte-
grating with any of the vehicle’s systems (apart
from power).
Page 13
Latitude
N 51.37445º
Longitude
E001.42790º
Heading Speed Height
320º 35mph 318ft
Mode Accuracy
3D Fix 28ft
Date Time
6 - OCT - 2002 11:36:19
RANGE
700
yards
11:36:19
Fig 2.10 - GPS page

35mph 70 yards
30
11:36:19
SPECS
GATSO
SPECS
WAYPOINT
USER
K
Radar versions only
LONDON CONGESTION
CHARGE ZONE
RANGE
500
yards
Press button to
cancel warnings.
RANGE
700
yards
11:36:19
2.6 Camera page
To select the Camera page, touch this icon
on the main menu. RoadPilot Pro also auto-
matically selects this page when the vehicle
is approaching a camera location.
The camera page visually shows the location of any
cameras relative to the vehicle’s position (Fig 2.11).
The vehicle is indicated by the square at the bot-
tom of the display.
The target camera is shown on the screen
as an icon, relative to the position of the car.
Any additional cameras within range are
indicated by this icon.
If the Show Off Heading Location function is
activated (see section 4.2.3), any Off
Heading cameras will be shown by this icon.
The position of any stored
waypoints (see section 3.2) will be indi-
cated by these icons.
The position of any reported locations
will be indicated by these icons.
SPECS cameras work in pairs - the time taken for the
vehicle to travel between the two cameras is used to
work out the speed. RoadPilot Pro shows SPECS
cameras with a line linking the partner cameras.
If the “Show Location Type” option is selected (sec-
tion 4.2.8), the camera type will be shown next to
the camera icon eg “Gatso”, “Truvelo” etc
.
The display also shows the speed the vehicle is trav-
elling and the range to the target camera / way-
point at the bottom of the screen.
Versions fitted with the Radar module (see Fig 2.11)
- if a camera with Radar emission is detected, the
bar on the left of the display shows the strength of
the signal detected. This is not shown on non-
Radar models.
London Congestion Charge Zone
- RoadPilot Pro
can detect when you are close to the Zone (Fig
2.12) and will show the range in the main portion of
the screen (the information display will continue to
show the range of the nearest camera). When
approaching the edge of the zone the display will
show “Zone Boundary”. While inside the zone the
display will show “Inside Zone”.
Page 14
Fig 2.11 - Camera page
Fig 2.12 - London Congestion Zone

3. Miscellaneous Features
3.1 User Reported Locations
If you encounter a new camera position, or one
that does not appear on the database, the position
can be logged and automatically relayed to the
RoadPilot Network.
Touch the display to bring up the main menu.
Touch the SSttoorreeLLooccaattiioonnicon. There is a count-
down of 5 seconds that gives you the oppor-
tunity of aborting if this was incorrectly
selected.
The location of the camera will be stored in your
RoadPilot Pro and uploaded to the Network the
next time you update your RoadPilot Pro by con-
necting to the RoadPilot Central Database. The
reported location will be automatically deleted
from RoadPilot Pro's memory after the upload.
You will be alerted visually and audibly each time
you approach the location you've stored until it is
deleted.
Our team will validate the position of the camera. If
you are the first user to identify this camera posi-
tion, we will credit your account to offset against
future subscription charges. Please contact us to
confirm the location by phone, via our website
(www.roadpilot.com) or email us at
database@roadpilot.com.
3.2 Store Waypoint
Waypoints are points of interest that you can store
in RoadPilot Pro and can also view on your PC
using the RoadPilot software supplied with the unit.
To store the location of an item of interest,
touch this icon on the main menu.
The position marked will subsequently be
shown on the display by this icon (Fig 3.2).
If the vehicle is heading towards the way-
point, it will be shown as this icon.
NNoottee- You will be alerted visually and audibly each
time you approach a stored waypoint until it is
deleted. Waypoints are not uploaded to the Network
and therefore can only be deleted manually.
Page 15
Fig 3.2 - Camera page showing waypoints
35mph
RANGE
300
yards
11:36:19
SAVING LOCATION
IN 5s
PRESS TO CANCEL
WAYPOINT
WAYPOINT
Fig 3.1 - New camera added to database

3.3 Delete Location
This icon will only appear on the main menu when
the vehicle is close to a camera location, a User
Reported Location or a Waypoint. It is used to
delete the location from RoadPilot Pro's memory,
for example if a camera is no longer there or if you
wish to delete a User Reported Location or
Waypoint.
Touch this icon when passing the location
to delete it from RoadPilot Pro’s database
(Fig 3.3). There is a countdown of 5 sec-
onds that gives you the opportunity of
aborting if this was incorrectly selected.
NNoottee--Please inform us if a camera is no longer in
a position indicated by the RoadPilot database, so
that we can keep it up to date. Otherwise the loca-
tion will be reinstated when your RoadPilot Pro is
next updated.
3.4 Mileage Summary
Touching this icon will bring up a Mileage
Summary page showing the mileages
recorded, categorised as Business, Private,
Commuting and Total Mileage (Fig 3.4).
Touch to return to the main menu.
Touch to return to the previously selected
data screen.
Touch to reset respective mileage to zero.
Page 16
DELETING LOCATION
IN 5s
PRESS TO CANCEL
BUSINESS MILEAGE
008752miles
PRIVATE MILEAGE
002824miles
COMMUTING MILEAGE
005472miles
TOTALMILEAGE
017048miles
Fig 3.3 - Deleting a camera/waypoint
Fig 3.4 - Mileage Summary page

3.5 LaserPilot
The LaserPilot is a compact weatherproof module
that can detect laser emissions from hand held and
mobile speed detection devices (SDDs), further
increasing the capability of your RoadPilot Pro.
It features front and rear sensor windows, enabling
it to detect laser emissions from SDDs coming
from the front and rear of the vehicle.
Note - The front sensor is the side with the fixing
screw. For optimum coverage ensure this side is
always pointing forward.
3.5.1 How it works
A laser SDD emits a narrow, focussed laser beam
consisting of a series of pulses which are reflected
back from the target vehicle. The times for these
pulses to return are measured and from these the
speed of the vehicle can be calculated.
Because the beam is so narrow, it allows the traffic
officer to target a specific part of the car - this
makes optimum positioning of the LaserPilot essen-
tial to ensure adequate coverage. Refer to the
installation instructions (section 5) for advice on
positioning of the LaserPilot to give the best results.
3.5.2 Operation
With a LaserPilot fitted, RoadPilot Pro will alert you
if it detects a laser SDD by flashing LASER! on the
screen (Fig 3.5). If voice alert is enabled, it will also
say “Laser!”, otherwise it will beep.
To acknowledge and cancel the alert, touch
the Mute icon on the screen.
Note - RoadPilot Pro will not necessarily trigger an
alert every time it passes a laser SDD position - the
traffic officer will normally not target you unless he
feels that you are exceeding the speed limit.
Page 17
35
000527
0062. 8
ODO
TRIP
mph
RANGE
700
yards
11:36:19
LASER!
Fig 3.5 - Laser alert

VOLUME
50
%
4. Setup
To select the Setup page, touch this icon on
the main menu.
The display will show five options -
The General setup menu
(section 4.1)
The Warnings setup menu
(section 4.2)
The Laser setup menu
(section 4.3)
Mileage manager
(section 4.4)
The Radar setup menu*
(section 4.5)
Touch to return to the main menu.
Touch to return to the previously selected
data screen.
* Will only appear if the optional Radar module is connected.
4.1 General setup
Touch this icon on the Setup menu to
select the General setup page.
Touch to scroll through the options.
Touch to return to the setup menu.
Touch to return to the previously selected
data screen.
4.1.1 Volume
This function sets the volume of the audible alarms
(Fig 4.2).
Touch to adjust the volume.
Touch to return to the setup menu.
Touch to return to the previously selected
data screen.
Page 18
Fig 4.1 - Setup page
Fig 4.2 - Volume setup page

4.1.2 Contrast
This function sets the contrast of the display (Fig
4.3).
Touch to adjust the contrast.
Touch to return to the setup menu.
Touch to return to the previously selected
data screen.
Note - for most conditions, 50% contrast will be
optimal (factory default).
4.1.3 Units
Speed and distance can be displayed in miles/
yards or kilometres/metres (Fig 4.4).
Touch to select miles/yards.
Touch to select kilometres/metres.
Touch to return to the setup menu.
Touch to return to the previously selected
data screen.
Page 19
UNITS
CONTRAST
50
%
Fig 4.4 - Units setup page
Fig 4.3 - Contrast setup page

4.1.4 Speedo type
This function selects the speedo style -
digital or “traditional” analogue (Fig 4.5).
Touch to select digital style.
Touch to select analogue style.
Touch to return to the setup menu.
Touch to return to the previously selected
data screen.
4.1.5 Set Voice Warning
This function is to turn the audible voice warning
off or on. (Fig 4.6).
Touch to turn Voice Warning on.
Touch to turn Voice Warning off.
Touch to return to the setup menu.
Touch to return to the previously selected
data screen.
NNoottee- If Voice Warning is turned off, audible warn-
ings will be given in beeps instead.
Page 20
SPEEDO TYPE
VOICE WARNING
Fig 4.5 - Speedo type setup page
Fig 4.6 - Voice Warning setup page
Table of contents

