Roadstar CD-825U/HP User manual

R
Car Stereo CD-MP3 Player with PLL / RDS
AM/FM Stereo Radio, USB-Port, 4 x 45 W.
Instructionmanual
Bedienungsanleitung
Manueld’instructions
Manualed’istruzioni
Manualdeinstrucciones
Manualdeinstruções
CD-825U/HP
R
AUDIO VIDEO
AUTO-HIFI
This product meets the essential requirements laid down by EEC Directive 89/336
and has been built in accordance with European standards EN50013, EN50020.
Dieses Produkt entspricht den Mindestanforderungen laut EU-Richtlinie 89/336 und
wurde gemäß den Normen EN50013, EN50020.
Se produit répond aux critères minima prévus par la directive 89/336/CEE et il a été
construit conformément aux normes EN50013, EN50020.
Questo prodotto soddisfa i requisiti minimi previsti dalla direttiva 89/336/CEE ed é
stato costruito in conformitá alle norme EN50013, EN50020.
Este producto cumple con todos los requisitos dispuestos por la directiva 89/336/EEC
y ha sido fabricado conformemente con las normas EN50013, EN50020.
O produto satisfaz os requisitos minimos previstos pela directiva 89/336/CEE e foi
fabricado em conformidade com as normas EN50013, EN50020.
is a registered Trademark of Roadstar S.A. - Switzerland All rights reserved

English Page 1
Deutsch Seite 13
Français Page 25
Italiano Pagina 37
Español Página 49
Portuguès Pagina 61
INDEX
Fig.
Fig.
• Your new unit was manufactured and assembled
under strict ROADSTAR quality control.
Thank-you for purchasing our product for your
music enjoyment.
Before operating the unit, please read this in-
struction manual carefully. Keep it also handy for
further future references.
• Ihr neues Gerät wurde unter Beachtung der
strengen ROADSTAR-Qualitätsvorschriften
gefertigt.
WirdankenIhnenfürdenKaufunseresProduktes
und wünschen Ihnen optimalen Hörgenuss. Bitte
lesen Sie diese Bedienungsanleitung durch, und
heben Sie sie auf, um jederzeit darin
nachschlagen zu können.
• Votre nouvel appareil a été fabriqué et monté en
étant soumis aux nombreaux tests ROADSTAR.
Nous espérons que cet appareil vous donnera
entière satisfaction.
Avant de vous adonner à ces activités, veuillez
lire attentivement ce manuel d’instructions.
Conservez-le à portée de main à fin de référence
ultérieure.
• Il vostro nuovo apparecchio è stato prodotto ed
assemblato sotto lo stretto controllo di qualità
ROADSTAR.
Vi ringraziamo di aver acquistato un nostro
prodotto per il vostro piacere d’ascolto.
Prima di procedere all'utilizzo dell'apparecchio,
leggete attentamente il manuale d’istruzioni e
tenetelo sempre a portata di mano per futuri
riferimenti.
• Vuestro nuevo sistema ha sido construido según
las normas estrictas de control de calidad
ROADSTAR.
Le felicitamos y le damos las gracias por su
eleccióndeesteaparado. Porfavorleerelmanual
antes de poner en funcionamiento el equipo y
guardar esta documentación en case de que se
necesite nuevamente.
• Seu novo aparelho foi construido e montado sob
o estrito controle de qualidade da ROADSTAR.
Agradecemos por ter comprado nosso produto
para a sua diversão.
Antes de usar esta unidade é necessário ler
com atençâo este manual de instruçâes pare
que possa ser usada apropriadamente;
mantenha o manual ao seu alcance para outras
informaçâes.
CD-825U/HP
14 2 / 3 11613 21
9
7611 510 4
15
17 18
19 20 812
21

EnglishEnglish
WARNINGS
CAUTION
RISK OF ELECTRIC
SHOCK
DO NOT OPEN
The exclamation point within the triangle is a warning sign alert-
ing the user of important instructions accompanying the
product.
The lightening flash with arrowhead symbol within the triangle
is a warning sign alerting the user of “dangerous voltage” inside
the unit.
To reduce the risk of electric shock, do not remove the cover. No
user serviceable parts inside the unit. Refer all servicing to
qualified personnel.
Invisible laser radiation when the unit is opened or interlocks
defeated. Avoid exposure to laser beam. Use of controls,
adjustments or procedures other than those specified herein
may result in hazardous radiation exposure.
This unit must not be exposed to moisture or rain.
This unit should be positioned so that it is properly ventilated.
Do not expose this unit to direct sunlight or heat radiating
sources.
12
CD-825U/HP
Car Stereo CD-MP3 Player with PLL AM / FM Stereo Radio
RDS with PTY and
USB. Detachable Front Panel System
INSTRUCTIONMANUAL
Please read this instruction manual carefully and familiarize yourself with your new Radio
before using it for the first time. Please retain this manual for future reference.
TABLE OF CONTENTS
• Location of Controls
• Features
• Installation
• Precautions and Maintenance
• Operating Instructions
• Specifications
LOCATIONSOF CONTROLS
1. POWER ON/OFF
2. FUNCTION SELECT BUTTON: BASS/TREBLE/BALANCE/FADER / TA SEEK / PI /
LOUDNESS/BEEP/AUDIO DSP/LOC-DX(/STEREO. “ENTER” IN MP3 MODE.
3. VOL UP/VOL DOWN FOR BASS/TREBLE/BALANCE/FADER
4. PRESET STATIONS (1,2,3,4,5,6)
5. 'AF' function (ALTERNATIVE FREQUENCIES)
6. 'TA' function (TRAFFIC ANNOUNCEMENT)
7. 'PTY' function (PROGRAM TYPE)
8. + 10 BUTTON (CD / MP3)
9. MODE BUTTON (MODE)
10. BAND BUTTON
11. AUTOMATIC OR MANUAL TUNING (FREQ UP >> OR FREQ DOWN << /
CD - USB (MP3) TRACK SKIP BUTTON
12. - 10 BUTTON (CD / MP3
13. LCD DISPLAY
14. PANEL RELEASE BUTTON
15. USB PORT
16. CD SLOT-IN
17. PAUSE BUTTON
18. INTRO BUTTON (CD SCAN)
19. REPEAT BUTTON (REPEAT)
20. RANDOM BUTTON (SHUFFLE)
21. RESET BUTTON (on main unit)
22. CD EJECT BUTTON

EnglishEnglish 34
FEATURES
The unit features a detachable front control panel, AM/FM stereo RDS, CD - USB:
• Electronic Volume, Bass, Treble, Fader and Balance control.
• CD Player with antishock protection
• Precision electronic tuning with phase-lock loop (P.L.L.) circuitry.
• Programmable 30 preset memory tuning (18 for FM and 12 for AM)
• Loudness control
• Manual / Auto (Seek) / up and down tuning control
• Band selector for FM1/ FM2 / FM3 / MW1 / MW2
• Clock Function in RDS
• MP3 Repeat Function
• Preamplified Line-out
• Detachable front panel protects against theft
• Lighting system
• RDS Function: PI (Program Identification) TA (Traffic Announcement)
PS (Program Service Name) PTY (Program Type)
AF (List of Alternative Frequencies)
TP (Traffic Program)
INSTALLATION
PRECAUTIONS
• Choose the mounting location carefully so that the unit will not interfere with the normal
driving functions of the driver.
• Avoid installing the unit where it would be subject to high temperatures, such as from
direct sunlight or hot air from the heater, or where it would be subject to dust, dirt or
excessive vibration.
• Use only the supplied mounting hardware for a safe and secure installation.
• Be sure to remove the front panel before installing the unit.
Mounting angle adjustment
Adjust the mounting angle to less than 20o.
MOUNTINGEXAMPLE
Installation in the dashboard
Note: Keep the release key in the safe place as you may need it in future to remove the unit
from the car.
Detaching and attaching the front panel
The front panel of this unit can be detached in order to prevent the unit from being stolen.
DETACHINGTHEFRONTPANEL
Before detaching the front panel (14), be sure to press the PWR button (1) To OFF first.
Pull out the panel towards you in order to detach completely the panel from the main unit.
Refer to below instruction.

EnglishEnglish 56
BUILT- IN ISO CONNECTOR
RCA Jack Line Out (Rear) -
Gray : Red (right)
: White (left)
CONNECTORA
1.
2.
3.
4. MEMORY +12V
5. AUTOANTENNAOUTPUT
6.
7. +12V (TO IGNITION KEY)
8. GROUND
Note: 12 V wire (connector A no. 7) must be connected by car ignition key in order to avoid
that car battery becomes weak when the car will be not used for long period.
CONNECTORB
1. REAR RIGHT SPEAKER (+)
2. REAR RIGHT SPEAKER (-)
3. FRONT RIGHT SPEAKER (+)
4. FRONT RIGHT SPEAKER (-)
5. FRONT LEFT SPEAKER (+)
6. FRONT LEFT SPEAKER (-)
7. REAR LEFT SPEAKER (+)
8. REAR LEFT SPEAKER (-)
Maintenance
FUSEREPLACEMENT
If the fuse blows, check the power connecton and replace the fuse. If the fuse blows again
after the replacement, there may be an internal malfunction. In this case, consult your
nearest repairing centre.
ATTACHINGTHEFRONTPANEL
Make sure the front panel is the right way up when attaching it to the unit as it cannot be
attached upside down. Bring side B of panel to side A of main unit.
Insert the panel in and push until it clicks.
Panel is attached.
Notes:
• Do not press the front panel hard against the unit when attaching it. It can be easily
attached by pressing it lightly against the unit.
• When you carry the front panel with you, put it in the supplied front panel case.
• Do not press hard or give excessive pressure to the display window of the front panel
when attaching it to the unit.
Panel case
Front panel
Front panel
Front panel
Main unit Rear of the front panel

EnglishEnglish
Warning
Use the specified amperage fuse for each lead. Use of a higher amperage fuse may
cause serious damage.
OPERATING INSTRUCTIONS
POWERON/OFF (1) (PWR)
Insert the front panel in the unit and push Power button in order to switch on the unit. Push
PWR button newly in order to switch off the unit and push REL button (14) to release the
front panel.
Note: Never release the front panel when the unit is on. Power remains on even when car
radio is off.
SELECT(2) VOLUME UP/DOWN (3)
Rotate the VOLUME Knob (3) to control the VOLUME. To select other functions, press the
SELECT (2) button shortly until the desired functions is shown on the display. Figure 1
shows how control functions are selected using the SELECT button.
1. VOLUME (rotate knob)
2. SELECT (push down)
3. BASS
4. TREBLE
5. BALANCE
6. FADER
7. LOUDNESS ON / OFF
8. DSP (ROCK - POP - CLASS - SDP OFF)
9. DX / LOC
10. STEREO / MONO Fig. 1
3.VOLUMECONTROL
Rotate the VOLUME knob to increase or decrease the volume. This knob can be used to
adjust the BASS, TREBLE, BALANCE and FADER.
This knob also selects the possible options in RDS function.
TASEEK/TAALARM(2)
When press the SEL button for more than 2 seconds, it is activated as selecting mode
of these function. Turn the volume knob to select:
TA SEEK Mode or TAALARM mode.
78
- TA SEEK mode:
When newly turned station does not receive TP information for 5 sec., the radio retunes
to next station which has not the same station (PI) as the last station, but has the TP
information.
In TA seek mode, the current station can be changed to the completely different station
because the unit searches TP station when the field strength of the current station is
very weak, or the current station has no TP signal.
- TA ALARM mode:
Any automatic retune mode is not activated, just can be heard Beep sound.
PI SOUND / PI MUTE
– PI SOUND
When a car cruises some special area which has different PT code with same AF.
PI sound (DIP) is heard once in a while, the DIP’s sound will be heard for less than 1
second.
– PI MUTE
Under the above same situation, a mute sound will be heard for less than 1 sec.
RETUNE L / RETUNE S
The initial time of automatic TA search or PI search mode is selected.
When PI information is not caught for retune time, the radio start to retune to next same
PI station. When same PI station does not catch 1 cyclic search, the radio goes to last
station and waits for 4-5 minute until PI code is received.
4. PRESET STATIONS (1,2,3,4,5,6)
(A) RADIO MODE:
When pressed short, these keys select a preset station directly. When pressed longer
than 1 sec., current station is stored in preset memory bank. When PTY mode is se-
lected, the PTY switch is shared as follows:
PTY music group ---- PTY speech group ---- OFF
MUSIC SPEECH
1. POP M, ROCK M 1. NEWS, AFFAIRS, INFO
2. M.O.R. M, LIGHT M 2. SPORT, EDUCATE, DRAMA
3. CLASSICS, OTHER M 3. CULTURE, SCIENCE, VARIED
4. JAZZ, COUNTRY 4. WEATHER, FINANCE, CHILDREN
5. NATION M, OLDIES 5. SOCIAL, RELIGION, PHONE IN
6. FOLK 6. TRAVEL, HOBBIES, DOCUMENT
(B) CD/MP3 PLAYER MODE:
1. PAUSE 2. INTRO 3. REPEAT 4. RANDOM
USINGTHERDSFUNCTION

EnglishEnglish 109
TITLE - SONG - ARTIST - DIRECTORY
11. AUTOMATIC OR MANUALTUNING(FREQUP>>ORFREQ DOWN <<)
(A) RADIO MODE
When pressed short, these keys are operated as MANUAL tuning mode.
When pressed longer than 1 sec., they are operated as SEEK tuning mode.
(B) USB-CD / MP3 PLAYER MODE
When pressed short, they are operated as TRACK UP or TRACK DOWN mode.
12. - 10 BUTTON (CD / USB MP3)
Press this button to skip 10 tracks each time back of CD / USB MP3
15. USB PORT
17. PAUSEBUTTON
During “PLAY”, press (17) ‘PAUSE’ button to “PAUSE”. Press it again to resume play.
18. INTRO BUTTON(MP3SCAN)
When this button is pressed, ‘SCN’ indication is displayed and the first several seconds
of each track of the disc are played. Press again to stop intro and listen to track.
19. REPEATBUTTON'REPEAT'
When this button is pressed, ‘RPT’ indication is displayed and play of the selected track
will be continually repeated until the Track repeat mode is cancelled by pressing ‘RPT’
button again.
20. RANDOM BUTTON'SHUFFLE'
When this button is pressed, ‘SHF’ indication is displayed and each track of the disc are
played in random instead of normal progression. To cancel RANDOM mode, press
‘SHF’ button (20) again.
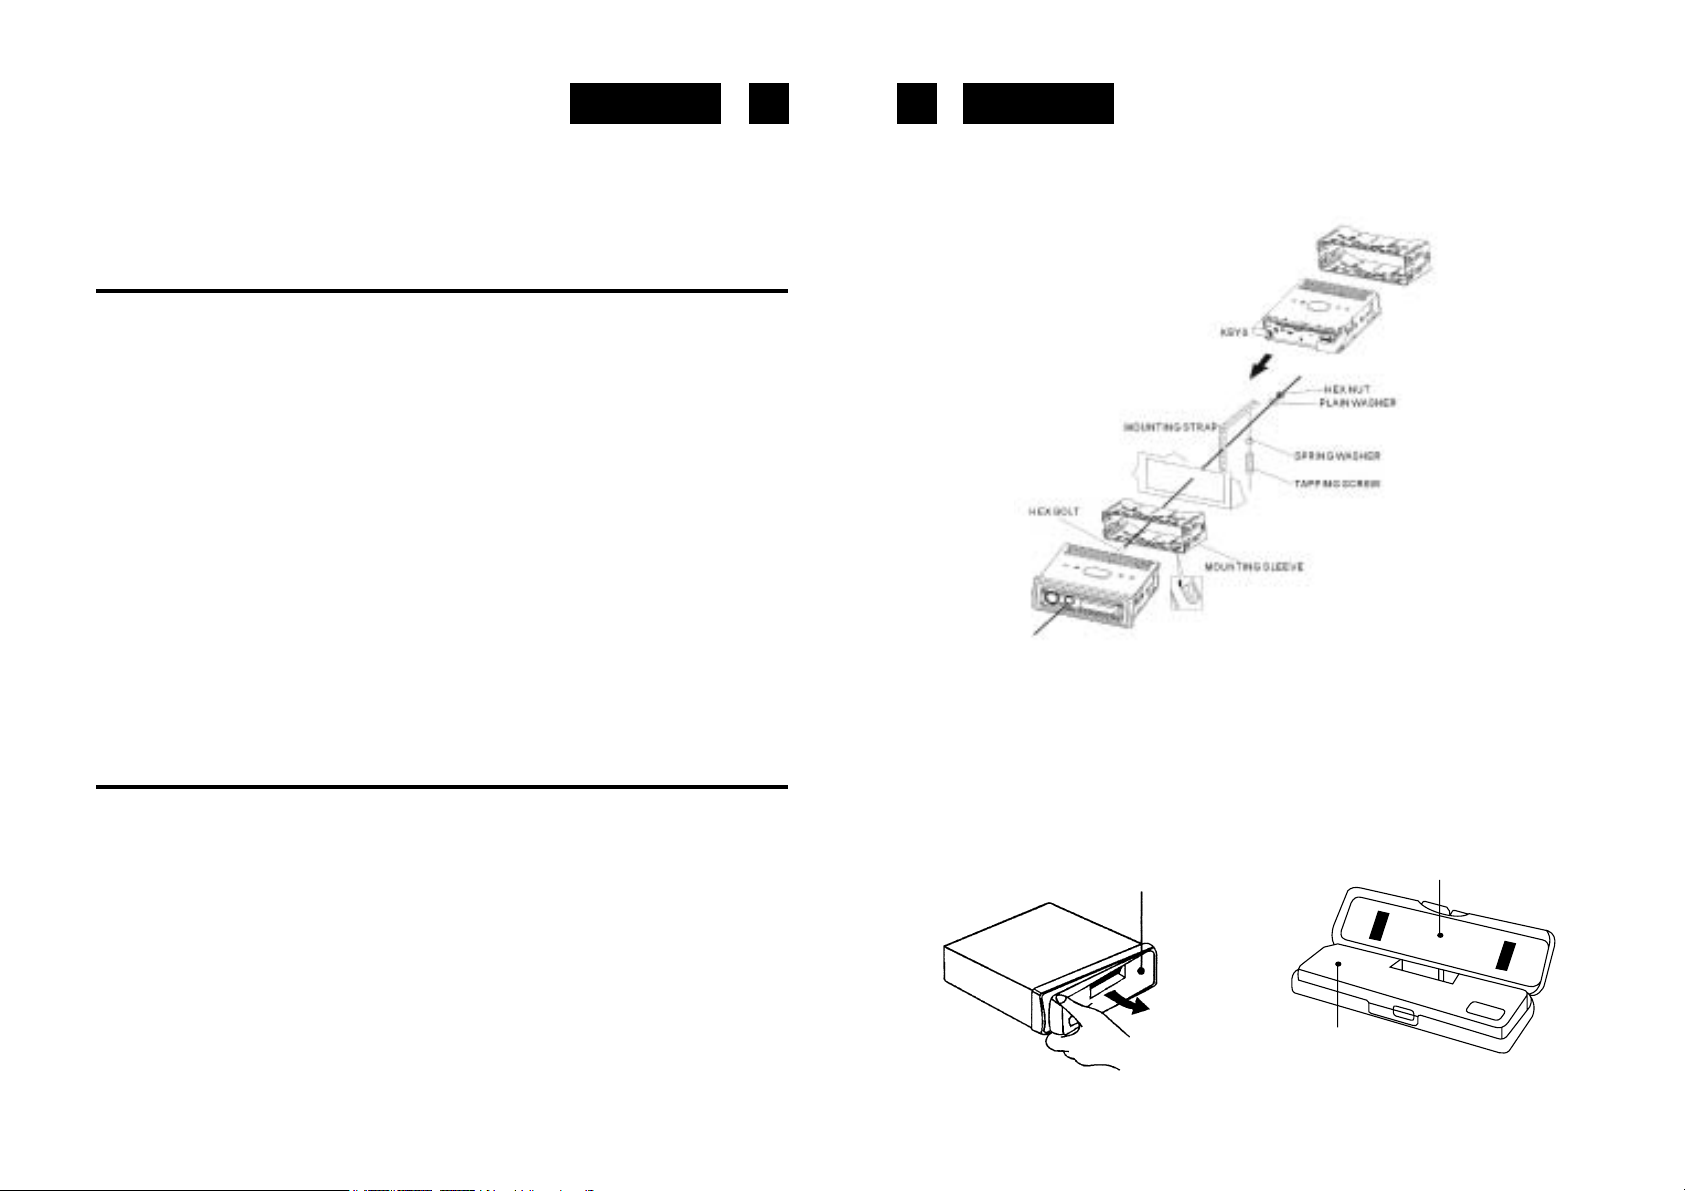
21. RESETBUTTON
Reset button (25) is placed on the housing.
The reset button is to be activated for the following reason:
• Initial installation of the unit when all wiring is completed.
• All the function buttons do not operate properly.
• Error symbol on the display.
ID3 Tag
Press BAND button repeatedly to Display ID3 TAG information.
If the MP3 file is available with ID3 TAG, pressing the display button repeatedly will show
information in the following sequence:
SONG TITLE > ARTIST> ALBUM TITLE > YEAR> COMMENTS
What is RDS?
The RDS (Radio Data System) is a digital information system developed by the EBU (Euro-
pean Broadcast Union). Piggy-backed on normal FM broadcasts, RDS offers a variety of
information services and automatic retuning functions for RDS-compatible car stereos.
In 1988, RDS became available in the United Kingdom, France, West Germany, Ireland and
Sweden. Test transmissions are being conducted in many other european countries. It is
expected that RDS will be available in most western european countries in the near future.
5. 'AF/REG'function (ALTERNATIVEFREQUENCIES)
When pressed, AF/REG switchig mode is selected.
When AF/REG switching mode is selected, the radio checks the signal strength of the AF
all the time. When pressed long, it is activated as regional mode ON/OFF.
– Regional mode ON:
AF switching or PI SEEK is implemented to the station which have all PI codes same as
current station. REG segment is turned on, in LCD display.
– Regional mode OFF
The regional code in the format of PI code is ignored when AF switching or PI SEEK is
implemented.
6. 'TA'function (TRAFFICANNOUNCEMENT)
When pressed short, it is activated as TA mode on or off
When TA mode is on and traffic announcement is transmitted
– When the unit is it CD/MP3 mode, it will switch to radiomode temporarily.
– If the volume level was under the threshold point, it will be raised to the threshold point.
– When TP station is received, TP segment is turned on in LCD display.
7. 'PTY' function(PROGRAMTYPE)
PTY MUSIC ---- PTY SPEECH ---- PTY OFF
While selecting PTY type, its selection is impremented by preset buttons as described
in preset key. When PTY is selected, the radio starts to search corresponding PTY
information, and stops if the corresponding PTY information, is detected.
8. + 10 BUTTON (CD / USB MP3)
Press this button to skip 10 tracks each time up of CD / USB MP3
9. MODEBUTTON (MODE)
By pressing this key, user can select.
RADIO mode or USB - CD mode.
10. BAND BUTTON(BAND)
Each band is toggled cyclically by pressing this key FM1---FM2---FM3---MW1---MW2.
In CD / USB (MP3) mode, when this key is pressed it is operated as the conversion of
each display mode as follow:

EnglishEnglish 1211
If any of the ID3-TAG information is not available, pressing the BAND button re
peatedly will show information in the following sequence:
UNKNOWN SONGNAME> UNKNOWN ARTIST> NO ALBUM TITLE > UNKNOWN
YEAR > NO COMMENTS
If the MP3 file is without ID3 TAG, pressing the BAND button, “NO ID3 TAG” will be
displayed.
The file name & track number of the MP3 file will scroll repeatedly through the display
during the playing of the MP3 file.
HOWTOSELECT MP3 FILES
A. Searching Track directly
Keep pressed the BAND Button (10) once, the displays shows “TRK SCH”: select the
MP3 track by rotate the Volume knob (3) to scroll through the numbers. Then press
ENTER (VOLUME) to confirm.
B. Searching by Directory or FIle name
Keep pressed the BAND twice, the displays shows “FILE SCH”. Enter the character
directly. The unit searches files and directories which have the same character which is
inputted by the user. The unit shows these sorted files and directories by VOLUME UP /
DOWN (1) Knob. If the selected name is directory, the user can go into the selected
directory by press MP3 ENTER BUTTON and continue to search the directory or file
name in the directory by VOLUME UP / DOWN knob. The selected file can be played by
pressing MP3 Enter Button.
Rotate the Volume knob (3) in both directions to scroll through the characters
(alphanumerical). Then press ENTER (VOLUME) to confirm.
C. Searching from Directory
SEARCH DIRECTORY BY USING VOLUME UP / DOWN KNOB.
Under MP3 play mode, keep pressed BAND three times. Then the first Directory name
is shown (DIR SCH). Move VOLUME UP/DOWN to navigate through the directory list,
press MP3 ENTER BUTTON to select the desired directory.Select the tracks under the
selected directory, press MP3 ENTER KNOB knob again to confirm when desired track
is found. Rotate the Volume knob (1) in both directions to scroll through the characters
(alphanumerical). Then press MP3 ENTER BUTTON (3) to confirm.
SPECIFICATIONS
CD/MP3PLAYERSECTION
Signal to Noise Ratio > 70dB
Channel Separation > 50 dB (1kHz)
Frequency Response 20Hz - 20 kHz
TUNER
Sensitivity 2 dBμ
Stereo separation 35 dB
Signal to noise radio 55 dB
FM Frequency range 87.5-108 MHz
MW Frequency Range: 522 - 1620 KHz
Channel step FM: 50 kHz
Channel step MW: 9 kHz
Intermediate frequency 10.7 MHz
LINE-OUT
Output 350mV max.
Impedance 10kOhm
GENERAL
Power Supply 13.8V DC
(10.8-15.6V allowable)
Speaker impedance 4 or 8 ohm
Output power 25 W (RMS) x 4CH, 4 x 45 W M. Power
Note: Specifications and the design are subject to possible modification without notice due
to improvement.
Correct Disposal of This Product (Waste Electrical & Electronic
Equipment)
This marking shown on the product or its literature, indicates that it should
not be disposed with other household wastes at the end of its working
life. To prevent possible harm to the environment or human health from
uncontrolled waste disposal, please separate this from other types of
wastes and recycle it responsibly to promote the sustainable reuse of
material resources.
Household users should contact either the retailer where they purchased
this product, or their local government office, for details of where and how
they can take this item for environmentally safe recycling. Business users
should contact their supplier and check the terms and conditions of the
purchase contract. This product should not be mixed with other
commercial wastes for disposal.

DeutschDeutsch
CAUTION
RISK OF ELECTRIC
SHOCK
DO NOT OPEN
13 14
CD-825U/HP
Auto-MP3-Spieler mit PLL MW-UKW/Stereo-Radio Radio-Daten-System, CD-
USB, PTY und abnehmbares Bedienteil.
BEDIENUNGSANLEITUNG
Bitte lesen Sie aufmerksam diese Bedienungsanleitung, um sich mit Ihrem neuen Autoradio
vertraut zu machen, bevor Sie es zum ersten Mal in Betrieb nehmen. Bitte bewahren Sie diese
Anleitung auf, um später jederzeit nachschlagen zu können.
INHALTSVERZEICHNIS
• Lage der Bedienungselemente
• Merkmale
• Installation
• Vorsichtsmaßnahmen und Wartung
• Anschlüsse
• Funktionsanleitungen
• Technische Daten
LAGEDERBEDIENUNGSELEMENTE
1. Netztaste EIN/AUS
2. WAHL-FUNKTION LOUDNESS / DSP / DX-LO / ST. - MONO / TA / PI / RETUNE / BEEP
3. Lautstärkeregelung AB /AUF (+,- Bässe/Höhen/Balance/Fader)
4. Vorwahl-Tasten (1,2,3,4,5,6)
5. AF-Taste
6. TA-Taste
7. PTY-Taste
8. + 10 WAHLTASTEN
9. Modus-Taste (MODE)
10. Band-Taste/ LOUD
11. Auto/Manuell-Suchlauf AB (<<)/ Suchlauf AUF (>>) MP3-SKIP
12. - 10 WAHLTASTEN
13. LCD-Anzeige
14. Bedienteil-Entriegelungstaste
15. USB PORT
16. CD-Schublade
17. MP3-Pause-Taste
18. MP3-Intro-Taste
SICHERHEITSHINWEISE
Das Ausrufszeichen im Dreieck weist den Benutzer auf wichtige
Bedienungs- und Wartungsanweisungen (Service) in diesem Handbuch
hin, die unbedingt zu befolgen sind.
Das Blitzsymbol im Dreieck weist den Benutzer auf “gefährliche
Spannungen” an einigen freiliegenden Bauteilen im Innem des Gerätes
hin.
Um die Gefahr elektrischer Schläge auszuschliessen, Gehäuse auf keinen
Fall abnehmen. Im Innem befinden sich keine vom Benutzer selbst
instandsetz-barenTeile. Reparaturen dürfen nur von einer autorisierten
Fachwerkstatt durchgeführt werden.
Dunkelstrahlung bei geöffneten Geräten und defektem Verschluss.
Bedienung oder Regulierung der technischen Eigenschaften oder
sonstige nicht spezifierte Prozeduren auf dieser manuellen Betriebsart
können zurAusetzung gefährlicher Laserstrahlen führen.
Setzen Sie das Gerät weder Feuchtigkeit noch Regen aus.
Stellen Sie das Gerät so auf, dass immer eine ungestörte Frischluftzufuhr
sichergestellt ist.
Setzen Sie das Gerät weder direkter Sonneneinstrahlung noch
Wärmequellen aus.

DeutschDeutsch 15 16
19. MP3-Wiederhol-Taste (REPEAT)
20. MP3-Zufallswiedergabe-Taste (SHUFFLE)
21.RESET-Taste
22. CD-Auswurf-Taste
MERKMALE
Dieses Gerät ist mit einem abnehmbaren Frontbedienteil, MW- UKW-Stereo und einem CD-
USB / MP3-Spieler mit den folgenden Merkmalen ausgestattet:
• Elektronische Lautstärke-, Tiefen- Höhen-, Fader- und Balance-Regler.
• Genaues elektronisches Abstimmen durch den Phasenkuppelungsring (P.L.L.)-Schaltkreis.
• 30 programm. Stationsspeicher (6UKW 1/ 6UKW2 / 6UKW3/ 6MW1/ 6MW1)
• Loudness-Regler
• Leicht zu betätigende Netztaste Ein/Aus
• Manueller/Automatischer (Seek)/Abstimmknopf Auf und Ab
• Bandwahlschalter (BND) zur Wahl von MW1, MW2, UKW1-UKW2 oder UKW3
• Uhr-Funktion in RDS
• RADIO- und MP3-Spieler
• Vorverstärkte-Ausgang (RCA, rückseitig) zum Anschluß eines Leistungsverstärkers
• Abnehmbares Frontbedienteil zum Schutz gegen Diebstahl
• Beleuchtungssystem
• RDS-Funktion: PI (Programm-Identifikation) TA (Verkehrsdurchsage)
PS (Programmdienstname) PTY (Programmtyp)
AF (List der Alternativfrequenzen) TP (Traffic Program)
INSTALLATION
VORSICHTSMASSNAHMEN
• Wählen Sie sorgfältig, wo Sie Ihr Autoradio einbauen möchten, damit das Gerät nicht
die normale Fahrtätigkeit des Fahrers beeinflußt.
• Vermeiden Sie, das Gerät dort zu installieren, wo es hohen Temperaturen, wie dem
direkten Sonnenlicht oder Heißluft vom Heizer, oder wo es Staub, Schmutz oder
übermäßigen Schwingungen ausgesetzt werden könnte.
• Verwenden Sie nur das mitgelieferte Montagematerial, um eine sichere Installation
zu garantieren.
• Bevor Sie das Gerät installieren, entfernen Sie das Frontbedienteil.
RegulierungdesMontagewinkels
Der Montagewinkel muß kleiner als 20º sein.
Montagebeispiel
EinbauinsArmaturenbrett
Hinweis: Bewahren Sie den Entriegelungsschlüssel an einem sicheren Ort auf, Sie könnten
Ihn später zum Entfernen des Gerätes aus dem Auto gebrauchen.
ABNEHMENDESFRONTBEDIENTEILS
Bevor Sie das Frontbedienteil abnehmen, drücken Sie zuerst die PWR-Taste (1).
Dann drücken Sie die ENTRIEGELUNGSTASTE-Taste (14) und nehmen das Bedienteil ab,
indem Sie es herausziehen, wie in der Abbildung gezeigt .
Wenn nötig,
biegen Sie diese Haken.
Frontbedienteil
Herausnehmen
Frontbedienteil Schutzhülle

DeutschDeutsch 17 18
ANBRINGEN DES FRONTBEDIENTEILS
Nehmen Sie die rechte Seite des Frontbedienteils und setzen Sie es auf das Gerät, wie in
der Abbildung gezeigt, und drücken Sie, bis es einrastet.
Bitte beachten Sie, dabei keinen Druck auf das Display oder die Bedienungstasten
auszuüben.
Hinweise:
• Vergewissern Sie sich, daß Sie das Frontbedienteil richtig herum auf das Gerät
aufsetzen.
• Drücken Sie das Frontbedienteil nicht zu stark gegen das Gerät, wenn Sie es
aufsetzen. Es kann einfach angebracht werden, indem Sie es leicht gegen das Gerät
drücken. Wenn Sie das Frontbedienteil mit sich nehmen, legen Sie es in die
mitgelieferte Schutzhülle.
• Drücken Sie nicht zu stark oder mit übermäßiger Kraft auf das Display-Fenster des
Frontbedienteils, wenn Sie es am Gerät anbringen.
ISO-ANSCHLUSSTEIL
RCA-Buchse Ausgangsleitung (Hinten) –
Grau : Rot (rechts)
: Weiß (links)
ANSCHLUSSTEILA
1.
2.
3.
4. GELB : SPEICHER +12V
5. BLAU: AUTOANTENNENAUSGANG
6.
7. ROT : +12V (AN DEN ZÜNDSCHLÜSSEL)
8. SCHWARZ : ERDUNG
Hinweis:
Der ROTE Draht (Anschlußteil A Nr.7) muß an die Autozündung angeschlossen werden, um
zu vermeiden, daß die Autobatterie entladen wird, wenn das Auto längere Zeit nicht benutzt
wird.
ANSCHLUSSTEILB
1. VIOLETT : HINTERER RECHTER LAUTSPRECHER (+)
2. VIOLETT/SCHWARZ : HINTERER RECHTER LAUTSPRECHER (-)
3. GRAU : VORDERER RECHTER LAUTSPRECHER (+)
4. GRAU/SCHWARZ : VORDERER RECHTER LAUTSPRECHER (-)
5. WEISS : VORDERER LINKER LAUTSPRECHER (+)
6. WEISS/SCHWARZ : VORDERER LINKER LAUTSPRECHER (-)
7. GRÜN : HINTERER LINKER LAUTSPRECHER (+)
8. GRÜN/SCHWARZ : HINTERER LINKER LAUTSPRECHER (-)
Wartung
ERSETZEN DERSICHERUNG
Wenn die Sicherung durchgebrannt ist, überprüfen Sie den Netzanschluß und ersetzen Sie
die Sicherung. Wenn die Sicherung nach dem Ersetzen erneut durchbrennt, könnte ein
internes Funktionsproblem vorliegen. In diesem Falle wenden Sie sich an Ihr nächstes
Kundendienstzentrum.
Achtung
Verwenden Sie für jedes Kabel die vorgeschriebene Amperestärke. Wenn Sie eine Sicherung
mit höherer Amperestärke verwenden, könnte das ernsthafte Schäden verursachen.
FUNKTIONSANWEISUNGEN
NETZTASTEEIN/AUS(1)(PWR)
Setzen Sie das Frontbedienteil auf das Gerät auf und drücken Sie die Netztaste, um das Gerät
einzuschalten. Drücken Sie erneut die PWR-Taste, um das Gerät auszuschalten und
drücken Sie die ENTRIEGELUNGS-Taste (14), um das Frontbedienteil freizugeben.
Hinweis: Entriegeln Sie das Frontbedienteil niemals, wenn das Gerät eingeschaltet ist.
Strom fließt auch, wenn das Autoradio ausgeschaltet ist.
WAHL-TASTE(2)(SEL)/LAUTSTÄRKEREGELUNG(3)
Der Knopf VOLUME reguliert die LAUTSTÄRKE. Um andere Funktionen zu wählen, drücken
Frontbedienteil
Hauptgerät Rückseite des Bedienteils

DeutschDeutsch
Sie kurz die WAHL-Taste (2), bis die gewünschte Funktion auf dem Display erscheint. In der
Abbildung 1 wird gezeigt, wie die Kontrollfunktionen gewählt werden, wenn Sie die WAHL-
Taste drücken.
1. LAUTSTÄRKE (Knopf drehen)
2. WAHL (SEL) (drücken)
3. BÄSSE
4. HÖHEN
5. BALANCE
6. FADER
7. LOUDNESS EIN AUS
8. DSP (ROCK - POP - CLASS - DSP OFF)
9. DX / LOC (RADIO)
10. STEREO / MONO
LAUTSTÄRKEREGELUNG(3)
Erhöhung und Erniedrigung der Lautstärke ist durch den VOLUME-Regler möglich. Dieser
Knopf hat die gleiche Funktion auch bei Bässen, Höhen, Balance und Fader, wenn sie durch
die WAHL-Taste (2) gewählt sind.
Diesen Knopf wird benutzt auch, um die RDS-SDK-Optionen zu wählen.
TASEEK/TAALARM(2)
Die "SEL"-Taste (2) länger als 2 Sekunden drücken, wählt man eine der folgenden
Funktionen . Lautstärke-Regler benutzen, um TA-SUCH-Modus oder TA-ALARM-Modus zu
wählen.
-TA-SUCH-Modus:
Wenn eine aktuell gehörte Station 5 Sekunden lang keine TP-Informationen erhält, schaltet
das Radio auf die anschließende Station um, die nicht die gleiche PI der letzten Station hat,
die aber TP-Informationen bringt.
In TA-Such-Modus, die aktuelle Station kann zu einem ganz verschiedenen Sender
wechseln, weil das Gerät einen TP-Sender sucht und die Feldstärke des aktuellen Senders
sehr schwach ist, oder kein TP-Signal hat.
-TA-ALARM-Modus:
Wenn man dieses System wählt, wird beim Fehlen des TP-Signals keine alternative Station
gesucht, sondern es wird ein doppeltes Signal (ALARM) abgegeben, um darauf
hinzuweisen, daß das TP-Signal fehlt.
PI TON / PI MUTE
– PI TON
19 20
Wenn sich ein Fahrzeug in einem besonderen Bereich mit einem PT Code aber mit dem
gleichen AF befindet, ist ab und zu ein Piepton (DIP) zu hören. Der Piepton (DIP) ist weniger
als 1 Sekunde zu hören.
– PI MUTE
Bei den vorher beschriebenen Bedingungen wird der Piepton in weniger als 1 Sekunde
anulliert.
(C) NEUABSTIMMUNG L /NEUABSTIMMUNG S
Es wird die Startzeit zur automatischen TA oder PI Suche ausgewählt.
Wenn die PI Information nicht innerhalb der Neuabstimmungsdauer gefunden wird,
beginntdas Radio mit der Neuabstimmung auf den nächsten PI Sender. Wird der PI Sender
bei der ersten zyklischen Suche nicht gefunden, geht das Radio auf den gleichen Sender
und wartet 4-5 Minuten, solange bis der PI Code empfangen wird.
–L Abstimmung: als 90 Sekunden gewählt.
– SAbstimmung: als 30 Sekunden gewählt.
4.VORAUSWAHLEN(1,2,3,4,5,6)
(A)BETRIEBRADIO:
Durch einen leichten Druck auf diese Tasten kann man direkt einen vorher ausgewählten
Sender anwählen. Wird die Taste länger als 1 Sekunde gedrückt, wird der gerade eingestellte
Sender gespeichert. Ist der PTY Modus aktiv, wird die PTY Taste wie folgt unterteilt:
PTY Gruppe Musik ----- PTY Gruppe gesprochen ----- AUS
MUSK GESPROCHEN
1.POP Musik, ROCK Musik 1.NACHRICHTEN, WIRTSCHAFT, INFOS
2.UNTERHALTUNGS Musik 2.SPORT, ERZIEHUNG, DRAMEN
3.KLASSIK, ANDERE Musik 3.KULTUR, WISSENSCHAFT, VERSCHIEDENES
4.JAZZ,COUNTRY 4.WETTERVORHERSAGEN, FINANZEN, KINDER
5.NATIONM, OLDIES 5.SOZIALES, RELIGION,TELEFON
6.VOLKS Musik 6.REISEN, UNTERHALTUNG, DOKUMENTATIONEN
(B)BETRIEBUSB-SD-MMC/MP3PLAYER:
1. PAUSE 2. INTRO 3. WIEDERHOLEN 4. ZUFÄLLIG
DIERDSFUNKTION.WASBEDEUTETRDSSYSTEM?
RDS (Radio Data System) ist die Abkürzung für ein digitales Radio-Informations-System, das
von EBU (European Broadcasting Union) entwickelt und auf dem Markt eingeführt wurde.
Über die normalen FM Übertragungssender ausgestrahlt, bietet RDS eine Reihe Informationen
wie z.B. den Sendernamen, das Programm, Verkehrsnachrichten und nützliche Funktionen

DeutschDeutsch 2221
wie die automatische Abstimmung der besten im gewählten Programm zur Verfügung
stehenden Signale.
5.AF/REG‘Funktion(ALTERNATIVEFREQUENZEN)
Mit einem leichten Tastendruck wählt man den AF/REG Modus.
Wenn der AF/REG ausgewählt wird, kontrolliert das Radio ständig das AF Signal. Drückt
man die Taste länger als 2 Sekunden, wird der Modus Regional EIN/AUS aktiviert.
–ModusRegionalEIN:
Die AF Umschaltung oder die PI SEEK Suche ist auf all die Sender ausgeweitet, die den
gleichen PI Code des momentan eingestellten Senders haben. Es erscheint die Schrift
REG auf dem Display.
–ModusRegionalAUS
Der Regionalcode im PI Format wird ignoriert, wenn die AF Umschaltung oder die PI SEEK
Suche auf alle Sender ausgeweitet ist.
6.‘TA’FUNKTION(VERKEHRSFUNK)
Bei leichtem Tastendruck wird der Modus TA ein oder aus gewählt. Wenn der TA Modus
ausgewählt und eine Verkehrsnachricht übertragen wird – Wenn das Gerät auf der Betriebsart
CD/MP3 steht, wird zeitweilig auf Radio umgeschaltet. – Ist nur eine geringe und nicht gut
hörbare Lautstärke eingestellt, wird diese auf ein gut hörbares Niveau erhöht.
7.‚PTY‘Funktion(PROGRAMMTYP)
PTY MUSIK ----- PTY GESRPOCHEN ----- PTY AUS
Wählt man PTY, hängt das Programm wie vorher beschrieben von den Vorauswahltasten ab.
Wenn man PTY wählt, beginnt das Radio mit der Suche nach entsprechenden PTY- Infor-
mationen und stoppt mit der Suche, wenn die entsprechende PTY Information gefunden wird.
8.SPRUNG+10 WAHLTASTEN
Durch Drücken dieser Taste schaltet man auf den + 10 skip.
9.MODETASTE(MODE)
Durch Drücken dieser Taste kann der Bediener wählen zwischen
Betrieb des RADIOS oder des CD/USB MP3 Players .
10.BANDTASTE(BAND)
Jedes Frequenzband wird durch das hintereinander abfolgende Drücken dieser Taste
umgeschaltet FM1---FM2---FM3---MW1---MW2 .
Drücken der Taste BAND erscheint die folgende Information in der Folge:
TITLE - SONG - ARTIST - DIRECTORY
11.AUTOMATISCHEODERMANUELLEABSTIMMUNG(FREQ AUF >>ODER FREQAB <<)
(A)BETRIEBDESRADIOS
Bei leichtem Druck fungieren diese Tasten zur manuellen Suche.
Drückt man länger als 1 Sekunde, wird die automatische Suche aktiviert (SEEK)
(B)BETRIEBDESUSB-SD-MMC/MP3PLAYERS
Bei leichtem Druck fungieren diese Tasten als LIEDER ÜBERSPRINGEN HOCH oder
RUNTER.
12. SPRUNG -10 WAHLTASTEN
Durch Drücken dieser Taste schaltet man auf den - 10 skip.
13.LCDDISPLAY
Der Flüssigkristalldisplay zeigt den momentanen Empfang und die Operationen an.
STEUERUNGDESCD/USBPLAYERS
15. USBPORT
17.PAUSENTASTE
Beim Abspielen die Taste PAUSE (17) ‘PAUSE’ betätigen, um das Abspielen kurzfristig
anzuhalten. Erneut drücken, um zum normalen Abspielen zurückzukehren.
18.INTROTASTE(CDSCAN)
Nach Drücken dieser Taste erscheint die Anzeige ‘SCN’ auf dem Display und die ersten
10 Sekunden jeden Liedes werden abgespielt.
19.REPEATTASTE‚REPEAT‘
Wird diese Taste gedrückt, erscheint die Anzeige ‘RPT’ auf dem Display und das aktuelle
Lied wird solange abgespielt, bis die ‘RPT’ Taste erneut betätigt wird.
Wird diese Taste in der Betriebsart MP3 länger als eine Sekunde lang gedrückt, erscheint
die Anzeige ‘D-RPT’ und die mit den Tasten Auf/Ab ausgewählten Lieder des laufenden
Albums werden abgespielt.
20.RANDOMTASTE‚SHUFFLE‘(ZUFÄLLIG)
Wird diese Taste betätigt, erscheint die Aufschrift ‘SHF’ und jedes Lied wird in zufälliger
Reihenfolge und nicht in der normalen Reihenfolge abgespielt. Um diesen Modus zu
löschen, erneut die Taste ‘SHUFFLE’ (20) betätigen.

DeutschDeutsch 2423
21.RESET-TASTE
Die Reset-Taste (25) befindet sich auf der Innenseite.
Die Reset-Taste ist aus einem der folgenden Gründe zu drücken:
• Erste installation des Gerätes, wenn alle Kabel angeschlossen sin.
• Keine der vorhandenen Tasten funktioniert.
• Fehlersymbol auf dem Display.
ID3 Tag
Drücken Sie die Taste BAND wiederholt um die Information ID3 TAG anzuzeigen.
Wenn der MP3-Dokument mit ID3 TAG erforderlich ist, durch Drücken der Taste
BAND erscheint die folgende Information in der Folge:
LIED-TITEL > SÄNGER>ALBUM-TITEL > JAHR > BEMERKUNGEN
Wenn eines des MP3-Dokuments mit ID3 TAG nicht erforderlich ist, durch Drücken
der Taste DISPLAY erscheint die folgende Information in der Folge:
UNKNOWN SONGNAME> UNKNOWN ARTIST> NO ALBUM TITLE > UNKNOWN
YEAR > NO COMMENTS
Wenn das MP3-Dokument ohne ID3 TAG ist, durch Drücken der Taste BAND
erscheint “NO ID3 TAG”.
Der Lied-Name und die Spur-Nummer des MP3-Dokuments läuft kontinuierlich auf der
Anzeige währen der Wiedergabe.
WIEDIESUCHENACHDENMP3LIEDERNABLÄUFT
A. Direkt Lied-Suchen
Drücken Sie die Taste BAND (10) einmal, an der Anzeige erscheint “TRK SCH”: Drehen Sie
den Lautstärkeknopf (3). Dann drücken Sie ENTER (2) zu bestätigen.
B. Suchen durch Album- oder File-Name
Drücken Sie die Taste BAND (10) zweimal, an der Anzeige erscheint “FILE SCH”, treten Sie
die Buchstabe ein. Das Gerät sucht Titel und Alben mit der gleiche eingetretene Buchstabe.
Drehen Sie die Tasten VOLUME UP / DOWN (2) um die Titel und Alben zu wählen . Wenn der
gewünschte Name ist ein Album, drücken Sie die Taste ENTER, dann drehen Sie die
Tasten VILUME UP / DOWN (2). Drücken Sie die Taste ENTER, um das gewählte Lied
abzuspielen Die Wahl der alphabetischen Buchstaben ist wie folgt: oder drehen Sie den
Lautstärkeknopf (2) in beiden Richtungen, um die Buchstaben anzusehen (alfanumerisch).
Dann drücken Sie ENTER (3) zu bestätigen.
C. Suchen durch Album
Suchen Sie das Album mit der Tasten VOLUME UP / DOWN (2).
Drücken Sie die Taste BAND (10) dreimal. Erscheint die erste Album-Name. drehen
Sie volume UP / DOWN (3), um in der Liste der Alben zu bewegen, dann drücken Sie die
Taste ENTER, um das gewünschte Album zu wählen. Um die Lieder in diem Album zu
wählen, drehen Sie VOLUME UP / DOWN (3) dann drücken Sie ENTER, um zu
bestätigen,oder drehen Sie den Lautstärkeknopf (3) in beiden Richtungen, um die
Buchstaben anzusehen (alphanumerisch). Dann drücken Sie ENTER (3) zu bestätigen.
TECHNISCHEDATEN
CD/MP3-SPIELERTEIL
Rauschabstand: > 70 dB
Kanaltrennung: > 50 dB (1kHz)
Frequenzgang: 20Hz - 20 kHz
UKW-TUNER
Empfindlichkeit: 2 dBμ
Stereo-Trennung: 35 dB
Rauschabstand: 55 dB
Frequenzbereich: FM: 87.5 – 108MHz, MW 522 - 1620 KHz
Kanal-Stufe: 50 kHz
IF-Frequenz: 10.7MHz
AUSGANGSLEITUNG
Ausgang: MAX. 350mV
Impedanz: 10 kOhm
ALLGEMEINES
Betriebsspannung: 13.8V DC (10.8-15.6V), Negative Erdung
Lautsprecher-Impedanz: 4 oder 8 Ohm
Max. Ausgangsleistung: 25W (RMS) x 4 Kanäle, 4 x 25W M. Power
Hinweis: Auf Grund ständiger Verbesserungen bleibt die Änderung der technischen Daten
und des Designs ohne Vorankündigung vorbehalten.
Korrekte Entsorgung dieses Produkts (Elektromüll)
Die Kennzeichnung auf dem Produkt bzw. auf der dazugehörigen Literatur gibt an, dass
es nach seiner Lebensdauer nicht zusammen mit dem normalen HaushaltsmüIl entsorgt
werden darf. Entsorgen Sie dieses Gerat bitte getrennt von anderen Abfallen, um der Umwelt
bzw. der menschlichen Gesundheit nicht durch unkontrollierte Müllbeseitigung zu schaden.
Recyceln Sie das Gerät, um die nachhaltige Wiederverwertung von stofflichen Ressourcen
zu fördern.
Private Nutzer sollten den Händler, bei dem das Produkt gekauft wurde, oder die zuständigen
Behörden kontaktieren, um in Erfahrung zu bringen, wie sie das Gerät auf umweltfreundliche
Weise recyceln können.
Gewerbliche Nutzer sollten sich an Ihren Lieferanten wenden und die Bedingungen des
Verkaufsvertrags konsultieren. Dieses Produkt darf nicht zusammen mit anderem

FrançaisFrançais
CAUTION
RISK OF ELECTRIC
SHOCK
DO NOT OPEN
25 26
CD-825U/HP
Autoradio AM /FM Stéréo Digitale PLL avec lecteur CD USB / MP3, Syntoniseur
système Radio Data System avec EON et PTY, Façade frontale détachable
MODED’EMPLOI
Veuillez lire attentivement ce mode d’emploi, afin de familiariser avec votre nouvel
appareil avant de l’utiliser pour la première fois. Veuillez s’il vous plaît garder ce mode
d’emploi comme référence pour le futur.
TABLEDESMATIERES
• Emplacement des Commandes
• Caractéristiques
• Installation
• Précautions et Entretien
• Connexions
• Opérations
• Spécifications
EMPLACEMENTDES COMMANDES
1. TOUCHE MARCHE/ARRET
2. TOUCHE SELECTION LOUDNESS / DSP / DX - LOC / STEREO - MONO / TA / PI / BEEP
3. VOLUME BAS/HAUT (+ REGLAGE BAS/AIGUS/BALANCE/FADER)
4. TOUCHES DE PRESELECTION RADIO (1,2,3,4,5,6)
5. TOUCHE AF (FREQUENCES ALTERNATIVES)
6. TOUCHE TA (MESSAGES SUR LE TRAFIC)
7. TOUCHE PTY (TYPE DE PROGRAMME)
8. TOUCHE SAUT +10 (CD / USB MP3)
9. TOUCHE MODE
10. TOUCHE BANDE
11. SYNTONIEAUTOMATIQUE OU MANUELLE (HAUT TUN>> /BAS TUN<<
/ SAUT/ USB / CD (MP3)
12. TOUCHE SAUT -10 (CD / USB MP3)
13. AFFICHEUR LCD
14. TOUCHE RELACHEMENT FAÇADE
15. USB PORT
16. COMPARTEMENT POUR LE CD
ATTENTION
Le symbole “point d’exclamation” à l’intérieur d’un triangle avertit l’utilisateur
que d’importantes instructions d’utilisation et de maintenance sont contenues
dans le mode d’emploi.
Le symbole “éclair” à l’intérieur d’un triangle sert à avertir l’utilisateur de la
présence du courant à l’intérieur de l’appareil qui pourrait constituer un
risque.
Afin de minimiser les risques, ne pas ouvrir le boîtier ni ôter le dos de
l’appareil. En cas de panne, faites appel aux techniciens qualifiés pour les
réparations. L’appareil ne renferme aucune pièce réparable par l’utilisateur.
Un rayonnement laser invisible est présent lorsque l’appareil est ouvert ou
le verrouillage de sécurité est inopérant. Eviter toute exposition directe au
rayon laser. L’utilisation des commandes, réglages ou procédés autres que
ceux stipulés dans le présent mode d’emploi sont dangereux.
L’appareil ne doit pas être exposé à l’humidité ou à la pluie.
L’appareil doit être gardé dans un endroit suffisamment ventilé.
L’appareil ne doit pas être exposé à la lumière directe du soleil ou à des
sources de chaleur.
Correct Disposal of This Product (Waste Electrical &
Electronic Equipment)
This marking shown on the product or its literature, indicates
that it should not be disposed with other household wastes
at the end of its working life. To prevent possible harm to the
environment or human health from uncontrolled waste
disposal, please separate this from other types of wastes and
recycle it responsibly to promote the sustainable reuse of
material resources.
Household users should contact either the retailer where they
purchased this product, or their local government office, for
details of where and how they can take this item for
environmentally safe recycling. Business users should contact
their supplier and check the terms and conditions of the
purchase contract. This product should not be mixed with other
commercial wastes for disposal.

FrançaisFrançais 27 28
17. TOUCHE DE PAUSE
18. TOUCHE D’EXPLORATION USB / CD
19. TOUCHE DE REPETITION USB / CD (MP3 REPEAT)
20. TOUCHE RANDOM (LECTURE ALEATOIRE USB / CD)
21. TOUCHE DE RESET
22. TOUCHE EJECT CD
CARACTERISTIQUES
Cette autoradio douée de façade amovible, FM/FM stéréo, lecteur USB-CD / MP3 a les
suivantes caracteristiques :
• Contrôle électronique Volume, Aigus, Bas, Balancement, Fader
• Syntonie électronique de précision douée de circuit PLL.
• 30 stations mémorisables (6FM1 + 6FM2 + 6FM3+ 6MW1+ 6MW2)
• Loudness
• Interrupteur Marche/Arrêt illuminé
• Contrôle syntonie Manuelle / Automatique Haut / Bas
• Sélecteur Bande pour la sélection de FM1, FM2, FM3, MW1 ou MW2
• Fonction horloge en RDS
• Fonction Répétition USB / CD
• Lecteur et fichiers MP3 enregistrés sur de USB / CD
• Prise de sortie PRE (type RCA) pour la connexion à l’amplificateur
• Façade amovible qui fonctionne d’antivol
• Système d’illumination
• Fonctions RDS : PI (Identification Programme) TA (Annonce Trafic)
PS (Service Nom Programme) PTY (Type Programme)
AF (Liste Fréquences Alternatives)
TP (Progamme Trafic)
INSTALLATION
PRECAUTIONS
• Choisir l’emplacement du montage en veillant à ce que l’appareil ne gêne pas le
conducteur au volant.
• Eviter d’installer l’appareil dans un endroit exposé à des températures élevées,
comme les rayons directs du soleil ou l’air chaud de l’installation de chauffage ou
bien dans un endroit exposé à la poussière, saleté ou à de fortes vibrations.
• Ne se servir que des outils de montages fournis pour effectuer une installation sûre.
• S’assurer d’avoir ôté la façade extractible avant d’installer l’appareil..
EXEMPLEDEMONTAGE
Installation dans le tableau de bord
Nota: Garder la clé de déblocage dans un endroit sûr pour vous permettre, le cas échéant,
d’extraire l’appareil de l’auto.
Comment placer et enlever la façade.
La façade peut être enlevée de façon à éviter que l’appareil puisse être volé.
COMMENTENLEVERLAFACADE
Avant tout, s’assurer d’avoir pressé le bouton PWR (éteint) (1). Presser ensuite le bouton
RELEASE (14) et la retirer en tirant vers soi comme le montre le dessin.
Façade détachable
Façade détachable
Etui

FrançaisFrançais 29 30
COMMENTREMETTRELAFACADE
Portez la partie de la façade à la zone de l’appareil comme le montre la figure et pressez tant
que vous n’entendez pas un déclic.
Faites attention à ne pas exercer aucune pression sur le display et sur les autres touches.
Nota:
• S’assurer que la façade est dans la bonne position lorsque vous la remettez en
place sur l’appareil, pour ne pas l’appliquer à l’envers.
• Ne pas trop presser la façade contre l’appareil; il suffit d’appuyer légèrement sur
l’appareil.
• Lorsque vous emportez la façade, rangez-la dans son étui.
• Ne pas trop appuyer sur l’afficheur de la façade lorsque vous le remettez en place.
COMNECTEURISO”BUILD- IN”(INTÉGRÉ)
Le fil +12V Nº7 du connecteur A, doit être connecté sous clef de démarrage pour éviter que
la batterie de la voiture se décharge lorsque cette dernière n’est pas utilisée pendant
longtemps.
Prise RCA Line Out (Arriere) –
Gris : Rouge (droit)
: Blanc (gauche)
CONNECTEURA
1.
2.
3.
4. MEMOIRE + 12V PERMANENT
5. SORTIE ANTENNEAUTOMATIQUE
6.
7. + 12V (A LA CLEF D’IGNITION)
8. MASSE
N.B.:
CONNECTEURB
1. HAUT-PARLEUR ARRIERE DROIT (+)
2. HAUT-PARLEUR ARRIERE DROIT (-)
3. HAUT-PARLEUR AVANT DROIT (+)
4. HAUT-PARLEUR AVANTR DROIT (-)
5. HAUT-PARLEUR AVANT GAUCHE (+)
6. HAUT-PARLEUR AVANT GAUCHE (-)
7. HAUT-PARLEUR ARRIERE GAUCHE (+)
8. HAUT-PARLEUR ARRIERE GAUCHE (-)
REMPLACEMENTDESFUSIBLES
Si un fusible est grillé, contrôler la connexion électrique et remplacer le fusible. Si le fusible
se grille même après avoir été remplacé, il se peut qu’il y ait un mauvais fonctionnement à
l’intérieur. Dans ce cas, consultez le revendeur le plus proche.
Attention
Utiliser des fusible ayant l’ampérage spécifié pour chaque câble. L’emploi de fusibles
possédant un ampérage supérieur pourrait provoquer de graves dommages.
OPÉRATIONS
ALLUMAGE/COUPAGE(1)(PWR)
Insérez la façade amovible dans l’appareil et pressez la touche PWR pour mettre en fonction
l’autoradio.
Pour éteindre l’autoradio, pressez encore la touche PWR, puis pressez la touche
RELACHEMENT (14) pour extraire la façade.
Faites attention à ne pas extraire la façade lorsque l’autoradio est allumée.
SELECTION(2)/VOLUME(3)
Le contrôle VOLUME règle la sortie du son. Pour sélectionner les autres fonctions pressez
légèment la touche SEL (2) jusqu’à ce que la fonction choisie est visualisée sur l’afficheur.
Employer les touches du VOLUME pour modifier les autres fonctions. La figure 1 montre la
sélection des fonctions.
Façade détachable
Appareil principal arrière de la façade

FrançaisFrançais
1. VOLUME (tourner)
2. SELECT(ION) (pousser)
3. GRAVES
4. AIGUS
5. BALANCE
6. FADER
7. LOUDNESS
8. DSP (ROCK - POP - CLASS - DSP OFF)
9. STEREO MONO Fig. 1
ContrôleVOLUME(3).
Augmentation ou diminution du volume en tournant le contrôle VOLUME. Ce bouton peut
être utilisé pour ajuster la tonalités BASSES, AIGUÊS, BALANCE et FADER.
Il peut être utilisé aussi pour choisir les options des fonctions RDS/SDK.
RECEHERCHETA/ALARMETA (2)
Pressez la touche "SEL" (2) pendant plus de 2 secondes pour sélectionner les fonctions
suivantes en tournant la contrôle Volume:
Mode RECHERCHE TA ou le mode ALARME TA
- Mode Recherche TA:
Quand une station syntonisée ne reçoit pas d'informations TP pendant 5 secondes, la radio
passe à la station suivante qui n'a pas la même (PI) que la dernière station, mais qui a les
informations TP.
In TA seek mode, the current station can be changed to the completely different station
because the unit searches TP station when the field strength of the current station is very
weak, or the current station has no TP signal.
-ModeALARMETA:
Si vous sélectionnez ce système, quand il n'y a pas le signal TP, la radio ne recherche
aucune station alternative mais elle émet un signal (ALARME) pour signaler l'absence
du signal TP.
TONALITE PI / MUTE PI
– TONALITE PI
Lorsqu’une voiture roule dans une aire spéciale ayant un code PT mais le même AF, on
entend une tonalité PI (DIP) de temps en temps. On peut entendre le son DIP pendant au
moins 1 seconde.
– MUTE PI
Dans les mêmes conditions que nous venons de voir, la tonalité est mise à zéro pendant
au moins 1 seconde.
31 32
(C) RESYNTONISATION L / RESYNTONISATION S
Le temps initial de recherche automatique TA ou de recherche PI est sélectionné.
Lorsque l’information PI n’est pas trouvée pendant le temps de resyntonisation, la radio
commence la resyntonisation à la prochaine station PI. Lorsque la même station PI n’est
pas trouvée dans la première recherche cyclique, la radio va à la même station et elle
attend pendant 4-5 minutes jusqu’à ce que le code PI soit reçu.
– Syntonie L: sélectionnée comme 90 secondes.
– Syntonie S: sélectionnée comme 30 secondes.
4.PRESELECTIONS(1,2,3,4,5,6)
(A)MODALITERADIO:
Si appuyées légèrement, ces touches permettent de sélectionner directement une station
présélectionnée. L’appui sur ces touches pendant plus de 1 seconde mémorise la station
actuellement syntonisée. Lorsqu’on sélectionne la modalité PTY, la touche PTY est partagée
de la manière suivante:
PTY groupe musique —— PTY groupe parlé —— ETEINT
MUSIQUE PARLE
1.Musique POP, Musique ROCK 1.JOURNALPARLE, AFFAIRES, INFOS
2.Musique EASY, Musique LEGERE 2.SPORT, EDUCATION, PIECES
3.CLASSIQUE, AUTRE Musique 3.CULTURE, SCIENCES, DIVERS
4.JAZZ,COUNTRY 4. PREVISIONS DU TEMPS, FINANCES,
ENFANTS
5.NATION M, OLDIES 5.SOCIAL, RELIGION, TELEPHONE
6.Musique FOLK 6.VOYAGES,DIVERTISSEMENT,DOCUMENTAIRES
(B)MODALITELECTEURMP3(CD/USB)
1. PAUSE 2.BALAYAGE 3. REPETITION 4. CASUEL
LAFONCTIONRDS.QU’EST-CEQUELESYSTEMERDS?
RDS (Radio Data System) est un système d’informations numériques radio développé et
introduit par l’EBU (European Broadcasting Union). Transmis sur le canal des émissions
normales FM.
Le RDS offre une variété d’informations telles le nom des stations, le programme et les
informations sur le trafic, ainsi que des fonctions utiles comme la syntonisation automatique
des meilleurs signaux disponibles dans le programme choisi.
5.Fonction‘AF/REG’(FREQUENCESALTERNATIVES)
Une légère pression sur cette touche permet de sélectionner la modalité AF/REG.

FrançaisFrançais 3433
Lorsque la modalité AF/REG est sélectionnée, la radio contrôle continuellement le niveau
du signal AF. L’appui sur cette touche pendant plus de 2 secondes active la modalité
BRANCHE/DEBRANCHE Régional.
–ModalitéRégionaleBRANCHEE:
La commutation AF ou la Recherche PI SEEK est effectuée dans toutes les stations ayant
le même code PI que la station actuelle. L’inscription REG s’affiche.
–ModalitéRégionaleDEBRANCHE
Le code Régional dans le format PI est ignoré lorsqu’on effectue la commutation AF ou la
Recherche PI SEEK.
6.Fonction‘TA’(ANNONCESTRAFIC)
Une légère pression sur cette touche permet de brancher ou de débrancher la modalité TA.
Lorsque la modalité TA est sélectionnée et une annonce sur le trafic est transmise
– Lorsque l’appareil est en modalité CD/MP3, elle commutera temporairement sur la
modalité radio.
– Si le niveau du volume était sous le seuil bien audible, le niveau bien audible augmentera.
– Lorsqu’on reçoit une station TP, l’inscription TP s’affiche.
Un appui plus long active la modalité TA LOCAL / TA DISTANCE est sélectionnée.
– Modalité TA LOCAL
Lorsque le signal de branché est sous le seuil de réception, la radio ne commute pas sur
cette station et l’auditeur n’entend pas les parasites. “TA LO” s’affiche pendant quelques
secondes.
– Modalité EON TA DISTANCE
La commutation TA essaie de développer l’information de la station actuelle. “TA DX” s’affiche
pendant quelques secondes.
7.Fonction‘PTY’(TYPEDEPROGRAMME)
PTY MUSIQUE —— PTY PARLE —— PTY DEBRANCHE
Lorsqu’on sélectionne PTY, il est effectué par les touches de présélection ainsi que décrit
dans les touches de présélection. Lorsqu’on sélectionne PTY, la radio commence à
chercher l’information PTY correspondante et elle s’arrête si l’information PTY correspondante
est trouvée.
8.TOUCHE + 10 (CD/ USB -MP3)
SAUT 10 MORCEAUX HAUT.
9.TOUCHEMODE(MODE)
L’appui sur cette touche permet à l’utilisateur de sélectionner
Modalité RADIO ou Modalité Lecteur CD - USB.
10.TOUCHEDEBANDE(BAND)
Chaque bande est commutée en appuyant l’une après l’autre sur les touches FM1-FM2-FM3
- MW1 - MW2.
En modalite Lecteur CD / USB MP3, l’appui sur cette touche illustre sur l’ afficheur LCD
TITLE - SONG - ARTIST - DIRECTORY
11.SYNTONISATIONAUTOMATIQUEOUMANUELLE(FREQHAUT>>OUFREQBAS<<)
(A)MODALITERADIO
Si appuyées légèrement, ces touches font fonction de Recherche Manuelle.
Une pression de plus de 1 seconde active la Recherche Automatique.
(B)MODALITELECTEURUSB-SD/MP3
Si appuyées légèrement, ces touches font fonction de SAUT MORCEAU HAUT ou BAS.
12.TOUCHE - 10(CD /USB - MP3)
SAUT 10 MORCEAUX BAS
13.AFFICHEURLCD
L’afficheur à cristaux liquides illustre l’état actuel de réception des opérations.
CONTROLESLECTEUR MP3(USB/SD/MMC)
15.PORTEUSB
17.TOUCHEPAUSE
Durant la lecture, appuyer sur la touche PAUSE (17) ‘PAUSE’ pour arrêter momentanément
la lecture. Appuyer de nouveau pour retourner à la lecture normale.
18. TOUCHE INTRO (Balayage de tous les morceaux)
L’appui sur cette touche affiche l’indication ‘SCN’ et effectue la reproduction des 10
premières secondes de chaque morceau.
19.TOUCHEREPEAT‘REPEAT’
L’appui sur cette touche affiche l’indication ‘RPT’ et la lecture du morceau actuel est répétée
jusqu’à ce que le mode répétition soit effacé en appuyant à nouveau sur la touche ‘RPT’ .

FrançaisFrançais 3635
20.TOUCHERANDOM‘SHUFFLE’(CASUEL)
L’appui sur cette touche affiche l’indication ‘SHF’ et chaque morceau du disque est lu dans
un ordre casuel et non dans la séquence normale. Pour effacer le mode Casuel, appuyer
à nouveau sur la touche ‘SHUFFLE’ (20).
21.TOUCHERESET
La touche Reset (21) se trouve sur la façade interne. Utilisez la pointe d’un stylo à bille ou
d’un autre objet métallique pour l’actionner. La touche Reset doit être utilisée dans les cas
suivants:
• installation initiale de l’appareil, après avoir branché tous les câbles,
• défaut de fonctionnement de toutes les touches,
• symbole d’erreur affichée.
Comment effectuer la recherche des morceaux MP3
A. Recherche directe de la piste
Appuyer sur la touche de BAND (12) une fois, à l’afficheur apparaît “TRK SCH”: Tourner
le contrôle de Volume (3) pour lister les numéros.
Puis appuyer sur ENTER (10) pour confrimer.
B. Recherche par nom d’Album (Directory) ou de Piste (File)
Appuyer sur la touche de band (12) deux fois, à l’afficheur apparaît “FILE SCH”. Entrer
la lettre directement. L’appareil cherche les pistes et les albums qui ont la même lettre
initiale entrée. Les pistes et les albums sont listées avec les touches de VOLUME
HAUT/BAS. Si le nome sélectionné est d’un album, ont peut entrere dans l’album en
pressant la touche ENTER et continuer la recherche de la piste avec les touche de
VOLUME HAUT/BAS. La pièce sélectionnée peut être lue en pressant sur la touche
ENTER.
Tourner le contrôle de Volume (3) dans les deux sens pour lister les caratères
alphanumériques. Puis appuyer sur ENTER (10) pour confrimer.
C. Recherche par Album
Rechercher l’album avec les touches de VOLUME HAUT/BAS.
En mode lecture MP3, appuyer sur la touche de BAND (12) trois fois. Le nom du
premier album sera montré. Appuyer sur VOLUME HAUT/BAS pour naviguer dans
l’album, puis presser ENTER pour sélectionner l’album désiré. Pour choisir les
pièces dans l’album sélectionné, appuyer sur VOLUME HAUT/BAS puis presser ENTER
pour confirmer la pièce.
ID3TAG
Appuyer sur DISPLAY à maintes reprises pour montrer l’information ID3 TAG.
Si le document MP3 est fournin de ID3 TAG, appuyer sur DISPLAY à maintes reprises pour
montrer l’information comme suivant:
TITRE CHANSON > ARTISTE>TITRE ALBUM > ANNEE> COMMENTAIRES
Si il y a quelque information ID3-TAG pas présente, appuyer sur DISPLAY à maintes reprises
pour montrer l’information comme suivant:
UNKNOWN SONGNAME> UNKNOWN ARTIST> NO ALBUM TITLE > UNKNOWN YEAR >
NO COMMENTS
Si il y n’y a pas d’information ID3 TAG, appuyer sur DISPLAY, apparaîtra “NO ID3 TAG”
à l’afficheur. Le nom et le numéro du document passeront en continuation sur l’afficher pendant
la lecture.
SPECIFICATIONS
LECTEURCD/MP3
Rapport Signal/Brouillage > 70dB
Séparation Canal > 50 dB (1KHz)
Réponse en fréquence 20Hz - 20 KHz
SYNTONISATEURFM
Sensibilité 2 dBμ
Séparation Stéréo 35dB
Rapport Signal/Brouillage 55dB
Gamme fréquence FM 87.5 – 108MHz
Gamme fréquenceAM 522-1620 KHz
Pas Canal 50 kHz
Fréquence intermédiaire 10.7MHz
SORTIEPREAMPLIFIEE
Sortie 350mV(MAX)
Impédance 10kOhm
GENERALITES
Voltage alimentation 13.8V DC (10.8-15.6V), Negative à la masse
Impédance haut-parleurs 4 ou 8 Ohms
Puissance maximale de sortie 25W (RMS) x 4 canaux, 4 x 45 W M. Power
Les spécifications et le design peuvent changer sans avis préalable.
Table of contents
Languages:
Other Roadstar Car Video System manuals