Voxx Electronics HR8MA1 User manual

HR8MA1
8” MONITOR WITH DVD
Owner’s Manual
HR8SS
REAR SEAT VIDEO HEADREST SYSTEM
AvAilAble in two configurAtions


3
8”MONITOR REAR SEAT VIDEO HEADREST SYSTEM Owner’s Manual
TABLE OF CONTENTS
© 2021 VOXX Electronics Corp. All rights reserved. This manual, or any portion thereof,
may not be reproduced without the express written permission of VOXX Electronics Corp.
Contents
WELCOME
CONGRATULATIONS.....................................................................................................................................4
CAUTIONS ........................................................................................................................................................4
PRODUCT FEATURES....................................................................................................................................5
SYSTEM CONFIGURATIONS.......................................................................................................................6
BATTERY INSTALL
REMOTE CONTROL BATTERY INSTALLATION ....................................................................................7
HEADPHONE BATTERY INSTALLATION.................................................................................................8
HR8MA1
HR8MA1 FRONT PANEL CONTROLS.......................................................................................................9
HR8MA1 QUICK START GUIDE...............................................................................................................10
HR8MA1 SYSTEM SETUP MENUS.........................................................................................................11
HR8MA1 SYSTEM SETUP SUBMENUS...............................................................................................12
REMOTE CONTROL
REMOTE CONTROL OPERATION...........................................................................................................16
DVD SETTINGS
DVD SETTINGS AND ADJUSTMENTS .................................................................................................19
GENERAL DISC OPERATION INSTRUCTIONS ..................................................................................22
DVD REGION CODES.................................................................................................................................23
USB
HR8MA1 USB................................................................................................................................................24
INPUTS & OUTPUTS
AV, AUX INPUTS, AV OUTPUTS,HDMI AND USB PORT INFORMATION.................................25
SMART STREAM
SMART STREAM OPERATION ................................................................................................................27
TROUBLESHOOTI NG
TROUBLESHOOTING ................................................................................................................................28
SPECIFICATIONS
SPECIFICATIONS ........................................................................................................................................30
COMPLIANCE INFORMATION ..................................................................................................................... 31

4
8”MONITOR REAR SEAT VIDEO HEADREST SYSTEM Owner’s Manual
WELCOME
Thank you for purchasing your new Vehicle Headrest Entertainment System.
Before operating this system read this manual thoroughly and retain it for future reference.
CONGRATULATIONS
Patented, refer to www.voxxintl.com/company/patents
The M1 monitor will only respond to the
Remote Control when the Monitor Select
“M1” button is pressed.
The M2 monitor will only respond to the
Remote Control when the Monitor Select
“M2” button is pressed.
* SMARTSTREAM requires an optional WM1
module which allows Wireless Content
transfer from select Smartphones and
Tablets to your 8” Headrest system.
Note: Wireless content transfer can be limited
based on the Smart device and content due
to copyright regulations.
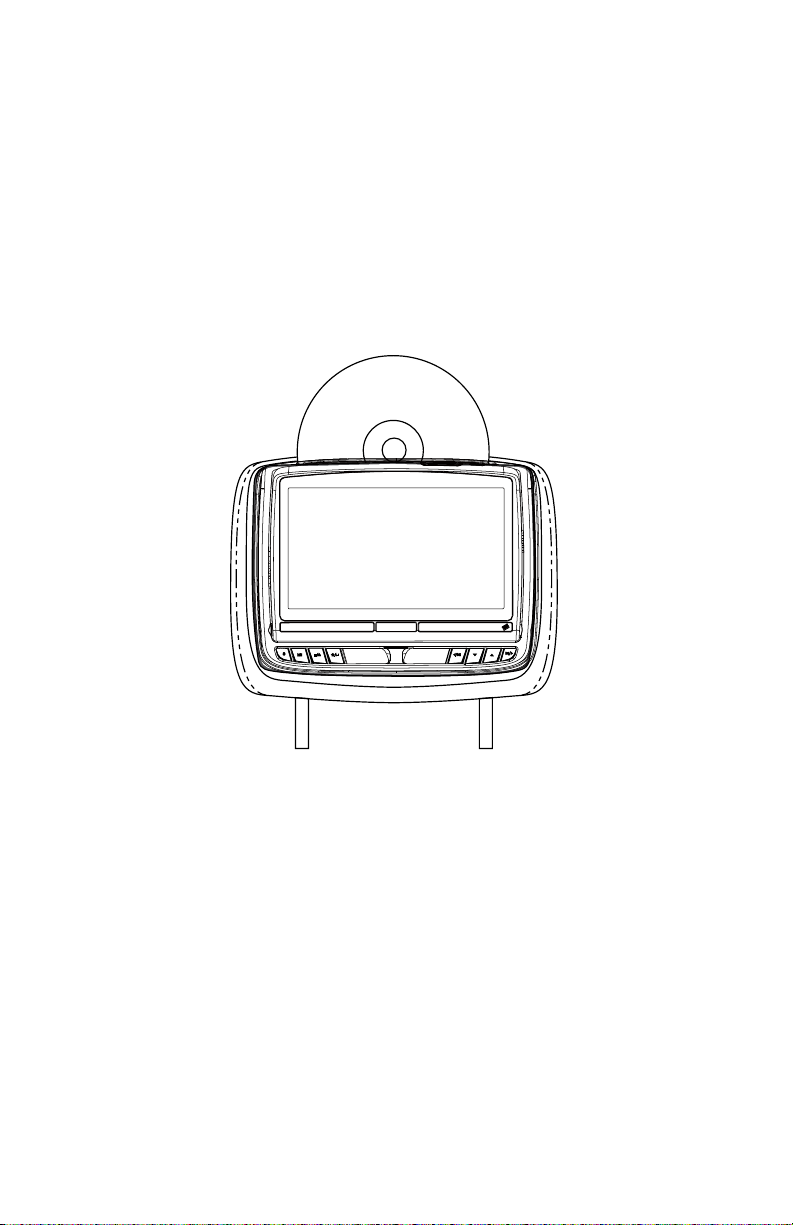
The 8” Rear Seat Video Headrest System has
two video headrest monitors referred to as
either“M1”or“M2”in this manual. The system
allows the users to watch the same video
source on both monitors simultaneously or
individual video sources on either monitor.
The full function wireless Remote Controls
operate either monitor by selecting the
Monitor Select “M1” or “M2” button. There
are two 8” Rear Seat Video Headrest System
models available that use HR8MA1 monitor.
The HR8MA1 monitor has an 8” LCD panel
with built-in DVD player that allows the user
to select from several sources (DVD, USB,
AUX, HDMI or SMARTSTREAM* and M1/M2,)
The monitor has a built-in infrared audio
transmitter channel.
The monitor also has a built-in 2 channel
infrared Headphone transmitter.
The two-channel wireless Infrared (IR)
headphones have an A-B switch that allows
the users to select the audio from either the
M1 monitor on “CH A” or the M2 monitor on
”CH B”.
Safety Precaution
For safety reasons, when changing a video
disc, it is recommended that the vehicle
not be in motion, and that you do not allow
children to unfasten safety belts to change a
disc or make any adjustments to the system.
CAUTION
Always run the vehicle’s engine while using
the 8” Rear Seat Video Headrest System.
Using the system without running the engine
can result in battery drainage. To avoid the
risk of battery drainage, please remember to
turn the system OFF when the vehicle is not
in use for long periods of time.
Important Notice
An LCD Panel and/or Video Monitor may be
installed in a motor vehicle and visible to the
driver if the LCD Panel or Video Monitor is
used for vehicle information, system control,
rear or side observation or navigation. If
the LCD Panel or Video Monitor is used for
television reception, video or DVD play,
the LCD Panel or Video Monitor must be
installed so that these features will only
function when the vehicle is in “park” or
when the vehicle’s parking brake is applied.
An LCD Panel or Video Monitor used for
television reception, video or DVD play that
operates when the vehicle is in gear or when
the parking brake is not applied must be
installed to the rear of the driver’s seat where
it will not be visible, directly or indirectly,
by the operator of the motor vehicle.
CAUTIONS

5
8”MONITOR REAR SEAT VIDEO HEADREST SYSTEM Owner’s Manual
WELCOME
PRODUCT FEATURES
The 8” Rear Seat Video Headrest Systems consist of:
1. Two matching headrests with 8-inch
color TFT-LCD Display Screens
(800x480)16:9 aspect ratio.
2. Two Infrared (IR) Transmitters for
listening to the audio signal through
Wireless IR Headphones.
3. Two wireless Infrared (IR) Headphones
equipped with volume control and an
A/B switch to select between “M1” and
“M2”.
NOTE: The wireless IR headphones must
be used within a line of sight from the
transmitter as infrared transmission,
like visible light, travels only in an
unrestricted line of sight.
4. One wireless 100 channel FM
transmitter for listening to audio (from
the M1 Monitor only) through the
vehicle’s FM radio by tuning to one of
100 frequencies. Locate an unused FM
frequency on the radio and set the FM
modulator to that frequency.
NOTE: Whenever the FM transmitter
is active, regular radio reception may
be poor. Turn the FM transmitter o to
allow normal radio reception.
5. USB Input to connect a USB memory
device. This input will also charge a
USB device that contains a battery. (see
page 24-26 for more information)
6. Sources:
• HR8MA1: DVD, USB, AUX IN, AV/
DTV (HDMI or SMARTSTREAM*),
M1/M2.
• SMARTSTREAM: requiresanoptional
WM1module which allows LIMITED
Wireless Content transfer from
select Smartphones and Tablets
to your 8” Headrest system.
7. HDMI Input is used to connect a
device with an HDMI output such as a
Smartphone.
NOTE: Requires an HDMI enabled
device and a special HDMI adapter.
Contact your HDMI device supplier for
the adapter. (see pages 25 for more
information).
8. Remote Sensors on the front panels.
9. Two full function Remote Controls to
operate either monitor by selecting
“M1” or “M2”.
10. Controls & Indicators on the Front and
Top Panel.
HR8MA1:
• POWER
• SOURCE (S)
• PLAY/PAUSE ()
• STOP/ EJECT (n )
• ENTER ()
• LEFT / PREVIOUS (/ )
• DOWN (q)
• UP (p)
• NEXT / RIGHT (/ )
• USB Connector
• AUX Jack

6
8”MONITOR REAR SEAT VIDEO HEADREST SYSTEM Owner’s Manual
WELCOME
SYSTEM CONFIGURATIONS
The 8”Rear Seat Entertainment System is available in 2 model congurations.
Please refer to the following gures which detail each entertainment system
conguration.
Available in the conguration as follows:
Conguration 1: Model HR8SS
Two HR8MA1 8” LCD monitors with built-in DVD players. (Figure 1)
+
Figure 1
HR8MA1
(M2)
HR8MA1
(M1)

7
8”MONITOR REAR SEAT VIDEO HEADREST SYSTEM Owner’s Manual
BATTERY
INSTALL
REMOTE CONTROL BATTERY INSTALLATION
Installation of the Remote Control Battery
1. Remove the battery cover.
2. Insert two AAA batteries into the battery holder. Be sure to observe the correct polarity.
3. Reinstall the battery cover back into the Remote Control until it locks in place. (Figure 2)
NOTE: The Remote Control will only operate with the HR8SS Rear Seat Video Headrest System.
It is not a universal Remote Control and will not control other equipment.
Figure 2

8
8”MONITOR REAR SEAT VIDEO HEADREST SYSTEM Owner’s Manual
BATTERY
INSTALL
Each wireless IR headphone requires two AAA batteries.
1. Locate the battery compartment cover on the earphone (backside or under ear cup).
2. For headphones with under ear cup battery compartments - While holding the left earphone in
one hand, insert a coin or slot head screwdriver into the screw slot and turn counterclockwise
to release the battery compartment cover. Insert two AAA batteries, carefully following the
markings inside the battery compartment to ensure the batteries are inserted properly (“+”
and“-”ends in the correct positions). Close the battery compartment cover. Insert a coin pr slot
head screwdriver into the screw slot and turn clockwise to fasten the cover.
3. For headphones with backside ear cup battery compartments - remove the battery cover by
sliding the cover downward. Insert two AAA batteries, carefully following the markings inside
the battery compartment to ensure the batteries are inserted properly (“+” and “-” ends in the
correct positions). Place the cover back on top of the battery compartment and slide up until
the cover locks in place.
Installation of the Headphone Batteries (Actual Headphone may dier)
HEADPHONE BATTERY INSTALLATION
• Always keep the Monitors, Remote Controls and Headphones clean and dry.
• Always seek qualied personnel to perform repairs to the system or individual components of the
system. NOTE: Never attempt your own repairs.
• Do not drop Remote Controls and Headphones or expose to strong impacts.
• Do not expose Monitors, Remote Controls and Headphones to direct sunlight for extended periods of
time.
• Always ensure that the batteries are correctly installed in the Remote Controls and Headphones with
the positive and negative sides in the directions as shown in the battery compartment.
• Use two AAA (1.5v) Alkaline batteries in each of the Remote control.
NOTE: Do not use dierent types.
• Use two AAA (1.5v) Alkaline batteries in each of the Headphones.
NOTE: Do not use dierent types.
• Do not use old batteries in the Remote Controls or Headphones.
• When the batteries fail to function, replace them immediately.
• Remove the batteries if the Remote Controls and Headphones are not used for a month or longer.
• Keep all batteries out of the reach of children. Should a battery be swallowed, immediately consult a
doctor.
• When disposing of used batteries, please comply with governmental regulations or environmental
rules that apply in your area.
Figure 3

9
8”MONITOR REAR SEAT VIDEO HEADREST SYSTEM Owner’s Manual
HR8MA1
Figure 4
HR8MA1 FRONT PANEL CONTROLS
1
12
13
10
8
6
5
7
9
2
3
16
4
11
14
15
1. DVD disc insertion slot
2. IR TRANSMITTER and IR SENSOR
IR Transmitter: Used to broadcast audio
signal to the wireless IR headphones.
IR Sensor: Used to receive signals from
the Remote Control.
3. PLAY/PAUSE ( ) Button
This button is used to start playback of
the disc or pause a disc.
4. SOURCE (S) Button
This button is used to access the USB,
DVD, AV/IN, HDMI, M1/M2 and Settings.
5. STOP / EJECT (n) Button
This button is used to stop the playback
of the disc or USB in use and to eject the
disc.
6. HOME / MENU SELECT ( ) Button
This button is used to access the
system menu. This button is also used
to execute selected settings or menu
options.
7. USB INPUT CONNECTOR
This port is used to connect a USB
device for playback of content. To
view content, select “USB” as the video
source and insert the USB device. The
USB device will start automatically.
NOTE: This input will also charge a USB
device that contains a battery.
8. AUX INPUT
This port is used to connect analog
Audio/Video Devices.
9. JACK COVERS
These covers are used to protect and
cover the USB port and AUX Input when
not in use.
10. DOWN (q) Button
This button is used to navigate through
menu selections in downward direction.
11. UP (p)Button
This button is used to navigate through
menu selections in upward direction.

10
8”MONITOR REAR SEAT VIDEO HEADREST SYSTEM Owner’s Manual
HR8MA1
HR8MA1 FRONT PANEL CONTROLS (continued)
12. NEXT / RIGHT ( / ) Button
This button is used to skip to the next
chapter or track during playback of a
disc. This button is also used to navigate
through menu selections.
13. LEFT / PREVIOUS (/ ) Button
This button is used to skip to the previous
chapter or track during playback of a
disc. This button is also used to navigate
through menu selections.
14. POWER INDICATOR
Bright Red when OFF and dimly lit when
ON.
15. 8-inch TFT LCD Display Screen
(800 x 480)
HR8MA1 QUICK START GUIDE
1. Press the Power button on the top of the
front panel or on the Remote Control.
The power indicator will be dimly lit.
2. Insert a DVD, CD, or MP3 disc (label
toward user) into the disc slot located
on top of the M1 monitor. The DVD
player will pull the disc in automatically.
NOTE: Do not force the disc in the slot.
The monitor must be in DVD mode to
accept a disc.
3. Tilt the screen to a comfortable viewing
position. The screen has a built-in stop.
Do not force it past this stop, otherwise
damage will occur.
4. Each wireless IR headphone has an
”A-B” switch used to select the
audio from either the “M1” or “M2”
monitor. When sitting in front of the
M1 monitor, use the CH A setting.
When sitting in front of the M2 screen,
use the CH B setting.
• Set the headphone to the
proper channel and press the
Power On/O button to turn
the headphones ON. The power
indicator will light up red.
NOTE: Turn the volume down to its
lowest setting before putting the
headphones on.
5. When the DVD menu appears, select
the menu item using the UP/DOWN
buttons and press the HOME / MENU
SELECT button on the front panel or
Play button on the Remote Control.
6. If audio playback through the vehicle
radio is preferred, use the FM transmitter
ON/OFF button on the Remote
Control. Set the vehicle radio to the
channel selected on the M1 monitor. If
interference with a local radio station
occurs, set the FM modulator to one
of the other 100 radio frequencies
using the Channel Select button on
the Remote Control or front panel.
NOTE: To operate the M1 screen, press
M1 button on the Remote Control. To
operate the M2 screen, press the M2
button on the Remote Control.
7. To turn OFF either the M1 or M2
monitor, press and hold the Power ON/
OFF button for 5 seconds.
16. POWER Button
• Press and release this button to turn
the monitor ON.
• Press and hold this button for 5
seconds to turn the monitor OFF.
Warnings
Do not use any solvents or abrasive cleaning
materials when cleaning the screen. Use only
a lightly dampened lint free cloth to wipe the
screen if it is dirty.
Lock the front panel in the fully closed
position when not in use. Do not put
pressure on the screen, caution children to
avoid touching or scratching the screen.

11
8”MONITOR REAR SEAT VIDEO HEADREST SYSTEM Owner’s Manual
HR8MA1
Using the System Menu
Navigating and selecting available settings
in the SYSTEM MENU is accomplished using
the Remote Control buttons (Figure 6) or the
Front Panel buttons (Figure 7).
Follow the steps outlined in this section to
select and customize each of the adjustable
Sub-Menu functions and a Settings option
listed above in the MAIN MENU, refer to the
sections that apply.
MAIN MENU System Sources and
Settings
The MAIN MENU is used to access and
change the AV source between USB, DVD,
AUX, AV/DTV (HDMI/SMARTSTREAM*), M1/
M2 sources.(The SETTINGS menu is also
can accessed through the MAIN MENU.
There are several ways to access the MAIN
MENU screen
• From the front panel press the SOURCE
(S) button. (Figure 7)
• From the Remote Control press the SRC
button (Figure 6).
The SYSTEM MENU allows the user to
personalize the HR8MA1 Rear Seat Video
Headrest System settings. This menu is
accessed by selecting the gear ( ) icon in
the MAIN MENU. The MAIN MENU is used
in the initial setup to adjust the picture
quality and customize adjustable functions.
Once the initial settings are customized,
they will remain the same until modied
or reset to the factory default settings.
There are two ways to access the SYSTEM
MENU:
• From the key buttons, long press the
HOME / MENU SELECT ( ) button
to call up the adjustable menu.
(Figure 7)
• From the Remote Control press the
SYSTEM MENU or PIX button
(Figure 6).
NOTE: SYSTEM MENU changes are best
made without a DVD inserted into the unit.
The following section describes how to
adjust and set settings using the ve setup
screens:
S
HOME
/ MENU
SELECT
(ENTER)
BUTTON
HR8MA1 Main Menu
Figure 5
Figure 6
HR8MA1 SYSTEM SETUP MENUS
SOURCE
BUTTON Figure 7
SYSTEM
MENU
BUTTON
OK
BUTTON
SOURCE
BUTTON

12
8”MONITOR REAR SEAT VIDEO HEADREST SYSTEM Owner’s Manual
HR8MA1
System Sub-Menus
1. Press the SYSTEM MENU button on the
Remote Control (Figure 6) or long press
the Home/Menu Select button on the
front panel of the monitor (Figure 7) to
display the SYSTEM MENU.
2. Use the UP and DOWN direction buttons
to select and enter the desired SYSTEM
SUB-MENU:
• PICTURE
• WFMM (Only M1 mode)
• LANGUAGE
• DEFAULT DVD
• IR TRANSMITTER
• SMART STREAM
• EXIT
NOTE: Selected items in the SYSTEM
MENU and the Sub-Menus will be
highlighted in orange.
3. Use the UP, DOWN, LEFT and RIGHT
direction buttons to adjust or select an
item in the Sub-Menu screen and then
press the OK button on the Remote
Control (Figure 6) or press the HOME /
MENU SELECT button (Figure 7).
4. To exit the SYSTEM MENU screen or the
SYSTEM SUBMENU screens and return
to the MAIN MENU at anytime, press the
SOURCE SRC button on the Remote
Control or the SOURCE (S button on
the front panel.
PICTURE CONTROL
Picture Control Menu
PICTURE CONTROL from the Front
Panel:
1. Press and hold the HOME/ MENU SELECT
button on the front panel of the unit to
show the SYSTEM MENU.
2. Use the UP and DOWN direction buttons
to select PICTURE CONTROL (Figure 8)
and press the HOME / MENU SELECT
button to enter the sub-menu.
HR8MA1 SYSTEM SETUP SUBMENUS
Figure 8
Figure 9
WFMM Channel/Frequency Menu
3. Use the UP and DOWN direction buttons
to select one of the ve selections in the
Sub-Menu (Brightness, Contrast, Color,
Tint and Reset).
4. Use the LEFT and RIGHT direction
buttons to adjust the picture setting
levels.
NOTE: Levels are set from “0” to “32” for
Brightness, Contrast and Color. The level
for Tint is set from “-16” to “+16” . There
is no Tint Control in PAL Mode.
5. Select Reset to return the picture setting
controls to the factory default settings.
1. Select “M1” or “M2” on the Remote
Control.
2. Press the SYSTEM MENU or PIX button to
enter PICTURE CONTROL then press the
OK button to enter the sub-menu.
3. Use the UP and DOWN direction buttons
to select one of the ve selections in the
Sub-Menu (Brightness, Contrast, Color,
Tint and Reset).
4. Use the LEFT and RIGHT direction
buttons to adjust the picture setting
levels.
NOTE: Levels are set from “0” to “32” for
Brightness, Contrast and Color. The level
for Tint is set from “-16” to “+16”. There
is no Tint Control in PAL Mode.
5. Select Reset to return the picture setting
controls to the factory default settings.
FM CHANNEL
Wireless FM Modulator (WFMM
Channel Select from the Front Panel
1. Press and hold the HOME/ MENU SELECT
button on the front panel of the unit to
show the SYSTEM MENU.
2. Use the UP and DOWN direction
buttons to select WFMM (Wireless
FM Modulator) and press the HOME
/ MENU SELECT button to enter the
sub-menu.

13
8”MONITOR REAR SEAT VIDEO HEADREST SYSTEM Owner’s Manual
HR8MA1
3. Use the UP, DOWN, LEFT and RIGHT
direction buttons to select the best
channel/frequency from a ve page list
of one hundred frequencies then press
the HOME / MENU SELECT button to
enter selection.
4. When a channel/frequency is selected,
the Wireless FM Modulator screen will
display the selected channel/frequency.
NOTE: The WFMM menu is only
available on the “M1” monitor.
Wireless FM Modulator (WFMM)
Channel Select from the Remote
Control:
1. Select “M1” on the Remote Control.
2. Press the SYSTEM MENU or PIX button to
enter SYSTEM MENU.
3. Use the UP and DOWN direction
buttons to select WFMM Wireless FM
Modulator and press the ENTER button
to enter the Wireless FM Modulator
sub-menu.
4. Use the UP, DOWN, LEFT and RIGHT
direction buttons to select the best
channel/frequency from a ve page list
of one hundred frequencies then press
the ENTER button to enter selection.
NOTE: When a channel/frequency is
selected, the Wireless FM Modulator
screen will display the selected channel/
frequency.
WIRELESS FM MODULATOR ON/
OFF Direct Access Button on the
Remote Control:
Press the FMM ON or OFF button on the
Remote Control (Figure 10) to turn the
Wireless FM Modulator ON or OFF.
When ON is selected, the channel/frequency
the system is set to will be displayed on the
lower left-side of the main screen. When OFF
is selected, FMM OFF will be displayed on
the lower left-side of the main screen.
LANGUAGE
LANGUAGE from the Front Panel:
1. Press and hold the HOME/ MENU SELECT
button on the front panel of the unit to
show the SYSTEM MENU.
2. Use the UP and DOWN direction buttons
to highlight Language and press the
HOME/MENUSELECTbuttontoenter the
sub-menu.
3. Use the UP and DOWN direction buttons
to select the desired language then press
the HOME / MENU SELECT button to
save the setting.
LANGUAGE from the Remote Control
1. Select “M1” or “M2” on the Remote
Control.
2. Press the SYSTEM MENU or PIX button to
enter SYSTEM MENU.
3. Use the UP and DOWN direction buttons
to highlight Language and press the
ENTER button on the Remote Control to
enter the Language
sub-menu.
4. Use the UP and DOWN direction buttons
to select the desired language then
press the ENTER button on the Remote
Control to save the setting.
HR8MA1 SYSTEM SETUP SUBMENUS (continued)
Figure 11
Language Menu
Figure 10
FMM ON/OFF
BUTTON

14
8”MONITOR REAR SEAT VIDEO HEADREST SYSTEM Owner’s Manual
HR8MA1
IR Transmitter ON/OFF from the Front
Panel:
1. Press and hold the HOME/ MENU SELECT
button on the front panel of the unit to
show the SYSTEM MENU.
2. Use the UP and DOWN direction buttons
to highlight IR TRANSMITTER and press
the HOME / MENU SELECT button to
enter the sub-menu.
3. Use the UP and DOWN direction buttons
to select ON or OFF and press the
HOME / MENU SELECT button to enter
selection. When ON is selected, IRT ON
will be displayed on the SYSTEM MENU
screen. When OFF is selected, IRT OFF
will be displayed on the SYSTEM MENU
screen.
IR Transmitter ON/OFF from the Remote
Control:
1. Select “M1” or “M2” on the Remote
Control.
2. Press the IRT ON/OFF button to enter the
Sub-menu.
3. Use the UP and DOWN direction buttons
to highlight ON or OFF and press the
ENTER button to enter selection. When
ON is selected, IRT ON will be displayed
on the SYSTEM MENU screen. When OFF
is selected, IRT OFF will be displayed on
the SYSTEM MENU screen.
or
1. Select “M1” or “M2” on the Remote
Control.
2. Press the SYSTEM MENU or PIX button to
enter SYSTEM MENU.
3. Use the UP and DOWN direction buttons
to highlight IR TRANSMITTER and press
the ENTER button to enter the sub-
menu.
4. Use the UP and DOWN direction buttons
to highlight ON or OFF and press
the ENTER button to enter selection.
When ON is selected, IRT ON will be
displayed on the SYSTEM MENU screen.
When OFF is selected, IRT OFF will be
displayed on the SYSTEM MENU screen.
DEFAULT DVD
With the “Default DVD ON” feature selected,
the monitor will default to DVD Mode each
time the system is turned ON. For example,
if the user is playing a game and the system
is turned OFF, the next time the system is
turned ON, it will power up in DVD Mode.
Default DVD ON and OFF from the Front
Panel:
1. Press and hold the HOME/ MENU SELECT
button on the front panel of the unit to
show the SYSTEM MENU.
2. Use the UP and DOWN direction buttons
to highlight DEFAULT DVD and press the
HOME / MENU SELECT button to enter
the sub-menu.
3. Use the UP and DOWN direction buttons
to select ON or OFF and press the HOME /
MENU SELECT button to enter selection.
Default DVD ON and OFF from the
Remote Control:
1. Select “M1” or “M2” on the Remote
Control.
2. Press the SYSTEM MENU or PIX button to
enter SYSTEM MENU.
3. Use the UP and DOWN direction buttons
to highlight DEFAULT DVD and press the
ENTER button to enter the sub-menu.
4. Use the UP and DOWN direction buttons
to highlight ON or OFF and press the
ENTER button to make the selection.
IR TRANSMITTER
HR8MA1 SYSTEM SETUP SUBMENUS (continued)
Default DVD Menu, Figure 12
IR Transmitter Menu, Figure 13

15
8”MONITOR REAR SEAT VIDEO HEADREST SYSTEM Owner’s Manual
HR8MA1
HR8MA1 SYSTEM SETUP SUBMENUS (continued)
SMART STREAM
SMART STREAM from the Front Panel:
1. PressandholdtheMENU/SELECTbutton
on the front panel of the system for
3 to 5 seconds to show the System
Menu.
2. Use the UP/DOWN direction buttons
to select SMART STREAM and press
the MENU/SELECT button to to select
between MIRACAST/AIRPLAY Mode.
Note: User need to change the source to
SMART STREAM source.
SMART STREAM from the Remote Control:
1. Press the System Menu button then
use the UP/DOWN direction buttons to
select SMART STREAM.
2. Press OK button to select between
MIRACAST/AIRPLAY Mode.
NOTE: SMART STREAM ONLY CAN BE
SELECTED WITH INSTALLATION OF
IPP2 AND WM1.
SMART STREAM, Figure 14

16
8”MONITOR REAR SEAT VIDEO HEADREST SYSTEM Owner’s Manual
REMOTE
CONTROL
REMOTE CONTROL OPERATION
Figure 15

17
8”MONITOR REAR SEAT VIDEO HEADREST SYSTEM Owner’s Manual
REMOTE
CONTROL
REMOTE CONTROL OPERATION (continued)
1. POWER ( )
Press this button to turn the system ON
and OFF.
2. SOURCE (SRC)
Press this button to display the MAIN
MENU. Use the UP/DOWN/LEFT/RIGHT
Arrow buttons to highlight a source then
press OK to select.
3. DVD Source
Not applicable on these models.
4. DVD Mode Select
Press this button to control DVD
functions.
5. NUMBERS
• Allows the user to change the
parental controls.
• Allows the user to select tracks on a
disc during playback.
6. SYSTEM MENU
This button is used to make system setup
adjustments.
7. UP/DOWN/LEFT/RIGHT Arrows
Use these buttons to navigate the menu
selections on the screen.
8. ENTER (OK)
Press this button to make an OSD
selection.
9. DISC MENU
This button acts as a compound button
that calls the RETURN or DISC MENU
function. Short press the DISC MENU
button to enter RETURN mode and
go back to the DVD Menu while the
disc is playing. Press PLAY to return to
the Title/Chapter. Long press the DISC
MENU button to access the menu of the
DVD playing. Press PLAY to start at the
beginning of the disc.
NOTE: These buttons can be used with
the PIX button for adjusting the picture
controls.
10. DISPLAY
Press the TV button (30) and the DISPLAY
button (10) to show monitor status,
modulator status, IR Transmitter status,
M1/M2 ID, Source status.
Press the DVD button (4) and the
DISPLAY button (10) to show current disc
information while the disc is playing.
In DVD mode, press the DVD button (4)
and the DISPLAY button (10) to show
current disc information. Press once
to show the Title/Chapter/Play Time
information. Press a second time to show
the OSD Subtitle/Audio Language. Press a
third time to show the Title/Chapter/Time
status remaining.
Press the DVD button (4) and hold the
DISPLAY button (10) for 3 seconds to
enter the GO TO mode (change the
Disc Title, Disc Chapter, and Play Time).
Press the LEFT or RIGHT button to select
the Title, Chapter or Play Time. Use the
numeric buttons to enter the desired
Title/Chapter/Play Time selection.
11. PLAY ( )
Press this button to initiate play mode
when a disc is loaded in the disc
compartment.
12. PAUSE ( )
Press this button to pause the playback
of a disc. Pressing pause again or
pressing the Play button will resume
normal playback.
13. SCAN BACKWARD ( )
Press this button to search in the
backward direction. Press this button
repeatedly to change the search speed
from 2, 4, 8, and 16 times the normal
speed.
14. SCAN FORWARD Button ( )
Press this button to search in the forward
direction. Press this button repeatedly to
change the search speed from 2, 4, 8, and
16 times the normal speed.
15. PREVIOUS ( )
When a disc has more than one Chapter,
Track, or File, you can move to another
Chapter/Track/File. Press this button
briey during play to skip back to the
previous Chapter for DVD-video or
Track/File for MP3, CD, etc.

18
8”MONITOR REAR SEAT VIDEO HEADREST SYSTEM Owner’s Manual
REMOTE
CONTROL
REMOTE CONTROL OPERATION (continued)
16. NEXT ( )
When a disc has more than one Chapter,
Track, or File, you can move to another
Chapter/Track/File. Press this button
briey during play to skip forward to the
next Chapter for DVD-video or Track/File
for MP3, CD, etc.
17. REPEAT
Press this button to switch the repeat
mode options of CHAPTER, TITLE, ALL and
cancel while playing DVD-video. Other
disc types such as CD have two repeat
modes that can be selected: TRACK and
ALL.
18. A-B REPEAT
Allows user to repeat the playback from
point A to point B of a DVD. Press the
A-B button once to select a starting point
(A) and again to select a end point (B).
The DVD will only play the selection from
point A to point B. Press the A-B button
again to cancel selection and return to
normal playback of the DVD.
19. SUB-T (DVD MODE ONLY)
If the DVD playing has dierent subtitle
options, press this button to display
and select the desired available subtitle
language.
NOTE: The subtitle selections vary from
disc to disc.
20. ZOOM
Press this button to enlarge the
picture when playing a DVD disc. Press
repeatedly to change the zoom from 2x,
3x, 4x, 1/2, 1/3, 1/4 and OFF.
21. IRT ON/OFF
This button is used to turn the Infrared
Transmitter ON and OFF for the Wireless
IR Headphones. Pressing M1 then the
IRT ON/OFF button will control the IR
Transmitter for M1. Pressing M2 then
the IRT ON/OFF button will control the
IR Transmitter for M2.
22. FM Modulator Channel Select (C)
(M1 Monitor only)
Not applicable on these models.
23. FMM ON/OFF ( ) (M1 Monitor only)
This button is used to turn the wireless
FM Modulator ON and OFF.
24. AUDIO (DVD MODE ONLY)
Press this button to display and select
the available AUDIO languages. Each
time you press the button, the audio
language changes.
NOTE: The audio languages vary from
disc to disc.
25. PIX
This button is used to make picture
adjustments. Use the UP or DOWN
direction buttons to select BRIGHTNESS,
CONTRAST, COLOR, TINT, or RESET. Use
the UP or DOWN buttons to adjust the
setting. The OSD will automatically
disappear if no adjustments are made
within 6 seconds.
26. VOLUME DOWN ( - ) or UP ( + )
Press these buttons to control the
volume level.
27. STOP ( )
Press this button to stop playback of
disc.
28. SETUP
Please refer to the following pages to
congure the system: General Setup Page,
Audio Setup Page, Preference Page, and
Password Setup Page.
29. MUTE ( )
Press this button to mute the sound
transmitted to the headphones and the
FM Modulator. “MUTE” will be displayed
on the screen. Pressing the button again
restores sound to the previously set level.
30. TV Refer to Item 10.
31. Monitor Select (M1 and M2)
Press this button to select a monitor to
control.
M1- Press to control the M1 monitor.
M2- Press to control the M2 monitor.
32. EJECT ( )
Press this button to eject the disc from
the disc slot.

19
8”MONITOR REAR SEAT VIDEO HEADREST SYSTEM Owner’s Manual
DVD
SETTINGS
SYSTEM SETUP
TV SYSTEM
The TV System setup mode allows the user
to select television standard which
corresponds to your TV.
•NTSC - Select this TV type for NTSC TV
•PAL - Select this TV type for PAL TV
•AUTO - Select this TV type if the con-
nected screen is multi-system.
The output format of the video signal
will be in accordance with the video
signal of the disc.
SCREEN SAVER
The Screen Saver setup mode allows the
user to turn the screen saver ON or OFF.
ON - Screen saver will appear
OFF - Screen saver will not appear
NOTE: The DVD player will enter Screen
Saver mode if the unit is inactive for
approximately 2 minutes.
Screen Saver Setup
Figure 17
SYSTEM SETUP
TV SYSTEM
TV TYPE
PASSWORD
RATING
OFF
ON
DEFAULT
SCREEN SAVER
DVD SETTINGS AND ADJUSTMENTS
SYSTEM SETUP and LANGUAGE
SETUP
Using the SYSTEM SETUP and
LANGUAGE SETUP Menus from the
Remote Control
1. From the MAIN menu highlight DVD
and press ENTER.
2. Press the SETUP button and the SETUP
menu appears on the screen. There are
2 icons on the upper left side of the Set-
up menu. Each icon represents a page
for:
SYSTEM SETUP
LANGUAGE SETUP
3. Highlight the desired setup option using
the UP or DOWN direction buttons and
press ENTER to open the sub-menu that
contains the available options.
4. Press the UP or DOWN direction buttons
to highlight the desired option, and
press ENTER to conrm the selection.
5. Repeat steps 2 - 4 to set the options that
reside on the same Setup Page.
6. To change to another Setup page, press
the LEFT direction button to position the
highlight back on the icon side of the set-
up page. Then, repeat steps 2 through 4.
SYSTEM SETUP
TV SYSTEM
SCREEN SAVER
TV TYPE
PASSWORD
RATING
NTSC
PAL
AUTO
DEFAULT
TV System Setup
Figure 16
The SYSTEM SETUP and LANGUAGE SETUP menus contain features and options that lets you
customize your DVD player. For example, you can set the screen display or a language for the
on-screen display or prevent DVD playback of certain DVD discs (for example PG-13 or R Rated)
for children.

20
8”MONITOR REAR SEAT VIDEO HEADREST SYSTEM Owner’s Manual
DVD
SETTINGS
This item allows the user to limit the content
of movie playback from G to Adult.
The lower the value, the more strict the
control.
For the rst time setting the parental control
rating, key in the default password (3308) and
press ENTER to unlock the parental control
rating. Press the cursor button to move the
highlight to the parental level sub-menu.
Press to select the desired level of parental
control and press ENTER.
To change the password to your own
password, select the Password setting and
press ENTER and Key in a new four digit
password, press ENTER to lock the parental
control rating setting.
NOTE: The rating level can only be changed
when the correct password is entered on the
password setting.
DEFAULT - RESTORE
The DEFAULT - RESTORE feature allows you
to restore all options to factory settings.
DVD SETTINGS AND ADJUSTMENTS (continued)
TV TYPE
The TV TYPE setup allows the user to set the
screen aspect ratio.
SYSTEM SETUP
TV SYSTEM
SCREEN SAVER
4:3PS
4:3LB
16:9
PASSWORD
RATING
DEFAULT
TV TYPE
TV Type Setup
Figure 18
4:3 PS (Pan Scan)
The left and right sides of the screen are cut
o and displays the central portion of the
16:9 screen.
4:3 LB (Letter Box)
Displays the content of the DVD title in 16:9
aspect ratio. The black bars will appear at the
top and bottom of the screen.
16:9
Displays a wide picture with black bands on
the upper and lower portion of the screen.
The bandwidth will vary, depending on the
aspect ratio of the disc.
PASSWORD
NOTE: The Default Password is 3308.
The default password is always accept-
ed even after a new password has been
entered.
To avoid the possibility of others using the
default password to set the parental level
and change the password, record this de-
fault password in another area and delete it
from this manual. The restriction of viewing
disc content by younger users may be avail-
able on some discs but not on others.
RATING
SYSTEM SETUP
TV SYSTEM
SCREEN SAVER
PASSWORD
RATING
DEFAULT
TV TYPE
SYSTEM SETUP
xxxx
TV SYSTEM
SCREEN SAVER
PASSWORD
RATING
DEFAULT
TV TYPE
.
SYSTEM SETUP
TV SYSTEM
SCREEN SAVER
PASSWORD
DEFAULT
RATING
G
PG
PG13
R
NC-17
ADULT
TV TYPE
Password setup (Locked)
Figure 19
Password Setup (Unlocked)
Figure 20
SYSTEM SETUP
TV SYSTEM
SCREEN SAVER
RESTORE
PASSWORD
DEFAULT
RATING
TV TYPE
Figure 24
SYSTEM SETUP
TV SYSTEM
SCREEN SAVER
PASSWORD
RATING
DEFAULT
TV TYPE
SYSTEM SETUP
xxxx
TV SYSTEM
SCREEN SAVER
PASSWORD
RATING
DEFAULT
TV TYPE
Default-Restore Feature
Figure 22
RATING SETUP
Figure 21
Table of contents