Roam Adventure Vagabond User manual
USER MANUAL
VAGABOND ROOFTOP TENT

Congratulations on your new ROAM rooftop tent, and
welcome to our family of ROAM adventurers!
To assemble and install this tent, you will attach two
mounting extrusions to the tent, attach the adjustable
length ladder, and attach the PVC-coated durable tent
cover.
But first, please take note of a few important things:
Read this manual in its entirety before installing the
tent. Improper installation can result in serious
injury. Evaluate the static and dynamic load
capacities of your roof rack before install (the tent
weights 130 pounds), as not all racks can
accommodate a rooftop tent.

Hardware Guide
[hardware pouch located inside tent]
A. sandwich plates (4)
B. wrenches (2)
C. tent stakes (4)
D. extrusion covers (4)
E. ladder bracket bolts
(two washers) (4)
F. extrusion mount bolts
(one washer) (4)
G. mounting extrusions (2)
H. elastic cord (1)
I. ladder brackets and
hardware (2)
J. extrusion slide bolts and
brackets (8)
A
B
C
D
E
F
G
H
I
J

Unpacking the Tent
1. On a clean, flat workspace, open tent packaging. If using a knife, take care to not
cut any fabric.
2. Undo two large tent straps, where two aluminum extrusions are also located.
Undo two small end-straps on the side opposite the hinge to allow tent to fold
open.!Unzip either end’s doorway to find inside the small pouch of hardware,
ladder, and tent cover.!(The long pouch can remain inside the tent. It contains six
window awning supports.)!Fold up the tent.
3. Using a razor, lightly trace the perimeter of the frame's surface to peel back the
plastic protective film. Discard and repeat on opposite side.!
Extrusion mount bolt
Washer
Extrusion mount nut
Extrusion
!
Extrusion slide bolt
Extrusion slide bracket
Sandwich plate
Slide bolt nut
Extrusion
Mounting
System
Diagram

1. Lay the tent with the side up that contains four holes in the tent base. Remove
the packaging around the extrusions. Open the small hardware pouch and locate
two included wrenches, and four 6mm bolts with one washer and nut.
2. Align the extrusions to the holes in the tent base,
ensuring that the extrusions are laid along the length
(rather than the width) of the base. Align the oblong
holes in the extrusions with the similarly shaped holes
on the frame.!
3. Remove the four nylon nuts from the 6mm bolts. Slide
two nuts into the small rectangular pocket of each
extrusion. The fitted channel will prevent the nuts from
spinning. Position each nut over each oblong hole.
4. Slide your hand with bolt and washer between the
mattress and the frame at the tent's hinge, and insert
bolt into the through-hole of the frame. Secure with the
nut inside the extrusion using included wrench (tighten
to 4 ft-lbs). Repeat for the other three holes.!
Attaching the Extrusions
Attaching the Ladder and Cover
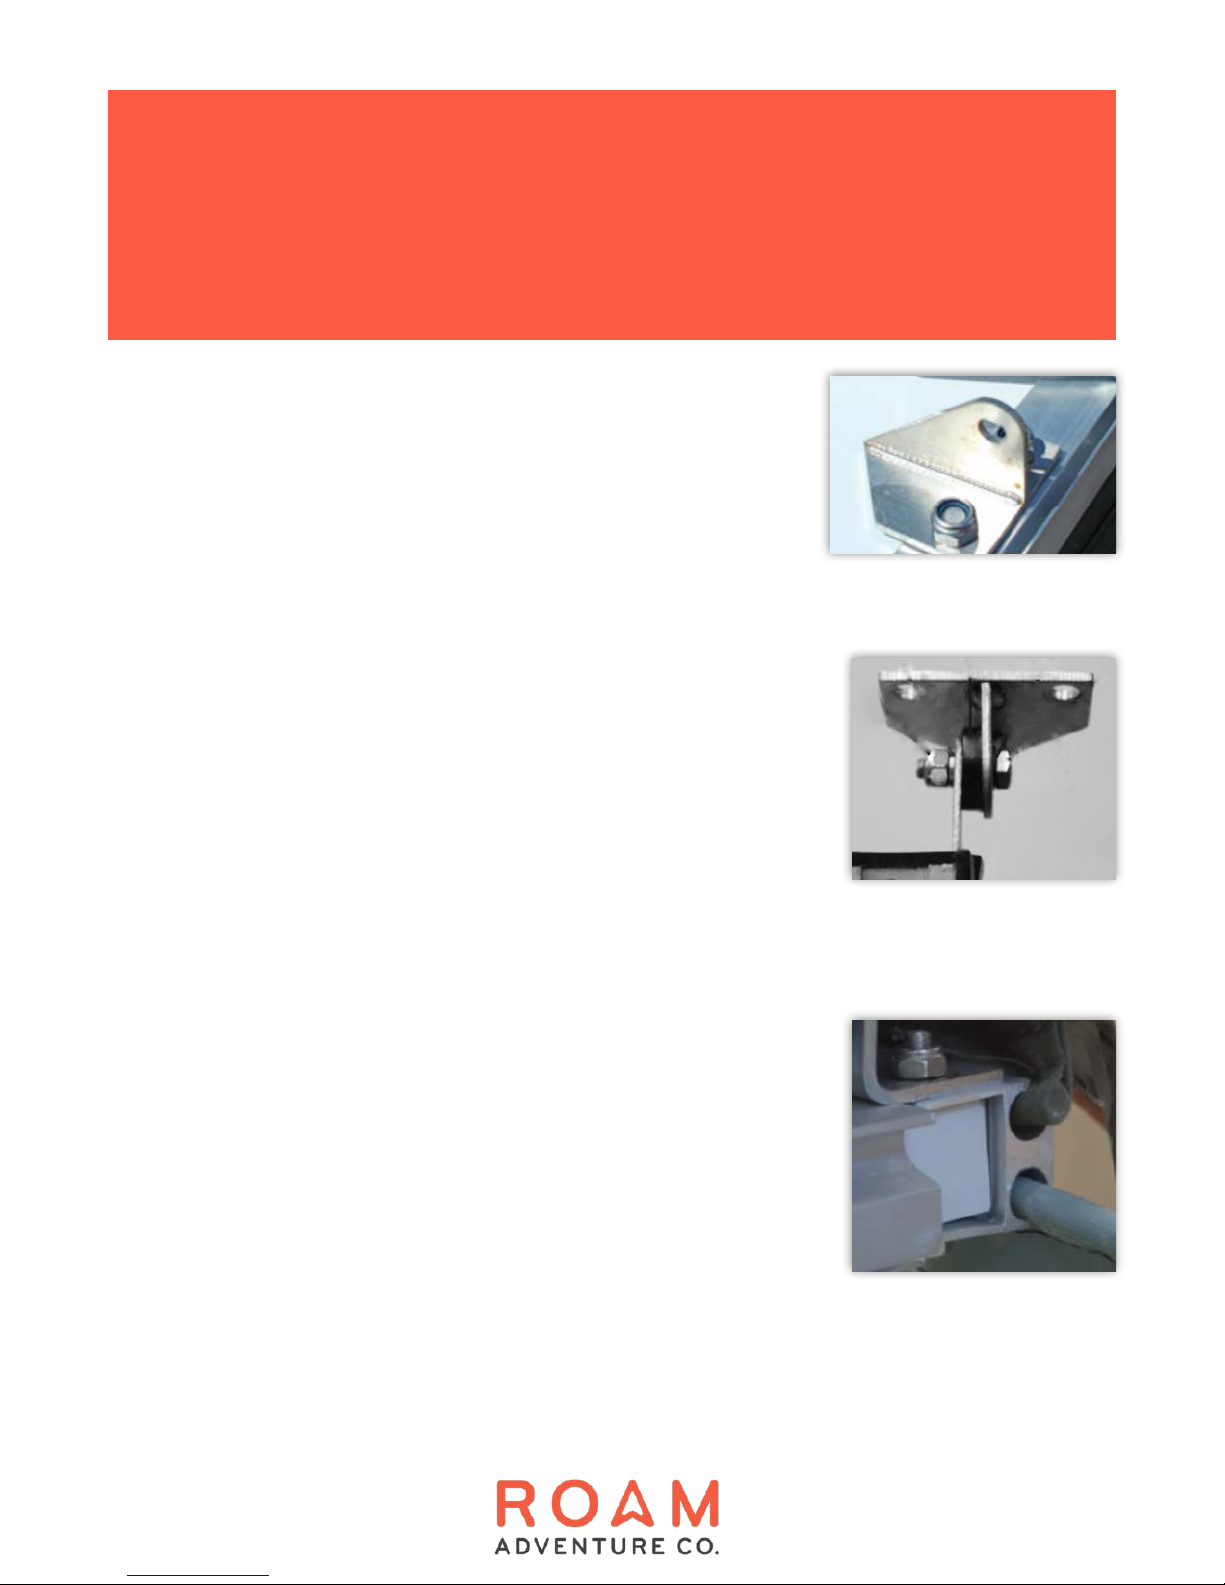
1. Flip the tent over and locate the four holes in the
outer aluminum frame opposite the hinge side. Loosely
attach ladder brackets with the flat side towards the
outside of the frame and the nuts on the top side.
2. Unpack the ladder and place between ladder brackets,
taking note to orient the ladder so that the ladder’s feet
are resting against the tent base. Using two washers,
short bolt, nylon nut, and plastic washer, attach the
ladder (see image). Tighten the ladder into position (2 ft-
lbs). Cycle the ladder through its range of motion to
ensure the it moves freely. Finish fastening the ladder
brackets to the tent frame (4 ft-lbs).!
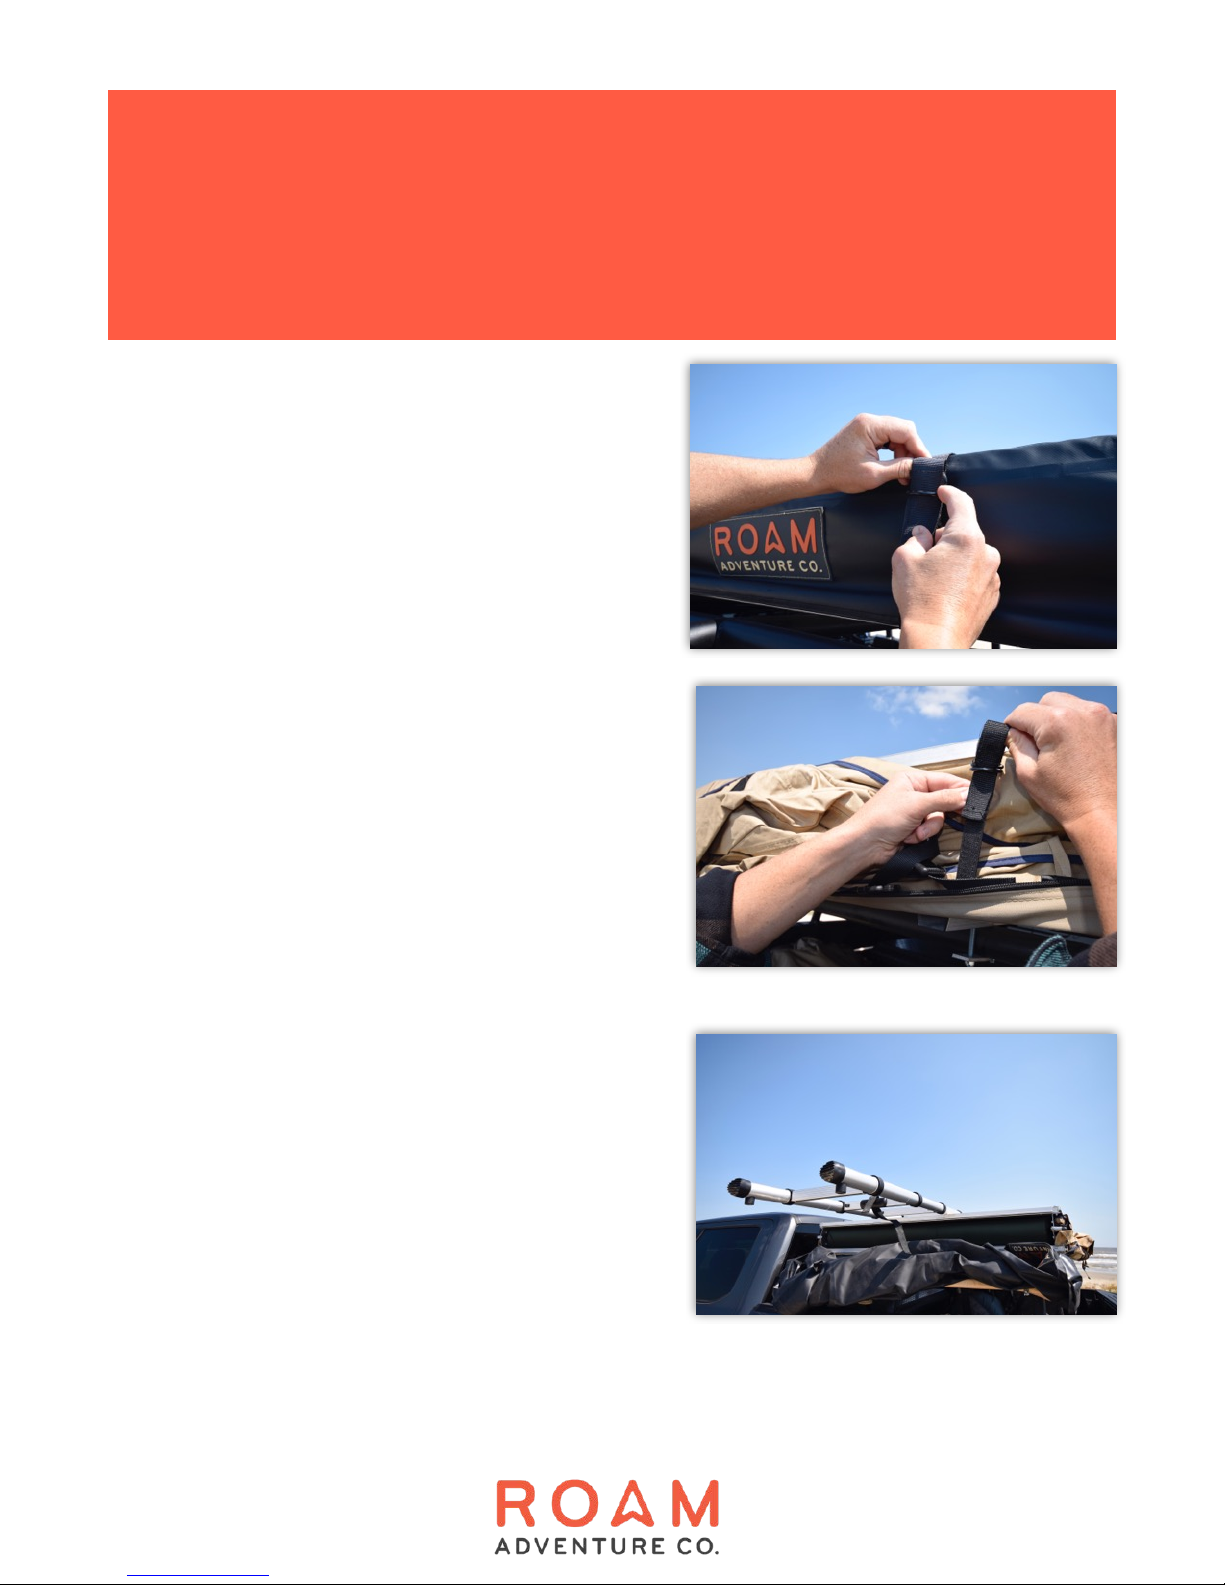
3. To attach the tent cover, first secure the small end
straps on the side opposite the hinge. Insert the edge of
cover with tan cord into channel on the bottom extrusion
nearest the hinge side. Fold the cover over the tent, fitting
all corners. Zip the tent shut, guiding the zipper to
prevent jamming on tent fabric. Fasten the two large top
straps over the cover.!

Vehicle Install
The tent can be mounted to open in one of two directions:
O!the back O!the side
1. After verifying the static and dynamic load capacities of your rack, and that the
rack is securely mounted to the vehicle, lift the tent into position, using the help of
another person or a hoist. Ensure that the tent is centered on the roof rack. Mounting
rails should be at least 48 inches apart.!
2. Slide two extrusion slide bolts into each
end of the aluminum extrusions, ensuring
they are seated correctly in the channel
(see image).
Note: Measure the diameter of the mounting
rail, and add 1” to that measurement. This
number is the bolt length to be used with slide
brackets (5/16”-18, grade 5 or better). Tent
comes standard with 2” bolts.!

Vehicle Install cont’d
3. Lifting one side of the tent at a time,
position one of the two slide bolts on
either side of the mounting rail. Repeat
for each of the four corners of the tent.
4. Slide sandwich plate under mounting
rail and onto each pair of bolts, using
either of the two holes on the sandwich
plate that best suits the position. Tighten
all eight bolts to finger tightness first, and
then tighten using the 13mm end of the
included wrench to15 ft-lbs.!
You are now ready to unfold your next adventure!
Setting Up Camp
1. Park vehicle on level ground, and set
parking brake. Undo the large cover straps.
Unzip and remove cover. The cover can hang
down, be rolled and tucked up, or removed,
but be sure to keep fabric away from tent
hinge.
2. Undo small front tent straps.
3. Undo ladder strap. Fully extend ladder by
pulling the feet until all rungs are locked into
place.

Setting Up Camp cont’d
4. Using ladder as a lever, unfold tent completely to a horizontal position.
5. Adjust ladder height to achieve a 30
degree angle by depressing the buttons
under each rung, starting at the top rung.!
6. Pull out U-shaped overhang support bar from end of tent, and insert each end into
swivel eyelets on either corner of tent. Position bar so that the corners sit in the
seams of overhang fabric.

Pro tip: When the adventure is done, prior to closing tent,
attach the included elastic cords to hanging plastic rings
inside tent to aid in collapsing fabric while folding tent up.
Setting Up Camp cont’d
6. Stake down each corner of overhang using attached guy lines.!
7. Climb up inside tent to find window awning supports. Undo window flap
attachment clips. Insert straight end of awning support into pre-drilled holes on
the sides of tent below windows at a 45 degree angle. Flex support rods to
insert hook into grommet on each window awning corner.!
Climb up and enjoy the view!
Other manuals for Vagabond
1
Table of contents
Other Roam Adventure Tent manuals

Popular Tent manuals by other brands


Quictent
Quictent GM1404W user manual

Boutique Camping
Boutique Camping Nova Air Dome instruction manual

Vortex
Vortex 4300 Louvre Pergola owner's manual

Bestway
Bestway Station Port owner's manual

Rhino Shelter
Rhino Shelter PB143012RGN Assembly instructions

Sojag
Sojag EVEREST Series Owner's manual and assembly guide

One Stop Gardens
One Stop Gardens Greenhouse 6 Ft. X 6 Ft. Owner's manual & safety instructions

skandika outdoor
skandika outdoor KORSIKA 10 Setup Instruction

Palram
Palram Orion 1350 Assembly instructions

Snugpak
Snugpak JOURNEY SOLO Assembly instructions

Costway
Costway GP11657BL user manual

Dancover
Dancover TentZing manual