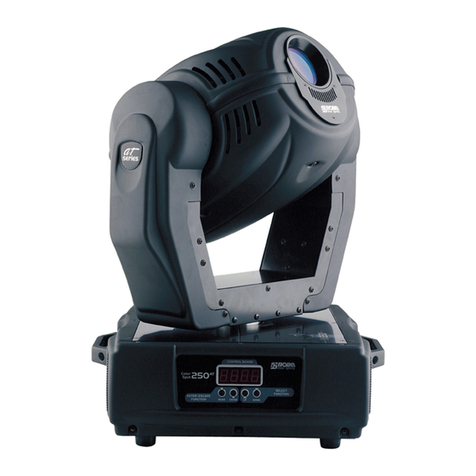
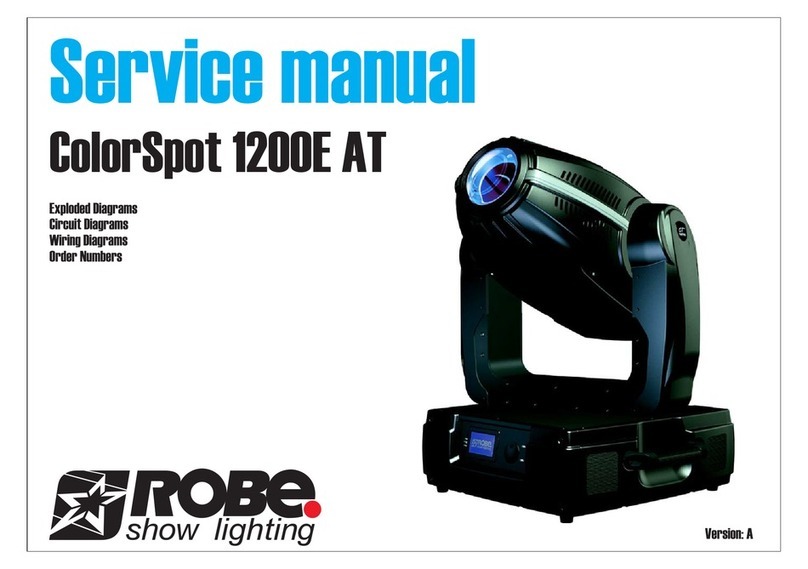
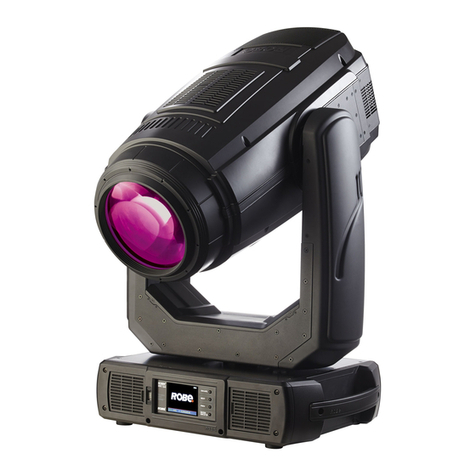
Robe Color Spot 1200 AT User manual

1

2
Table of contents
1. Safety instructions......................................................................................................... 3
2.Operating determinations .............................................................................................. 4
3. Description of the fixture............................................................................................... 5
4.Installation ...................................................................................................................... 7
4.1 Connection to the mains............................................................................................ 7
4.2 Changing the power supply settings - magnetic ballast ............................................ 7
4.3 Fitting the lamp.......................................................................................................... 8
4.4 Lamp adjustment....................................................................................................... 9
4.5 Inserting/Exchanging gobos,colours and effects....................................................... 9
4.6 Rigging the fixture ................................................................................................... 11
4.7 DMX-512 connection/connection between fixtures ................................................. 13
4.8 Ethernet connection ................................................................................................ 14
5. DMX protocol ............................................................................................................... 15
6. Controller mode ........................................................................................................... 22
6.1 DMX addressing ..................................................................................................... 22
6.2 Remotely controllable functions .............................................................................. 22
7.Control menu map........................................................................................................ 24
8. Control menu ............................................................................................................... 27
8.1 Fixture Address ....................................................................................................... 27
8.2 Fixture informations................................................................................................. 27
8.3 Personality .............................................................................................................. 30
8.4LampOn/Off ............................................................................................................ 32
8.5Test sequences........................................................................................................ 32
8.6 Manual mode .......................................................................................................... 32
8.7 Stand-alone setting ................................................................................................. 32
8.8 Reset functions........................................................................................................33
8.9 Special functions..................................................................................................... 34
9. Low power mode.......................................................................................................... 34
10. Error and information messages.............................................................................. 35
11.Technical specifications ............................................................................................ 37
12. Maintenance and cleaning ........................................................................................ 42
Colorspot 1200 AT

3
CAUTION!
Keepthis deviceaway fromrain andmoisture!
Unplugmains leadbefore openingthe housing!
FORYOUROWNSAFETY,PLEASEREADTHISUSERMANUALCAREFULLY
BEFOREYOU INITIALSTART-UP!
1. Safety instructions
Every person involved with installation and maintenance of this device have to:
-be qualilfied
- follow the instructions of this manual
CAUTION!
Be carefulwith your operations.
Witha high voltage you can suffer
adangerous electricshock whentouching thewires!
Thisdevice has leftour premises in absolutely perfect condition. Inorder to maintainthis condition and toensure
asafe operation, itis absolutely necessary for the user tofollow the safetyinstructions and warning noteswritten
in this manual.
Important:
Themanufacturer willnot acceptliability for anyresulting damagescaused by thenon-observance ofthis manual
or any unauthorized modification to the device.
Please consider that damages caused by manual modifications to the device are not subject to warranty.
Neverlet thepower-cord comeinto contact withother cables!Handle thepower-cord and allconnections withthe
mains with particular caution!
Make sure that the available voltage is not higher than stated on the rear panel.
Alwaysplug in thepower plug least.Make sure thatthe power-switch isset to off-positionbefore you connectthe
device to the mains.The power-plug has to be accessable after installing the device.
Make sure that the power-cord is never crimped or damaged by sharp edges. Check the device and the power-
cord from time to time.
Alwaysdisconnect fromthe mains,when thedevice isnot inuse orbefore cleaningit. Onlyhandle thepower-cord
by the plug. Never pull out the plug by tugging the power-cord.
This device falls under protection class I.Therefore it is essential to connect the yellow/green conductor to earth.
The electric connection, repairs and servicing must be carried out by a qualified employee.
Do not connect this device to a dimmer pack.
Do not switch the fixture on and off in short intervals as this would reduce the lamp’s life.
During the initial start-up some smoke or smell may arise.This is a normal process and does not necessarily
mean that the device is defective.
Donot touch the device’shousing bare hands during itsoperation (housing becomes hot)!
For replacement use lamps and fuses of same type and rating only.
CAUTION! EYEDAMAGES!
Avoid looking directlyintothelight source
(meantespecially forepileptics) !

4
2.Operating determinations
This device is a moving-head spot for creating decorative effects and was designed for indoor use only.
If the device has been exposed to drastic temperature fluctuation (e.g. after transportation), do not switch it on
immediately.The arising condensation watermight damage yourdevice.Leave the deviceswitchedoffuntilit has
reachedroomtemperature.
Never run the device without lamp!
Do not shake the device.Avoid brute force when installing or operating the device.
Never lift the fixture by holding it at the projector-head, as the mechanics may be damaged. Always hold the
fixture at the transport handles.
Whenchoosing the installation-spot, pleasemake sure that the deviceis not exposed to extreme heat, moisture
or dust.There should not be any cables lying around.You endanger your own and the safety of others!
The minimum distance between light-output and the illuminated surface must be more than 2.5 meters.
Make sure that the area below the installation place is blocked when rigging, derigging or servicing the fixture.
Always fix the fixture with an appropriate safety-rope.Fix the safety-rope at the correct holes only.
Onlyoperate the fixtureafter having checked that the housing isfirmly closed andall screws are tightlyfastened.
The lamp must never be ignited if the objective-lens or any housing-cover is open, as discharge lamps may
explose and emit a high ultraviolet radiation, which may cause burns.
Themaximum ambient temperature 40°C must neverbe exceeded. Otherwise,the lamp is switchedoff and the
fixture is out of operation for 5 minutes.
CAUTION!
Thelens hasto be replacedwhen itisobviously damaged,
sothat itsfunctionis impaired,e.g. dueto cracks ordeep scratches!
Operate the device only after having familiarized with its functions. Do not permit operation by persons not
qualifiedfor operating the device.Most damages are theresult of unprofessional operation!
CAUTION!
Thelamp hastobe replacedwhen it isdamaged
ordeformed due to theheat!
Please use the original packaging if the device is to be transported.
Please consider that unauthorized modifications on the device are forbidden due to safety reasons!
If this device will be operated in any way different to the one described in this manual, the product may suffer
damages and the guarantee becomes void. Furthermore, any other operation may lead to dangers like short-
circuit, burns, electric shock, burns due to ultraviolet radiation, lamp explosion, crash etc.
CAUTION!
Thehead andyoke mustbeunlocked beforeoperation!
Checkthepan/tiltlocks!
5
3. Description of the fixture
1-Yoke
2 -Frontpanel
3- Moving head
4-Tilt lock button (red)
5-Tilt unlock button (green)
6- Pan lock/unlock lever
7-Handle
8- Base
Rear panel of the base
1 - Neutral fuse holder
2 - Live fuse holder
3- Power cord
4 - Power switch
5 - 5-pin DMX output
6 - 5-pin DMX input
7- 3-pin DMX output
8 - 3-pin DMX input
9 - Ethernet input
Front panel of the base
1 - Networkindicator
2 - Display
3-Infra-red sensor
4 - Data-transfer indicator
5 - RNS encoder wheel
6 - Escape button
7 - Enter button
The head can be locked for transportation- the tilt lock button (4) is pushed and the pan lock/unlock lever (6) is in
lock position.To unlock the head,press the tilt unlock button (5) and move the pan lock/unlock lever (6) to unlock
position.

6
Head inside-top side
1 - Gobo wheel 2
2 - Colour wheel
3- CMY/conver.filter module
4 - Objective
5 - Effect wheel
6 - Gobo wheel 1
7- Lamp chamber
Head inside-bottom side
8 - Frost lamellas
9 - Iris
10 -Termostat
11 - Zoom/Focus module
12 - Igniter
13 - Lamp cover

7
4. Installation
4.1 Connection to the mains
Verifythe powersupplysettings beforeapplyingpower!
Thefactory settings are printednext to the powerswitch.If youwish to change thepower supply settings,see the
nextchapter.
Installla 3-pronggrounding-typeplug onthe powercable(only forUS version208VAC/60Hz).The earth hasto be
connected!
If you have any doubts about proper installation,consult a qualified electrician.
The occupation of the connection-cables is as follows:
Cable (EU) Cable (US)-208V Pin International
Brown Black Live L
Lightblue Brown Neutral N
Yellow/Green Green Earth
4.2 Changing the power supply settings - magnetic ballast
Boththe transformer andthe magneticballast mustbe connectedcorrectly forthe localACvoltageandfrequency.
Thewrong settings can cause poorperformance or demage ofthe moving head.
Note:TheUS-version settings is 208VAC interphase ,60Hz.
If you want to change the power supply settings,follow the instructions:
1.Disconnect the fixture from AC power.
2.Remove the both top base covers by loosening the 12 screws.
3.Move both wires 1 and both wires 2 on the ballast connection block to the position according to the desired
voltage.(The fixture contains 2 magnetics ballast connected in parallel).Move the wire 3 on the transformer
connection block to the position according to the desired voltage.
5.Closethe base beforeapplying AC power.
Example: Ballastand transformer connection block

8
4.3 Fitting the lamp
DANGER!
Installthe lampswiththe deviceswitchedoff only.
Unplugfrom mainsbefore !
To insert the lamp (MSR 1200 AT SA):
1.Disconnect the fixture from power and allow it to cool.
2.Loosen the 2 quarter-turn fasteners marked "X,Y," on the lamp cover at the back of the head.
3.Gently pull the lamp cover with lamp holder out of the head.
4.Holding the lamp by its ceramic base,carefully pull the lamp straight out of the lamp socket.
5.Holding the new lamp by its ceramics base,gently insert the lamp to the lamp socket.Make sure that the lamp
is installed tightly into the lamp socket.
Do not install a lamp with a higher wattage! A lamp like this generates temperatures the device is not designed
for.Damages caused by non-observance are not subject to warranty. Please follow the lamp manufacturer‘s
notes!Do not touch the glass bulb bare hand during the installation!
6.Reinsertthe lamp coverand tighten the 2quarter-turn fastenersagain.
7.Alignthe new lamp (see instructions below)
8.Reset "Lamp OnTime" counter in "Fixture information" menu.
Donot operate thisfixture withopened housing-cover!
Lampcover 2 quarter-turn fasteners
Lamp
Lampholder

9
4.4 Lamp adjustment
The lamp holder is aligned at the factory.Due to differences between lamps, fine adjustment may improve light
performance:
1.Switch on the fixture and after reset turn on the lamp.
2.Cancel all effects, open the shutter and focus the light on a flat surface (wall) using either DMX controller or
function "Lamp adjustment" in "Special functions" menu.
3.Center the hot-spot (the brightest part of the beam) using the 3 adjustment screws „A, B, C”.Turn one screw
at a time to drag the hot-spot, diagonally across the projected image. If you cannot detect a hot -spot, adjust
the lamp until the light is even.
To reduce a hot-spot, pull the lamp in by turning all three screws „A, B, C” clockwise 1/4-turn at a time until the
light is evenly distributed.
If the light is brighter around the edge than it is in the center, or if light output is low, the lamp is too far back in the
reflector.„Push”the lamp out by turning the screws „A, B, C” counterclockwise 1/4-turn at a time until the light is
brightand evenly distributed.
4.5 Inserting/Exchanging gobos,colours and effects
DANGER!
Installthegobos,coloursand prisms withthe deviceswitchedoff only.
Unplugfrommainsbefore!
Turn off the lamp and allow it to cool for at least 10 minutes.Disconnect the fixture from power.
Open the bottom cover of the moving head by loosening the 4 quarter-turn fasteners on the top cover and follow
theinstructions below:
Rotating gobo-wheels:
1.Gently bend out the gobo holder to release it from the fixative holes and eject it from the pressing snap.
2.Press the ends of the spring gobo-lock together with an appropriate tool and remove it.
Do not touch the surface of the pattern of the glass gobos as the oils from your hands can damage the
pattern.Always load coating away from the light source.
3.Remove the distance ring and gobo and insert the new gobo with distance ring. Press the ends of the spring
gobo-lock together and insert it in the front of the gobo.
4.Put the gobo holder back under the pressing snap and push it to the 3 fixative notches.
3 adjustment screws "A,B,C"
gobo springgobo-
lock
distancering
goboholder
pressingsnap
magnet

10
CAUTION!
Thegobo holder withthe magnet mustbe placed inthe same goboposition
asit wasplaced before gobo replacement!
Colour-wheel:
1.Gently bend out the colour module to release it from the fixative holes and eject it from the pressing snap.
2.Put the new colour module back under the pressing snap and push it to the 3 fixative notches.
Effect-wheel:
1.Gently bend out the prism holder to release it from the fixative holes and eject it from the pressing snap.
2.Pressthe ends ofthe spring prism-lock together withan appropriate tooland remove it.Remove theprism and
insert the newone.
3.Press the ends of the spring prism-lock together and insert it in the front of the prism.
4.Put the prism holder back under the pressing snap and push it to the 3 fixative notches.
CAUTION!
ThePrism holder withthe magnet mustbe placed inthe same
prism position asit was placed beforeprism replacement!
colourmodule
pressingsnap
springprism-lock
prismholder
pressingsnap
prism
prismholder
magnet

11
4.6 Rigging the fixture
DANGERTOLIFE!
Pleaseconsider the respectivenational normsduring theinstallation! The installation
mustonly becarried outby anauthorized dealer!
Theinstallation ofthe fixturehas to bebuilt andconstructed in a way thatit canhold 10 timesthe weightfor 1hour
withoutany harmingdeformation.
The installation must always be secured with a secondary safety attachment, e.g.an appropriate catch net.This
secondary safety attachment must be constructed in a way that no part of the installation can fall down if the
main attachment fails.
Whenrigging, derigging orservicing the fixture stayingin the areabelow the installation place,on bridges, under
highworking placesand other endangeredareas isforbidden.
Theoperator hasto makesurethat safety-relatingandmachine-technical installationsare approvedbyan expert
before taking into operation for the first time and after changes before taking into operation another time.
Theoperator hasto makesurethat safety-relatingandmachine-technical installationsare approvedbyan expert
after every four year in the course of an acceptance test.
Theoperator has to makesure that safety-relating andmachine-technical installations are approvedby a skilled
persononce a year.
Allow the fixture to cool for ten minutes before handling.
The projector should be installed outside areas where persons may walk by or be seated.
IMPORTANT! OVERHEAD RIGGING REQUIRES EXTENSIVE EXPERIENCE, including (but not limited to)
calculating working load limits, installation material being used, and periodic safety inspection of all installation
material and the projector.If youlackthese qualifications, do not attempt theinstallation yourself, butinstead use
a professional structural rigger.Improper installation can result in bodily injury and or damage to property.
The fixture has to be installed out of the reach of people.
If the fixture shall be lowered from the ceiling or high joists, professional trussing systems have to be used.The
fixture must never be fixed swinging freely in the room.
Caution: Fixturesmay cause severeinjuries when crashing down!If you have doubtsconcerning the safety ofa
possible installation, do not install the fixture!
Beforeriggingmakesure thatthe installation area canhold a minimumpoint load of10 times thefixture’s weight.
Dangerof fire !
Wheninstallingthe device,make surethereis nohighly inflammable
material(decoration articles,etc.)in betweena distanceof min. 1.2m.
CAUTION!
Use 2 appropriate clamps to rig the fixture on the truss.
Follow the instructions mentioned at the bottom of the base.
Make sure that the device is fixed properly!
Ensure that the structure(truss) towhich you areattaching the fixturesis secure.
Themoving-head can be placed directlyon the stage floor orrigged in any orientation on a truss without altering
its operation characteristics .
The Omega holders can be placed in 4 positions on the bottom of the base.Use the clamps (not included) with
screws M12.

12
For overhead use, always install a safety-rope that can hold at least 10 times the weight of the fixture.You must
onlyuse safety ropeswith screw-oncarabines.Pullthesafetyrope throughthe twoapertures on thebottomof the
base and over the trussing system etc.Insert the end in the carabine and tighten the fixation screw.
Fixation via the omega holders
1.Bolt each clamp (1) to the omega holder (4) with M12 bolt and locknut through the hole in the holder.
2.Fasten theomega holders on thebottom of thebase byinsertingboth quick-lock fasteners(3)into the holes of
the base and tighten fully clockwise.
3.Fasten the safety-rope (2) through the two apertures on the bottom of the base and over the trussing system.
1-Clamp
2-Safety-rope
3-Quick-lockfastener
4-Omegaholder
Wheninstallingfixturesside-by-side,
avoidilluminating one fixturewith another!
DANGERTOLIFE!
Beforetaking intooperation forthe first time,the installation hasto beapproved by
an expert!
Possibleomegaholder positions:

13
4.7 DMX-512 connection/connection between fixtures
Thefixture is equippedwith both3-pin and 5-pinXLR sockets forDMX input andoutput.The sockets are wiredin
parallel.
Onlyusea shielded twisted-paircable designedfor RS-485 and3-pin or5-pin XLR-plugs andconnectorsin order
to connect the controller with the fixture or one fixture with another.
Occupation of the XLR-connection:
DMX - output DMX-input
XLR mounting-sockets (rearview): XLR mounting-plugs (rear view):
If youare using thestandard DMX-controllers, you canconnect theDMX-output of thecontroller directlywith the
DMX-input of the first fixture in the DMX-chain. If you wish to connect DMX-controllers with other XLR-outputs,
youneed to useadapter-cables.
Building a serial DMX-chain:
Connect the DMX-output of the first fixture in the DMX-chain with the DMX-input of the next fixture. Always
connect one output with the input of the next fixture until all fixtures are connected.
Caution: At the last fixture, the DMX-cable has to be terminated with a terminator. Solder a 120 Wresistor
between Signal (–) and Signal (+) into a XLR-plug and plug it in the DMX-output of the last fixture.
1- Shield
2 - Signal (-)
3 - Signal (+)
4 - Not connected
5 - Not connected
1- Shield
2 - Signal (-)
3 - Signal (+)
4 - Not connected
5 - Not connected

14
4.8 Ethernet connection
The fixtures on a data link are connected to the Ethernet with Art-Net communication protocol.The controlling
software from PC (or lighting console) has to supported Art-Net protocol.
Art-Net communication protocol is a 10 Base T Ethernet protocol based on the TCP/IP.Its purpose is to allow
transfer of large amounts of DMX 512 data over a wide area using standard network technology.
TheCOLORSPOT1200 ATis equippedwith 8-pin RJ-45 socket forEthernetinput.Use a networkcablecategory
5 (with four "twisted" wire pairs) and standard RJ-45 plugs in order to connect the fixture to the network.
RJ-45 socket (front view): RJ-45 plug (front view):
1-TD+ 5-Not connected
2-TD- 6-RX-
3- RX+ 7- Not connected
4-Not connected 8- Notconnected
Patch cables that connect fixtures to the hubs or LAN sockets are wired 1:1,that is,pins with the same numbers
areconnected together:
1-1 2-2 3-3 4-4 5-5 6-6 7-7 8-8
If only the fixture and the computer are to be interconnected,no hubs or other active components are needed.A
cross-cable has to be used:
1-3 2-6 3-1 4-8 5-7 6-2 7-5 8-4
Ethernet connection
Connect the Ethernet-inputs of all fixtures in the fixture chain with the network.
Options "Enable Ethernet" has to be selected from "Set Ethernet Mode" menu on the fixture.
Set IP address (002.xxx.xxx.xxx / 010.xxx.xxx.xxx) and the Universe.
Example:
(DMXaddress=49) (DMXaddress=25) (DMX address=1)
IPaddres=002.168.002.003 IP addres=002.168.002.002 IP addres=002.168.002.001
Universe=1 Universe=1 Universe=1
A control PC setting: IP address: 002.xxx.xxx.xxx / 010.xxx.xxx.xxx (Different from fixture IP addresses)
NET mask: 255.0.0.0

15
Colorspot 1200 AT- DMX protocol-Version 1.5
Mode 1 Mode 2 Value Function Type of control
channel channel
1 1 Pan
0-255 Pan movement by 530° proportional
2 2 Pan Fine
0-255 Fine control of pan movement proportional
3 3 Tilt
0-255 Tilt movement by 280° proportional
4 4 Tilt fine
0-255 Fine control of tilt movement proportional
5 5 Pan/Tilt speed , Pan/Tilt time
0 Max.speed (tracking mode) * step
P./T.speed- set Speed Mode in menu: Pan/Tilt Mode
1-255 Speedfrom max. to min. (vector mode) ** proportional
P./T.time - setTime Mode in menu: Pan/Tilt Mode
1-255 Time from 0.1s to 25.5s. *** proportional
6 6 Power/Special functions
0-49 Reserved step
To activate following functions, stop in DMX value
for at least 3 s and shutter must be closed at least
3s.("Shutter,Strobe"channel23(30) must be
atrange:0-31 DMX).****
50-59 Pan/Tiltspeedmode step
60-69 Pan/Tilt time mode step
70-79 Blackout while pan/tilt moving step
80-89 Disabled blackoutwhile pan/tilt moving step
90-99 Blackout while colour wheel moving step
100-109 Disabledblackout while colour wheel moving step
110-119 Blackoutwhile gobo 1/gobo 2 moving step
120-129 Disabled blackoutwhile gobo 1/gobo 2moving step
To activate following functions, stop in DMX value
for at least 3 s.
130-139 Lamp On,reset(total reset except pan/tilt reset) step
140-149 Pan/Tiltreset step
150-159 Colour system reset step
160-169 Gobo system reset step
170-179 Dimmer/Strobe reset step
180-189 Focus/Zoom/Frost reset step
190-199 Iris/Effect/ reset step
200-209 Total reset step
210-229 Reserved step
230-239 LampOff step
240-255 Reserved step
7 No function-Reserved for future using
8 No function-Reserved for future using
7 9 Colour wheel
0 Open/white proportional
18 Deepred proportional
37 Deepblue proportional
55 Green proportional
73 Orange proportional
91 6000K temperaturefilter proportional

16
Mode 1 Mode 2 Value Function Type of control
channel channel 110 UV filter proportional
128 129 White proportional
130-139 Deepred step
140-149 Deepblue step
150-159 Green step
160-169 Orange step
170-179 6000 K temperaturefilter step
180-189 UV filter step
190-215 Forwards rainbow effect from fast to slow proportional
216-217 Norotation step
218-243 Backwards rainbow effect from slow to fast proportional
244-255 No function step
190-215 Forwards rainbow effect from fast to slow proportional
216-217 Norotation step
218-243 Backwards rainbow effect from slow to fast proportional
244-249 Random colourselection by audio control step
(Set microphone sensitivity in menu "Personality")
250-255 Auto random colour selection from fast to slow proportional
8 10 Cyan
0-255 Cyan (0-white, 255-fullcyan) proportional
9 11 Magenta
0-255 Magenta (0-white,255-fullmagenta) proportional
10 12 Yellow
0-255 Yellow(0-white,255-fullyellow) proportional
11 13 Conversion temperature filter 3200K
0-255 (0-5600K,255-3200K) proportional
14 CMY Colour macros
0-3 No function step
4-7 Macro 1 step
8-11 Macro 2 step
12-15 Macro 3 step
16-19 Macro 4 step
20-23 Macro 5 step
24-27 Macro 6 step
28-31 Macro7 step
32-35 Macro 8 step
36-39 Macro 9 step
40-43 Macro10 step
44-47 Macro11 step
48-51 Macro12 step
52-55 Macro13 step
56-59 Macro14 step
60-63 Macro15 step
64-67 Macro 16 step
68-71 Macro17 step
72-75 Macro18 step
76-79 Macro19 step
80-83 Macro20 step
84-87 Macro21 step
88-91 Macro22 step
92-95 Macro23 step
96-99 Macro24 step
100-103 Macro25 step
104-107 Macro26 step

17
Mode 1 Mode 2 Value Function Type of control
channel channel
108-111 Macro27 step
112-115 Macro28 step
116-119 Macro29 step
120-123 Macro30 step
124-127 Macro31 step
128-131 Macro32 step
132-135 Macro33 step
136-139 Macro34 step
140-143 Macro35 step
144-147 Macro36 step
148-151 Macro37 step
152-155 Macro38 step
156-159 Macro39 step
160-163 Macro40 step
164-167 Macro41 step
168-171 Macro42 step
172-175 Macro43 step
176-179 Macro44 step
180-183 Macro45 step
184-187 Macro46 step
188-191 Macro47 step
192-195 Macro48 step
196-199 Macro49 step
200-203 Macro50 step
204-207 Macro51 step
208-211 Macro52 step
212-215 Macro53 step
216-219 Macro54 step
220-223 Macro55 step
224-227 Macro56 step
228-231 Macro57 step
232-2351Macro58 step
236-239 Macro59 step
240-243 Macro60 step
244-247 Macro61 step
248-251 Macro62 step
252-255 Macro63 step
12 15 Effectspeed
0-255 From max.speed to min.speed ***** proportional
16 Effect speed assigning
0-31 Dimmer+CMY step
32-63 Dimmer step
64-95 CMY step
96-255 No function step
13 17 Rotating gobo wheel 1
Index - set indexing on channel(s) 14 (18,19)
0-9 Open/hole step
10-13 Gobo1-Rainbow Chips(15030012) step
14-17 Gobo2-SunMan (15030013) step
18-21 Gobo 3-Water Drops(15030014) step
22-25 Gobo4-TriangleSpiral(15020123) step
26-29 Gobo5-EccentricRayes(15020124) step
30-33 Gobo 6-SwirlDandelion Electric(15020125) step

18
Mode 1 Mode 2 Value Function Type of control
channel channel
Rotation - set rotation on channel(s) 14 (18,19)
34-37 Gobo1-RainbowChips(15030012) step
38-41 Gobo2-SunMan (15030013) step
42-45 Gobo3-WaterDrops(15030014) step
46-49 Gobo4-TriangleSpiral(15020123) step
50-53 Gobo5-Eccentric Rayes(15020124) step
54-57 Gobo 6-SwirlDandelionElectric (15020125) step
Shaking gobos from slow to fast
Index - set indexing on channel(s) 14 (18,19)
58-69 Gobo1-RainbowChips (15030012) proportional
70-81 Gobo2-SunMan (15030013) proportional
82-93 Gobo 3-WaterDrops (15030014) proportional
94-105 Gobo4-Triangle Spiral (15020123) proportional
106-117 Gobo5-Eccentric Rayes (15020124) proportional
118-129 Gobo6-SwirlDandelion Electric(15020125) proportional
Shaking gobos from slow to fast
Rotation - set rotation on channel(s) 14 (18,19)
130-141 Gobo1-RainbowChips (15030012) proportional
142-153 Gobo2-Sun Man (15030013) proportional
154-165 Gobo 3-WaterDrops (15030014) proportional
166-177 Gobo4-TriangleSpiral(15020123) proportional
178-189 Gobo 5-EccentricRayes (15020124) proportional
190-201 Gobo6-Swirl Dandelion Electric(15020125) proportional
202-221 Forwards gobo wheel 1 rotation from fast to slow proportional
222-223 No rotation
224-243 Backwards gobo wheel 1 rotation from slow to fast proportional
244-249 Random gobo 1 selection by audio control step
(Set microphone sensitivity in menu "Personality")
250-255 Auto random gobo 1 selection from fast to slow proportional
14 18 Gobo 1 indexing and rotation
Gobo indexing
-set position on channel 13 (17)
0-255 Goboindexing proportional
Gobo rotation
-set position on channel 13 (17)
0 Norotation step
1-127 Forwards gobo rotation from fast to slow proportional
128-129 Norotation step
130-255 Backwards gobo rotation from slow to fast proportional
19 Gobo 1 fine indexing and rotation
(set position on channel13 (17))
0-255 Fineindexing (rotating) proportional
15 20 Rotating gobo wheel 2
Index - set indexing on channel(s) 16 (21,22)
0-9 Open/hole step
10-13 Gobo1-GlassRing (15040020) step
14-17 Gobo2-Cartwheel(15020126) step
18-21 Gobo 3-EccentricCone (15020127) step
22-25 Gobo4-Bubbles1 (15020128) step
26-29 Gobo 5-Dotsin Circle(15020129) step
30-33 Gobo6-RadialDashes (15020130) step
Rotation - set rotation on channel(s) 16 (21,22)
34-37 Gobo1-GlassRing(15040020) step
38-41 Gobo2-Cartwheel(15020126) step
42-45 Gobo 3-EccentricCone(15020127) step

19
Mode 1 Mode 2 Value Function Type of control
channel channel 46-49 Gobo4-Bubbles1(15020128) step
50-53 Gobo5-Dots inCircle (15020129) step
54-57 Gobo6-RadialDashes (15020130) step
Shaking gobos from slow to fast
Index - set indexing on channel(s) 16 (21,22)
58-69 Gobo1-GlassRing(15040020) proportional
70-81 Gobo2-Cartwheel(15020126) proportional
82-93 Gobo 3-EccentricCone(15020127) proportional
94-105 Gobo4-Bubbles 1(15020128) proportional
106-117 Gobo 5-Dotsin Circle(15020129) proportional
118-129 Gobo 6-RadialDashes(15020130) proportional
Shaking gobos from slow to fast
Rotation - set rotation on channel(s) 16 (21,22)
130-141 Gobo 1-GlassRing(15040020) proportional
142-153 Gobo2-Cartwheel(15020126) proportional
154-165 Gobo3-Eccentric Cone(15020127) proportional
166-177 Gobo 4-Bubbles1(15020128) proportional
178-189 Gobo 5-Dotsin Circle(15020129) proportional
190-201 Gobo6-RadialDashes(15020130) proportional
202-221 Forwards gobo wheel 2 rotation from fast to slow proportional
222-223 No rotation
224-243 Backwards gobo wheel 2 rotation from slow to fast proportional
244-249 Random gobo 2 selection by audio control step
(Set microphone sensitivity in menu "Personality")
250-255 Auto random gobo 2 selection from fast to slow proportional
16 21 Gobo 2 indexing and rotation
Gobo indexing
-set position on channel 15 (20)
0-255 Goboindexing proportional
Gobo rotation
-set position on channel 15 (20)
0 Norotation step
1-127 Forwards gobo rotation from fast to slow proportional
128-129 Norotation step
130-255 Backwards gobo rotation from slow to fast proportional
22 Gobo 2 fine indexing and rotation
(set position on channel15 (20))
0-255 Fineindexing (rotating) proportional
17 23 Effect wheel
Index - set indexing on channel(s) 18 (24,25)
0-19 Open/hole step
20-39 3-facet prism step
40-59 5-facet prism step
60-79 Effect 1- lined glass step
80-99 Effect 2- diamond glass step
Rotation - set rotation on channel(s) 18 (24,25)
100-119 3-facet prism step
120-139 5-facet prism step
140-159 Effect 1 - lined glass step
160-179 Effect 2- diamond glass step
Prism/gobo macros
180-183 Macro1 step
184-187 Macro2 step
188-191 Macro3 step
192-195 Macro4 step

20
Mode 1 Mode 2 Value Function Type of control
channel channel
196-199 Macro5 step
200-203 Macro 6 step
204-207 Macro7 step
208-211 Macro8 step
212-215 Macro9 step
216-219 Macro10 step
220-223 Macro11 step
224-227 Macro12 step
228-231 Macro13 step
232-235 Macro14 step
236-239 Macro15 step
240-243 Macro16 step
244-249 Random Effect selection by audio control step
(Set microphone sensitivity in menu "Personality")
250-255 Auto random Effect selection from fast to slow proportional
18 24 Effect indexing and rotation
Effect indexing
-set position on channel17 (23)
0-255 Effect indexing proportional
Effect rotation
-set position on channel17 (23)
0 Norotation step
1-127 Forwards effect rotation from fast to slow proportional
128-129 Norotation step
130-255 Backwards effect rotation from slow to fast proportional
25 Fine effect indexing and rotation
(set position on channel17 (23))
0-255 Fineindexing (rotating) proportional
19 26 Frost
0 Open step
1-179 Frost from 0% to 100% proportional
180-189 100% frost proportional
190-211 Pulse closing from slow to fast proportional
212-233 Pulse opening from fast to slow proportional
234-255 Ramping from fast to slow proportional
20 27 Iris
0 Open step
1-179 Frommax.diameter to min.diameter proportional
180-191 Closed step
Pulse effects with Iris blackout
192-203 Pulse opening from slow to fast proportional
204-215 Pulse closing from fast to slow proportional
216-217 Randompulse opening(fast) step
218-219 Random pulseopening (slow) step
220-221 Randompulse closing (fast) step
222-223 Random pulseclosing (slow) step
Pulse effects with Iris blackout and zoom
224-239 Pulse opening from slow to fast proportional
240-255 Pulse closing from fast to slow proportional
21 28 Zoom
0-225 Zoom from 42° to 13° proportional
22 29 Focus
0-255 Continuousadjustment from far tonear proportional
23 30 Shutter,strobe
0-31 Shutterclosed step
This manual suits for next models
1
Table of contents
Other Robe Spotlight manuals
Popular Spotlight manuals by other brands

Forch
Forch 5424 360 quick guide

Vision & Control
Vision & Control SLB-500-IR850-P-24V Instructions for use

Francis Searchlights
Francis Searchlights M17 User instruction & installation manual

Vector
Vector 90510392 Instruction manual and warranty

Behringer
Behringer EUROLIGHT OCTAGON THEATER OT360 quick start guide

Angelo Decor
Angelo Decor Pond Building Series quick start guide