Roccat Kone Release note

1
DRIVER MANUAL
IMPOR TANT
DOCUMENT

2
TABLE OF CONTENTS
Safety Instructions
Introduction
Installation
Main Control
• Sensitivity Options
• DPI Switcher
• Mousewheel Scroll Speed
• Double Click
• Button Assignment
Macro Manager
• Creating a Macro
• Integrate Mouseklicks
• Switch to advanced editor
Game Profiles
Color Control
Advanced Settings
Update/Warranty/Support
3
4
5
6
7
7
7
7
8
9
10
11
12
13
14
16
19
DRIVER MANUAL

3
Laser
This mouse uses a Class 1 laser sensor (830nm).
The light from this sensor is invisible to human
eyes and is therefore classified as being harmless.
Despite this, under certain circumstances pointing
the laser directly at the eyes may cause blindness.
Never look directly at the laser beam and never
point it at other people or reflective objects such
as mirrors, for instance. Never look at the laser
beam using magnifying devices such as magnifying
glasses, microscopes or similar devices.
Troubleshooting/repairs
Do not attempt to service or repair the product
yourself; leave any maintenance to qualified
experts. Do not attempt to modify the product in
any way as doing so will invalidate the warranty.
Moisture/heat
Only use the mouse in dry, interior rooms. Do not
operate the device near water and keep it away
from damp areas and areas where liquids are
likely to drip or be sprayed in order to prevent
damage occurring.
Physical harm
Some experts are of the opinion that the use and
handling of a mouse may lead to health problems
with the hands, wrists, arms, neck and/or back.
Please seek specialist medical advice if you notice
any pain, numbness or weakness in any of these
areas.
Disposal
The markings on the product and on the
associated literature show that this product
must not be disposed of together with normal
household waste at the end of its useful life.
Please dispose of this device separately from
other waste in order not to cause harm to
the environment or human health through
uncontrolled refuse disposal.
Recycle the device to facilitate the sustainable
recycling of material resources.
Private users should contact the dealer from
whom the product was bought, or the authorities
responsible for recycling, to find out how to
recycle the device in an environmentally friendly
way.
Commercial users should ask their suppliers and
consult the sales contract terms. This product
must not be disposed of together with other
commercial waste.
SAFETY INSTRUCTIONS

4
Welcome to the ROCCAT™ Kone
Congratulations. You have purchased our first
gaming mouse which is stuffed with technology
and design innovations. It is the only tool to
unleash your hidden skills and develop your
existing ones to the max.
The ROCCAT™ Kone is a mouse that can be highly
customized to suit the individual preferences and
requirements of each gamer.
The integration of the Tracking Control Unit (TCU)
allows the ROCCAT™ Kone Gaming Mouse to
be calibrated for various surfaces. During the
calibration process, the mousepad currently being
used is sampled using the TCU. The data obtained
is then used to perfectly match the ProAim
Gaming Sensor to the profile and characteristics
of the mousepad. The result is a considerable
improvement in precision.
Our current generation of the ProAim Gaming
Sensor with true 3200dpi, 6.4 megapixel
resolution and a frame refresh rate of 7080fps
(frames per second) guarantees perfect
transmission of mouse movements at a maximum
acceleration of 20G. The combination of a 1ms
response time, 1000Hz polling rate and the ability
to adjust the resolution in 6 steps between 800
and 3200dpi forms the basis for optimum aiming
accuracy. The familiar pick-up flight problem has
been reduced to a minimum.
Along with adjustment of the light system, the
driver allows many other settings to be configured
as well. Eight of the ten mouse buttons are
programmable, the speed of the 4D scroll-wheel
can be controlled, the sensitivities of the X and Y
axes can be separately adjusted and acceleration
can be set.
INTRODUCTION

5
Windows® XP/Vista
Step 1: Plug the mouse into any free USB
port on your computer.
Step 2: Windows® will automatically
detect the ROCCAT™ Kone.
Step 3: Download the latest driver from
www.roccat.org/support.
Step 4: Select a folder in which to install
the driver software.
Step 5: Start the installation process by
clicking on the file ‘Setup.exe’.
Step 6: Windows® will prompt you if
installation should continue
despite not passing Windows
Logo testing; install the driver
despite this.
Note: The driver will automatically
uninstall older ROCCAT driver
versions. For that reason it may
take a little while until the driver
is installed and ready to use.
Step 7: As soon as the installation
process has completed click ‘Ok’.
Step 8: Reboot your PC.
Step 9: The ROCCAT symbol will now
appear in the right-hand side
of the Taskbar. You access the
ROCCAT™ Kone configuration
menu by right clicking it.
Note: Driver and Firmware Updates
The software for the ROCCAT™ Kone Gaming
Mouse consists of a driver and firmware.
Check regularly under the tab ‘Update’ in the
driver menu to see if a new driver or new
firmware is available.
System Requirements
• Windows® XP/Vista
• Free USB port
• CD-ROM drive
• 25MB free hard disk space
INSTALLATION

6
About the Main Control
Millisecond-precise attack, buff or cast sequences with complex character strings and pauses can be
stored on just a single mouse button. 128kB of internal memory allows 5 Game Profiles to be stored on
the mouse itself for separate game characters and individual settings.
The Macro Manager allows complex command sequences to be programmed, each of which can contain
512 subsequent or parallel key commands for each mouse button. Since these macros of up to 20
actions are available even without having to install the driver, it doesn’t matter which computer the
mouse is connected to: the macros can be called up at any time.
Main Controls Overview:
• Sensitivity Options
• DPI Switcher
• Mousewheel Scroll Speed
• Double Click
• Button Assignment
• Game Profiles
Note: As soon as you have configured a setting
you should assign the function to the mouse
by clicking the ‘Apply’ button without exiting the
ROCCAT menu. It may take a few seconds until
the information is transferred to the mouse.
You’ll be able to tell the transfer process is
taking place as the light on the mouse will light
up 5-6 times. Once you’re done configuring
the mouse settings click ‘Ok’. You can exit the
configuration menu by clicking ‘Cancel’.
MAIN CONTROL

7
Button Assignment
Sensitivity Options
Set the sensitivity of the mouse pointer here.
You can select a sensitivity level down to a
hundredth of a point on the scale of 1.00 to 10.00.
10 equates to the highest level of sensitivity.
Note: We urge you to keep the initial setting of 5.
It is advisable to adjust the sensitivity of the mouse
pointer only in the respective game itself.
DPI Switcher
Select the desired resolution(s) of the mouse
sensor here. You can configure the resolution of
the sensor in different steps. Using the upper
check boxes, select which steps you want to switch
the dpi resolution between using the Plus/Minus
mouse buttons. With some programs or games it’s
best not to check each individual
dpi step.
For example, if you just check 800dpi and 3200dpi
then the dpi number will only switch between
800dpi and 3200dpi for each press of the
respective dpi button. If you check each individual
step then the mouse will go through all the checked
dpi values for each press of the respective dpi
button.
The arrow beneath the number bar shows which
dpi value is currently active.
We recommend using the mouse with a resolution
of 800dpi at first then increasing the dpi resolution
in steps as soon as you become accustomed to the
speed.
Note: Please note that the resolution of the monitor
affects the speed of the mouse. The higher the
resolution setting of the sensor (dpi), the shorter
the distance you have to cover with the mouse to
reach the desired point on your screen.
Mousewheel Scroll Speed
Here you can select how quickly your mousewheel
should scroll a document. You can choose between
1 to 10 rows or a whole screen page per notch
of the mousewheel. Test this function using your
internet browser or in a text document and select
the speed you prefer.
Double Click
Configure the double-click response speed here.
‘Slow’ means that the interval between two mouse
clicks is long. ‘Fast’ means that the interval
between clicks is particularly short. Test your
settings on the right in the test area.
Note: Please note that all settings must be
transferred to the mouse by clicking the ‘Apply’
button.
MAIN CONTROL

8
Button Assignment
Click: Left mouse button.
Menu: Right mouse button. The context menu
will open when you point to a document
or folder using the mouse.
Universal scrolling: Mousewheel function to scroll by moving
the mouse.
Double-click: Left mouse button double click.
Assign a key: A single keyboard command can be
assigned to one of the mouse buttons
here.
Button off: Switches the button function off.
OSD XY Prescaling: Displays the current X-Y sensitivity value
of the mouse above the right-hand side of
the Taskbar. It’s possible to increase or
decrease the value using the mousewheel.
OSD DPI-Switch: Displays the currently selected DPI value
above the right-hand side of the Taskbar.
It’s possible to increase or decrease the
value using the mousewheel.
OSD Profile-Switch: Displays the currently selected profile
above the right-hand side of the Taskbar.
It’s possible to scroll forward and
backward through the profiles using
the mousewheel.
Note: The OSD (on screen display) is also
displayed during a game. The duration and
intensity of the display may vary according
to the respective game and version of
DirectX.
IE Forward: Select the next previously selected
program or internet site.
IE Backward: Select the previous program or website
DPI up: Increase the preselected DPI resolution.
DPI down: Decrease the preselected DPI resolution.
Tilt Left: Scroll horizontally to the left (only under
Windows Vista™).
Tilt Right: Scroll horizontally to the right (only under
Windows Vista™).
Profile up: Jump to the next profile.
Profile down: Jump to the previous profile.
Note: If you use this function to switch
profiles by pressing a button, the same
button should be assigned this function in
the other profile(s).
Left Windows Button: This function calls up the Windows
Start menu.
Note: As soon as you’ve
configured a setting you should
assign the function to the mouse
by clicking the ‘Apply’ button
without exiting the ROCCAT menu.
It may take a few seconds until the
information is transferred to the
mouse. You’ll be able to tell the
transfer process is taking place
as the light on the mouse will light
up several times.
Along with the left and right
mouse buttons the mouse has 8
additional buttons which can be
freely assigned with the functions
available in the driver menu. You’ll
see the list of functions that can
be assigned when you click on the
dropdown menu to the side of the
particular button.
Note: In addition to the pre-
defined functions you can also
assign a unique key combination
(macro) to eight of the mouse
buttons. This can consist of a
keyboard modifier key plus one or
more standard keys.
You can use the Macro Manager
to do that; this is located at the
start of the dropdown menu. As
soon as you’ve programmed a
macro you can select one using
‘Assign Macro’ and assign it to
one of the buttons on the mouse.
MAIN CONTROL

9
To access the Macro Manger, choose the index
‘Main Control’. Then click onto the arrow next
to any of the boxes under ‘Button Assignment’
to open a dropdown menu and select ‘Assign
Macro’. Choose ‘Create New Macro’ on the
following dropdown menu. This gives you direct
access to the Macro Manager.
The Macro Manager consists of three areas: on
the far left you can select, add or delete a macro
set or an individual macro (Macro Select); in the
middle area the ‘Macro Basic Editor’ displays
the key combination; and finally, the start/ stop
button (Start Record) is located in the right-hand
area.
To record a macro you must first create a macro
set. A macro set is a group which consists of
multiple individual macros. The set only serves to
give a better overview of the individual macros.
Only one macro, not an entire set, can be
assigned to an individual mouse button.
As soon as macros have been saved using the
Game Profile it doesn’t matter which computer
the mouse is connected to, they can be called
up at any time.
Note: A macro which is longer than 20 events
cannot be saved on the mouse. A notification
will appear saying that the macro will be saved
on your computer’s hard drive instead.
Two events are carried out when a key is
pressed: pressing the key, releasing the key.
For example, the key combination Alt+Ctrl+t
consists of 6 events.
MACRO MANAGER

10
Creating a Macro (Basic Editor)
Step 1:
Click the upper line in the left-hand window. In the
following dropdown menu you can add a macro set
(Add Macro Set) or delete one (Delete Macro Set).
Click ‘Add Macro Set’.
Step 2:
Give your macro set a name. To make things clearer, use
a general name for the events in the game you’re playing.
For example, you can name the set ‘Magic buffs’ or
‘Weapons arsenal’ or just give it the name of the game.
Step 3:
If you click ‘New’ under the left-hand window, you can
assign a name to the individual macro like ‘Arcane
rotation’ or ‘Sniper rifle’. Confirm the name by hitting
the return key.
Step 4:
Now you can enter a macro. To do that, click the ‘Start
Record’ button in the right-hand window. Enter the key
combination which you need for a special action in the
game.
The option ‘Record delays between key commands’ is
located under the record button. This option allows you
to determine how long a certain key should be pressed
for. As a result it’s possible to create a macro that
instructs a figure in the game to only perform a specific
action after a pre-determined period.
Step 5:
Click ‘Stop Record’ once you’re done entering your key
combination via the keyboard. You can now either record
an additional macro in the macro set you’ve created or
create a new macro set.
Click ‘OK’ when you’re done. The macro can now be
assigned to any one of the eight programmable buttons.
You can assign the macro to a button by clicking onto the
arrow next to the box of the button you want the macro
to be assigned to. In the following dropdown menu choose
‘Assign Menu’. All available macro sets are now displayed.
Select the one containing your macro of choice and then
click on the respective macro.
Note: You’ll need to assign the macro to the desired
mouse button again even if you’ve edited a macro that is
already assigned to a particular button.
Step 6:
Assign the function to the mouse by clicking the ‘Apply’ button without exiting the ROCCAT menu.
It may take a few seconds until the information is transferred to the mouse.
You can now store and save these settings under one of the five profiles that can be stored on the
mouse. Profiles will be easier to manage if you name them after the game, gamer or program.
Note: A running macro can be ended at any time by clicking on the button again.
MACRO MANAGER

11
Integrate Mouse Clicks
Another special feature of the ROCCAT driver
is that it allows you to integrate mouse clicks
into a macro along with keyboard commands.
You can program a mouse event to be executed
after, before or in-between a key sequence.
To do that, select the keyboard command in the
‘Macro Basic Manager’ before or after which you
want to insert a new event.
By right clicking, you can open a window
that contains various options:
Start Record before:
Starts recording the macro before the
selected event.
Start Record after:
Starts recording the macro after the
selected event.
Insert Delay:
Manually increase or decrease the delay
between two commands.
Insert Mouse Event:
Specify which mouse event should be executed.
The following options are available:
Left Button: Left mouse button
Right Button: Right mouse button
Wheel: Centre mousewheel
button
Side Button 1: The upper side button
Side Button 2: The lower side button
There are always three events to choose from:
Down: Keeps the button depressed
Up: Releases the button
Click: Executes the commands ‘press’
and 'release’ in turn.
Note: It isn’t possible to program the scroll
function to the mousewheel. Here too, only three
options are available: ‘press’, ‘release’ as well as
‘press and release’.
Edit Delay:
You can manually increase or decrease the delay
here. All you need to do is enter the desired time
value; there’s no need to enter ‘ms’ (milliseconds).
Note: Some games are unable to detect short
delays.
Delete:
Delete the selected step from the macro’s key
sequence.
MACRO MANAGER

12
Switch to advanced editor
In the center window it’s possible to manually
change the time intervals between the individual
key presses of a particular macro. Individual
blue bars show the length of time the respective
button has been pressed for. Along with the
duration, you can also change the position of
the pressed key here. The default timeline is in
milliseconds: (0.05 / 0.10 / 0.15 … seconds).
You can change the timescale of the display for
increased accuracy. Using the plus button to the
right of the window you can zoom into the scale
to make really precise adjustments to the time
value. It’s also possible to delete or add individual
macros. To do that, click the point in the macro
list where you want to insert an additional macro
and then click ‘Add’. If you want to delete a key,
click the key and then click ‘Del’. Confirm the
process by clicking ‘Ok’.
It’s also possible to delete entire macro sets.
To do that, you need to select ‘Delete Macro Set’
from the dropdown menu. Here too, you must
confirm final deletion of the set and all its assigned
macros by clicking ‘Ok’.
MACRO MANAGER

13
Create/Save Profile
Create one of five profiles. For instance, you
can save all button assignments, macros, color
settings or sensitivity settings to a profile here.
As each different mouse assignment is best
suited to different programs you can assign each
program/game a special preset. Along with the 5
profiles that can be saved on the mouse itself, you
can also save additional profiles on the computer.
Note: Only when accessing a saved profile by using
the ‘OSD Profile Switch,’ the profile’s settings can
be immediately called up on the mouse; this means
in this case you don’t need to click the ‘Apply’
button. The TCU setting will always remain the
same in all five profiles.
Once you’ve assigned all desired macros using the
macro manager to different buttons, and perhaps
made different color setting changes, save these.
It’s best to name the profile after the program or
game for which you’ve configured the settings.
You can then also link it to the *.exe file of the
program or game by entering the relevant path
when saving the profile.
Note: If you’ve assigned a game or program to a
profile, the mouse will automatically switch to the
relevant profile upon starting the respective game
or program.
Load Profile
Load a profile stored on the hard drive to one
of the 5 slots in the mouse’s on-board memory.
For example, this allows you to directly load your
friends’ profiles or your own presets onto the
mouse.
Edit Profile
Here you can edit the names and the link of
the selected profile. Use the link so that the
mouse automatically detects the program you’ve
programmed specific mouse settings or macros
for.
GAME PROFILES

14
Choose a light to adjust
Five LEDs can be assigned 38 different colors.
Under ‘Change Color’ click one of the LEDs to
assign it a color of your choice.
Change Color
Click a color box to select the color you want.
Light On/Off
Here you can switch off the LEDs individually.
To do that, select the desired LED on the left-hand
side of the window and check the box ‘Light On/
Off’.
Note: You’ll need to switch off all 5 LEDs individually
if you want to switch all LEDs off.
COLOR CONTROL
The sophisticated light system allows the ROCCAT™ Kone to light up in any color you like. Whether light
blue, dark blue, red or yellow – the variety of colors to choose from is vast. The mouse can light up in up
to five different shades at the same time.

15
Adjust the light effect
Multiple options are listed here which allow you to
control the use of the color you’ve selected on the
ROCCAT™ Kone. In the first section you can use
the selected color or allow a random single color
or random multiple colors to be used.
Note: If you want the mouse to light up in all colors
on either a rotating or up-down / left-right basis
then you need to select ‘Random Single Color’. You
can then choose how the mouse’s colors are to
move in the menu sections below.
In the second section you can choose whether the
color should be fixed, rotate or go up and down/
left to right. In the final section you can select the
effects. You can choose between no effect (full
lightened), pulsating, blinking and heartbeat.
Using the ‘Effect Speed’ adjuster you can set the
speed of the configured effects.
Effect explanation:
Use Selected Color:
Use the selected color
Random Single Color:
A single color is chosen at random
Random Multi Color:
Multiple colors are chosen at random
Fixed Color:
The color remains fixed
Rotating Color (Clockwise):
The colors rotate in a clockwise direction
Rotating Color (Counterclockwise):
The colors rotate in a counterclockwise direction
Moving Colors (up – down):
The colors move (up-down)
Moving Colors (left – right):
The colors move (left-right)
No Effect (full lightened):
No effect (full lightened)
Pulsating:
Pulsating effect
Blinking:
Blinking effect
Heartbeat:
Heartbeat effect
Note: As soon as you’ve configured a light
setting you can assign the function to the
mouse by clicking the ‘Apply’ button without
exiting the ROCCAT menu. It may take a few
seconds until the information is transferred
to the mouse. Once you’re done configuring
the mouse settings click ‘Ok’. You can exit the
driver by clicking ‘Cancel’.
COLOR CONTROL

16
Advanced Sensitivity (X-Y)
It can be a great help to independently configure
the sensitivity of the horizontal and vertical (x-
axis and y-axis respectively) movements of the
mouse pointer, not only when it comes to graphics
applications, with many games but especially when
using a widescreen monitor. Just like the general
sensitivity setting, you can also select a value
between 1.00 and 10.00 here.
We urge you to keep the initial setting of 5. It is
advisable to adjust the sensitivity of the mouse
pointer only in the respective game itself.
ADVANCED SETTINGS

17
TCU – Tracking Control Unit
The Tracking Control Unit (TCU) is an additional
sensor that scans the surface of the mousepad
and then automatically adjusts the performance
of the sensor to match the surface.
This adjustment results in optimized tracking.
Activate the TCU by clicking ‘TCU ON’.
Now calibrate the laser by clicking ‘Recalibration’.
The ROCCAT™ Kone laser is calibrated in 3 steps:
Step 1:
Click the ‘Start Calibration’ button.
Step 2:
Do not move the mouse for 5 seconds; the
calibration process will be running during this
short period. After that, click ‘Continue’.
Step 3:
Following that click on ‘Accept Changes’.
The setting will now be saved on the mouse; this
may take a few seconds.
Note: When you want o use a different mousepad,
it is advisable, to recalibrate the ROCCAT™ Kone to
it. Please use your old mousepad and turn the TCU
off. Then change the mousepad, select ‘TCU on’
and start recalibrating the mouse. The calibration
process works best on solid colored mousepads.
ADVANCED SETTINGS

18
Polling Rate
The term ‘polling rate’ describes the number
of times the computer prompts the mouse for
information. A high polling rate in conjunction
with a high dpi setting ensures smooth pointer
movement. We recommend that you start off
with a resolution of 800dpi and a polling rate of
1000Hz.
Note: In general a high polling rate produces a
rounder and softer pointer movement.
Mouse Acceleration
The acceleration of the mouse pointer can be
set on a scale of 1.00 to 10.00. If a high value is
selected then the mouse pointer will move faster
compared to when the mouse is moved manually,
i.e. without acceleration. A lower value slows
the mouse pointer, even if the mouse is moved
quickly. The can also completely deactivate mouse
acceleration by unchecking the box.
Windows Pointer Speed
Set the speed of the mouse pointer on a scale of
1 to 11 here. This is the same as the value that
has been set in the Windows Control Panel.
Note: ROCCAT™ recommends to keep the default
settings.
Driver Reset
By clicking the RESET button, all the settings you
have made will be reset to their original factory
default settings.
ADVANCED SETTINGS

19
Update your ROCCAT™ Kone Gaming Mouse
at any time. You can check here whether new
software is available for the mouse.
Note: All mouse settings will be reset as soon
as you install new firmware on your computer.
Macros saved on the mouse will not be affected.
Update/Warranty/Support
If you need additional help, just send us an e-mail.
Our Support Team will be pleased to help you with
any technical questions you might have.
Send the e-mail to: support@roccat.org
Note: There is a ROCCAT™ ID Card inside every
ROCCAT™ Hardware package. With the number on
this card you gain access to our online insider area
‘ROCCAT™ World’ and with that to a whole lot of
valuable progamer-info, fantastic server-discounts
and exclusive competitions.
UPDATE/WARRANTY/SUPPORT
Table of contents
Other Roccat Mouse manuals

Roccat
Roccat TYON User manual

Roccat
Roccat KOVA User manual

Roccat
Roccat Kova Plus User manual

Roccat
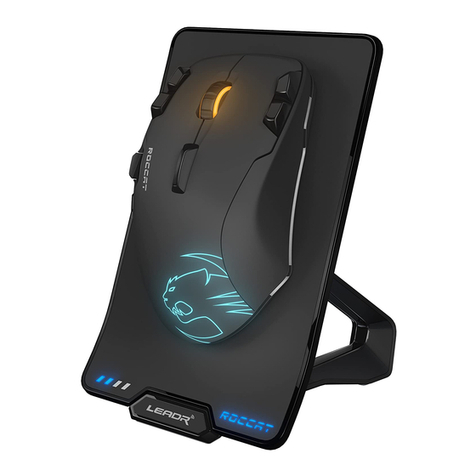
Roccat LEADR User manual

Roccat
Roccat KONE XTD User manual

Roccat
Roccat nyth User manual

Roccat
Roccat KONE PURE CAMO CHAGRE User manual

Roccat
Roccat Kone XTD Optical User manual

Roccat
Roccat Kone Pure User manual

Roccat
Roccat Kova+ User manual