07 12
Band switch
Touch the [ ] button on the screen to switch
band in the following sequence.
FM1 → FM2 → FM3 →AM1 →AM2
Press remote control or [BAND] button on the
panel also achieves this function.
Manually/Automatically Search Station
(1). Manual Search
Short press [ / ] button on the screen to up /
down tuning frequency search for radio.
(2). Automatic Search
Long press [ / ] button on the screen to
search station up /down. While searching, touch
the key again to stop the search.
Manual Preset Station
30 stations can be stored in the radio(18 FM
bands, 12 AM bands).
(1). Search a station by manual searching.
(2). Long press any number button in 1-6 on the
radio main interface, the station will be stored
in the appointed position in radio (such as: 6
87.50M)
Browse Station/Select Station
(1). Browse Station
After searching and storing station, short press
[ ] icon to browse, 6s for each. During
browsing , repress [ ] if you find favorite
program and need to stop browsing.
(2). Select Station
After searching and storing station, short press
[ ] icon to browse, 6s for each station.
During browsing ,repress [ ] if you find
favorite program and need to stop browsing.
Directly touch number button 1-6 on the screen
to play.
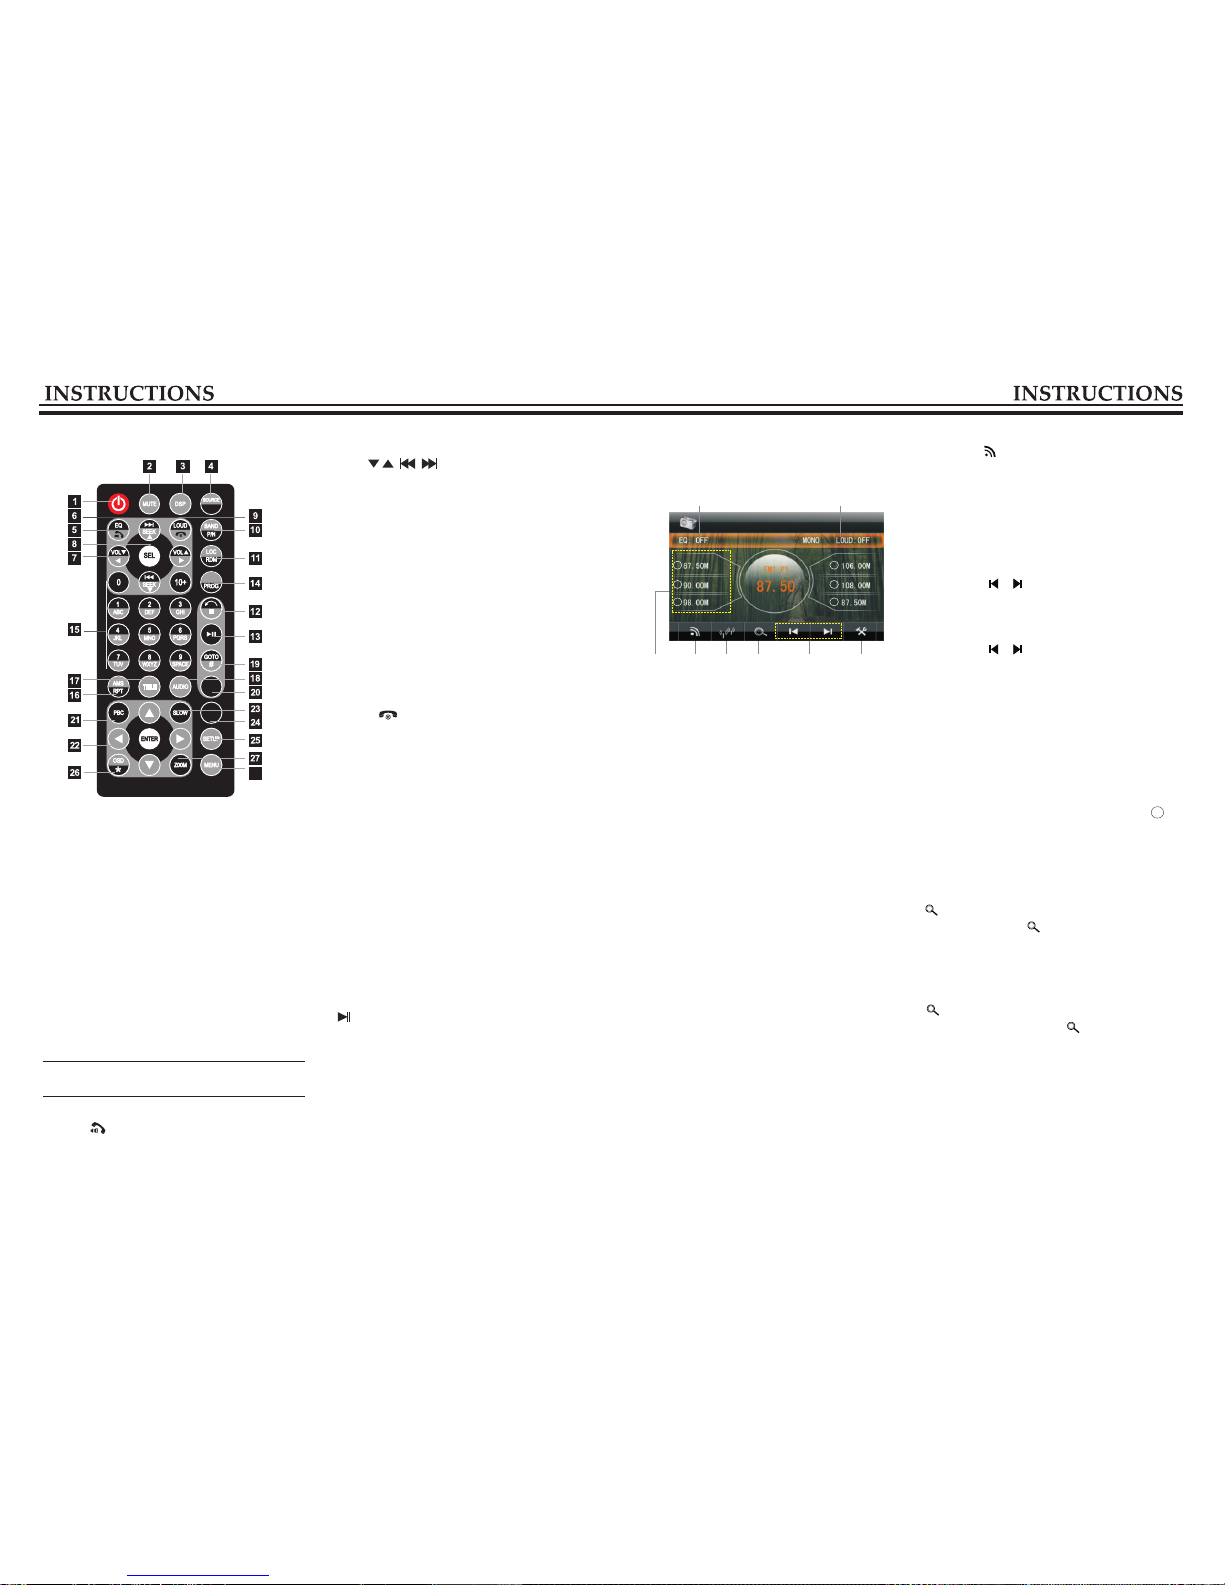
Radio Function Operation
Touch [RADIO] icon to enter the radio interface
as below.
1. Preset Station Button
To display preset station list (long press the
button to store the current frequency onto the
pre stored list).
2. BAND
Touch the button to switch band.
3. LOC
Touch the button to switch between the far and
the short-range .
4. Browse / search for radio
Short press to browse the stations in sequence for
6 seconds each, long press to search station
automatically.
5. Up / down tuning frequency scanning radio
Short to touch the keys up / down manually fine-
tune the radio frequency long touch the key
automatically up / down scan radio.
6. Set up
Press to enter the setting interface.
7. EQ
Press to switch asked in the following audio:
POP — ROCK — CLASSIC — OFF
8. LOUD
Press the button to turn on/off equal loudness.
1 2 3 4 5 6
7 8
2
3
4
5
6
1
DV D REMOTE
IR-SW
ST
SUB-T
ANGLE
28
Only works when the background mode
is on.
.
5. EQ/
Press the button to select different sound effect
mode.
When the unit supports BT, press the button to
answer the call.
6. SEEK
In playback mode, short press the button to access
previous track/next track; long press it to speed
forward/backward play. In radio mode, short
press this button can search station manually;
long press it to scan radio station manually.
7. VOL
Press this button to increase/decrease volume
level.
8. SEL
Press this button repeatedly to choose sound
feature.
9. LOUD/
Press to turn on/off LOUD function.
If the unit supports BT, press this button to hang
up the call.
10. BAND/P/N
In radio mode, press it to switch band. In playback
mode, press it to choose AUTO, PAL OR NTSC
system.
11. LOC/RDM
In radio mode, press the button to switch between
remote and local. In playback mode, press it to
random play.
12. STOP
Press it once to pause, press it twice to stop.
13.
Press to switch between play and pause;
In stop status, press it to play.
14. ST/PROG
In radio mode, press this button to select stereo
or mono station. In playback mode, work with
number button to access programmed play.
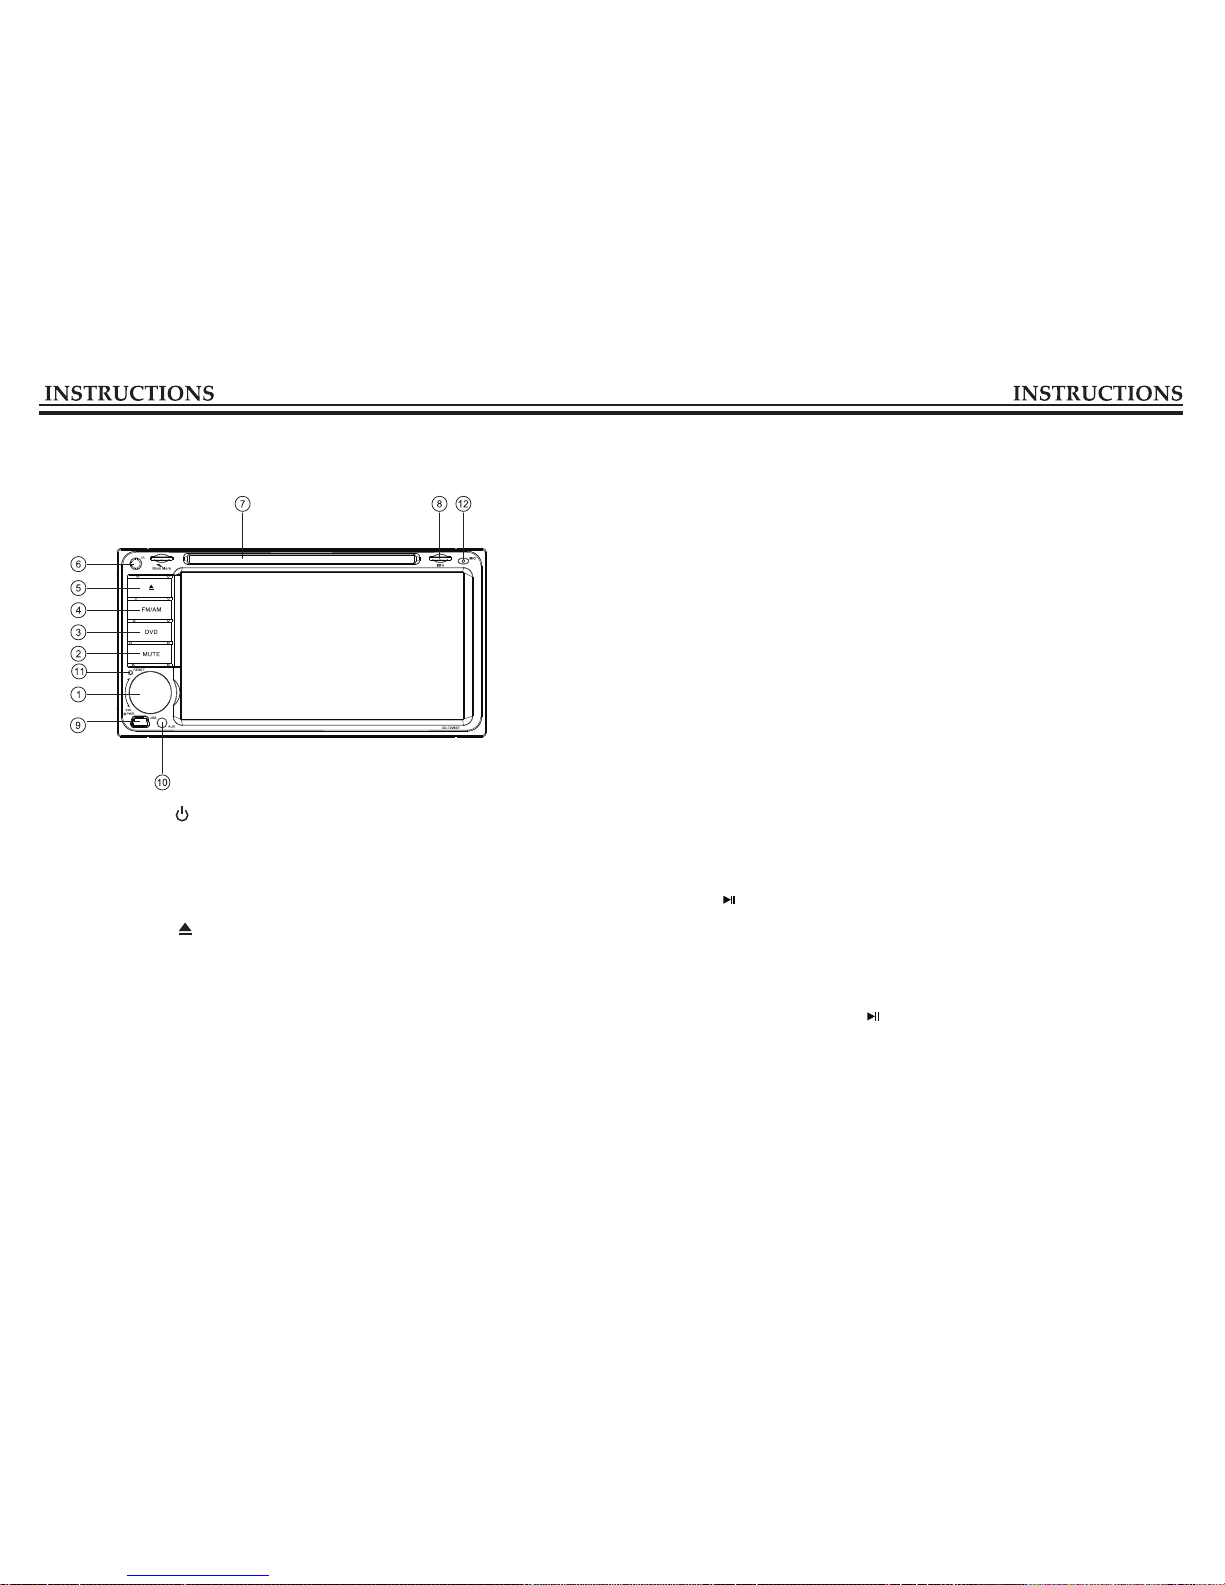
1. POWER
Press once to switch on, press again to switch off.
2. MUTE button
Press once to turn off audio output, press again
to resume volume level.
3. DSP
Press this button to show the time.
4. SOURCE/IR-SW
Short press the button to switch the mode.
Long press the button to switch between
foreground/background remote control.
Remote Control Function