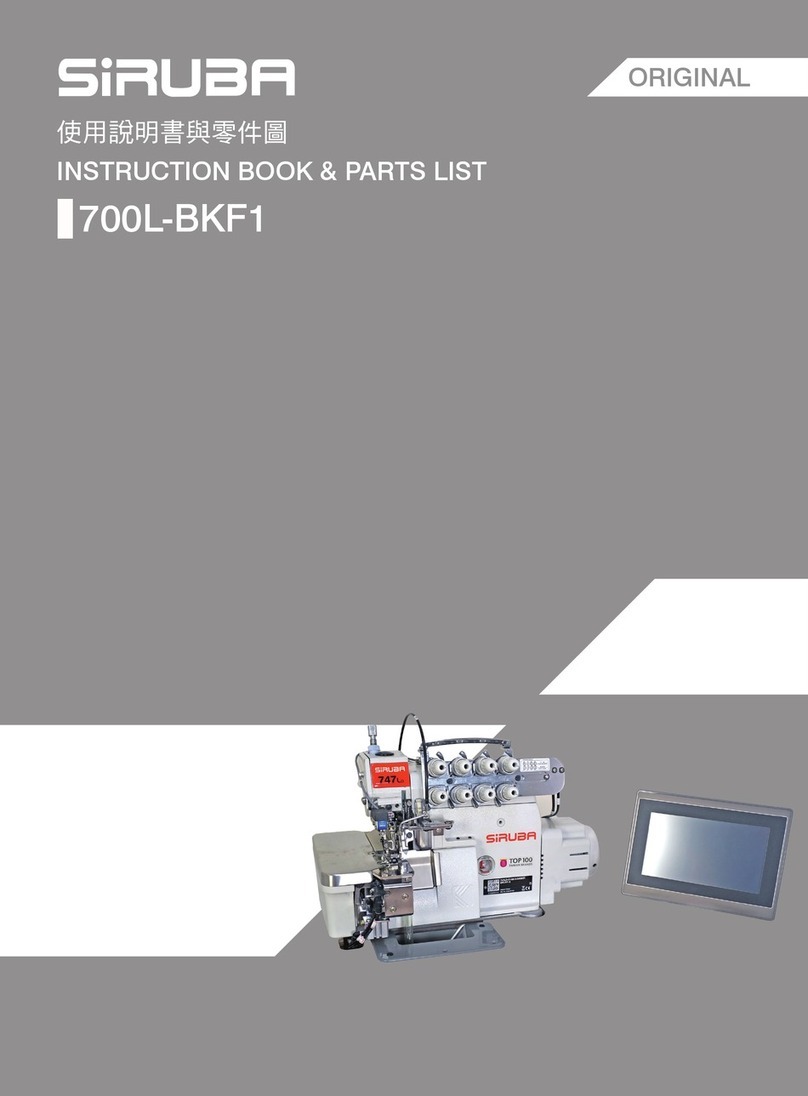
Rockwell international Rimoldi 527 manual

INSTRUCTIONS HANDBOOK GEBRAUCHSANWEISUNGEN
LIVRET D'INSTRUCTIONS LIBRO DE INSTRUCCIONES
®
n. 222

N.B.
The
current
must
be
cut
off
from
the rnachine
motor,
by
operating
the relative switch,
when the needle
is
changed,
or
presser
foot,
needle plate
and looper removed,
during
breaks when the machine
is
without
operator, and
while
rnaintenance
is
being carried
out.
The devices on the machine
for
safeguarding the
operator
such
as
needle guard, needle
bar guard,
belt
cover, etc.
must
never
be
removed,
except
for
maintenance.
P.S.
Beim Auswechseln der Nadel,
wenn man
das
fusschen, die
Stichplatte
oder den Greifer
abnimmt
und
bei
nicht
uber·
wachten
Unterbrechungen
bei
der
Arbeit
und wahrend der
Wartung, muss der
Strom
ausgeschalten werden, indem
n1an
auf den entsprechenden
Scha Iter
einwirkt.
Die
Schutz-Vorrichtungen,
wie Nadelschutz, Schutz-
vorrichtung
der NadeIbarre,
Zahnriemenschutzgehause,
ecc.
die
fur
die Sicherheit des
Operateurs sorgen, durgen nie
abgenommen werden,
es
sei
denn
fur
die Wartung.
N.B.
Pour changer l'aiguille, ou
bien
pour
en
lever
le
pied-
presseur,
Ia
plaque aiguille
et
le
crochet, ou lors des inter-
ruptions
de
travail prolongees,
ou bien pendant
les
travaux
d'entretien
de
Ia
machine, il
faut
interrompre
Ia
mise sous
tension du
moteur
de
Ia
ma-
chine
en
utilisant
l'interrup-
teur
approprie.
Les
dispositifs
de
securite
de
l'operatrice
tels que protege
aiguilie,
protection
de
Ia
barre
d'aiguilie, carter
de
protection
de
Ia
courroie, etc.
ne
doivent
en
aucun
cas
etre enleves,
si
ce
n'est
pour
l'entretien
de
Ia
machine.
IMPORT
ANTE:
En
las
operaciones de
cambia
aguja,
remoci6n
prensatelas-
placa aguja-crochet,
como
asi
tambien
durante
las
interrup-
ciones sin custodia del trabajo
y
durante
Ia
operaciones de
manutenci6n,
debe quitarse.la
corriente
del
motor
de
Ia
maquina, accionando para
ello
el
interruptor.
Los dispositivos predispuestos
para
Ia
seguridad de
Ia
opera-
dora,
como
ser
el
salva-agujas,
protecci6n
de
Ia
barra aguja,
carter
protector
de
correa,
etc,
no
deben quitarse
por
ninguna raz6n, salvo
en
caso
de
manutenci6n.
From the library of Superior Sewing Machine & Supply LLC - www.supsew.com

2
INTRODUCTION
First
of
all
we
wish to
thank
you for showing
preference for
our
product.
\V
e are sure
that
your
confidence
in
our
brand will be fully repaid
by
the
long and useful service
that
you will certainly obtain
from the machine.
This
booklet
contains some notes on the
installation, operation and maintenance
of
Rimoldi
OVERLOCK machines which should be useful to
owners and should help them
to
become familiar
with the machine and to derive the best results from
it. This machine designed and realized with the most
advanced technologies, was carefully checked and
thoroughly tested before leaving the factory to
guarantee its long life and efficiency; however, it
must
be
remembered
that
these depend very much
on how the machine
is
operated and maintained,
and it
is
therefore in the owner's interest to read
thi~
book carefully and follow the instructions in it,
before using the machine.
N.B. The machine
is
despatched from
our
factory
fitted with all safety guards required by law.
EINFUEHRUNG
Zuallererst
mochten
wir Ihnen dafur danken, dass
Sie unser
Produkt
einem anderen vorgezogen haben
und sind sicher, dass das Vertrauen, das Sie unserer
Marke entgegenbringen, reichlich durch lange und
nutzliche Dienste, die Ihnen diese Maschine
sicherlich erweisen wird,
belohnt
werden wird.
In diesem Buchlein finden Sie einige Anmerkungen
bezuglich Installation, Einstellung und
\V
artung der
Ueberwendlichmaschine, was Ihnen bestimmt dabei
he
lfen
wird,
unsere
Maschinen
besser
kennenzulernen und zweckdienlicher einzusetzen.
Diese Maschine, mit modernsten Technologien
erdacht und hervorgebracht, gelangt erst nach
peinlich genauen Ueberprufungen und skrupellosen
Kontrollen zu Ihnen, weshalb wir Ihnen Dauer und
Leistungsfahigkeit derselben garantieren konnen,
was j edoch auch bedeutend vom Einsatz und von
der Wartung abhangt.
\Vir
raten
Ihnen
daher, in
Ihrem eigenen Interesse, dieses Buchlein vor dem
Einsatz aufmerksam durchzulesen und die
Anleitungen, die darin
enthalten
sind, genau zu
befolgen.
P.S. Die Maschine verlasst unsere Fabrik, mit allen
unfallsverhiHenden Schutzmassnahmen versehen,
die gesetzlich vorgeschrieben sind.
From the library of Superior Sewing Machine & Supply LLC - www.supsew.com

INTRODUCTION
Nous desirons en premier lieu vous remercier de
la
preference accordee anotre
produit
et nous sommes
certains que
la
confiance que vous no
us
avez
accordeee sera largement
n~compensee
par
la
duree
du service et
les
avantages certains que vous offrira
notre machine.
Nous avons regroupe dans
ce
livret quelques notes
relatives a !'installation,
la
mise au
point
et
l'entretien des machine SURJETEUSE-RASEUSES
qui vous seront utiles
pour
mieux connaftre
et
mieux utiliser
notre
produit.
Cette machine etudiee
et
con~ue
selon les plus
modernes technologies vous arrive apres avoir ete
soumise ades controles scrupuleux et ades essais
rigoureux qui nous
permettent
d'en
garantir la duree
et l'efficience, mais nous vous rappelons que
celles-ci
dependent
beaucoup de
1'
emploi
et
de
l'
entretien qui seront reserves aux machines. Nous
vous conseillons done avant d'utiliser
la
machine de
consulter
attentivement
ce
livret
et
de suivre avec
soin les instructions qu'il contient.
N
.B.
La
machine
sort
des etablissements equipee de
toutes les protection anti-accident prevues par
la
loi.
INTRODUCCION
Deseamos ante todo agradecerles
la
preferencia
dispendada a nuestro
producto
y estamos seguros
que, su confianza en relaci6n con nuestra marca,
sera ampliamente recompensada
por
el largo y
proficuo servicio que sin
duda
alguna
obtendran
de
la
maquina.
En este librito hemos recogidos algunas notas
relativas a la instalaci6n, puesta en fase y
manutenci6n de las maquinas OVERLOCK, que
consideramos puedan series utiles para conocer
mej
or y utilizar mas convenientemente nuestro
producto.
Esta maquina, estudiada y concebida con las mas
modernas tecnologi
as,
llega a V
ds.
despues de
escrupulosos controles y rigurosas pruebas que nos
permiten garantizar su duraci6n y eficiencia, pero
les
recordamos que ello depende muy especialmente
del uso y manutenci6n que Vds. prestaran a
la
maquina; antes/de su empleo, les aconsejamos en su
interes de consultar con atencion este folleto y
seguir con cuidado
las
instrucciones en el mismo
contenida.
P
D.
La maquina sale de nuestros establicimientos
completa de todas las protecciones contra
el
infortunio establecidas
por
las leyes vigentes.
3
From the library of Superior Sewing Machine & Supply LLC - www.supsew.com

4
CONTENTS
ELECTRICAL
CONNECTIONS
......................
.
Connection
diagrams
INSTALLATION
REFILLING
WITH
OIL
FITTING
AND
ADJUSTING
THE
SEWING
MECHANISMS
....
Positioning
the needle
Replacing
the
needle
Positioning
the
presser
foot
and
adjusting
its pressure
Timing
the
bottom
looper
Timing
the
top
looper
Chainstitch
looper
control
mechanism
(529)
Fitting
and
adjusting
front
and rear needle guards
(527)
Fitting
and
adjusting
front
and rear needle guards
(529)
Fitting
and
adjusting
cutters
Variation
of
b1ght
width
Fitting
and
adjusting
the
feed dogs
Adjusting
the
differential
feed rat10
Adjust1ng
the
stitch
length
SHARPENING
THE
CUTTERS.
ADJUSTING
THREAD
TAKE-UP
CAM
(529)
ADJUSTING
TENSION
THREADING
PULLER
MAl
NTENANCE
FAULTS
6
10
16
22
26
26
28
30
32
34
36
40
44
46
48
50
52
52
54
54
54
56
58
64
68
INHAL
TSVERZEICHNIS
E
LEKTR
ISCHE
ANSCH
LU
ESSE
Anschluss-Skizzen
INSTALLATION
OELVERSORGUNG
MONTAGE
UNO
PHASENEINSTELLUNG
DER
NAEHELEMENTE
Nadelste
II
ung
Nadelaustausch
Pos1tion ieren des
Druckerfusses
und
Druckregulierung
.....
.
Einstellen
des
Untergreifers
..........................
.
Phaseneinstellung
Obergreifer
.....
Antriebsgetriebe
Kettenstichgreifer
(529)
.....
.
Montage
und
Einstellung
der
vorderen
Nadelschutzes
sowie Nadelschutzes
(527)
................
.-
..........
.
Montage
und
Regulierung
des
vorderen
Nadelschutzes
und
des
Nadelschutzes
(529)
.....
Montage
und
Einstellung
der
Messer
Aenderung
der
Ueberwendlichbreite
Montage
und Regul ieru
ng
der
Transporteure
.............
.
Regulierung
des
Differentialtransport
Verhiiltnisses
.......
.
Stichliingen-Regu
lie
rung
.............................
.
SCHLEIFEN
DER
MESSER
.....................
.
REGULIERUNG
DES
FADENSPANNUNGS-NOCKENS
(529)
..
SPANNUNGSEINSTELLUNG
..
EINFAEDELN
............
..
PULLER
WARTUNG
ABNORM
ITAETEN
...............................
.
6
10
16
22
26
26
28
30
32
34
36
40
44
46
48
50
52
52
54
54
54
56
58
64
69
From the library of Superior Sewing Machine & Supply LLC - www.supsew.com

SOMMAIRE
CONNEXIONS
ELECTRIQUES
Schemas de
connexion
INSTALLATION
REI\IIPLISSAGE
DE
L'HUILE
MONTAGE
ET
MISE
EN PHASE DES
ORGANES
DE
COUTURE
Placement
de
l'aiguille
Replacement
de
l'arguille
Placement
du
pied-presseur
et
reglage de
Ia
pressron
Mise en phase du
crochet
inferieur
..
Mise en phase du
crochet
superreu r
Cinematisrne
de
cornm.
du
crochet
pornt
de
chainette
(529)
Montage
et
reglage
du
pare-boucle
et
du
protege-argurlle
(527)
Montage
et
reg/age du
pare-boucle
et
du
protege
argu rile
(529)
Montage
et
reglage des
couteaux
Modifications
de
Ia
largeur de
Ia
couture
Montage
et
reg/age des
griffes
Reglage
du
rapport
du
transport
drfferentiel
Reglage de
Ia
longueur
du
point
AFFUTAGE
DES
COUTEAUX
REGLAGE
DE
LA
CAME
DE
TENSION
DU
FIL
(529)
REGLAGE
DE
LA
TENSION
ENFILAGE
PULLER
ENTRETI
EN
ANOMALIES
6
10
16
22
26
26
28
30
32
34
36
40
44
46
48
50
52
52
54
54
54
56
58
64
70
SUMARIO
CONEXIONES
ELECTRICAS
Esquemas de
conexi6n
INSTALACION
...................................
.
SUMINISTRACION
ACEITE
........................
.
MONTAJE
Y
PUESTA
EN
FASE
DE
ORGANOS
DE
COSTURA
....................................
.
Posicionamiento
aguja
..............................
.
Sustituci6n
de
Ia
aguja
Posicion
prensatelas y
graduaci6n
presi6n
...............
.
Puesta
en
fase lanzadera
inferior
......................
.
Puesta
en
fase lanzadera
superior
......................
.
Crnematrsmo
mando
lanzadera
puntada
de
cadeneta
(529)
Montaje
y regu
laci6n
empuja
ojal
y
protec~or
aguja
\527)
Montaje
y
graduacion
empuja
ojal
protector
de aguja
(529)
Montaje
y
regulaci6n
cuchillas
Variaci6n
ancho
costura
Montaje
y
graduacion
drentes
Graduacr6n
relaci6n
transporte
difere.ncial
Graduaci6n
longitud
puntada
....
.
AF
I
LADO
CUCH
I
LLAS
...........................
.
GRADUACION
CAMA
TIRAHILO
(529)
..............
.
REGU
LAC
ION
TENS
ION
ES
ENHEBRADO
PULLER
MANUTENCION
IRREGULARIDADES
.............................
.
7
11
17
23
27
27
29
31
33
35
37
41
45
47
49
51
53
53
55
55
55
57
59
65
71
5
From the library of Superior Sewing Machine & Supply LLC - www.supsew.com

6
ELECTRICAL
CONNECTIONS
Before connecting
the
motor
to
the
mains supply proceed
as
follows:
Check
that
connection
to
the
terminal board inside
the
motor
is
suited
to
the
current
supply, since
all
motors
are
connected
for their
highest
permitted
voltage (see
sketches).
If
the
plant
has switch
with
fuses,
check
that
they
correspond
to
the
amperage value indicated
in
Table
1.
After
checking tighten
the
fuse
holder plugs so
that
there
is
perfect
electrical
contact.
If
the
plant
has a
motor
protector,
check
that
it
is
calibrated
to
suit
the
motor
power
and its effective
current
to
the
amperage value indicated
in
Table
2.
To
vary
the
motor
protector
calibrator remove
the
cover and
turn
screw A so
that
the
mark
on
it
corresponds
to
the
value required.
ELEKTRISCHE
ANSCHLUESSE
Bevor der Motor an das Zufuhrnetz ange-
schlossen wird, muss man folgendes
tun:
Sich davon uberzeugen, dass der Ansch-
luss des inneren Motor-
Klemmbrettes
derjenige ist, der effektiv von der
Spannung des
Zufuhrnetzes
gefordert
wird da aile Motoren, angeschlossen
fur die hochste, vom
Motor
selbst
zugelassene
Spannung
(siehe Skizze)
gel
iefert werde
n.
Wenn die Anlage mit einem Schalter
mit Sicherungen versehen ist, muss
man sich davon uberzeugen, dass die-
selben,
auf
Basis der Leistungsfahigkeit
des Motors und seiner effektiven Zu-
fuhrspannung dem Ampere-Wert, der
auf Tab. 1 angefuhrt ist. entsprechen.
Nach der Kontro
lie
die Sicherungstra-
gerstopsel bis zum Boden zuschrauben,
um einen perfekten elektrischen
Kontakt
zu
sichern.
Wenn die Anlage mit einem Motor-
schutz versehen ist, muss man sich
davon uberzeugen, dass die Eichung
desselben,
auf
Basis der Leistungsfahig
keit des Motors und seiner effektiven
Spannung, dem
in
Tab. 2
angefuhrten
Ampere-Wert entspricht. Um die Eich-
ung des Motorschutzes
zu
verandern,
muss man den Deckel
abnehmen
und
die Schraube A
derart
drehen, dass das
auf ihr bestehende Zeichen dem erfor-
derlichen wert entspricht.
CONNEXIONS
ELECTRIQUES
Avant de
brancher
le
moteur
au reseau
d'alimentation
il
taut:
Verifier
que
Ia
connexion
de
Ia
borne
interne du
moteur
soit
effectivement celle necessaire
pour
Ia
tension
d'alimentation
car
taus
les
moteurs
sont
fournis predisposes
pour
Ia
tension
maximum
permise
par
le
moteur
(voir schemas).
Si
!'installation electrique
est
dotee
d'un
coupe-circuit,
controler
que
les
fusibles
correspondent
a
Ia
valeur en
Ampere
i
nd
iquee dans
le
tableau 1,
selon
Ia
puissance
du
moteur
et
sa
tension
d'alimentation
effective.
Apres
le
controle
serrer afond
les
bouchons
porte-fusibles
afin
d'assurer
un
parfait
contact
electrique.
Si
!'installation
electrique
est
dotee
d'un
disjoncteur
controler
que
le
tarage de celui-ci corresponde a
Ia
valeur en
Ampere
indiquee dans
le
tableau
2,
selon
Ia
puissance du
moteur
et
Ia
tension effective
d'a Ii
mentation.
Po u r mod if ie r Ie tarage du
disjoncteur, enlever
le
couvercle
et
faire
tourner
Ia
vis
de fa9on
ace
que
le
signe qui
se
trouve
sur celle-ci so
it
en correspondance
de
Ia
valeur
demandee.
From the library of Superior Sewing Machine & Supply LLC - www.supsew.com

CONEXIONES
ELECTRICAS
Antes
de
conectar
el
motor
a
Ia
red de
alimentacion
es
preciso:
-
Comprobar
que
Ia
conexion
de
Ia
caja
de
contactos
interior del
motor
sea
efectiv
amente
Ia requer
ida
por
Ia
tension
de
Ia red de
al
imentacion, en
cuanto
todos
los
motores
se
suministran
conectados
para
Ia
tension maxima consentida
por
el
motor
mismo
(ver
esquemas
ilustrados).
-
Si
Ia
instalaci6n esta provista de
interruptor
con fusibles,
comprobar
que
los mismos correspondan, en base
a
Ia
potencia
del
motor
y a
su
efectiva
tension de
al
imentacion
al
valor
Amperio
que
figura en
Ia
Tabla
1.
Despues del control cerrar bien
-los
tapones
porta
fusibles; para asegurar
un
perfecto
contacto
electrico.
-
Si
Ia
instalaci6n esta provista de
protector
motor
comprobar
que
el
cal ibrado del mismo corresponda en
base a
Ia
potencia
del
motor
o a
su
efectiva tension
al
valor Amperio
que
figura en
Ia
Tabla
2.
Para variar
el
calibrado del
protector
motor,
quitar
Ia
tapa
y girar
el
tornillo A de forma que
el
signa
existente
sabre
el
mismo
corresponda
aI vaIor r
eq
uerido.
A
A -
calibrator
screw
-
Eich·Abanderungsschraube
-vis de
modification
du
tarage
tornillo
variacion
calibrado
MOTOR
PROTECTOR
MOTORSCHUTZ
DISJONCTEUR
PROTECTOR
MOTOR
7
From the library of Superior Sewing Machine & Supply LLC - www.supsew.com

FUSES
SICHERUNGEN
FUSIBLES
FUSIBLES
THREE-PHASE
MOTOR
POWER
PFERDESTAERKE
DES
DR
EHSTROMMOTORS
PUISSANCE
MOTEURS
TRI
PHASES
POTENCIA
MOTORES
TRIFASICOS
SINGLE-PHASE
MOTOR
POWER
PFERDESTAERKE
DES
EINPHASENMOTORS
PUISSANCE
MOTEURS
MONO
PHASES
POTENCIA
MOTOR
ES
MONOFASICOS
8
SYMBOLS
KENN.
NR.
SYMBOLES
SYMBOLOS
AMPERE
245
w
420
(1/3
HP)
368
w
420
(
1/2
HP)
552
w
420
(3/4
HP)
736
w
(1
HP)
245
w
420
(
1/3
HP)
368W
420
(1/2
HP)
552
w
(3/4
HP)
0
q
q
0
M
M
0
;;;
6
380
240
380
380
220
TABLE
TABELLE
TABLEAU
TABLA
380
420
380
380
420
1
-
0 0 0 0
0 0 0 0
6 6 6 6
......
c'l
C")
-d-
M M M M
M M M M
0 0 0 0
;;;
;;;
;;; ;;;
10 15
20
25
125
110
240 220
125
110
125
240
220
110
125
240
220
110
240 220
125
110
240
220
125
110
125
380
240 220
110
VOLT
From the library of Superior Sewing Machine & Supply LLC - www.supsew.com

0
a:
C/)
~
OCI)C/)0
r-a:wu
ooC/)-
I-
~~--~~
....J
0
wOa..u..
>
(/)~--
0
<(~a:a:
N
::r:ol--1-- N
a..a:CI)C/)
'1--a:w
WCI)::::ltr:
WIWO
a:wl--1--
I-~
::r:a:OO
f-Cl..
1--0~~
<(I
s:~
AMPERE
OF
ADJUSTING
REGUU
ERUNGSAMPER
AMPERE
DE
REGLAGE
TABLE
TABELLE
TABLEAU
TABLA
AMPERE
DE
REGULACION
1,4 A 1,6 A 2,5 A
3A
1,7 A 2,4 A 3,5 A
4A
245W
368 w
552W
736 w
(1/3
HP)
(1/2
HP)
(3/4
HP)
(1
HP)
2
AMPERE
OF
ADJUSTING
REGU
Ll
ERUNGSAMPER
AMPERE
DE
REGLAGE
AMPERE
DE
REGULACION
C/)
C/)0 0
N 3,4 A
3,6
A 4,8 A
a:CI)wU
N
OwCI)C/5
I-
1--a:<(<(
o0
::r:u..
....J
~1--a..o
0
woOz
>
C/)~zo
0 6,5 A
6,9A
8,9 A
<(ZO~
....
Iw~C/)
Cl..CI)tr:W
W<(:::)tr:
....J::r:wo
\.!)Cl..f-1--
I-
245W
368W
552W
zzoo
~--~
<(Cl..
u;w~~
s:E
(1/3
HP)
(1/2
HP)
(3/4
HP)
9
From the library of Superior Sewing Machine & Supply LLC - www.supsew.com

CONNECTION DIAGRAMS
The following diagrams illustrate how
the
motor
terminal board must be con-
nected
to
the leads from the
motor
pro-
tector,
according
to
the
type
of motor.
SINGLE-PHASE MOTORS
Connections should be made
as
shown
in
sketches A or
B,
according to
the
arrangement of the terminal board. The
direction of rotation can be inverted by
changing
the
connections from A to B
or viceversa.
THREE-PHASE MOTORS
Zefir -Zefiret
380-420 v 220-240 v
Lamp connection
To
plug
in
the lamp
1t
1s
necessary
to
use the RIMOLDI 019-90 low tension
device. This device must be connected
to
the connecting terminals of the mo-
tor
protector
I
mput
E:
125/160/220/240/380/415
V
50/60Hz
Output
U:
Adjustable from 5
to
12
V -
20
VA
1-
Earth lead (yellow-green)
2-
Cable from the
motor
protector
10
ANSCHLUSS-
SKIZZEN
Nachstehende Schemas stellen
je
nach
dem Motor dar, wie die vom Motor-
schutzschalter
kommenden
Drahte an
das Klemmbrett des Motors ange-
schlossen werden
mussen.
EINPHASIGE MOTOREN
Der Anschluss muss \aut Skizze A oder
B,
je
nach der Vorbereitung des
K lemmbrettes durchgefuhrt werden.
Eine
eventuelle
Inversion
der
Drehrichtung
kann
durchgefuhrt
werden,
indem
man
die
Anschluss-Skizze von A auf
B,
oder
umgekehrt, abandert.
DR
EHSTROM-MOTOR
EN
Zefir -Zefiret
380-420 v 220-240 v
Anschluss an Lampe
Um
eine unabhangige Lichtversorgung
zu
haben, die Vorrichtung RIMOLDI
019-90 mit niedriger Spannung an-
wenden, die mit den Eingangsklem-
men des Motorschutzschalters anzu-
sch Iiessen ist.
Eingang E =
125/160/220/240/415
V
50/60HZ
Ausgang (einstellbar) U = von 5 bis
12
V 20
VA
1
2 Erdleiter (gelb-grun)
vom Motorschutzschalter kom-
mendes Kabel
SCHEMAS
DE
CONNEXION
Les
schemas ci-dessous illustrent, sui-
vant
le
type du moteur,
comment
relier
au
bornier du moteur,
les
fils provenant
du disjoncteur de protection du rnoteur.
MOTEURS
MONOPHASES
La
connexion
doit
etre effectuee cornrne
ind
ique aux schemas A et B selon
Ia
predisposition de Ia borne. L'eventuelle
inversion du sens
de
rotation
peut
etre
effectuee en modifiant
le
schema de
connexion de A aB ou inversement.
MOTEURS TRIPHASES
Zefir -Zefiret
380-420 V I 220-240 V
Branchement lampe
Pour avoir une alimentation
autonome
de
Ia
lumiere, employer
le
dispositif
RIMOLDI 019-90 abasse tension, a
re-
lier aux barnes
d'entree
du disjoncteur.
Entree
E:
125/160/220/240/380/415
V
50/60
Hz
Sortie reglable
U:
de 5 a
12
V
20
VA
1-Fil
de terre (jaune-vert)
2-Cable
provenant de l'interrupteur
general
From the library of Superior Sewing Machine & Supply LLC - www.supsew.com

ESQUEMAS
DE
CONEXION
Los
esquemas a continuaci6n ilustran,
segun
el
tipo de motor, como deben
ser conectados
al
borne del
motor
los
cables que provienen del interruptor
salvarnotor.
MOTORES
MONOFASICOS
La
conexion debe ser efectuada segun
como
los
esquernas A o
B,
conforme a
Ia
predispos icion de
Ia
caja de contactos.
La
eventual inversion del sentido de
rotaci6n puede efectuarse variando
el
esquema de con
ex
ion
de A a B o
viceversa.
MOTORES
TRIFASICOS
Zefir -Zefiret
380·420 V I 220-240 V
Conexion lampara
Para disponer de alimentaci6n luz
independiente, uti/ izar
el
Aparato R
1-
MOLDI
019-90 de baja tension para
conectar con
las
abrazaderas de entrada
del
interruptor protector motor.
entrada E = 125 -160
220/240/
380/415
V
50/60
Hz
salida regulable U
=de
5 a
12
V 20
VA
1 -
conductor
a tierra (amarillo-verde)
2 -cable proveniente del interruptor
salvamotor
1
2
SKETCHES
A
SKIZZE
A
SCHEMAS
A
ESQUEMA
A
380-420
v
SKETCHES
B
SKIZZE
B
SCHEMAS
B
ESQUEMA
B
1
2
220-240
v
11
From the library of Superior Sewing Machine & Supply LLC - www.supsew.com

THREE-PHASE
MOTORS
QUICK
NDK
600
V
(up
to
serial no. 1,61 0,1 99)
QUICK
STOP
NDK
700
(up
to
serial no. 580,1 99)
THREE-PHASE
MOTORS
QUICK
NDK
600
V
(from
serial no. 1,610,200)
QUICK
STOP
NDK
700 and
NDK
707
(from
serial no. 580,200)
QUICK
ELECTRONIC
NDK
800,801,
880, 880T, 880BG,
880M
1
-earth
lead
(yellow/green)
2
·cable
from
main
switch
3 -
motor
term
inaI
board
4
-feed
cable Z
of
transformer
5
-transformer
for
controls
6-
panel
terminals
12
DR
EHSTROM-MOTOR
EN
QUICK
NDK
600
V
(bis
zu
Matrikei-Nr.
1.610.199)
QUICK
STOP
NDK
700
(bis
zu
Matrikei-Nr.
580.199
DR EH
STROM-MOTOR
EN
QUICK
NDK
600
V
(ab
Matrikei-Nr.
1.610.200)
QUICK
STOP
NDK
und
NDK
707
(ab
Matrikei-Nr.
580.200)
QUICK
ELEKTRONIK
NDK
800;801;
880;880T;880BG;880M
1 -
Erdleiter
(gelb-grun)
2-
vom Generalschalter
kommendes
Kabel
3-
Motor-Kiemmbrett
4 -
Zufuhrkabel
Z des
Transformators
5-
Transformator
fur
Steuerungen
6 -
Endteile
der
Steuerplatte
MOTEURS
TRIPHASES
QUICK
NDK
600
V
(jusqu'au
numero
de
matricule
1.610.199)
QUICK
STOP
NDK
700
(jusqu'
au
numero
de
matricule
580.
199)
MOTEURS
TRIPHASES
QUICK
NDK
600
V
(a
partir
de
numero
de
matricu
le
1.610.200)
QUICK
STOP
NDK
700
et
NDK
707
(a
partir
du
numero
de
matricule
580.200)
QUICK
ELECTRONIC
NDK
800, 801,
880,880T,
880BG,
880M
1 -
fil
de
terre
(jaune-vert)
2-
cable
provenant
de
l'interrupteur
general
3 -
borne
du
moteur
4
·cable
d'alimentation
Z
du
transformateur
5 -
transformateur
commandes
6 ·
terminaux
du
panneau
From the library of Superior Sewing Machine & Supply LLC - www.supsew.com

MOTORES
TRIFASICOS
QUICK
NDK
600
(hasta
Ia
matric. 1.610.199)
QUICK
STOP
NDK
700
(hasta
Ia
matric.
580.199)
MOTORES
TRIFASICOS
QUICK
NDK
600
V
(de
Ia
matric. 1.61
0.200)
QUICK
STOP
NDK
700
y
NDK
707
(de
Ia
matric.
580.200)
QUICK
ELECTRONIC
NDK
800;
801;
880;880T;880BG;880M
1
-conductor
de
tierra
(amarillo-verde)
2 -
cable
procedente
del
interruptor
general
3 -
caja
de
contactos
motor
4-
cable
de
alimentaci6n
Z del
transformador
5 -
transformador
para
mandos
6-
terminales
del
cuadro
2
380-420
v
220-240
v
s-
4
380-420
v
220-240
v
4 4
13
From the library of Superior Sewing Machine & Supply LLC - www.supsew.com

THREE-PHASE
MOTORS
EFKA
VARIOSTOP
220
V
THREE-PHASE
MOTORS
EFKA
VARIOSTOP
380
V
1 -
Earth
lead
(yellow-green)
2 - Cable
from
motor
protector
4-
Cable
from
motor
5-
Cable
from
control
panel
6-
Lead (blue)
7-
Lead
(brown)
9-
Lead
(yellow)
10-
Lead (green)
11
-Lead
(purple)
13-
Lead
(white-purple)
14-
Lead
(white-yellow)
15-
Lead
(white-green)
N.B.
The
direction
of
rotation
of
all
types
of
three
phase
motors
can be
changed
by
inverting
any
two
of
the
three
polarities,
or
by
making
th~
inv~r'.iion
on
2
of
the
3
lead~
going
to
the
plug
connectors,
always
excluding
the
yellow/green
earth lead.
14
DREHSTROM-MOTOREN
EFKA
VARIOSTOP
220
V
DR
EHST
ROM-MOTOR
EN
EFKA
VARIOSTOP
380
V
1 -
Erdleiter
(gelb-grun)
2-
vom
Motorschutzschalter
kom-
mendes
Kabel·
4-
vom
Motor
kommendes
Kabel
5-
von
der
Steuerungstafel
kommen-
des
Kabel
6-
Kabel (blau)
7-
Kabel
(braun)
9-
Kabel (gelb)
10-
Kabel (grun)
11-
Kabel (lila)
13-
Kabel
(weiss-
Iila)
14-
Kabel
(weiss-gelb)
15-
Kabel
(weiss-grun)
P
.S.
Eine
eventuelle
Inversion
im
Drehungssinn
kann
bei
allen
Typen
von
Drehstrom-Motoren
durchgefuhrt
werden,
indem
man
zwei
beliebige
Pole
der
drei
Pole venauscht oder
1ndem
r'i'ian
diese
Inversion
auf
zweien
der
drei
Drahte
durchfuhrt,
die
zu
den
Einsteckdornen
des Steckers gehen,
wobei
der
gelb-grune
Erd-Draht
immer
ausgeschlossen
wird.
MOTEURS
TRIPHASES-
EFKA
VARIOSTOP
220
V
MOTEURS
TRIPHASES
EFKA
VARIOSTOP
380
V
1 -
Fil
de
terre
(jaune-vert)
2-
Cable
provenant
de
l'interrupteur
general
4 - Cable
provenant
du
moteur
5-
Cable
pro~enant
du
panneau
de
commande
6-
Cable
(bleu)
7-
Cable
(marron)
9-
Cable (jaune)
10-
Cable
(vert)
11-
Cable
(violet)
13-
Cable
(blanc-violet)
14-
Cable (blanc-jaune)
15-
Cable
(blanc-vert)
N.B.
L'eventuelle
inversion
du
sens
de
rotation
pour
taus
les
types
de
m
oteurs
triph
ases
pourra
etre
effectuee
en
invertissant
deux
des
tro1s
polarites,
ou
en
operant
c~ne
inversion
sur
deux des
trois
fils
qui
vont
aux
connecteurs
de
Ia
fiche
en
excluant
toujours
le
fils
de
terre
jaune-vert.
From the library of Superior Sewing Machine & Supply LLC - www.supsew.com

MOTORES
TRIFASICOS
EFKA
VARIOSTOP
220
V
MOTOR~S
TRIFASICOS
EFKA
VARIOSTOP
380
V
~~ndlt~t~r
verOe)
a
tierra
(amarillo·
2 -
cable
proveniente
del
interruptor
salvamotor
4-
cable
proveniente
del
motor
5 - cable
proveniente
del panel de
control
6-
cable (azul)
7 - cable
(marron)
9 - cable
(amarillo)
10-
cable (verde)
11
-cable
(violeta)
13-
cable
(blanco-violeta,
14-
cable
(blanco-amarillo)
15 -cable (blanco-verde)
P
/D:
La eventual
inversion
del
sentido
de
rotaci6n,
para
todos
los
tipos
de
motores
trifasicos,
podra
efectuarse
invertiendo
dos
qualquiera
de
las
tres
polaridades,
o
efectuado
dicha
inversion
en
2
de
los 3 cables
que
van a los
conectores
del
enchufe
excluyendo
siempre
el
cable
amarillo-verde
de
tierra.
380
v
220 v
15
From the library of Superior Sewing Machine & Supply LLC - www.supsew.com

INSTALLATION
Machifle head
The installation
of
the
machine head
and its connection to
the
motor
(which
is
already
in
position on
its
mountings)
by means
of
the transmission belt
is
done
as
follows:
1.
Force the four shock absorbers on to
the pins attached
to
the
base·plate.
2.
Set
the
machine on
the
base, placing
the holes underneath
the
head on
the
shock absorbers.
A
-head
support
pin
16
INSTALLATION
Oberteil
Bezuglich Installation des Oberteiles und
Anschluss an den Motor (bereits auf
dem
Gestell
montiert)
mittels
Antriebsriemen, muss folgendermassen
vorgegangen werden:
1.
die vier stossdaempfenden Puffer mit
Kraft auf die eigens vorgesehenen
Stifte der
Stutzplatte
aufdrucken:
2.
Die Maschine auf dem Gestell
placieren und die unteren Bohrungen
des
Oberteiles
auf
den
vier
Stossdaempfenden
Puffern
zentrieren.
A -
Oberteii·Haltestift
INSTALLATION
Tete
Pour
!'installation
de
Ia
tete
et
son
raccordement avec
le
moteur
(deja
monte sur
le
bati al'aide
d'une
courroie
de transmission), proceder com
me
suit:
1.
Enfoncer avec force
les
quatres
tampons
amortisseurs sur
les
goupilles
de
Ia
plaque
se
soutien
2.
Placer
Ia
machine sur
le
bati en
centrant
les
trous qui
se
trouvent
sous
Ia
tete
sur
les
quatres tampons
amortisseurs.
A-
goupille
de
soutien
de
Ia
tete
From the library of Superior Sewing Machine & Supply LLC - www.supsew.com

INSTALACION
Cabeza
Para
Ia
instalaci6n
de
Ia
cabeza
y
su
con
ex
i6n
con
el
motor
(
ya
montado
sabre
Ia
bancada),
por
med
io
de
una
~arrea_ggJc~osm_i~_i~_n,
hay
que
proceder
1.
presionar
con
fuerza
los
cuatros
pivotes
amontiguadores
sabre
los
respectivos pernos de
Ia
placa sosten.
2.
Colocar
Ia
maquina sabre
Ia
bancada
centrando
los
agujeros inferiores de
la
cabeza sabre
los
cuatros pivotes
amortiguadores.
A-
perno
de
sosten
SUBMERGED
SETTING
VERSENKTE
AUFSTELLUNG
PLACEMENTENCASTRE
COLOCACION
SUMERGIDO
NORMAL
SETTING
NORMALAUFSTELLUNG
PLACEMENT
NORMAL
COLOCACION
NORMAL
17
From the library of Superior Sewing Machine & Supply LLC - www.supsew.com

Belt
(figs. 1-2)
To
connect
the
motor
to
the
machine
head a
"V"
belt
with
dimensions
as
indicated
in
Fig. 1
must
be used.
1.
Fit
the
belt
as
shown
in
fig. 2
2.
Adjust
the
belt
tension
by
turning
the
motor-fixing
screws
so
that
it
cannot
slip
but
make
sure
that
it
is
not
too
taut,
otherwise
the
pulley-shafts
will
be
overloaded
and
t
he
Iife
of
the
be
It
w iII be reduced.
The
belt
is
correctly
adjusted
when,
if
pressed
by
hand at
the
part
indicated
in
fig. 2,
the
belt
yields
about
10 · 15
mm.
(3/8"-
9/16").
3.
Level the
machine
head
so
that
the
belt
is
perpendicular
to
the
pulley
axes and
thus
centered
in
their
races.
This
is
done
by
adjusting
the
head
support
pins,
making
sure
to
lock
the
relative nuts
afterwards.
18
Riemen
(Abb.
1-2)
Fur
den Anschluss
Motor-Oberteil
ist
es
unerlasslich einen
Keilriemen
mit
Massen
it.
Abb.
1
zu
verwenden.
1.
Den
Antriebsriemen
it.
Abb.
2
montieren
2.
Die Riemenspannung
unter
Einwirken
auf
das
Motor-Anschlussgelenk
so
ein-
stellen, dass ein
Schlittern
verhindert
wird;
jedoch
unter
Berucksichtigung
diesen
nicht
ubermassung zu spannen,
damit
Ueberlastungen auf den Wellen
der Riemenscheiben
vermieden
werden
und
die
Lebensdauer des Riemen selbst
nicht
beeintrachtigt
wird.
Die
richtige
Spannung ist dann
erreicht,
wenn
sich,
durch
manuelles
Drucken
im
Zentrum
des
langsten, freien
Abschnittes,
eine
Durchbiegung
verwirklicht,
das heisst
ei
n Nachgeben des Riemens
von
10-15
mm.
3.
Das
Maschinenoberteil
so
livellieren,
bis sich
der
Riemen
auf
Normalebene
zu
den Achsen der Riemenscheiben
befindet,
bzw. in den
Zentren
derer
Hoh
lkehlen
arbeitet.
Zu
diesem
Zweck
muss
auf
die Oberteii-Stl.Jtzbugel einge-
wirkt
werden,
wobei
zu beachten ist,
dass die dazugehorigen
Muttern
ansch-
liessend
blockiert
werden mussen.
Courroie
(figs. 1-2)
Pour
le
raccordement
moteur-tete,
II
faut
employer
une
courroie
trapezoi.dale
ayant
les
dimensions
indiquees a
Ia
fig.
1.
1.
Monter
Ia
courroie
de transmission
comme
le
montre
Ia
fig. 2.
2.
Regier
Ia
tension
de
Ia
courroie
en
agissant sur I'axe de
fixation
du
moteur
de
fayon
a
empecher
tout
glissement, mais en
ayant
soin de
ne
pas
Ia
tendre
de
maniere
excessive
afin
d'eviter
des surcharges sur
les
arbres de
poulies
et
pour
ne
pas
compromettre
Ia
duree
de
Ia
courroie.
On
a
obtenu
Ia
juste
tension
lorsque
en
appuyant
avec
Ia
main
au
centre
de
Ia
partie
libre
Ia
plus longue,
Ia
courroieflechitde
10-15
mm.
3.
Centrer
Ia
tete
de
Ia
machine
de
fa9on
a
ce
que
Ia
courroie
soit
perpendiculaire
aux axes des poulies,
c'esh3-dire
qu'elle
travaille
au
centre
de leur gorge.
Pour
cela agir sur
les
goupilles
de
soutien
de
Ia
tete, en
ayant
soin de
bloquer
successivement
les
ecrous.
From the library of Superior Sewing Machine & Supply LLC - www.supsew.com

Correa (fig. 1-2)
Para
Ia
conexion
motor
cabeza
es
indispensable
emplear una correa
trapezoidal
de
las
dimensiones
indicadas
~~
Ia
fiaura
n.
1.
1_
Montar
la
correa
de
transmision
segun
iiUSlJdUO
en
Ia
iig.
Z
2.
Registrar
Ia
tension
de
Ia
correa
accionando
Ia
juntura
arrastre
motor
para
evitar
que
se
produzcan
deslizamientos, teniendo cuidado de
no
estirarla excesivamente para evitar
sobrecargas
en
los
ejes de
las
poleas y
no comprometer
Ia
duracion de
Ia
correa misma.
Se
obtiene
Ia
exacta
tension cuando presionando con
Ia
mano
en
el
centro del punto Iibre mas
largo,
se
verifica una flecha, o sea, un
aflojamiento de
Ia
correa de 10-15
mm.
3. Nivelar
Ia
cabeza de
Ia
maquina a fin
de que
Ia
correa
se
halle sabre
el
Plano normal de
los
ejes de
las
poleas,
o sea, trabaje
en
el
centro de sus
gargantas.
Para
esta operacion
accionar sabre
los
per
nos
de sosten de
Ia
cabeza.
belt
section
belt
guard
Zah
nriemen-
Schu
tzgehause
couvercle
de
protection
de
Ia
courroie
tapa protecci6n correa
Ouerschnitt
des
Zahnriemens
section
de
Ia
courroie
seccion
correa
19
From the library of Superior Sewing Machine & Supply LLC - www.supsew.com
This manual suits for next models
1
Table of contents
