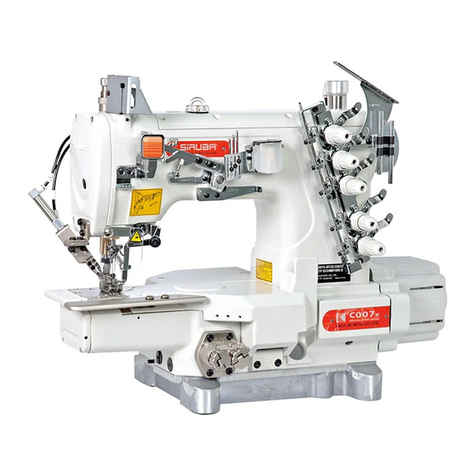
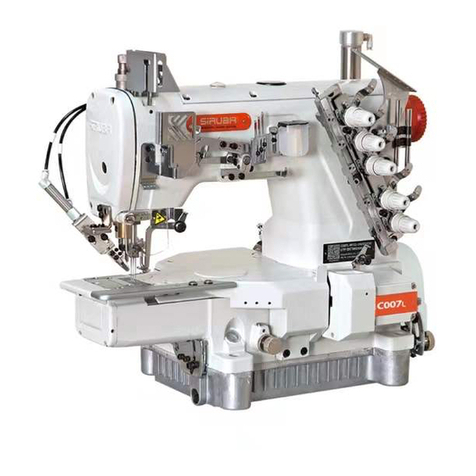
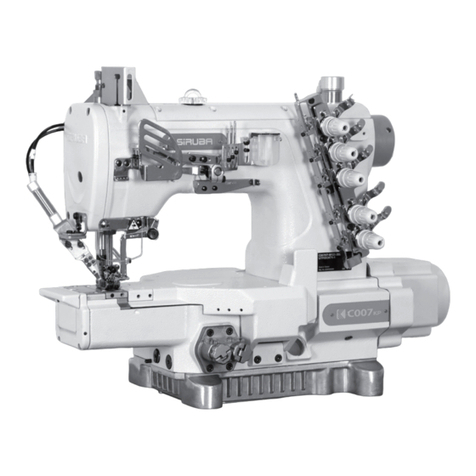
Siruba VC008 VSQ User manual

'flm~a~il
INSTRUCTION BOOK
C€
vcooa
VSQ/VSM
f/41
e
R~Jili£\JiiJimflaJ
~
KAULIN
MFG
.
CO
..
LTD.
From the library of: Superior Sewing Machine & Supply LLC

EC DECLARATION
OF
CONFORMITY
According to the following European Directive
EC
Machinery Directives:89/392/EEC (as amended by 89/368, 93/44 and
93/68/EEC).
The
undersigned,
ROBERT TSAI, representing KAULIN MFG. CO..
LTD.
11
F,
No.128,
Sec.3,
Minsheng
East Road,
Songshan
District, Taipei, Taiwan, ROC., manufacturer,
Declares
that
the
machine
described
hereafter:
Cylinder Bed Multineedle
Double Chainstitch Machine
Model:VC008NSQNSM
Provided
that
it
is used and maintained in
accordance
with
the
generally
accepted
codes
of
good
practice
and
the
recommendations
of
the
instructions
manual, meets
the
essential
safetyand health
requirements
of
the
Machinery Directive.
For
the
most
specific
risks
of
the
machine, safety
and
compliance
with
the
essential
requirements
of
the
Directive has been based on elements
of
IEC 204-3-1:1988: Electrical
equipment
of
industrial
machine-
particular
requirement
for
sewing
machines, units
and
systems, and
of
EN
60335-2-28: 1990: Safety
of
housed
hold
and
similar
electrical
appliances- Particular requirements
for
sewing
machines.
The
compliance
of
the
model
with
the
requirements
of
EC Machinery Directivewas
established
by
AIB-VINCOTTE Inter n.f.p. Avenue A. Drouart 27-29, B 1160, Brussels,
Belgium (Notified
body
under
the
number
26
for
machinery
listed in annex IV
of
EC
Machinery Directive).
Date: Mar/01/2008
Signature:
~
~
Qualification:
R&D
MANAGER
From the library of: Superior Sewing Machine & Supply LLC

運動部位,謹防工傷事故
Moving part, beware of industrial accident
高壓部位,謹防觸電事故
High voltage, beware of electric shock
高溫部位,謹防燙傷事故
High temperature, beware of burns
禁止 Prohibited
地線的接線表示
Indication of ground wiring
指示標幟
Instruction Label
警告圖案表示
Warning Sign
From the library of: Superior Sewing Machine & Supply LLC

I
'---
-
----
~~
-
---
-
---
--
--
~-
~
--
~-
~
- --
-----
---
-------
-
--
---
-
~~--
-
1
i
-tiil::i:$llmlB.ij
GENERAL SAFETYINSTRUCTIONS
i_
_________
- - -
--
- -
--
- - - -
~ ~
-
---
--
- -
--------
~
- - - --
-----
~
-
---
--
-
------
-
-
-
-
~--
-----
- -
•a:.r
-!!:!
woomm~*B·~~~~m~•§•m
~~~--x~----~~MA~~~
fSLIIJ)
0
ty,
~
.J..~
~51-·Jji
0
~~~~~*BZ~·~M~M~N~~
.§.ii~2~/D-
0
1. iiMifFtiJifiSI)I
iiiL~liiJUijftT*tB~Im:~
o
2.
:ffii
fFtaPfi•i.l
~•••~~m*z~-~a•••~~
n~~-~~MOOffl~~ftAo~~I~
tflJifi
~~--
o
-~~I
~X~eXSfl:fBMl
~~~{ffflfljliiAo
3.
~~n••fl•
~~&·~-~-~~~~~OO
o
~:
'ffll '
~-~·
•
.J..~:&~/.lJl)
4.
~fi···ili
::f-ii~~~111IA~:mgi$'if*i
5.
ill'
13(]!
••
::f~9WXR~~eX9·~•·m~~~
Z~W#~~ffiW~fB~o~-5·~~
ty,~~-0
6.
1'~if·~~··
~::f~m••~~~••·~~~~~~
~--*~~-•ooo••~-~~-~
nsx~~a~&•
o
7.
··~--~~
~~m~*~~~~~~~~~~~o~
~~~IAffl··~~~M~~·R~ffl
~~~MtJB.JB~tla:
o
-1-
Warning!
When using this machine, basicsafety
precautionsshould always be followed
to
reduce the riskof fire,electric shockand
personal injury, including the followings.
Read all these instructionsbefore
operating this product and save these
instructions.
1.
Keep
work
areaclean
Cluttered areas and benchesinvite
injuries.
2.
Consider
work
areaenvironment
Do not expose powerto rain.
Do
not use
machinetools in
damp
or wet locations.
Keepwork areawell lit.
Do not use powertools where there is risk
to
cause any fire
or
explosion.
3. Guard
against
electric
shock
Avoid
body
contactwith earthed
or
grounded surfaces
(e
.g. Pipes,radiators,
ranges refrigerators.)
4.
Keep
children
away
Do not let children touch the tool or
extension code.
5.
Dress
properly
Do not wear looseclothing or jewelry, they
can becaughtin moving parts. Wear
protecting haircovering to contain long
hair.
6. Do
not
abuse
the
cord
Nevercarry the machine
by
cord
or
yank
it
to disconnect
it
from thesocket. Keep the
cord away from heat, oil, and sharp
edges.
7.
Maintain machine
with
care
Followinstructions for lubrication and
changing accessories. Inspecttool cord
periodically. If damaged, have
it
repaired
byan authorized service facility.
From the library of: Superior Sewing Machine & Supply LLC

a.
~I
,HI
II
-~~m~B~~--~-~~~~~~
~0
9.
lt
St
ll
ltltJ
~-~~mWM~tiH.LZ~··~
MBmA·~
~I
Ao·~~m•zM·
tlii~IIIJ!IIIM~o
10
....
. . . fl:
t±il
-
"!PflmBAzitiJ
·
lllii'J\~~
1!f
~
W~-~~-
~
~~9G~aBA*W~
Wf.f.1£fiJiJfi~.§.~JlfJifjX}Jfm
o
11. •
i5-
~7tt~*~
m
~~~oo~--~XJJftz
9~
•
t.r
fiiJ
m
f-f
eX
~Ji~
f.f
a{]
ff
m·e
RJ
tm
*
.JifiJ.A.1JW~fBitft
o
12.
Eli**IAJl*tlll
ltA
m~B{J~~I~•5m~~~.A.•
~
m~
~11l
1JU
~
f.HfH'F
-~ o
1.
.R
RJ
~~
·
CE
·~~~((.J~I!~!JJ-·il~
il~ltfto
2.
•q~~m~
~
~
oo
*~-~~••
0
3.
tt~~~@
~
·~~~~--~-~~
tlf!
o
4.
G~--~
~
-f.f-~J!··~·z~·
~~-~~-~m-~~W·~M~
f.E
ffl
···~z9~~1Hli1Jffii5i!Ufi?;W
o
-2-
8. Disconne
ct
machine
When not
in
use, before servicing and
when changing accessories.
9. Avoid
unintentiona
l sta
rt
ing
Do notcarry a plug-in tool with a finger on
the switch. Ensure the power switch is off
when plugging
in
.
1
o.
Check damaged parts
Before further use ofthe too
l,
a guard or
otherpart that
is
damaged should be
carefullychecked
to
determine that
it
will
operate properlyand perform its intended
function.
11
. Warning
The use of any accessory or attachment,
otherthan those recommended
in
this
instr
uc
tion manual, may presenta risk of
pe
rsonal injury.
12. Have
your
tool
repa
ir
ed
by
a qu
alified
person
Repairs should only be carried outby
qualified persons using original spare
parts.
SPECIALWARNING FOR ELECTRIC
CONNECTION!
1. Incorporate thismachineonly with "
CE
"
certificate hold-to-run controldevice.
2.
Followthe instruction manual device to
install control device.
3. Always earth machine appropriately
during operation.
4. Before adjustment, parts change
or
servicing must besureto pull outthe plug
from socket
to
prevent the hazard of
un
intentionally start ofmachine.
From the library of: Superior Sewing Machine & Supply LLC

I
:---
--
-------
-----------
--
--
---------------
---
----
-
--------
-
---
- -
--
-
----
-----------
--- --
--
-
:
·-ie~a:ariiillf.l
IMPORTANT SAFETY
: INSTRUCTIONS
,
____
-
------------
---
-------------
----
-----------
---
--
----------
-----
--------
•••••*M~~7~m~au~
-~--~~~~~~~~~·&~~
~*~OOm~~~ft·OOm~9~~M
~oom~~-·~~-ft~~oom~o
a~•~~m~••~~~~·~~
1Jo
0
2.~mMB~·~7m*~m~~•
9~
'
~i¥1111Jll~Jt1iklilll~~-
0
Jl:t9~
·
~litli1iHii*OOm~a,ij
W·
~
1)!
I!
IU~
RJ
.1-YJI
~
IDl!H!
o
03.
~-~•w~~~-·~~m~~
8·fl·~OOfflMfto
~4
.
~~~H~~~11=.11H~
•
Pfi'Ji~~
fteti!fb1i~flitH·«tQk~PJT~~
~DC11"ffifF:It1'.ftl!f~
·
J.).~
WB.A.ii~11o
Jl:t~tft
11
w
~~•s
mn
t~z
t1
fF
.~t
ti11=
0
1!6
7
~~
·
~f~itil1flH52S~~Da
.0
A 7.
~"f~~~~~·M·~~W~~
.-.&
BJi:
(1)
VttM,
MWJ:t
,
:klJiif~&
J!~~-TP~'
(2)
If!tttt
, tfiiA ,
ttti
·
~A
, m
tt
Jt '
I!IPj\
'
-~-~
•
.1-).&Jt
fik
IW
Jl
ftC
1~
~
o
-3-
For operating safelyand getting the
bestfunctions
of
this machine,you
mustoperate it correctly. Please read
and followthe instructions
of
this
manual, and keep
it
at hand for future
references.
We
are confidentthatyou
will enjoythis machineas much as we
enjoy manufacturing it.
o1. Instead
of
the following ins
tr
uct
ions,
when you use this machine, please
payattention
to
the basicsafety
measures.
~4.
Before usingthis machine,please
read this manual and all related
instructions.
In
addition, please
keep this manual for future needs.
Before using this machine, please
ascertain that
it
conforms with safety
standards and regulations
of
your
country.
When the machine is readyfor
operation, all thesafetyequipments
must be ready.Operatethis machine
withoutthe specified safety devices
is notallowed.
This machinemust be operated bya
properlytrained operator.
Foryourown safety,we suggestyou
wearing goggles.
Please turn
off
the powerswitch
or
disconnect
it
for any oneof the
circumstances ofthe followings :
(1)
When threading needle(s),
adjustingthread Take-up(s),
thread guide(s), andI
or
replacing bobbin(s),
(2)
When replacing needles, presser
feet, needleplates,feed dogs,
needle guards, horns,cloth
guidesand otherparts or
accessories,
From the library of: Superior Sewing Machine & Supply LLC

(3)
*I
fiJI
fF~
o
{4) lllmI
{'J:t;.r:YT~I
1'Ff~AJ5JTM.AW
·~0
(5)
~ue.fflft~HI.f6.iliiMla.J:tit
• ~ ,
~
11-H~
Jlf6
it
~it
i*
.1!:
0
i;
~;pit
iiiUI
Ai
DC
f-F
00
m
;Z
)1ft~
)!linlj,
tiM!IJIUUl
, 8lJifXil1tBi ·
i!li.~IJJ.17.1<$1~$ttlM$lliAiit~
o
~9.
~~M~~-~-~zWf-F~~f-F
}jUi~Mfttljj!~aBrm~
·
J.1~
~B.AA~flo
0 10.
*~•'
~~Ait11Jil~I1'F
·
-EE~
~51'1'A/II*ia9~8ifj~M-¥~z
ott
•~.R~oommJE:z!t1~
0
1<::\
12.
fi-TW14:ftfiJAi1i.I
1'F~~AE8W
\;::,1
~a9ti-TtiBili~z
·
a1ZE8~J:~MR
a9.Aii~1FAimW
· S:W!JiW14:fl
illli
.
illi.~tl~.IJ:flftiiQ
0
1<::\
13.
1£M~~-Ib~5t1!f(@J~ItMHI
\;::,1
fta9M.Ai'filli
f'FiW
•
flfti!ti
~--Ai
7l
-~-~~fi?
J.1111
M
~
ftO!tt
•
~ft~BriitiS1111~11?
J.:!.)tff
lti ·
Ji:t9~U.It&tttm~•.Rft~
83
~ill
iii
'I'
!IIIII
a9
~
Bili
a1Z
M-¥
1\
;Zo
0 14.
mlftfim-~~111
· !lb.:iEJUHI
%.1
0
-4-
{98.
&
(3) When repairing,
(4) When the operatorleavesthe
working place
or
leaves the
machineunattended.
(5) Ifclutch motors without brake
pads
are used, must wait until
the motorstops completely.
Ifgrease, oil, or any fluid contacts
yourskin
or
eyes
by
anychance,
pleasewash the contacted area
completely with clean water and
consulta doctor. Or, swallowany
fluid mistakenly, consulta doctor
immediately.
Do nottouch any functioning parts
and devices. Always attend to
whetherpower switch is on or
off
beforeoperating
in
order
to
prevent
anyone from getting hurts.
O10. Qualified technicians are required
for adjustment, modification, and
repair. Onlyuse assigned parts for
replacement.
{9
11. Routine maintenance and service
must beperformed bywell trained
persons ,
or
qualified technicians.
{9
12. Maintain and checkthe electronic
parts must be done
by
qualified
electrician orwell-trained persons. If
anyelectronic partdamaged or
malfunctioned,
stop
the machine
immediately.
!(;\
13. The airhosehasto bedetached
\:::1
from the machine andthe
compressor
or
air supply has
to
be
cut
off
before repairing and servicing
the machine equipped with
pneumatic parts suchas an
air
cy
linder. Qualified technicians or
well-trained persons are required for
adjustmentand repairs.
0 14.
To
ensure the best performance,
periodicallyclean themachine is
necessary.
From the library of: Superior Sewing Machine & Supply LLC

015.
~00--~~~~~~-~~fi·
11i:tft~l¥tii±t!!..l:·l!ftlt~tt~
t.!~
Illff
a~ni
ill'
ttf'F o
0 16.
i!J~HI.
IY-J•illt~iilt
•
Mli:E
11-T-~
GifiHf1t~~1'±*BJ:
•
13JI9~11!
~1£1ittU~zt~JmJ:
o
(S)
18.
fJ~a2WJ!I!fi~~~003f:~1Jl~
~t~~·~~~mz~~~i(:i:nt
~,
*11~~jf{-fffpJ~kl3
~-~
~WJ!IffiliJT51ie~iiZW
o
(1) liflf1=Aa2.11Ui.AJlZiliJim;
lfi·-&~7it~M•z~Biffl·il
~HOOi.iiiltBmz9~11
.
~~
Jl11~-Hm~iliiZW1*
o
(2)
!.~H!~jjU)ifi*ll
a.
Mli~'ilJtt3!mBl1.fii
·
-¥
1~iiililf.lt~~~~1*fl
,
ii
fi•Htl11=
·
J..1!~.?JJB.A.ft
~·0
b.
li
71t!e
••
ft.{i
,
••
Hil"'f:l
·
?.JHI(J-¥
'
BAll~
~.IH·1.1iiM-¥fit
·
Bl1Nti~
~ij
it
;
Itt
9Hi
~
$
1tl
JiHII1'
QJntmfffiii~~
.
J..1~WD
AR~1'Jo
-5-
o15. In
order
to
operate
properly
and
to
reduce
the
noise,
please
place
the
machine
flat
and level on the
ground
.
Avoid
operating
the
sewing
machine
at
a
noisy
surrounding.
0 16. Select a
proper
power
plug
and
install it by an electrician. Please
connect
the
power
plug
to
a
grounded
receptacle.
(S)
17. This
machine
can
only
be used
for
the
designed
purpose
. Other
uses
of
this
machine
are
not
allowed.
IC\
18. Any
modification
or
conversion
\::::1
made
on
th
is
machine
must
be
conformed
with
the
safety
standards
and regulations. Precaution is
necessary.
No
responsibility
will
our
company
take
for
damages
caused
by
any
modification
or
conversion
of
this
machine
without
perm
ission.
19.
Two
safetywarning
signs
are
appl
i
ed
as
warning
signs:
(1) Forthe safety
of
operators
and
service
persons
, please
don
't
open
the cover
of
any
electronic
control
boxes
of
motor
or
other
devices
and don
't
to
uch
any
components
i
nside
to
avoid
electrical
shock
hazards
.
(2) Always
keep
in
mind:
a. Please never
operate
this
machine
without
belt
cover
,
finger
guard
or
any
safety
dev
ice
to
avoid
physical
injury.
b. Please
keep
your
hair
,
fingers
and
cloths away
from
the
hand
wheel, V
belt
and
motor
while the
machine
is in
operation, as well as never
put
anything
near
these parts,
to
preventthe risk
of
injuries
by
t
angled
in
to
them
.
From the library of: Superior Sewing Machine & Supply LLC

& c.
-1~1JIJD.il.lm
lllfl~41U
& c. Pleasenever putyourfingers
81£iltl~
,
~1'~Hf1~a9
underthe needle(s) or in the
=F1i!r1£tita9l':15~ti·~·
thread take-up coverto
f¥9~§~
•
.1-:i.~WD.A..I.~
prevent physical injuries when
1'Jo
you turn on the powerswitch
oroperatethe machine.
& d.
._81Hi1Q~
·
~Bli~31M
& d. While the machine is in
lh,
~
7ili~~=¥~~iJiie
operation, the hook rotates at
z11w
.
~mHil~1~a9-¥1i
a high speed. Please keep
~
iiiUtmt
1W
itt
oitt
9~
· 'I' your hands awayfrom the
J!~~-Tfti
·
filr:AE-~!mlll
areaof hookto prevent any
Bill
r:1J
•
.1-:i.
!A
8 D
.A.
il
~
1lo potential injuryto yourhands.
In
addition, please make sure
to turn offthe power
of
the
machinewhile changing
bobbins.
&
e.
'i':t&X~;U~ietiBftHi
·
,j,,LJ.
&
e.
Be careful and
do
not
place
~M~~-~ItH~
·
.1-:i.!AW
your fingers insidethe
JfAR~iJo
machinewhen placing or
lifting the machine head to
avoid possible physical
injuries.
&
f.
~
7
il~liB~~lN!iJifi]
iJI
~:g
&
f.
Please turn
off
the power
ilJtmA9~
.
••a111~~3
before tilting the machine
oo
Hl1;tli
ii
~
.l!l
~Hi
. m
11
t•
head or removing the belt
~tft•jjj
·
.1-:i.~WD.A.il~
coverand theV beltto avoid
flo
possible accidentsdueto
abruptstartof this machine.
g. ~
-1~HY.J
II
H
~
li!
.W
firi.J
RIUfij
g.Formachinesequippedservo
it
•
tiH~~.lJ:ff}!fmHi
• ~ motors, the motors
do
not
-~1'·~~11ti[a9·~7
produce noise whilethe
iH~MH~~~IbiffiiJiie~
machinesare atrest.
ttUa9~
·
tdl~lllt~l'!H.
»Jo
Therefore, pleaseturn
off
the
power
of
this machineto
avoid possibleaccidents due
to abrupt startof the machine.
h.
~
7Jt~Mtzm~~t
• mM h. Neveroperatethe sewing
4'~1£3m.l.iHiitMflfl
machine after the groundwire
11=tiW
o is removed to avoid electrical
shockhazards.
-6-
From the library of: Superior Sewing Machine & Supply LLC

i.
~ 7
il$t!ftUI~11-T.W.1!fMfl
ifiF:71
ieziiJ
1m
M
9~
·
!l
$t
+JJ
li
-~
·
iiHiJ:.~t~~MBl
o
~-
~
-
~
-
----
1
~BUall
L-
~7~~-w~•&m•·~~~~~
""'F•JJi=
-~~~~flftfl
'
jiM-;~MH
111'FiW
'
iftllllt$ft5111M
o
~•~11~~
~
5ftz
1!illl&~ mz
)fb~~
0
fit
:AE
fi&!.&.~il~
li
(fl
~
a2.=~)
~
&JEfilo
eta.
fit:AE~HMDn~~a.iEfito
A
-~t~f'FBXir.I·~-~PJf!miiJZ~~
DIM
·
il$t~tlilrRlt~
·
J.1$t!~~
~H~?&INI113ftl£zjj9~
o
-7-
i.
Please turn the power switch
offbeforeconnecting or
disconnecting thepowerplug
to prevent possibleaccidents
dueto electricshock
or
damaged electronic
components.
WARNING
Please confirm the followingsto avoid
malfunction
or
damageto this machine.
C»
1. After installingthe machine, and
beforethe first operation, please
(95.
clean itcompletely.
Clean all
dust
and overflowed oil
during transportation.
Confi
rm
that thevoltage andthe
phase (single or3 phase) ofmotor
are setcorrectl
y.
Confi
rm
that the powerplug is
correctlyconnected
to
the power
supply.
Never usethe machine when the
localvoltage type is differentfrom
themarked voltage on the nametag
attached on the machine.
C»
6. Confirm that the rotating direction of
themachinepulley is correct.
A Warning:
Before doing anyoperation
or
any
adjustmentdescribed later
in
this
manual, please turn the power
off
to
prevent accidents caused byabrupt
startofthe sewing machine.
From the library of: Superior Sewing Machine & Supply LLC

Ⓐ
Ⓑ
Ⓒ
Ⓓ
①
②
③
From the library of: Superior Sewing Machine & Supply LLC

Ⓐ
Ⓑ
Ⓒ
Ⓓ
①
②
③
From the library of: Superior Sewing Machine & Supply LLC

⑦
⑦
①
①
②
③
④
⑤
⑧
⑥
⑨
Ⓔ
Ⓕ
Ⓐ
Ⓑ
Ⓒ
Ⓖ
Ⓐ
Ⓑ
Ⓒ
Ⓓ
From the library of: Superior Sewing Machine & Supply LLC

⑦
⑦
①
①
②
③
④
⑤
⑧
⑥
⑨
Ⓔ
Ⓕ
Ⓐ
Ⓑ
Ⓒ
Ⓖ
Ⓐ
Ⓑ
Ⓒ
Ⓓ
From the library of: Superior Sewing Machine & Supply LLC

I
·---
---
--
-
-----------------
- -- -- --
-----
-
----
- - - - -- --
-------------
- --
----------
---
--
-
-----)
~M:M
ta:o~a
N-~~~~
ADJUST THE ORNAMENTAL I
=1Dtii1PHKm4FFR~11P1
PUSHING ROD !
---
--
---
--
-
-----
- -
-----
-
---
---
~-
-------
~
~--
----
-----
- - - -
----
- -
_____
_ J
1. 1:
1'7!11-!i
,,
>
~••u•n~~~<DJlimWtt~ooB9
8EIUlHili13-15
mm
• flli!R!I!IM®
(1116)
(2)
:it•J:&«tfl!XB9.tftififl~@
· ~
00
1fU~
1'
a~
~ijl
Ji
00
J:
a
~0.
2 m
mf.J
110
~~~~-~~D·~•w~aoo••
·
Rifli*litfU~@B<Jpqil~W~9~it\ll!6
1.
5- 2. 0
mm
(1117)
(3)
'l:~tfli·tt~pqil!JaM~&t~A~ti&
•~tt~•~••*•~~·~m••
8M®~J.1~(?)1lLKOO.trfiMtt~ft
ti~~
~rm
lt'i-~
l1i.l
CftPlflrra=b)fl~m
SUI**®
(118)
(4)
~RtfUitt~~~i!i11£1'·a~
·
~~
~11SI**®1l~~ifliMW~Ji1i~fg
0. 2
mmlHl~tf~ltiUII**®
o (118)
(5)
~Jf;~J:~trUitt~©
· ® •
®:tt~
~-@~-15
·
~~~ffU~!!e"iiJ~I
lbMfi
·
J:l'~fdl1'~•fl:t:::k
o
-12-
1.
Adjustthe height
(1} Adjustthe distanceto 13-15 mm
between thebottom surface of
Ornamental pushing rod base(f) and
needleplate surface. Then please
tighten the
screw®.(Fig
.
6)
(2}
Assemblethe lowest ornamental
pushing rod@ and makethe
gap
0.2 mm between thebottom surface
of
ornamental pushing rod and the
upper
surface
of
presser foot. So it can move
smoothlyand nothave friction with the
presserfoot. Bythe way, the distance
between ornamental pushing rod@
inner side and needleouter side is
1.5
mm-2.0
mm. (Fig.
7)
(3) When the lineof ornamental pushing
rod inner sideandthe line between
right and leftneedle of needleclamp
is
Parallel,please loosen the
screw®
and adjustthe base(?) in order to make
thedistance between ornamental
Pushing rod and leftor right needle be
thesame (It means parallel
a=
b). Then
please tightenthe
screw®
. (Fig.B}
(4)
When the ornamental pushing rod is
notflat,pleaseadjustthe two
screws®
in
orderto keep thedifference
in
0.2
mm
between the ornamental
pushing rod and presser foot. Then
please tighten the
screws®.(F
ig.
B)
(5)
Assemblethe ornamental pushing rod
in
sequence©,®
. ® . Followthe key
pointto assemble@.Please make sure
if the rods can be moved fluently.The
friction between upperand lower rods
should be small.
From the library of: Superior Sewing Machine & Supply LLC

2.
li:6"'fi'LI(ID~It
(1)
Qlh-¥M~-iffii4U1U¥®Ui3~ti:9t
l!i~
·
illt~IUftiiit1U$@1Y-JfJLK
·
fie
Alitt&t~lf~®;Zti:iiM51liMJt~
,iJ.
·
fJlll©(ID'I'JLX
·
00ft:6"ttti~!t
~©z:6"iiM5illQ1l~,iJ.(II9)
(2)
MQih-¥M~Rifti·!l~®ill3~:6"
9E~
·
lkt~&:6"ttfJ!~@~iiM4ii
*ilL~,iJ.
o A.tiil!M©.tijiM4imli1L
~~CJ.'
~·10o
(3)
Q11J=FMfl~tmltm~®U'l3?£li9E
&at
, =J'liUfUifft
"®(ID
tii
,
ue
etr.
tttt
~
li
~®ztf.il
m2m•1L
~,LJ.
0
a~®(IDm•
.
~•~tttt~
ti$®z~ilm21ISJ=L~,e;..
tmll
11
0
(4)
Mti11J=FMueliUfti*ifft~®flL3?£~
JE~
,
JJ:tatA:s-ttm~®tr.J:s-ilm
211J*IJ=L~,LJ.
o
Atftt®m~tEiiM
2i[iMJ=L~/iJ.
I
~-12o
(5)
•aQib-¥ta~~iftiMt1U~®
, ® ,
©-®3R~~A-ft
·~qft~ti
~-~··Rtr.J~~o-tftf"~tf~
MAB(]~,iJ.
·
~115
o
tt=~q·•~•m•&~~~~•
iitl~(IDHE.r~so
mm
•
~11113
o
-13-
2.
The adjustmentof horizontal movement
(1)
Turn
the hand wheel
to
movethe
spreader
of
decorativethread@ to the
leftdead point. Adjust the spreader
of
decorativethread for letting the left
needle point to aim at thecentral ofthe
5th thread hole
of@
from the leftside.
Adjust©
position to leftand right needle
point
to
aim at the central
of
the 5th hole
of
©.(Fig.9)
(2)
Turn
the handwheel till the thread
spreader@ moveto the right dead
point.For the time being, theright
needle is positionedatthecentral of the
4th holeon the right side
of@.
The left
needle is positionedatthecentral of the
4th holeon the left side
of©.
(F
i
g.1
0)
(3)
Turn
the hand wheel tomove the
spreader
of
decorative
thread®
to the
leftdead point and adjustthe position
of®
for
lettingthe left needle point aim
atthe central
of
the 2nd hole on the left
side. (Fig.11)
(4)
Turn
the hand wheel tomove the
spreaderofdecorative
thread®
to the
right dead pointand for the time being,
theright needle is positioned atthe
central ofthe 2nd right hole. The left
needle is positioned at the central ofthe
2nd left hol
e.
(Fig.12)
(5)
Turn
the hand wheel tomove the thread
ofdecorative
thread®,®,©
and@
f
or
having the holes on them to be
complied each other. Forthe time
being,the right needle point is
positioned atthe central
of
the right
hole.The left needlepoint is positioned
atthe central
of
the left hole. (Fig.5)
Remarks: The distance is50
mm
between the holder
edge
of
decorativethread and two
side. (Fig.13)
From the library of: Superior Sewing Machine & Supply LLC

1.
5""2.
Omm
0.
2mm
l /
117
/Fig.?
c
..
) ! I I I • ' • '
'.
iu'
n
\
D
III9/Fig.9
\
B
II11/Fig.11
50
I. •I
p-
n-
I
~
(
I
'"
'
~
@@
I
~
~
u
I
-14-
@
0 '\
..
I•
D
I
B
IIJ8/Fig.8
c
i i i $ I # •
•••
~
•
--I
111
0/Fi
g.1
0
-.t
II12/Fig.12
50
.I
I
~
~
I
~
~
ii13/Fig.13
From the library of: Superior Sewing Machine & Supply LLC

ttiti
,
tt~~ttrdJPJ,
~m
, 51tt
~
'
till*~
'
~JJUii~.:ZM.41iiiJ
VS
M16.1-
6:
It.
U1
!I
M!
Bij
THE HEIGHTOF NEEDLE, GAP
BETWEEN THE NEEDLE AND
LOOPER, TIMING, NEEDLE
GUIDER, WIPER AND THE
THREAD TAKE UP IS TO BE
ADJUSTED ON VSM AS SAME
AS OTHER NORMALMODEL
,----
-----
----- -- -
-------
----
----- -- --
---
-
---------
--
--
-- -- --
-------
-
----
- -- -- --
---
- -- --
1
VSQM.*Ill.l!l
ADJUST VSQ GAUGE SET
[_
_______________________
_
_________
-----------------------------------------
-
---
1. i!AGIY-Jjiijfi
H~
~Jltl
9{]
iS
JIJillt~
at~
ii
®iS1-
1.2
mm(ll14)
2.
tttfiliJla{J~~
tt•iSm~·-tiL*~AiS~~·ti~
~tt~ili@
;Z8,Eft12.3
mm
(1115)
n.ma~:
(1)
tii1J-=FM-fitt•mMfiiS~
·
~fiE
fmf!llEtitfi¥-Jfll**®
<
2)
••
ttff
CD~
J:J!&
rdl
~
JUR
R
!Ill
*i®
·
~-~flilliHI~
•
'l'titfl!f~il
ii~!eytf"JllttltlL~'~
o (1116)
a=
tlJilUIU1ft
It.®
:
(1)
~~at~M!I:M®~J.Y.~ilt~SI!
1.13~
••
5111)
~
0
<~•~eytt~•aM®~~*ro~••
:J:J3~·MS1'P*1
o
(11116)
-15-
1.
The
height
of
Feed
Dog
:
Adjust
the
feed
dog
till its
tip
is 1-1.2
mm
higher
than
the
needle
plate's
surface@.
(Fig.14)
2.
Adjust
the
height
of
the
Needle
Bar
:
The
needle
bar's
heigh
t is: when
the
needle
rise
to
their
highest
position,
the
clearance
between
the
needles'
tips
and
the
needle
plate's
surface@
should
be
12.3
mm
(Fig.15)
Pl
ease
do
the
adjustment
as
following
:
(1) Rotate
the
hand
wheel
to
move
the
needle
bar
to
the
highest
position
,
and
then
loosen
t
he
fix
i
ng
screw®
of
needle
bar.
(2)
Adjust
the
needle
bareD till
the
clearance
is
as
advised
above,
then
Note:
tighten
screw®.
When fi
nishing
the
adjustment,
please
reconfirm
that
"when
the
needle
bar
moves
to
the
lowes
t
position,
the
needle
shou
ld
be
in
the
center
of
the
needle
plate's
hole
.
(Fig.16)
Regarding
presser
foot
tension
spring®
:
(1)
Adjusting
screw®
counter
clockwise
can
reduce
the
spring
tension
. It
will
apply
to
sewing
li
ght
materials
.
(2)
Adjusting
screw®
clockwise
can
increase
the
spring
tension.
It will
apply
to
sew
i
ng
heavy. (Fig.16)
From the library of: Superior Sewing Machine & Supply LLC

③
②①
Ⓐ
ⒸⒷ
Ⓐ
①
From the library of: Superior Sewing Machine & Supply LLC
This manual suits for next models
1
Table of contents
Other Siruba Sewing Machine manuals

Siruba
Siruba C007K User manual

Siruba
Siruba VC008B User manual

Siruba
Siruba C007KD User manual

Siruba
Siruba ACS200 User manual

Siruba
Siruba C007L User manual

Siruba
Siruba DT828L User manual

Siruba
Siruba 700KS-LFD6-K1 User manual

Siruba
Siruba 700KS User manual

Siruba
Siruba NC008 User manual

Siruba
Siruba VC008A User manual

Siruba
Siruba HSM-2517 User manual

Siruba
Siruba AA-6 User manual

Siruba
Siruba C007K User manual

Siruba
Siruba 700DFT User manual

Siruba
Siruba ASV-ATS100 User manual

Siruba
Siruba D007R User manual

Siruba
Siruba T828-TP Datasheet

Siruba
Siruba 700F User manual

Siruba
Siruba DL7200 User manual

Siruba
Siruba DL7200D-NM1 User manual