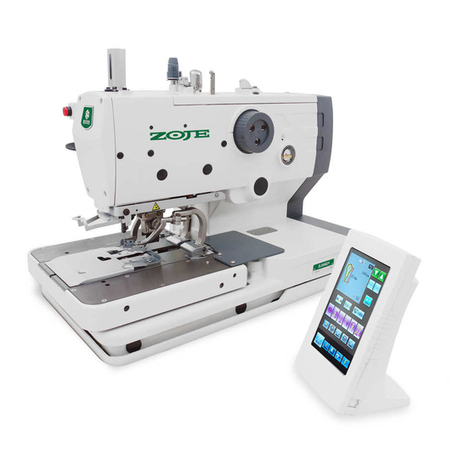
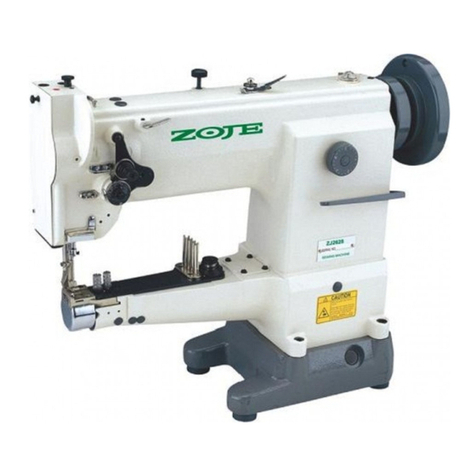
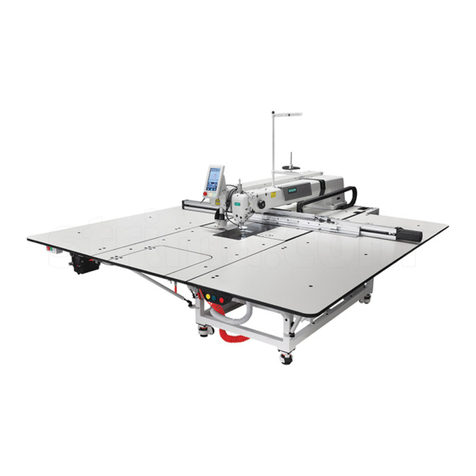
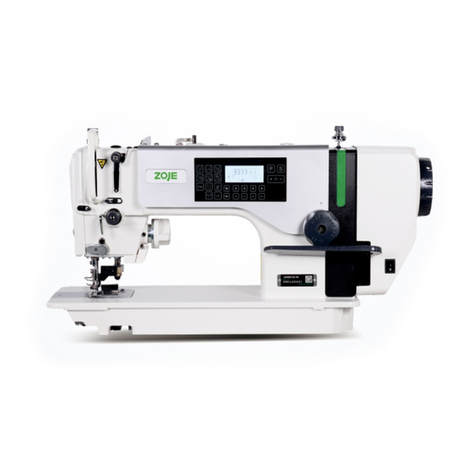
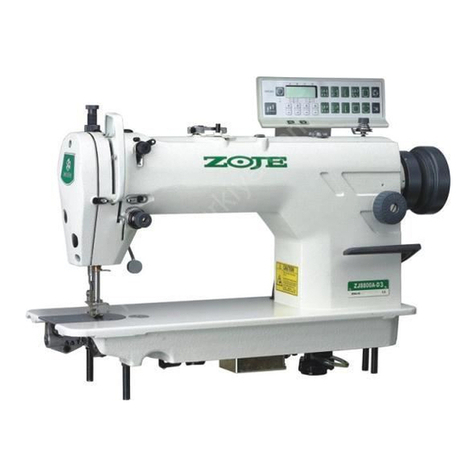
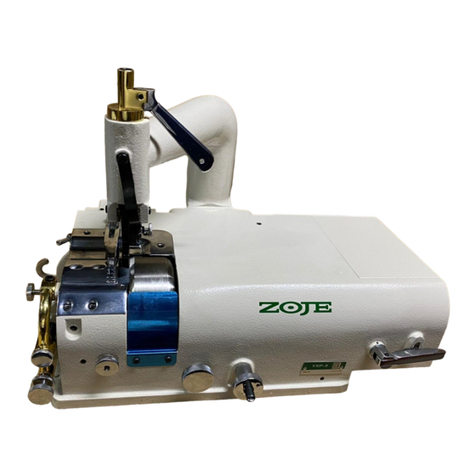
ZOJE ZJ20U93 User manual

AUTO-OIL FILLED ZIGZAG SEWING MACHINE
flmma_ij~
OPERATION
MANUAL
'11**¥*
PARTS
BOOK
llllll·lllJiiUil
!fl
m
ft2
fR
fEi
BIJ
~
61
ZOJE
SEWING
MACHINE
CO
.. L
TO
.
From the library of: Superior Sewing Machine & Supply LLC

-,
J@"iZi!
••••••••••••••••••
oooooooooo••••••••
ooooooooooooooooooo
o
ooooooooooooooooooooooooooooooooooooooooo•······
1
_,
~
~ti
ff'-Ij)i
...
.
0.
0
•••••••••••••••••••••••
0
••••
•
•••••••
•
••
0
•••
0 0
••••••••••
0
••••••••••••••••••
0
•••••••••
1
_,
tli'FM
aq
1t
~
.-Ijij'
....
.
...
o
•••••••••••••••••••
••
•••••••••••••••••••••••••••••••••••••••••••••••
•
••••••
1
fJl
Ha-g
ililii
..
.ooo0 • • •
••••••••
oo
....................
.
.........
•
.....
oo
.....
o
...
o.
o
••..
oo
......
o
........
o0 0 0 l
tt~~~m
..................................................
.
..
0 0 •
•••••
0
••
0
•••••••••••••••••••••••••••••
0 2
'f::;.,if1ttt~3t-········•
00000
••••••·•································•o••················•••o•••············•ooo
2.
--t,
htt'ff··········••••o•••••••••••••••••oooooooo••••···················
··
····························•o••••••
l
)"',
~~·t,t:tt
.................
o•••····
·
················•ooooooooooo
o
oo•••••••
·
·················••oooooooooooooooooo
2
ft,
~,c_,~~-·········
· · ·
············································
··
·················•••ooooooo•••••····
3
+'
JJW~·······••o••••••••o••···
···· ····
oo
ootOOttooootoottt
JO
OOO
t
toooooooooooooooooootoo••············••••ooo
3
+-,
t;l~-tE:Jla9i}!)~
.
..
............
oooooo••••••···············
·
····
···
··
··
········
·
···················
·
····
4
+=
...
ffiiJtllffijJag~~·························
·
···········································•
0
••··············
4
+
.=,
oo~~~::tJa9~;;-
..
o
....•••......................•
.
....•.......
o.o···
0
•••••••••
000
···············o··
4
+IZ!I,~t~•~*1.1&fr~tt:JiP-l~
..............................
.
.........................................
s
+
.li'
If£
t:l
~
jJ
iJiJ
-;;-
0 0
••••
0
•••••••••••••
0
•••
0
••••••••
0
•••••••••••••
•
••••••
0 • • • • • • • • • • • • • • • • • • • • • • • • • • • • • • • • 5
+~
...
ttm.~~~
..............
o••••········••••o••······················
-·
···•ooooo•••··························
5
+-t'
-tt
!e(J!P
iltt
~.§[
)~i}l];;
.....................
..
········••ooooooooooooooooooo•·••••••••o••••••
6
+
)"',
tll.~-ftiJ.*jfB:M:~ii!J':;J'
·•••o••····························
·
····
··
·····································
6
+n
"'
a-m:aag:iie~·········o········
·
·····
·
·····················
·
···
·
·····
·
·······
·
·······················
6
=+'
-~$1*~~~.....................................
.
........................................
..
....
7
=+-,
Jl..f!'~~:n;t~llffi!ftt:J~Jil
...................
.
.............................................
7
=+
=,
tllHIY:J~i?
...........................................
.
..............................................
9
-+-
--
.=.,
±.~tt*~~····••o••························•o•••••····
··
················•o••••••••••••o••••••
9
- I -
From the library of: Superior Sewing Machine & Supply LLC

CONTENTS
1. Applic.
ation
....•.......•.••.••••••••.•••••••••••.•••.•.••.•.•••.••.•.••••.....•.....•.•.•••.•......••.•••••••.
2.
Secure
operat
io
n........................................
...........
.
................................
.
....
1
3.
Caut
ion
befoe
op
eration..........................................................
.
....................
1
4.
Lubr
ication
••
.•
••.•....•••......•••..•••.••......••••..••.•.••••...•..••...................••.......••.••.•• 1
5.
Se
lection
of
needle
and
t.hread................................................................... 2
6.
I
nserting
of
n
ee
d
l...........
...........................................................
...
................
2
7. Replacing
bobbin
.................._
.,
....................................•.........•....................• 2
8.
Tbread
the bobbin case.......................•...................••...............•..........
•.
.•..•• 2
9.
The insta
ll
ation of
the
bobbin
..................................................................... 3
I0.
Thread
surface stitches.............................................................................. 3
11
. Adjustiog
stitch
length............................................................................. 4
12. Adjusting presser foot press
ur
e................................................................. 4
13. Adjusting needle
thread
tension................................................................ 4
14.
Regulate
the
length
and
tendion
of
take
-
up
spring..........
..
.
..
............... 5
15.
Adjust
bobbin
thread
tendion
...................•...........•..................•..........•.... 5
16.
Adju
.
st
needle position........................................._••••.•••.•.....•..
••.
•••..•••••••••••
5
17.
The
ad
justment
of
horizontal distaoce...................................................... 6
18.
To
mount
thread
uowinder........................................................................ 6
19. Assemblage
of
belt cover.................•................•...................•................... 6
20.
Mont
knee
lifter....................................................................................... 7
2l.
Modes
of
seve
ral
sew
ing
stitch
and
application
of
accessory................... 7
22.
Maintain
of
ma
chine
.......
.
...............
.
...............................
..
...................
..
...
9
23.
I\
1
ain
specification..................................................................................... 9
-
n-
From the library of: Superior Sewing Machine & Supply LLC

-,
I'll~
I
APPU:CATIO~
iJE~Li~Rlfl!Q~~-
II<J:JIJ~.
¥.li11l.
't
rll.
~!!~
~M.
~-~~~~~
-
~~-§~aR~.
!i<lll
7
iilim
!1t
lfJln.
H
IV
~fll'fl
~~IJ$~J'JIIIllill4l
~
~ T
~41<
i
!HH~tl~~~~i!
.
This
series of :rigzag
sew
ing machine
is
used to
zigzag, embroidery
and
lockstitch
on
thin. n•wdiun
and thick material f
or
garment, bed articles, shoes.
towels
and
waU
carpet.
Ex
tra acc
ur
ate mechanical transmission and
knee-
control
.wing
range
unit
asaue
many
kinds
or
perlect
embroidery stitch.
=,
:rt:i:lii'F·~
2.
SECURE
OPERATIO~
I.
Ji
ft!A
9Uli~;&
~lftiJIHHfiSifRJ
\J~
~ffl
i$1.19l~Jfi.
1ilifM;
2.8!1ftln.IIIH,
'l<i:~~,e.i>ji~l§~~;
3.~~~lilllifllf!!:
(
~u
:
tJL
tt.
JJi
,
llll,
#!!f.
illl'f.!f
fiJI!!<.>~
). ~
tl,
i:IH
G:.l:X
ll
ft:
A~
1£
i~Ul
.(!If,
£.i>ji
~
I'll
<1!.
Jil
*
~
ii!Z
wr It!tit
liti
!J..
:
4
.Vt
~!i'J!ltJ.
~l'l~
:X:
ft'.e>ll!II'V!II:tt;t:AJAilt
ti
;
L)
Th
e operator should
be
rtained. and U!'l
de
i$Wld
this manual \'ery well before operating.
2)
All security equipemnts should be
ILxed
very
'\\'ell while
running
the machine.
3)
Tu
rn
off the
DOWer
or
draw tile l)o
wer
of
f.
while urlfi:dg soe
aooe600r'.es
(like
.-!le.
prtSSet
fooL
needle plate,
feed
d
og
and
bobbin sase). winding
thread
and
no
operator
is
at
the workplace maintalning
the machine.
4) Maintenance
and
adjustment of the machine
should
be
carried
by
professional teChnician
5)
Th
e electricity equipment should
be
managed
by
managed
by
wireman
or
ptolessional technician•
.=..tti'FlllJtl9it~-~
3.
CAUTION
BEFOE
OPERA
TIO:\
.l!Ji!Stlil8
~~~~.
£•jjj
iVl
Jltt~l'
Jll$Jl;
1.
1t
IX
~rn~~".
&Mi
twI
ll<
ill~
.
'i'
Mr
1Jilm:
t~
E'll.~~~
~~$.
~~W~~
N~~:
l.
J:.
~-)j!·~-fll~;lj
(ll]
~ft
.
To
avoid
the
damage o!
madtine.
don care
of
the
!ollowinJI:
.
1.
1)
Please clean
the
machine thoroughly,
add
enough
oil belore first
usa11e.
2)
Check
the
normal
cy
of voltage
connecting
oil
be
fore first
usage.
3)
The upper
wh
eel
should rotate in the d.irec'Jon
facing
the
operator.
11!1
'
til
R
tt.J
iii!
if(
Ill I ' 2 )
~
.
L
U
BRICA
TION
(flg
.l,l)
!.
13
:/fVI.:'h.
tloJii!IJt~WIIlil!lx
HIGH
iC't~
(!Ill).
l.~il!llliflf::f
ADD
OIL
iC
~".
~lli.IIIJilllt(l'!ll).
3.!XJ
~
.fi.
*llllVI.l!J,
J!i
'lfi!il
llllilll
it~
~!!U~llll11!
A.
ili.LJil
ifil!It
iUWE
3),
4./jf
JI1
iltJili!.li
38
C li't, f&gfJ(; 20.0mm/s.
1'£
1S
'C
1J.t.
t(<Jjt)\7
O.
SSS
g/
m,
ll!\i£~11ll8
ol}llb.
I).Tum Over the machine head.
Pout
the
oU
into
the oil pan
tu
the
"HIGH" marks.
2).
\\hiJe
the
oU
is llowr
than
·ADD
OIL·.
please
po
ru
the n
ew
oil into the oil pan.
3).
Tun on the
m&.hine
a!'.er pouting
oiJJf
the
oil
SPiaCh
on
the
oil window A. freauemly, the lubrication
is goodorder.
4).The >iscosity
the
used oil o!
sh
ould
be
20.
oomm/ s when tile oil temperature is
3S'C.
Tile
denSily
or
the
used
oil should
be
0.88Sg/m
when the oil temperature is 15'C.
We suggest
that
you should use
No.I&
wb.ite
oU.
HIGE
I~Fig
l
l'f!Fig
.l
From the library of: Superior Sewing Machine & Supply LLC

1i.
H~((.J~ill
S.
S
£LECTI
ON
OF
~EtDL£
AN
D THREAD
Mll!
::r-lll!SU4.
ailtlll
m
e{r
i41'fJin.
tt·
&
111~.
1ft!
~~IRI:t<
1:
it<
1
iil!l~!l!!
fit+
'l'~tt
)q:
*+
~UIItt~
120
60
30
lll.tt.k'T #12-
116
*!8
-#19
(1/lOOmm) #10 (8Q-l00) (110-120)
mtl
~1lf
l910-05(135x9)
nJIII
:lt
It~
!lUll~
l'fJ
tt~
Select the apropriate
thre
ad
and needle
aceording to the different sewing material as
following:
Applicable
ltiJld
Thin
~12<lium
hea;-y
Hea>-y
of
w:etial
rntttrial
material
Max
si2e
of
l20
60
30
thread
Needle size #12-
116
tl8-1!19
(1/IOOmm)
#10
(80-100)
(1
10-120)
1\eedle
type
191Q-0
5(
135x9)
Other equal suitable si2e thread usable.
,\
,
t'ltt((.J:it~(~
3)
6. TNS£RT1
:-JG
OF
N
EE
DL(Fig.3)
00
Fig.3
et~.J:tetfttff
.J:"'fUU~IU
i
,
I*:Tf~tt~flol
!UTI
, f.lin.ttWi!ii'lJlili.
*ffJiiilul~fl!.fl,
t~Fa.
f'i'
~:llt61ilt
r
1,
Turning the hand wheel and raise the needle
bar
to
the
highest position. then loose
the
needle
rightening
screw
1.
Insert the
needle
in
the
needle
bar
and
push
it
up as far as
it
will
go.
-
2·
Make
sure its long groove faces toward the
front.
Tighten
needle
set
screw
I securely.
-t;, d
•L)
lf
(IIJ
4, Ill
5)
7.REPL
AC
1:-<G
BOBBIN
C
ASE
(Fig.4,
S)
.
II!Fig.4
3 4
00Fig.5
tt!fiH!!
nit
I.
1!jl
UJlf,(
lfi~·Nf
2.
~.J:~·D15D<t,
~*9G~:Tftf<f1iR
I,
f.U.i4)~tilt
A~~•2.t..~~~~~f13~~*~~~4mm
{i'.
~ffl~~~nm.
~~~~*.l:·
N~.J:~
~
.
Raise latch
!.
then pick out the bobbin case2.
Open
bed
slide I
and
lay
the
r.ase
on the case
Sthatt
2,
while the
case
hook
3 fit location channel
4.
then down the bed slide
and
press the case
and
push
the plate.
Jl.,
~Ah:-tl
8.
THREAD THE
BOBBIN
CASE
l.
ti
'
Hl
'f:E.J:It,
:6'
'f
:r.f
Ill
ftiUUJ
<D411
A1i
iOJ
$t~tHf.
2.
~~-t,.gMUil!S~al.
J1.1!Tfii!JI!!I1ir.
ffi~
L~~~~*~
..J:~~•~a+n~~~-~~~
~ttx.
M-
ntol
ftilllat.
*~f.l-'J'.
3.
11<::1!1.
c
ntaJJ!U~tJ<
:Il!:!/4~.ffil!i
a>.
~!66:
~m_a~~.
!!l~~~B:Htolll!Ut
.
lll:il!l'\1ll.C•.J:i!C.J~
t.t
~,
S'ea:ltci!\1
~
ilit!U.UT
®.
taJ
ltili:I!:H
ttl
ft
i\fJi!\1
'1'1
From the library of: Superior Sewing Machine & Supply LLC

!E:fli.
t'ttl-'l:r..~:P.
Ji.:t,
tH~
:
;t;l:r..Jt!ho
.
iii.J~f.i.
it
~
il!ll'i
JJi
:f1i
~
~
.
4-m*t't~~~~.
~~~~®.
~r~~~*
tli
a>f!l!~
~~l~.
1'1.\f.i
liUUUT
®.
I).St
op
motion of needle
by
o
Use
ning
stop
-
motion screw (
1)
. Hold hand wheel with left hand
and
tum
stop-motion screw toward you
"IVith
right
hand.
2).Place bobbin
on
bobbin winder spindle
(3),
pushing
it
on
as far as
it
will go.
Pre-tension (IJ
+
......
More tension.
-......
Less
tension.
3).Push larch (
2)
in the direction inwcated
by
arrow
(A),
th
en
start
the
machine.
Bobbin winder spindle
(3
) rotates in the direstion
indicated
by
arrow
(B
).
To adjust
the
amount
if
thread
on
bobbin,
looen screw (
4)
on latch {
2)
and swing the latch
(2)
and
swing
the
l
atch
(
2)
away
from
you
of
toward you, as required.
4
).
for
more thread on bobbin, swing latch
(2)
away from you.
For less thread on bobbin,
swing
latch (2)
toward you,
if
thread
"'inds
unevenly on bobbin,
loosen screw
(5)
and
move pre-tension (
6)
'
.lll
or
down,
as
required,
an
d tighten screw (5
).
J!l
Fig.6
;h..
~·
t>~~~(
J!l7
.
8,
9,
10)
9.
THE
I
NSTALLATION
OF
THE
BOBBIN
(F
i
g.7,8.9.!0
)
-3-
00
Fig.S
00
Fig.9
00
Fig.!O
I.
.lfl.f.•~A..ftl·N~
(J!l7),
:r..tli
»-.
*Hf2}l.ftl!IU
li!lii(
J!l
8)
2.
:13-tliti!tll.ftl.!t;t<ll!l;fo'fL
2 (
00
9J
>
lf!!'(~JtittliJLI.m
i:Jj60~**~tlg..
(
m
IO
J.
1). Put the bobbin into bobbin
case.
PuU
thread
into notch I and
draw
it
under tension spring 2.
(Fig.7)
2
).
Draw
thread
our form slot 2
on
end of
spring
I.
(Fig.9)
3). Pass it through bobbin case thread guise
(1).
aUow
about
60mm
of
thread out of the bobbin.
(Fig.!O)
t-,
~
i!ii~(l:l:Jll,
12,
13,
14)
10.
THREAD
SURFACE
STITCHES
(F
ig.
ll
,ll,l3,14)
A
0
'
00
Fig. II
From the library of: Superior Sewing Machine & Supply LLC

A
00
Fig.12
~
8
&i
Fig.l3
'~
1f1
Fig.14
].
ttffillliiJ~if;!j{!):~.
~
lf;bl.f&~.t~llll~:il..
It<
!X~i!A.
B. C.
D.
E~
F
.
t
~lll14
flliilr.JGf#~
.
l.
sltll~
IOOi
U
:li:~
~~
!)c
.
1). Raise needle
bar
to
(he
highest
position.
then
pull
the
trhcad
out
and
through
A.B,C,D,E
and
f.
2)
.
As
Fig.l4
, thread
fo
rm
forward
tc
back.
3). Pull
abou
t 100mm
or
thread
out
+-,
t!tl2HE
ffttr.Jilll
iHiil 1s)
II.
AUJ
US
TING
STITCH
LENGTH
(F
i&.IS
)
(11
.«~8tl~*ll:
(
I!Pttli'!!
)
ill~
1!1
Fig
.15
-4-
11<
llill<ttt
~i!
B>t
tt
:17
ioJ
a~
tt
i'l!llii!tll
'·
+
..
.....
.
..
#21!~~;
-
........
..
ttll!~li
.
(2)
1!lJ
.lllli!U~
(l(J
illll!
"'!fjlliJiJ&~2~'f
E!lllil!~H·t
,
tltl5~
'flllii!
*'l~
.v:~
.
~ttrl!lllliJ&"f
2.
!ILD~'fl!lliti.M.V:~
.
'It<
~
A<t
tt
mt
a!
O;f
H
:17
J
ol
Me$'¢
1
1Jlf
IU
T
3,
iiJ
\Ill
'1'i
1M
itil+~
ttll!
*ll
·
+
......
....
tt11!1l*;
-
..........
~Hu~l!i.
Regulating
the
stitch length
To
regulate
the
stitch
length,
turn feed
regulaUng
dial
1 (Oward left
right
as
reQuired,
+........
..
to
lengthen
-..........
to
shorten
Changing the reverse
feed
Push
lever 2, release for
forward
feed
and
down
for rever.;e
feed
.
To
regulate the re\'rse stitch length,
turn
lliumb
screw 3
toward
left
or
right
as
required.
~
..........
to
le1\i1hen
-..........to shorten
+=,
Uffi1ltr.J~i1
(.!4l.
lllt6
)
12.
ADJt:SIDG
PRESSER
FOOT
PRE
SSURE
(Fig.l6}
Jlllllttti1Etti.IIF.Ii*ltr I. .li1l
l!:k
.
.i!tt#rft!lilUli
lltr
I.
Ei1l~J-
.
To
regulate the presser foot
pres.<~re,
turn
l)reSlSW'e regulating
screw
I. toward lett to
strengthen
or
right
to
reduce pressu.ce.
00
Fig.l6
+
.=:,
lfi~~:htr.JW~
C
II!
11}
13.
ADJt:STING
NEEDLE
THREAD
TEN
S
ION
(
Fig.l7
)
,l(jllloftl'JUH~tU'll!i
I,
~:h
~
;:k
.
i!P<ttt
lfUt~
tH
I~
l,
~JJ~
.
From the library of: Superior Sewing Machine & Supply LLC

+.
..
.......
~:tlltl*
-
......
....
~
:1J
llttl'
Regul
ate
needle
thread
tendion
with
tension
regulating
knob
l.
toward
left
to
strengthen
or
right
to r3educe pressure.
+
..........
more tension
-
..
........less tendion
.
...
'
'
00
17
t-l!!l,
~Ul.*.1J
lH'f~
tt-l~
i5'
<1
1
118)
14.
REGULATE THE LENGTH
Al'\TJ
lEN
D-
ION Of TAKE- UP
S
PRI
~G
(Fig.
18
)
IJI
18
L
jjtt!l~~
:t
JJi9~1'i
:
m~ttn•~~~~nt.
~1'i~~Rii9~:tJ
+....
......
~:tl
ll*
-
........
..
ilr:
JJ
.
,]>
2,
ft~
Rftfi(l(JiiJ'P
Jll~
ttJ
J.rl!tk~~~'Rili!ijl
tJ
2.
ME~~~umf<!'
3,
lllli'ift
~ifli<Jill:
=-8'~.
l>'i.*161~fJ
2.
1). Regulate
lhe
tension of
teke-up
spring
t.:sing a screwdriver in slot
lD
regulate take-
up
Sl)ring tension
by
turning
st
ud
(I)
as
required.
+
......
....
more tendion
-..........less tendion
2). Regulate
lhe
length
of
take-up
spring
To
a<ljust
the
amount
of
take-up
spring
movement. loosen screw 2
and
se
take-up
Spring
height
by
tuming
the
entire
te
ndion
assembly 3
toward le!t
or
right
Then
oocurely tighten
screw
2.
t-
2i,
liUl*.1Jtt-l~i5'
(
11!
19
)
15.
ADJt.:ST
BOBBIN
THREAD
TE~DION
(Fig,l9)
l'il7H~
n
2.
rt
tli
»);~If!
1.t
1:11
•r
1.
il.1!
i'i
IIi':
~
•J
tt:IJ•
-
5-
+..........*JJI!I;k
-.
..
....
...
~:tJlll!J'
Regulate
bobbin
thread
tension
regulatiflg
s::rew
1.
+
..........
more tensi
on
-..........less tension
Ill
Fig.l9
t-7\,
ttura<Jvrrp
<
lll
20
>
1
6.
AFJUST NEEDLE POSITION (Fig.20)
llt~lll~tll.tth:.
ojo,
:ts
fi!:§:pqiJ.Ilfj
l\1:,
Ji~!.'illll
~-~~~
.
~~~~-~
-
:ts~fi!:r~m8~~~(j(J
-ill:
:5!
,
1!11
iiJ
ft
I!H!I.el
Ji9
~it
.
~~
=
m.ffr~-~~
.
~~
-
tt~
.
Left.Center
and
Right
needle position settings
are available
for
placement
oi
both
straigh
t
and
rigzag stitching.(Fig20)
To position,
push
le'-erin
and
move
to
dEsired
setting
.
Do
not
make
any
needle position adjustment
while
th~
needle is in
the
fabric.
1'
"'
.t
L
J.
..1
II Ill II
~
~
l.4
Ill
Fig
.
10
t--t,
iJtttlie:(llflflttMCfltt-l~'P
(11121
>
17
.
THE
AMJSTWENT
OF
HORIZOI
'
iTA1
DISTANCE
(f~l)
From the library of: Superior Sewing Machine & Supply LLC

Ill
Fig.21
~
t:
lf
ill:tl
dli
l1rst
(I!J
I*
tUI!N;-AHi:llt,
1IJ
~r
ii<i!rr:
(1
)
1'}:
Jfllttlti
'¥
~
fl'£1iltf 2;
(2)
r.fl!lftf-l&
'¥
3l1i
¥:
0flt (
ll!l
A
@ft
);
(;)tJ!ltflttli;fit~U
2;
(
4
)
1'}:1ff!U~fft~tr
I;
ISJ
.IItltlit~lf!fi'f
3
~
B
!i'lft;
1
6
J
~llU~f!tt~fl(tJ.tr
1.
U one fbced value
between
the
min-max
of
curviliru!ar
sti
tch is needed,
the
adjll$1ment
can
be
made as follows:
1).
Rele=
the
horizontal needle
set
screw
2;
2).
Tum
the
spanner
3
to
ODOSition
(i.e. A
position);
3).
Lock
the
set screw 2;
4). Release
the
needle
set
screw
I:
5
).
Tum
left
the
spanner 3
to
B position;
6
).
Then lock
the
set
screw
I.
-t
Jl..,
t11.
:9t&ll
~;II!~$!JlJIJ'P
!I
Il2
2
)
18
. TO
MOUNTT
HREAD
U:'<WJNDE
R(fi
g.22)
~iUfiMJ7tllll
i
&t
,
UU:~
3(
21lll~
l.
Jlll!t
nrr~A~.~-~~~~
.
~~mm~Ailll
••*·~*
iili
~I
H,a·J.
l&ft~
90
~.
While adjusting
the
oil
amount
of
the machine
head,plense
take
out
the
rubber
cap
3(
"2" is oil
pipe
).
Turn A
by
s:rew Sliver to adjust
the
r.
r
<Sitionof
"I".
While
the
position is shown
in
the
oil amount
is
max.H
you
wa
nt
to
edcrease
the
oil
amount.
Please
turra
..-1"
arotu1d
90• ,
-6·
00
Fig.22
-t
ft.,
&:ffi.ii$!J~il
<
lll2
3)
19
.
ASS
E
MB
L
AGE
OF
BELT
CO
VER
(Fig.23)
@I!LI::
fJ!'F~
V
~&:flfitl&:l!fD"'ll~
-
ll~.
t~.>
1J
l'i'
~t
~
n.
fg
.!li'f:
~~.ttL
11
Hll!ri
Fl!.
tll$B'~
it
~-ltUH
I
Jill
,
On
the
table:whUe
the
V
type
belt is
line
with
belt
co,
·
er,
tighten
thge
screw.
t;
nder
the
tabl
e:
after
the
assemblage
of
belt
covenn
the
wheel
and
belt
should
rotate
freely.
Ill
Fig.2J
=-t
,
~~!JJ#$!J3i:!l
(i
ll24
,)
20.
M
UN
T
KN
EE L
TTIT
ER (Fig.24)
1•
..$.1lll!!H'll1£1ltll9
ill!l
I)flill£
tlill:J:Illl~l!i
:J'
Q),
fi!.BiJfl
~
~
"fffl.ti:tl:~
.
~~~&r~~~~
.
~
a>
~
a>
~~m
.
*~~"~
l!i.
IJi.llffltJJ!l!
$ll~
lil:
, 9•*.
2.
ll
ut
lilt
~lit
Jl9
\tl
t.t
l)illli'iMiltr~t'!&il~.
ff@~a>~~J!I.
Ji
tkl!t
~illl~lli~U®.$.~J!I~"~~~~~~
.
!*tt~
i1ifilil:J;;:Ii.
(I
)
To
adjust presserlifter
Lift
the
presser fott $
by
presser lifter
<D
and
then
adjust
Q)
and
<D
to
push
the
knee lifter
controller
to
the
end,
the
lifting
height
is
up
to
9m:n.
(2) To adjust
width
stitch
Adjust
the
knee lifter Wlder
the
oil
pan
by
®
and
<21.
the
loosen
the
adjusting
screw
<2J,
®,
From the library of: Superior Sewing Machine & Supply LLC

Push
the knee lifter controller to t
he
end,
t!
."
width
stitch
is
up to Max.
mFig.24
=
+-'
Jl
fitl
~~
j'jitl
~
ll#f4:89fii!Jil
20
. M
OD
ES
OF
SEV
ERA
L
SE
WI
NG
STITC
H AND
A
PPLICATIO
N
OF
ACCESS
OR
Y
(20U33/
43
/ 53/ 63 )
l.
][!ii
;!t!ll~ffla91l:~.Eii!111,
H:llii.!1.iti*'fJf(
IE25),
It*
ffl~~
~
ffi!111
,
~~~~*'1-Jf*fiE~.
~~~ft
.
iiHr
.JU
!
il't.
flut
ii
l
U69lli
i1!1
~
o,
*ifllt
~
-wl
~ ~
flilll1i:
"#
ffli!
iill~".
~u:~J:~.mffi
.
l!l;i.
~l!i.
;
nt
Jf
. I. Linear
se"'ing
In care of linear sewing, using
the
linear sweing
presser foot, needle
and
feeding dog is
better
than
using multi-function ones.
(F
ig
.25)
While do linear
sew
ing,
the
hori2ontal
width
-7-
-sb,>uld be adjust to 0 position,
the
linear
locki
ng
unit
with
swaying
rack
of
l
ocking
needle
shaft
can
be
used
in
combination wish
swaying
rack
of
l
ocking
needle
shaf
t
can
be
used
in
comb
ination
with
spe:ial presser foot. needle plate
and
material
feeding tooth.
L,~::.~
l~~~
2.
$!]~
2.
Embr
oidery
llilFig
.2
5
<V
<IZ
•
iiiltl!
li(fUB
~~M
·
-
ft
:k.t.
J
iili:E~
il!l'i1
,le:§:
mi!:~:!E
ofl£.
#illlflf~~lillmllil
2
4
)
,1fli'-fflH~$1lm
~a9Jfl7;1J
.
®
l!P
"F
ffi!!11.
»:llii;fo
~*'I-*.
~J:.tJl.U:~
.
®mti·
Hn
iliT
~~""'.
ffl
'HI!
a
c.111al~iill
J:.
~
.
tl!Jil;~J.>U
t
l!i
1L
.P
ti
til.
®
l'ill~fll?
fo
!!lll~
~
~t4lllll7!:,
-l!iMUft'Jiii:.!lt~,
1!!i
~&
~-*4~illf
.
<m
26
J
Preparation before embroidery
~
).
Hshould be noted threat any
free
regulation can
be
made
at
t
he
horiZontal needle
distance
be
tw
een
min-m
ax,
set
the
vertical
needle
distance
to 0
position
and
will
adjust
the
knee-controlparts ro
make-the
component control
the
movemem
of
the
sway
of needle.(
fig
.
24
)
2). Dis:l1arge
the
presser for and needle plate and
feeding dog, then change
if
w
ith
embroidering plate.
3). Hold firmly
th
e
end
of
th
e
surtace
stitches with
yourleft hand,
tum
the out
from
the
hoksof
the
needle
plate.
4)
.
To
make sure
'to
stretchtightly
the
material
between
the
int
ernal
an
d
external
embroidering
frames, otherwise, may
be
cause skipptng and stitches
breaking or material creased.(Fig.
26
)
From the library of: Superior Sewing Machine & Supply LLC

00
Fig.26
l.~
U
J,
ZTPP
E
R£
0
SE
WI
NG
a
lt
i'lilt\lll!Ul.Bi!lf(
~
27
)
,
if
H~
XI!;f11
i1i
~
:.tl
~
J!l,
#
JE~-
fT
B
,
illl
i'i!li
.llll
.
if-I!L
tH
H
!ii
.i$
~£.
~
ill
!I
A!It,
iiJ
~
!Il
'f
lll28
<P
J
U
'I'
1;
~
.
nus
mode is preferable to make
use
of
:r.ippered
pr~r
iool (see
Fig.32
) in a
bid
to
make
the
stitches
more
acoessib
le
to
the p
roj
ectiong stitches ,
then
release
th
e screw
B.
regulate
the
presser
foot
and set the needle to the p
resse
r f
oo
t and set the
needle to left
and
right grooves A of the presser
f
oot
The
mode
is
exJ)eeted
to suit
for
the foll6"''ing
sewing
.(
Fig
.37)
Ill
F
ig
.27
Ill
F
ig
.28
4.
8itlll
4.
HEM-
WR
A
PP
ING
!'>iO
DE
~
i:!lst
Jt\
Ill~
ill
Eli
Ill!
(Ill 29)
~~~
~
~~
.
~
L
~i!l
.Bi
.illl
,
Jt\II!
K
»~
.~
m
;r;~<Pfiil
.
4tiiJ
I;J.
i!t
fi
lll3o
~~i!let
.
In this mode, the hem-wrapping
pre$eT
foot.can
be
used
as
we
wi
sh (fig.29)
Remove the multi-functional presser foot
and
replace it With the hem-wrapping one. This is
al$)
a
mode
of linear sewing
with
the
needle
set to
the
cenrtal
positio
n;
the
hem-wraJ)I:li.ng o
pe
rat
ion
can be
effeded
.(Fig.30)
Ill
Fig.29
1!1
Fig.30
5.
E!lffi
S.
STEM-W
RAPPING MODE
iiH
'i'
S
ff!I&
P.t
,
li'H"J:'!i'ffl~@Alfli!lll
.
ttl!i
. :ili ·
t+
~ (
111
31
), ttfl£i1Uf'i'
fiil.
tll
tt
ll!fl
"P
3I
3
mm
Z.
r*J
,
re
-
~l'Ji.11l.A9tll!fU~
.ii
Silt
.Bi.llf~
*itA,
it
llJ'
IiJ.
:i!t
fi
~.lf·
(lti32).
During
the
sewing
wi
th
the
stem-
wr
ap
ping!ll
ode, the s
pec
ia
l
stem-wr
ap
ping presser
foot
needle
plate
and
ma
te
rial feeding tooth
should
be
pu
t into use(fig.31). the neel
de
is
se
t to the
central position
and
the horizontal
needle
distan
ce
set
to
3
mm,
and
then
run
the rougb.er
thread
through the small groove A on the stem
-wra
pping
presser foot so that the sewing
of
this
mode
will
be smoothlY conducted
..
From the library of: Superior Sewing Machine & Supply LLC

>.
~l$!il(lli
33)
6.
OECORA
TIO'i
SEWl:-IC(
f
ig.JJ
)
AJH~~t£,
.P.
:6{1tJtlll'c&!!M~<l231llll*i!!·
.it
1!J
Ill
I!Hnm
361¥l
m~.
If
the
left,
central
and
right
needle POSitions
can
be hreely changeable
and
the
horizontal
needle
distance skillfully controlled,
the
patterns
of
the
decoration
sewing
will be well achieved.
ffi
Fig
.33
7.
:Jt
ft!!
-
~~
lll!ilit([ll34)
1.
OTHER
MODES
Of
PRA
CT
ICH
SEW
I
."'G
(F
ig.H)
The
machine
shou
ld be cleaned periokicaJJy to
remo,·e
lim
and fiulf. which may
have
accumulated
around
the
working
paru..
A
machine
in
continuous
use
should
be
oiled
freQuenUr
~~
~~]
~
JDH.iW
00Fig.34
11.
· ENCLO
SED
FIGURE:
#~
H~lM'l
0T.Ii!U!
~ * ~
=+=.;Jl
r!
{l'.}~if'
22. -"'AJ:-;TAI:-; OF :vtAC
Hl
N£
~~
!FIIJ;it.J'I:I'\'1
~.
*£.I!*
If. ·lkf.ii:t.liH<
~•-*
~-~~w~~~
x~~~
llt~.~~.~~
r,;m~ii!lta.
mitf.
You
should
tro
t
ect
your
machine,
and
clean it
e,·ery
day.
Remove
lint
and
nulf
wh
i
ch
may
hace
accumulated
around
the
working
pens
like presser
loot.
llEI!dle
plate.
!eed
dOi
and
rotating
hook.
A
machine
in
continuou>
use
should
be
oiled
and
cleaned frequently.
=
+=-
.
;E~~*
~f&
23. MAI
J>;
SP
ECIF
ICATION
tf"i!l:~~:
~lllfli'<
tt
~~~~
:
.ll!JII~
l
ll.ft£~:
!!!.~
I
'!'lll'EJ!~Il:1Ull!
:
6.35mm
1:~:
V M{iffe74mm
I
lf.S!JOJ:W.l!:
2llmm(20Ul
43:289mm)
Ift~Ji;J~)jl::
130mm
)\i
JdHe
:
Ji!.lllf
;;'<
la,ili!!l.i!Y!:
~lllf~
Tte
mode
oi
stitches:see
the
enclooed
Tt.e
mode
of
machine:see
the
enclooed
Tte
specification
of
needle:see
upper
figure
The
height
of
hand
lifter
presser fool:6.35mm
U
pper
wheel:model V
belt
wheel
74mm
The
height
of work:130mm
The
max
of
needle clistance:see
the
enc
ll
losed
The
highest
sewing
speed:see t
he
enclooed
1P..
~fi:~Jil:{f:J!(
114!!!;!
ffi!W
t%
71-il':i
Jl
Model Stitch
mOdes
Ma'l:.of speed
Max
.horizontaJ needle distance Length of
stitches
Height
of
lifter
-
2000UI#
ZJ20U93
V\N
2000.r.p.m
9mm
Smm
9mm
·9·
From the library of: Superior Sewing Machine & Supply LLC

·1~-¥M
PARTS
LIST
From the library of: Superior Sewing Machine & Supply LLC

FACE PLACE, ARM TOP COVER,
J.
RM
SIDE COVER
ff:~
NO.
1
2
3
4
5
6
7
8
9
lUi
PART
NO. QTY DESCRIPTION
From the library of: Superior Sewing Machine & Supply LLC

THR
EADTAKE-UP, ARM,
HAND
WHEEL
·- - - - --- - - -
-·
1 GR1431/1 1
2 GH200-8 1
3 GH143-8 1
4 GH141-8 1
5 GS166-8 1
6 GH160-8 1
7 G0511-8 1
8 GA143315-8 1
9 G$160-8 1
_1Q- _G§!6..)-§. _ 1
11
GZ142-8 1
12
G0141-8
1
13 GH144-8 1
14
GX
144-8 1
15
G$
147-8 1
16 GK254-8 1
17 G$132-8 2
18
~GA1434/5·8
1
19 GZ248-8 1
20 GA1435/4·9 _1_
"
21
-
GSlsB
-8 - - 1
22
GS404-8 1
23 G$404-8 1
24
GS169-8 1
25 G0143-8 1
26 GR143613-8 1
27 G$167·8 2
28 GA1437/3·8 1
29 GS170-8 2
30
GR1438-8 1
31
GS25i-8--
32 GS251-8
33 GT\53-8
34
GS277-8
35 G0510-8
36 G0209-8
37 GS380-8
38
GE380·8
rr
/•
~17
OESCAIPnON
Thread
18.\!-q>
comp
.
Thread~
lever
dllnr.d
eye«
busting
Thread~
!eYes
....
eyelel
busling
Thraad
lake-up
lever
ton
k
Neede
b81
conn
eclilg
Wl
k
cap
screw
1\l!nged
I:W~
<>
<llg
W:!~
.
t!
Needl~[e
~bat~con~nec~clf~ng~
IM
:
om'""'
-
...
---
... ... ...
- - - -
nin]eJi!l~N-
...
......
_
t..eeclle
tilt
~g
srud
......
pon
Nee:le
blf
00Yoacll19
st.d
""
99
pll
oasiler
Thread
lal<e-up
aanll
Thread
leke·up
lever
(;n
k
h'"ge
p;n
.
Thread
take-up
lever
ir
<
hinge
pin
set
sete'•
.......
b8r
""''""'
9
"'
'
goioe
Needle
bar
cor.necOOng
frll:
guide
screw
I
Arm
shaH
(hO<rZontal)
and
neede
ba
r
crank
comp
.
Arm
shaH
(horizonla
)
- - - -
--
- -
----
-~b!·~<!lk.f'O!TE:
-
--
.--
- -
-
--
-
·2·
tr~
geaJCOOIP
.
gea·
sel
screw
comp
.
setraew
From the library of: Superior Sewing Machine & Supply LLC

il'-tt
D.l
-lt
~-
4S
f3\
I DESCRIPTION
NO
.
PART
NO. QT'I
39 GP15
1·8
1
Ji'€;tl
fr
~SlOp
mofun~saew
40
GR279-8 1 Jit;
•J,
IIU
Oa:np
m>p
ll'tlWl
Slop
screw
41
GP142·8
1
.t~
H~l
(fct
moiOI
dnve)
------
--
- - -- ------
-- --
--------
--
-
--
------
-- -- --
-
-- --
--
---
--
---- -- ---------
--
---
--
----- --
--
-----------------
--+--
--
--
--
--
---
--
---
--
--
-- --
--- ----
--
---------------
I
I
·3·
From the library of: Superior Sewing Machine & Supply LLC

NEEDLE BAR,
PRE
SSER BAR,THROAT PLATE
---
, ,
--·
y
u~
J.
•I
~2
-,
6-1
h~
··
}-
-
~
9-
"l
!
~
'
I
,~
·
-·
-......
.....
1
l._...)..
_j
l l . I
10
1
r,
,
.,
\
30-{
I I
~
;
t -
L
3
'~-J
L
v
~l
v'
II
........
I
~
-
--
.....
r
2'-d~
1
~
k_
31
\..,
~
~
v " I · .,, I
--it!""'
'U I
~
I "
!~l·-1
I 1 _
__,
~~
~
-
J
r\
.I
. I
"'
I
~
·
' "
..
,-
16
13
.
,/·
L/
"-If
lil!ii
tta
OESCRIPnON
~~~~~~~~
--
--
--
------
--
~~~
~--------
--
--4
Nae<1e
bar
{hclllolo
)
NO. PART
NO
. OTY
1 GZ223-8 1
2 GR485/5-8 1
3 GR251-8 1
4 GA255-8 1
5 GS163-8 2
6 GS158-8 1
7 GS164-8 1
8 GX143-8 1
9 GA484/4-8 1
10 GA487-8 1
11
<35290-8
____
1_
12 GR466-8 1
13 GS289-8 1
15 GV130-8 1
16
GR
144012-8
1
17 GS384-8 1
18
GC
178-8 2
19
GZ187-8 1
20
GW
153-8 1
21
~--
~£1!3~~
-
~
-
_1_
22
GS232-8 1
23 GA1394-8 1
24
GR465/4-8 1
25
GS231-8 1
26
GM156-8 1
27 GS338-8 2
28
GR477/4-8 1
29 GM130-8 1
30 GW130·8 1
31
SG255-8 2
-32
+
(3'R476
i4-
8-
-1-
33
GM132-8 1
34
GW131-8 1
35
GM156-8 2
36
GR1384-8 1
Need<>
bar
lrame
camp
Neec:e
bar
frame
Needle
bar
li!MQ
lndlcakl<
pla:e
Need
le
bar
timng
lndlcalor
pla!e
screw
Zigzag
s-~cll
regllial!lt'
~
ICQitllric
COillledicn
pi
n
set
screw
Needle
bar
frame
pin
set
screw
Needle
bar
lra11'.e
poo
Needle
clamp
camp.
Neede
aarrtll
~~~~---
-- --
----
Neede
Cla."''
CVNd
pld
Needle
03."'0
I!VeaCI
p:d
~&
savw
Needle
{szel14)
Presse
l
regulalrlg
thumb
~e"•
nut
oomp.
Presse.
regulabng
thrumb
SCI'CW
Preaae<
~
lhumb
WVtf
nUl
Presser
bar
Pre$Ser
ba
r
Snng
P~!
il!'~u~de-~~~~~-
___ __ ___ _
Presser
oar
quide
Bracket
SCf&'N
Presser
oar
lt.lng
and
nt'-ng
lew
bred<et
Presser
loot
(
Soong
H.nged)
Como
.
Presser
'ool
saew
rr.w
pla:e
n-
.w
p1a:e
saew
Sed
plole
CQT4)
.
Sed~.e
Bed
plate
bla<:ket
~~te
-
~el_~~
______
_
___
_ _
Sed
slide
eomp.
Bed
slide
Bed
s
lide
spring
Bed
slide
spring
SCrt'N
Needle
torr
lrama
oil
!eft
From the library of: Superior Sewing Machine & Supply LLC

ZIGZAGTRINGULAR CAM,
HOOK
ADVANCING
CRANK
r-
--,-
---,---
-.-:-,-,-
---
- -
--
I¥
~
~~~~
CUt
~
~
DESCR
IPT
I
ON
NO.
PART
NO
.
QTY
1 GS147
·8
1
llt
t11
Ui
u
Zigzag~
cam
lllaft
sa
screw
2 GR1441/2-8 1
llftiil!l
Zigzag
triang.t'al
cam
slla!1
~
.
3 GZ219·8 1
:;illitl
Zigzag
triangUlar
camp
shaft
4
GZ221
·8
1
Zigzag
triangular
camp
$haft
oil
wick
5 GR145/5·8 1
lit
l!!ii*
Zigzag
tria
n
gula
r
camp
$haft
cil
comp
.
6 GR1442/3·8 1 : =
lt.tn
Zigzag
triangljar
cam
shaft
ccllec
cornp.
7
G$2
23-8 2
Jj\L
tJ
~
tf.angu2<
cam
shaft
coli«
set
SCt!W
8 GS132-8 1
eseMlir
set
sere~<
9 GR1386-8 1 II
0~
11
~
lliaf9.ia1
CI/T4)111aft
om.
10 GR1386-8
li!I
IJ
-~
-
~~
-------
---
-- --
-=------ - - ,f-ili.l
if
---------------
11
GR1390-8 1
01
reserroir
1Qp
cover
•
12 GR1387·8 1
,J,
illliltmf't
Oi
ReseMli'
comp
.
13 GR1391·8 1
J)
\il!iil;
tl
Ol
reservoir
oil
wick
14
GK1
95·8 1
J)\ i
dif:i<~i&
CW
rosarvoir
JiatB
15
G$
258·8 1 J
)\illl
:i<~i&!lfT
()II
reseMli'
plats
sot
sctt'Hibaci<
)
16 G$212-8 1
tt
••n
()II
,_....,;,
plats
..
"""'
fiOrt)
17 GR288-8 1
llttt
!If"-
Zigzag*'~
Iori<
18 GX155-8 1
tt=~·
Zigzag
stildl
~
Iori<
ea:entJJ:anldOir
pr1
19
G$291-8 1 •
;,.
tan
~
ampliWde
$Ide
boodc
cap
screw
20
GR978-8 1
)~
~~~~
- - - - - -
-
--
---
----
~~
~~~
~~
-
---
--
------
------
---
·5-
From the library of: Superior Sewing Machine & Supply LLC

ZIGZACTRIANGULAR CAM,
HOOK
ADVANCING
CRANK
At~
Ail~
NO. PAAT NO.
1 GS256-8
2 G0174-8
3 GR289-8
4 GL1S3-8
5 GS215·8
6 GS213·8
7 GW142·8
8 GR290-8
9 GA291-8
10
GR294-8
--
-
--
---
-
11 GS383·8
12
GW141·8
13
GA521-8
14
GA519-8
15 G0140-8
16 GR298·8
17
GS185·8
18
GR29213·8
19
GS214·8
20
Gl-i178-8
21
-(;5216-8-
-
22 GR296·8
23 GX154·8
24
GA144213-8
25
GR218-8
26
G0286-8
27 GR731·8
28
GS278·8
29
G0217·8
30
-~£1~68-
_
8
- -
31
GS223-8
32
GR1385
· 8
33 GS281·8
34
GL163·8
35
GS32N!
36 GR621·8
37 GR619-8
38
GZ263-8
n•
QTY
~
~
DESCRIPTION
·6-
From the library of: Superior Sewing Machine & Supply LLC

"~
~~~
Itt
~
# DESCRIPTION
NO. PART
NO
.
QTY
39 G0512-8 1
·~~l'fli~$1U~
Sleeve
of
hom!l
component
shaft
40 G0420-8 1
Itt
l¥$iliO~I!Il
().
r
in
g
of""'"""'
o1
sw
aying
neede
--
-------
--
----
--
-----------------------------
-------
---
............
......
--
---------------
--
----
--
-------
--
----------
--
--
----
-
--
-------------------
--
---------------------
-7-
From the library of: Superior Sewing Machine & Supply LLC
Other manuals for ZJ20U93
1
Table of contents
Other ZOJE Sewing Machine manuals