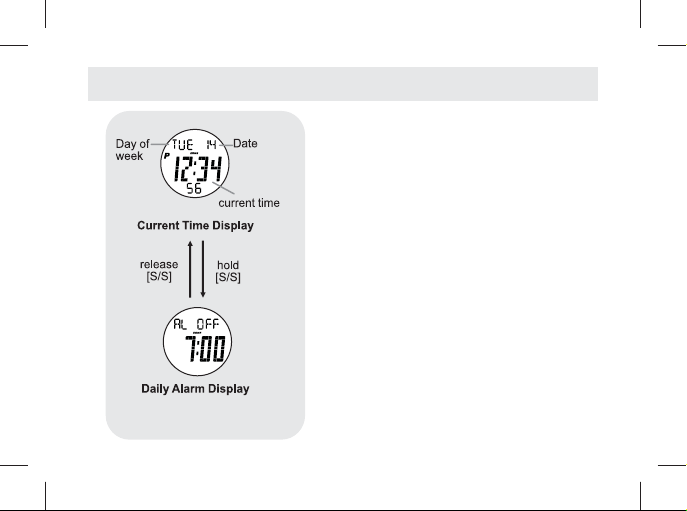
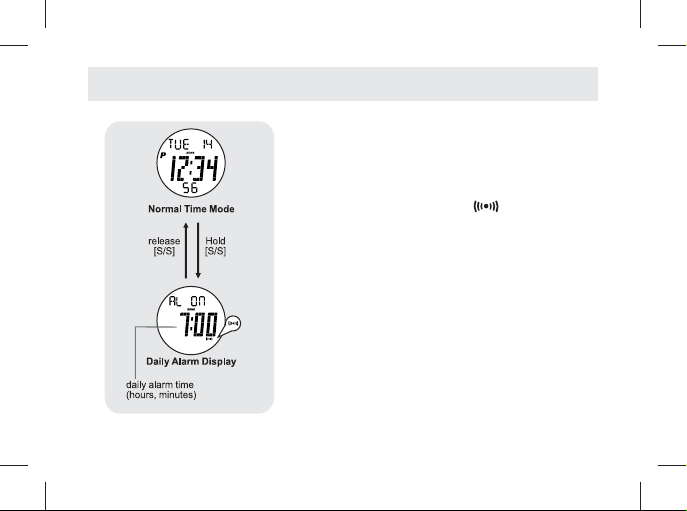
5.1 Current Time Mode - Setting Sequence
To Set the Current Time Mode
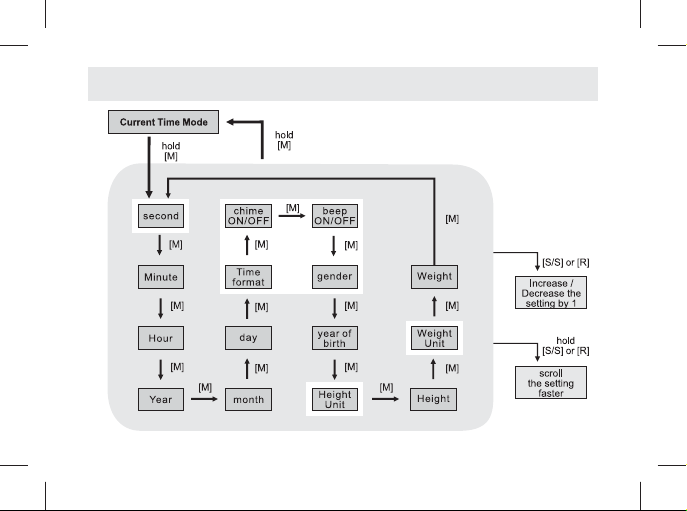
● To set the current time, date, and other settings, press and hold the [M] button for about 2
seconds to select the setting display (the second digits will start flashing).
The Setting Sequence
● When the second digits start flashing, press the [M] button to move the flashing following the
setting sequence diagram in the previous page or press the [S/S] or [R] button to reset the
second digits to zero.
● When one of the settings (minute, hour, year, month, day, 'BIRTH '-birth year, 'HGT '-height,
'WGT '-weight) is flashing, press the [S/S] or [R] button to scroll through the setting (hold the
button down to scroll the setting at a faster pace).
● When the '12Hr ' or '24Hr ' icon is flashing, press the [S/S] or [R] button to switch between
'12Hr ' (12 hour format) and '24Hr ' (24 hour format).
● When the hourly chime (CHIME) or the beep tone (BEEP) 'on ' or 'oFF ' icon is flashing,
press the [S/S] or [R] button to turn it ON ('on ') or OFF ('oFF '). And when the hourly chime
is ON, an indicator ' ' will appear and the watch will beep once every hour.
● When the Gender 'F ' or 'M ' icon is flashing, press the [S/S] or [R] button to switch between
'F ' (Female) and 'M ' (Male).
● When the Height Unit 'In ' or 'CM ' icon is flashing, press the [S/S] or [R] button to switch
between 'In ' (Inch) and 'CM ' (Centimeter).
● When the Weight Unit 'kG ' or 'LB ' icon is flashing, press the [S/S] or [R] button to switch
between 'kG ' (Kilogram) and 'LB ' (Pound).
● When the setting is completed, press and hold the [M] button for about 2 seconds to exit the
setting sequence. The setting display will return to Current Time Mode automatically if NO
button is pressed for about 1 minute.