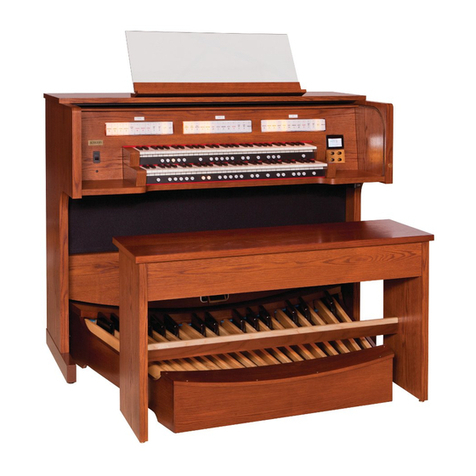
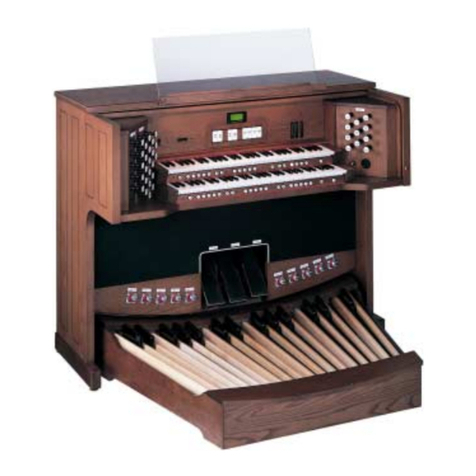
Rodgers Trillium T787 User manual

Rodgers T787
Owner’s Manual
Copyright Rodgers Instruments LLC


i
SAFETY INSTRUCTIONS
Lithium Battery warning
Caution: Danger of explosion is lithium battery is incorrectly replaced. Replace only with same or
equivalent type.
Manually operated mains power switch
Caution: The mains power switch does not completely disconnect this equipment from the mains power
when the switch is in the off position. Remove power cord from mains outlet when servicing equipment.

ii
FCC NOTICE
Radio and Television Interference
Rodgers Trillium organs use and generate small amounts of radio-frequency (RF) energy. The
instrument complies with the limits set for Class B computing devices. FCC Rules, Part 15,
Subpart J define the limits for radio and television interference in a residential installation.
Follow the installation and the use instruction in the manual, or the instrument could potentially
cause interference with some radio or television reception. In the unlikely event this occurs, we
encourage the user to try the following corrective measures:
!Turn the instrument OFF to see if it is the actual source of the interference.
!Disconnect the peripheral devices and their input/output cables one at a time. If the
interference stops, it is caused by the peripheral device or its I/O cable.
!Try coiling and uncoiling the instrument’s power cord in different ways.
!Connect the instrument’s power cord to a power outlet on a different circuit.
!Move the instrument further away from the radio or television receiver.
!Turn the radio or television receiver until the interference stops.
!Connect the radio or television receiver to a different power circuit.
!Reorient or move the receiver antenna further away from the instrument. Consider
installing a rooftop antenna with coaxial cable lead-in between the antenna and receiver.
!Consult the nearest Rodgers dealer for more information if the above corrective measures
don’t remove the interference.

iii
NOTICE TO USERS
Information in this document is subject to change without notice. No part of this manual may be
translated into any language, stored in a retrieval system, reproduced or transmitted in any form
or by any means, electronic or mechanical, including photocopying and recording, for any
purpose without the express written permission of Rodgers Instruments LLC.
RODGERS INSTRUMENTS LLC
1300 N.E. 25th Avenue
Hillsboro, Oregon 97124
USA
(503) 648-4181
www.rodgersinstruments.com
RODGERS IN CANADA
5480 Parkwood Way
Richmond, B.C. V6V 2M4
(604) 270-6332
©Copyright 2000. Rodgers Instruments LLC, a member of the Roland Group. All rights reserved. Printed in the
United States of America. QuickMenu™, Rodgers®, Rodgers Classic Organs®, Digital Dynamic Wind™,
Dimensional Sound Modeling®, Parallel Digital Imaging®, Voice Palette™, DVM™, PDI™, TrueChimes™, Rodgers
SmartCard™, and Trillium™ are trademarks or registered trademarks of Rodgers Instruments LLC, Hillsboro,
Oregon. RSS® is a registered trademark of the Roland Corporation.

iv

v
CONTENTS
SAFETY INSTRUCTIONS.............................................................................................................I
FCC NOTICE .................................................................................................................................II
Radio and Television Interference............................................................................................ ii
NOTICE TO USERS.....................................................................................................................III
CONTENTS....................................................................................................................................V
INTRODUCTION ...........................................................................................................................2
How to Use this Manual ............................................................................................................2
QUICK TOUR.................................................................................................................................4
Console Controls........................................................................................................................4
Turn On/Turn Off ......................................................................................................................4
Manuals and Pedalboard............................................................................................................5
Activating Stops.........................................................................................................................5
Couplers.....................................................................................................................................5
General Cancel...........................................................................................................................6
Using Pistons to Select Registrations ........................................................................................6
About General and Divisional Pistons.................................................................................6
Setting a Piston ....................................................................................................................8
Combination Memory Levels..............................................................................................8
Unlocking and Locking a Combination Memory................................................................9
Reversibles.................................................................................................................................9
Expression Shoes and Controls................................................................................................10
Crescendo Pedal and Controls.................................................................................................10
Transposer................................................................................................................................10
Tremulants ...............................................................................................................................11
Tutti..........................................................................................................................................11
Melody Coupler .......................................................................................................................12
Bass Coupler............................................................................................................................12
FEATURES ...................................................................................................................................13
Console Displays, Indicators, and Menus................................................................................13
QuickMenu™ ....................................................................................................................13
Changing a Setting with QuickMenu.................................................................................14

vi
Accessing Organ Control Functions with SET and the Select knob .................................14
Getting Menu Information.................................................................................................16
Console Menu Map............................................................................................................16
Master Tuning..........................................................................................................................21
Unlocking Master Tuning..................................................................................................21
Adjusting Pitch...................................................................................................................22
Tremulant Controls..................................................................................................................22
Adjusting Tremulant Settings............................................................................................22
Crescendo.................................................................................................................................23
Unlocking Crescendo.........................................................................................................23
Setting Crescendo Sequence..............................................................................................23
Locking Crescendo ............................................................................................................24
Restoring Factory Crescendo Setting.................................................................................25
TUTTI Settings........................................................................................................................25
Viewing Tutti Setting.........................................................................................................25
Unlocking or Locking Tutti...............................................................................................25
Setting Tutti .......................................................................................................................26
Restoring Factory Tutti Setting..........................................................................................26
Melody and Bass Couplers ......................................................................................................27
Setting Range of the Melody Coupler ...............................................................................27
Setting Range of Bass Coupler..........................................................................................27
Antiphonal On/Main Off..........................................................................................................28
Controlling Pipes .....................................................................................................................28
Pipes Off/Ancillary On......................................................................................................28
Automatic Shutdown Timer.....................................................................................................29
Rodgers SmartCard Memory System...................................................................................29
Inserting a SmartCard........................................................................................................30
Saving to a SmartCard.......................................................................................................30
SmartCard Folders.............................................................................................................31
Selecting a SmartCard Folder............................................................................................31
Storing Tutti Settings on a SmartCard...............................................................................32
Deleting a Tutti from a SmartCard ....................................................................................32

vii
Storing Additional Settings on a SmartCard......................................................................33
Deleting Settings from a SmartCard..................................................................................33
Deleting a Memory Level from a SmartCard ....................................................................33
Using your SmartCard on Other Rodgers Organs .............................................................33
About Stop Families ................................................................................................................34
Other Families..........................................................................................................................34
Pitch Designations ...................................................................................................................35
Celeste ranks............................................................................................................................36
More about Couplers................................................................................................................36
Intermanual couplers..........................................................................................................36
Pedal/Great Piston Coupler................................................................................................36
Temperaments..........................................................................................................................37
Ancient Temperaments......................................................................................................37
Well Temperaments...........................................................................................................37
Selecting a Temperament...................................................................................................38
Digital Dynamic Wind™..........................................................................................................39
Wind Supply ............................................................................................................................39
Adjusting Wind Supply......................................................................................................39
Random Detuning....................................................................................................................40
Shutter Thickness.....................................................................................................................40
Setting Shutter Thickness ..................................................................................................41
Voice Palette............................................................................................................................42
Making a Voice Palette Selection......................................................................................42
Resetting Voice Palette Selections.....................................................................................44
Master Volume Control ...........................................................................................................44
Adjusting Master Volume..................................................................................................44
Audio Save...............................................................................................................................45
Saving Audio Control Settings..........................................................................................45
Stereo Headphone Jack............................................................................................................45
Adjusting Headphone Settings...........................................................................................45
Auxiliary Controls ...................................................................................................................46
Adjusting Auxiliary Inputs ................................................................................................46
Room Modeling.......................................................................................................................48
viii
Adjusting Room Modeling Settings...................................................................................48

Console Settings.......................................................................................................................49
MIDI (MUSICAL INSTRUMENT DIGITAL INTERFACE)......................................................50
MIDI Coupler Settings.............................................................................................................50
Tone ...................................................................................................................................50
MIDI Channel....................................................................................................................54
Octave Shift .......................................................................................................................56
Velocity..............................................................................................................................57
Pan......................................................................................................................................60
Sustain/Sostenuto/Soft.......................................................................................................61
Reverb................................................................................................................................62
Chorus................................................................................................................................63
Expression..........................................................................................................................63
Global MIDI Settings...............................................................................................................64
All Notes Off Command....................................................................................................64
Master Channels.................................................................................................................65
Registrations ......................................................................................................................66
Multitrack Mode ................................................................................................................68
Local On/Off......................................................................................................................69
Sequencer Update ..............................................................................................................70
Setting Velocity Sensitivity...............................................................................................72
MIDI Device ID.................................................................................................................73
Tone Names.......................................................................................................................74
MIDI Connections ...................................................................................................................75
MIDI Save................................................................................................................................75
Saving MIDI Control Settings...........................................................................................75
Saving a Combination Memory to a Sequencer ......................................................................75
Saving a Combination Memory.........................................................................................75
Restoring a Combination Memory.....................................................................................76
SPECIFICATIONS........................................................................................................................78
Rodgers T787 Controls Specification......................................................................................78
RODGERS T787 CONSOLE DIMENSIONS ..............................................................................79
FACTORY DEFAULT COMBINATION SETTINGS ................................................................80

ix
Restoring Factory Default Combination Settings..............................................................80
DEMONSTRATION TOOLS.......................................................................................................82
Accessing the Rodgers Ambiance Demo...........................................................................82
Playing the Demo Songs....................................................................................................82
CARE AND MAINTENANCE.....................................................................................................84
Console and Pedalboard...........................................................................................................84
Keyboards and Stop Tabs ........................................................................................................84
Pipes on Pipe-Augmented Instruments....................................................................................84

1

2
INTRODUCTION
Grand, glorious sound is the hallmark of the Rodgers Trillium787. Providing a rich and
spacious ensemble sound complemented by crystal-clear definition, the Rodgers T787 will take
you to new musical heights, while sustaining the tradition of quality, craftsmanship and
innovation you’ve come to expect from Rodgers.
Dimensional Sound Modeling®is the 21st Century standard in digital organ-building technology.
Dimensional Sound Modeling ushers in a new era of choice and control to create authentic pipe
organ sound and room acoustics as never before possible. Dimensional Sound Modeling
technology takes you from virtual to reality. With unmatched user control over every major facet
of the organ, you can create a sound and an acoustical environment modeled to your taste and
musical needs.
The Rodgers T787 features Rodgers’ exclusive Voice Palettesystem which allows you to
easily access numerous additional sounds. These voices, available as alternate selections behind
many stops, greatly expand the tonal resources of the instrument. Each selection can be easily
stored in the organ’s memory system, allowing you to authentically recreate virtually any
musical style or individual performance desired with the push of a button.
With remarkable flexibility, superior sound and the option of adding real pipes at any time, the
Rodgers T787 is a perfect choice for any home, concert or worship setting.
Built entirely in Oregon by dedicated, expert craftsmen, our consoles are meticulously
handcrafted of hardwoods and veneers, and are designed to the exacting standards of the
American Guild of Organists.
This manual will help with the exploration of the expansive capabilities and the variety of
features and functions offered by this instrument. As highly sophisticated as the Rodgers T787
is, the features are easy to use and easy to access, creating a most satisfying musical experience
for the player and listener alike.
To keep abreast of the latest news and other items of interest, visit the Rodgers website at:
www.rodgersinstruments.com.
How to Use this Manual
This manual is divided into four main sections:
Quick Tour – An introduction to the T787. Use this section to familiarize
yourself with the instrument. (Page 4).
Features –
MIDI –
A more detailed description of controls and features. Use this
section to find additional information about the capabilities and
operation of the T787. (Page 13).
A description of organ features and settings for use with an
external MIDI (Musical Instrument Digital Interface) device.
(Page 50).
Specifications – Dimensions and Stoplist. (Page 78).

3

4
QUICK TOUR
To get started, here is an overview of the basic operations of the Rodgers T787.
Console Controls
Many console controls which will be referred to in this overview are illustrated in Figure 1.
Figure 1. Console Controls.
Turn On/Turn Off
To turn the organ on:
1. Press and hold the top part of the On/Off switch in the left panel until RODGERS
T787 CLASSIC ORGAN or your personalized greeting appears in the Console
Display. Release the switch. The organ then performs a self diagnostic test of its
systems over the next few seconds. When completed, the Console Display reads
TRANSPOSER 0 and shows the clock. The Rodgers T787 is ready to play.
To turn the organ off:
1. Press and hold the lower part of the On/Off rocker switch for 1-2 seconds, and
release.
The organ is also equipped with a Automatic Shutdown feature. See page 29.
!

5
Manuals and Pedalboard
The T787 has two keyboards played by the hands, commonly referred to as manuals. In order
from bottom to top, they are the Great manual and the Swell manual. Each manual plays an
assortment of stops, known as a division. Stops played by the Great manual make up the Great
division, and stops played by the Swell manual are referred to as the Swell division.
The keyboard played by the feet is referred to as the pedalboard, and stops which are played by
the pedalboard make up the Pedal division.
The stops in each division are designated by nametags: Great, Swell, and Pedal.
Activating Stops
The term stop is used to describe a single voice on an organ. The T787 has a large array of
stops, each of which is given a name, such as Principal 8’, Clairon 4’, Mixture IV, etc. A stop
sound will be heard if it is activated and keys or pedals which control it are also activated. For
example, the Principal 8’ stop in the Great division will sound if it is activated and notes are
played on the Great manual.
To activate a stop:
1. Press the bottom half of the rocker tablet until it lights, and release.
To silence a stop:
1. Press the top half of the rocker tablet until the light goes off, and release.
Couplers
A Coupler is a control which allows a division of the organ to be played from a different
manual. For example, by activating the Swell to Great coupler, you could play stops in the
Swell division from the Great manual. (“Swell to Great” literally means, “connect the Swell
division to the Great manual”).
These couplers are referred to as intermanual couplers, because they connect a division
associated with one manual to an additional manual or to the pedalboard. They are activated by
rocker tabs located above the Swell manual and allow you to control multiple divisions from one
manual. Couplers allow you to control a larger portion of the organ from one manual or the
pedalboard and are useful in achieving larger or more varied registrations.
To activate a coupler:
1. Press the bottom half of the rocker tablet until it lights, and release.
To disengage a coupler:
1. Press the top half of the rocker tablet. The light will go out.

6
General Cancel
Activated stops and couplers can be cleared quickly by pressing the General Cancel piston,
(labeled ‘0’) located under the Great manual on the right-hand side of the keyboard. Simply
press and release this piston to cancel a registration.
Using Pistons to Select Registrations
By now, you may have experimented with combinations of stops and couplers and have started
to get a feel for the tremendous versatility of the T787. In organ terms, these combinations of
stops and couplers are referred to as registrations.
Obviously, once you’ve found a desirable registration, you’ll want to be able to recall it quickly
and easily. This is done through the combination action of the T787. With Rodgers’ powerful
digital technology, you can store and recall stops, pistons and even MIDI settings.
The combination action of the T787 is comprised of pistons, each of which can store a
combination of stops, couplers and other settings. These pistons are located beneath the manuals
of the organ (commonly referred to as thumb pistons) or on the kneeboard to the left and right
of the expression shoes (commonly referred to as toe pistons).
Pressing a piston with your thumb or foot will cause its stored registration to be recalled
instantly.
Your Rodgers organ has factory-set registrations on many pistons – try them!
However, each of the available pistons in the Rodgers combination action can be easily changed
to suit your particular needs and tastes. The next section introduces this extremely useful system
and illustrates how to make use of its many features.
About General and Divisional Pistons
The T787 has two different types of pistons, general and divisional pistons. General pistons
affect the entire organ, while divisional pistons affect a single division. For example, you
could use a single general piston to recall stops, couplers and MIDI settings on every
division at once, or you could use a Swell divisional piston to change the Swell alone.
General pistons, numbered 1 to 10, are located on thumb pistons under the left-hand side of
the Great and Swell manual. In addition, they are duplicated on toe pistons to the left of the
expression shoes.
To recall a registration stored on a general piston, you could press either the corresponding
thumb piston or toe piston; in other words, to select general piston 7, you could either press
thumb piston 7 under the Swell manual or toe piston 7 on the kneeboard. This duplication of
pistons allows you to use either your thumb or foot to recall the same registration, depending
on what is most convenient.
The Rodgers MIDI system is covered in great detail, starting on page 50.
!

7
There are five divisional pistons for the Great and Swell; these pistons are numbered 1 to 5
and are located under the corresponding manual. For example, Great divisional pistons are
located underneath the Great manual near the middle of the keyboard, and Swell divisional
pistons are under the Swell manual.
Pedal divisional pistons are thumb pistons to the right of the Great divisional pistons
numbered 1 to 5.
General pistons are commonly used to make changes which affect the entire instrument. Use
these pistons when you want to affect all stops and couplers with a single control.
Divisional pistons work well when you want to affect only a single division. For example, if
you want to change stops in the Swell without affecting the rest of the instrument, you could
use a Swell divisional to change only the Swell registration.
Refer to Figure 2 for the location of general and divisional pistons.
Figure 2. Piston Locations.

8
Setting a Piston
The Rodgers T787 is equipped with factory registrations, each of which can be used for a
wide variety of wonderful musical effects. However, the contents of any piston can be easily
changed to suit your particular needs.
To set a new registration on a piston:
1. Select the desired stops, couplers and MIDI settings.
2. Press and hold the SET piston, located on the left hand side under the Great
manual.
3. While continuing to hold SET, press the piston to be programmed.
4. Release both pistons. The new registration is now stored.
Combination Memory Levels
The T787’s advanced combination action has four memory levels, effectively multiplying the
number of available combination pistons by four. Pistons stored on one memory level don’t
affect those stored on other memory levels; each of the memories is independent.
Many organists keep regularly used registrations, such as those used for hymns, on one
memory and use other memory levels for preludes, postludes and choral accompaniments,
which may change week to week.
A variety of useful registrations are included with your new Rodgers T787. Memory 1
contains registrations commonly used for church and classical organ literature. Memory 2
contains orchestral registrations, and Memory 3 contains registrations from the Evangelical,
Gospel and Theatre organ traditions.
Memory Levels can be selected by pressing the corresponding piston located on the left-hand
side under the Choir manual. These pistons are labeled M1, M2, M3 or M4.
To select a memory level:
1. Press the corresponding memory piston (M1, M2, M3 or M4). It will light.
When the organ is powered on, M1 is automatically selected.
A memory level must be unlocked before it can be changed. See below.
!
Rodgers SmartCard Memory System™ gives you unlimited memory levels. See page
29 for more information.
!

9
Unlocking and Locking a Combination Memory
When shipped from the Rodgers factory, all memory levels are unlocked so that pistons can
be changed easily. If desired, each memory level can be locked individually so that it cannot
be changed.
To lock a memory level so that it cannot be changed:
1. Press and hold the memory piston (M1, M2, M3 or M4) corresponding to the
memory level you want to lock. USING INTERNAL MEMORY or USING
CARD MEMORY will appear in the Console Display. Continue to hold the
memory piston. After approximately 5 seconds, MEMORY (#) UNLOCKED or
MEMORY (#) LOCKED appears in the Console Display.
2. If MEMORY (#) LOCKED appears, the memory level is already locked; release
the memory piston. If MEMORY (#) UNLOCKED appears, go to step 3.
3. While continuing to hold the memory piston, rotate the Alpha dial until the
console display reads MEMORY (#) LOCKED.
4. Release the memory piston. The memory is now locked.
To unlock a memory level so that it can be changed:
1. Press and hold the memory piston (M1, M2, M3 or M4) corresponding to the
memory level you want to unlock. USING INTERNAL MEMORY or USING
CARD MEMORY will appear in the Console Display. Continue to hold the
memory piston. After approximately 5 seconds, MEMORY (#) UNLOCKED
or MEMORY (#) LOCKED appears in the Console Display.
2. If MEMORY (#) UNLOCKED appears, the memory level is already unlocked;
release the memory piston. If MEMORY (#) LOCKED appears, go to step 3.
3. While continuing to hold the memory piston, rotate the Alpha dial until the
console display reads MEMORY (#) UNLOCKED.
4. Release the memory piston. The memory is now unlocked.
Reversibles
The Rodgers T787 is equipped with a number of reversible controls, so named because pressing
them once will activate them, pressing them again will turn them off. These reversibles, located
on thumb and toe pistons, are especially useful in a performance when you want to quickly
activate or remove a single coupler, stop or other setting.
Press the thumb or toe piston to turn on, and press again to turn off. All reversible thumb pistons
light when engaged. Each specific function controlled by a reversible is also discussed
elsewhere in the manual.
Table of contents
Other Rodgers Musical Instrument manuals

Rodgers
Rodgers Providence 330 User manual

Rodgers
Rodgers OXFORD 940 User manual

Rodgers
Rodgers 950B User manual

Rodgers
Rodgers Classic Organ 527 User manual

Rodgers
Rodgers 702 User manual

Rodgers
Rodgers 35A User manual

Rodgers
Rodgers Cambridge 735 User manual

Rodgers
Rodgers OLYMPIC User manual

Rodgers
Rodgers 690 User manual

Rodgers
Rodgers Providence 330 User manual

Rodgers
Rodgers 445E User manual

Rodgers
Rodgers Trillium T837 User manual

Rodgers
Rodgers 605 User manual

Rodgers
Rodgers 805C User manual

Rodgers
Rodgers 690 User manual

Rodgers
Rodgers 790C User manual

Rodgers
Rodgers 558 User manual

Rodgers
Rodgers 960 User manual

Rodgers
Rodgers A657 User manual

Rodgers
Rodgers Columbian 75 User manual