manuals.online logo
Brands
  1. Home
  2. •
  3. Brands
  4. •
  5. ROGERSELLER
  6. •
  7. Plumbing Product
  8. •
  9. ROGERSELLER WATERSLIDE User manual

ROGERSELLER WATERSLIDE User manual

WATERSLIDE
Installation Instructions
CARE + MAINTENANCE
WARRANTY
- Product should be inspected for surface damage prior to installation.
- Never use acetone silicones in conjunction with tapware products.
- Clean products with warm soapy water and a soft cloth. Do not use
harsh abrasive cleaning compounds.
NOTE:
Ceramic Cartridges - Warranty claims will not be honoured where the ceramic
cartridge has malfunctioned due to the presence in the water supply of:
- Copper tube pieces
- Sand, dirt, or stones
- Thread tape
- Other objects not normally present in potable water supplies
- All Rogerseller tapware, bathroom fittings and sanitary ware are covered by
a five (5) year warranty from date of purchase. Tapware cartridges are
covered by a ten (10) year warranty.
- Due to manufacturer's conditions, the warranty on flexible hoses and
cistern mechanisms is only 12 months from date of purchase, and on soft
close seats it is 24 months from date of purchase.
- Rogerseller will undertake to repair or replace free of charge any faulty
product due to defects in materials or workmanship (within the warranty
period). Rogerseller (or their nominated agency) reserve the right to assess,
repair, replace or service any warranty claims as they see fit.
- This warranty excludes any defect or injury caused by or resulting from
misuse, abuse or neglect, accidental damage, improper installation or other
alterations or modifications which affect the reliability or performance of
the unit not attributed to faulty manufacture.
Melbourne
173-177 Barkly Avenue
Burnley VIC 3121
P 03 9429 8888 F 03 9429 6966
Sydney
PYD Building
197 Young Street
Waterloo NSW 2017
P 02 8396 8700 F 02 9690 2804
Brisbane
72–78 McLachlan Street
Fortitude Valley QLD 4006
P 07 3251 4333 F 07 3257 2155
Perth
153 Broadway
Nedlands WA 6009
P 08 6389 1366 F 08 6389 1466
AFTER SALES TEAM
CONCEPT STORES
Southern Innovations
Canberra ACT
P 02 6126 1155 F 02 6126 1156
Albury NSW
P 02 6049 3355 F 02 6049 3356
Estilo Bathware & Ceramics
Adelaide SA
P 08 8415 2999 F 08 8415 2900
Vogue Spas & Bathrooms
Southport QLD
P 07 5528 0077 F 07 5528 0767
Gunns Kitchens & Bathrooms
Launceston TAS
P 03 6332 6201 F 03 6332 6299
Hobart TAS
P 03 6272 6899 F 03 6272 9088
WC Bath + Shower
Chatswood NSW
P 02 9413 3999 F 02 9413 9333
P 1300 781 966
E [email protected]
If you have any concerns with
installing your products, please
call or email our Concierge team:
0611
WATERSLIDE
Installation Instructions
3. PILLARS
Insert top and bottom
wall plug, pillar & screw,
into the wall.
5. RAIL ATTACH
Attach rail to pillar and loosely
tighten the screw.
8. HAND SHOWER
Attach hose to hand shower.
Attach hose to wall union.
6. FASTENING
Tighten bottom and top
rail screws with a flat head
screw driver.
7. CAPS
Attached end caps.
1. POSITION
Select desired positionof
rail against wall by marking with
a lead pencil against the screw
holes on the hand rail.
4. RAIL PLUGS
Insert rail plugs into the
top and bottom of the rail.
2. DRILLING
Drill top and bottom
hole using a8mmdrill bit.
Fixed Rail
3. WALL INSERTS
Insert wall plugs.
5. HAND SHOWER
Attach hose to hand shower.
Attach hose to wall union.
1. POSITION
Select desired height of hook
(bracket) by marking the wall
with a lead pencil through the
screw holes positioned on the
hook (bracket).
4. HOOK ATTACH
Attach hook (bracket) to wall
with screws.
2. DRILLING
Drill top and bottom holes using
a 6mmdrill bit.
FixedHook
3. PILLARS
1) Fixed Bracket position: Insert
large wall plug, pillar and
screw into wall.
2) Free Fix Bracket position:
Insert small wall plug, pillar
and screw into wall.
5. RAIL ATTACH
Attach rail to top pillar and
loosely tighten the screw of the
fixed bracket.
8. HAND SHOWER
Attach hose to hand shower.
Attach hose to wall union.
6. FASTENING
Tighten top rail screw with a flat
head screw driver.
Tighten Free Fix grub screw with
Allen/Hex Key.
7. CAPS
Attach end caps.
1. POSITION
Select desired positionof rail
against wall by marking wall
with a lead pencil.
Determine the required height
and position of the Free Fix
Hand Rail by marking wall with
a lead pencil.
4. RAIL PLUGS
AND BRACKET
Insert rail plugs into top
end of rail.
Insert adjustable Free Fix
Bracket onto bottom of the rail.
2. DRILLING
Drill top and bottom
hole using a 8mm drill bit.
Free Fix Bracket
WATERSLIDE
Installation Instructions
Free Fix HandRail
1)
2)
see Figure 1 see Figure 2
½” Male BSP
2. AFFIX
Affix threaded washer and
hex nut as per Figure 1.
Ensure teflon tape is used
prior to fixing the threaded
washer and hex nut.
4. FLUSH
Flush line before attaching
hose and hand shower.
1. DRILL
Drill & fix bottom pillar
using an8mmdrill bit
3. TRIM
Trim ½” Male BSP as per
Figure 2. Attach top pillar
and rail as per Figure 3.
½” Male BSP
Wall
Hex Nut
Threaded
Washer
Barrel Union
Rail
Cover Plate
Cut all thread flush to the
front face of the Hex nut
Detail installation
Figure 1 Figure 2 Figure 3
WATERSLIDE
Installation Instructions
Water Inlet Rail
Top Pillar
Hole diameter of finished wall
Min. 24mm - Max. 30mm
Teflon

Other ROGERSELLER Plumbing Product manuals

ROGERSELLER Tonic User manual

ROGERSELLER

ROGERSELLER Tonic User manual

ROGERSELLER COMPACT 211030 User manual

ROGERSELLER

ROGERSELLER COMPACT 211030 User manual

ROGERSELLER Tonic User manual

ROGERSELLER

ROGERSELLER Tonic User manual

ROGERSELLER Eccentric User manual

ROGERSELLER

ROGERSELLER Eccentric User manual

ROGERSELLER Arq 3606003301 User manual

ROGERSELLER

ROGERSELLER Arq 3606003301 User manual

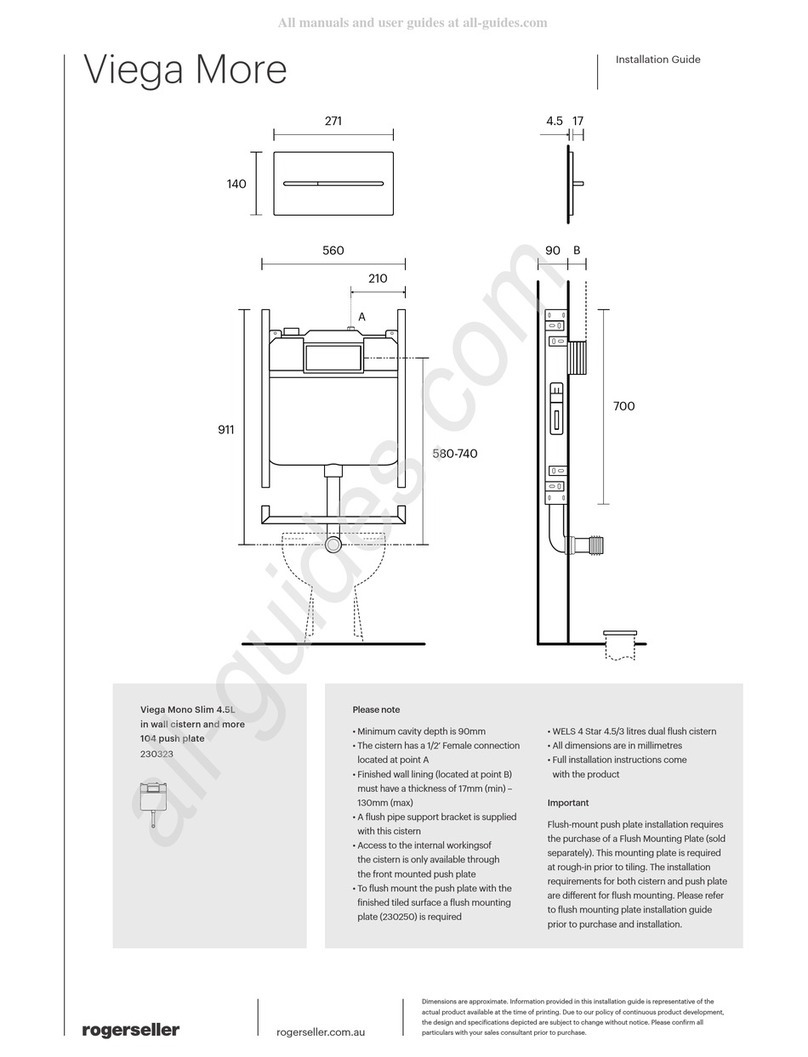
ROGERSELLER Viega More User manual

ROGERSELLER

ROGERSELLER Viega More User manual

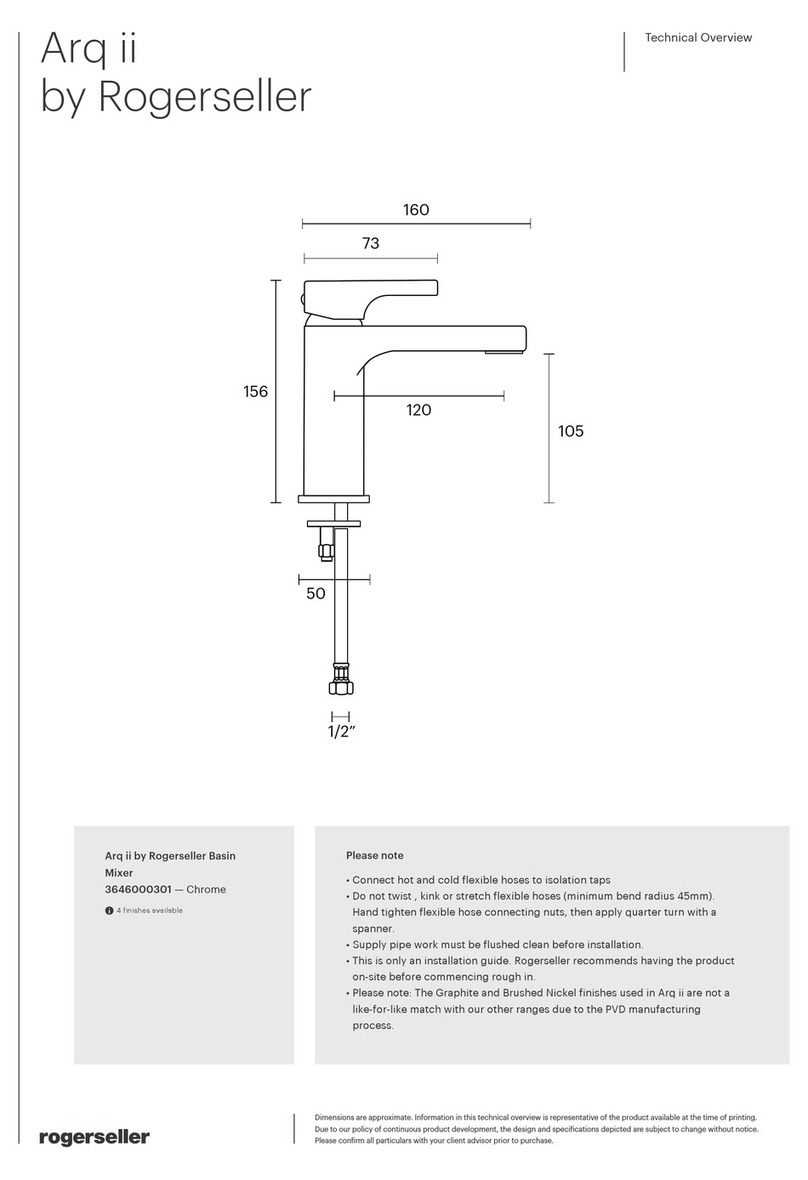
ROGERSELLER Arq ii 3646000301 Installation guide

ROGERSELLER

ROGERSELLER Arq ii 3646000301 Installation guide

Popular Plumbing Product manuals by other brands

Linki Tek 200 installation instructions

Linki

Linki Tek 200 installation instructions

THG PARIS C8105N quick start guide

THG PARIS

THG PARIS C8105N quick start guide

IKEA EDSVIK Assembly instructions

IKEA

IKEA EDSVIK Assembly instructions

agape ARUB1038S Installation and maintenance instructions

agape

agape ARUB1038S Installation and maintenance instructions

Signature Hardware 948044 manual

Signature Hardware

Signature Hardware 948044 manual

Franke AQCT0031 Installation and operating instructions

Franke

Franke AQCT0031 Installation and operating instructions

Moen CHATEAU 7454 specification

Moen

Moen CHATEAU 7454 specification

Luxart Poydras PO511TOV Installation

Luxart

Luxart Poydras PO511TOV Installation

Graff BALI 2368200 Instructions for assembly and use

Graff

Graff BALI 2368200 Instructions for assembly and use

Spectrum Brands Pfister Ashfield G89-XYP Quick installation guide

Spectrum Brands

Spectrum Brands Pfister Ashfield G89-XYP Quick installation guide

Glacier bay HD873X-0701 Installation and care guide

Glacier bay

Glacier bay HD873X-0701 Installation and care guide

unidrain 8022.0110 installation guide

unidrain

unidrain 8022.0110 installation guide

Fortis Scala 8471100 installation instructions

Fortis

Fortis Scala 8471100 installation instructions

Spectrum Brands Pfister Kenzo LG89-7DFK Quick installation guide

Spectrum Brands

Spectrum Brands Pfister Kenzo LG89-7DFK Quick installation guide

TECE Lux Mini Technical guidelines

TECE

TECE Lux Mini Technical guidelines

American Standard Cadet Anti-Scald Pressure Balance Tub & Shower Set... Specification sheet

American Standard

American Standard Cadet Anti-Scald Pressure Balance Tub & Shower Set... Specification sheet

Delta Dryden T17T051 Series parts manual

Delta

Delta Dryden T17T051 Series parts manual

Omnires Parma PM7433 Installation and Maintenance

Omnires

Omnires Parma PM7433 Installation and Maintenance

manuals.online logo
manuals.online logoBrands
  • About & Mission
  • Contact us
  • Privacy Policy
  • Terms and Conditions

Copyright 2025 Manuals.Online. All Rights Reserved.