Rointe EASY Touch Quick start guide

EASY Touch
EASY SETUP GUIDE
EN

EASY Touch
2
INTRODUCTION
This thermostat is designed to aid in the comfort of your home by providing timed regulation of your heating system. The
thermostat is designed to receive temperature input signals from the following sensors:
1. Air sensor located inside thermostat
2. Floor sensor installed in oor (see heater instructions for details)
The thermostat is not a safety device and should only be used with Rointe heating products. In order to avoid damaging your
ooring the correct oor type must be selected during the thermostat programming process.
WARNING – Important safety note
This product uses mains voltage electricity and work should only be carried out by a qualied electrician. You should always
isolate the power supply before attempting to install or repair the thermostat. The thermostat should not be put into operation
unless you are certain that the entire heating installation complies with current general safety requirements for electrical
installations. Electrical installation to be in accordance with latest Wiring Regulations.
LOCATION
The thermostat should be installed inside a single gang electrical wall box that is at least 35mm deep. For optimal performance
the thermostat should be located in an area with good ventilation. It should not be beside a window/door, in direct sunlight or
above another heat generating device (e.g. radiator or TV). The thermostat is designed for operation between 0°C and 55°C with
relative humidity less than 80%.
EN

2 3
EN
INSTALLATION
Separate the front housing of thermostat from wall module:
1. Unscrew both closing screws (bottom of thermostat) until they will not turn any further
2. Release front housing by gripping lower half of outer frame and pulling outwards then upwards
3. Place front housing somewhere safe
4. Run all wires to the wall box. Check to ensure that you have included the following:
Power (Live and Neutral)
Heater (Live and Neutral or Switch Live only)
Floor sensor
Fil pilote (if necessary)
5. Pull wires through wall box and complete terminal wiring
IMPORTANT: Ensure that multi stranded wires are fully inserted into the terminals and secured tightly. Any loose strands should
be trimmed as they could cause a short-circuit. If connecting more than two heaters, an electrical junction box will be required.
NOTE: Always ensure that the sensor cable is installed in a separate conduit to the power cables supplying the thermostat and
heating system.
ELECTRICAL SPECIFICATION:
• Supply voltage: 230V +/-10% at 50Hz
• Thermostat is not designed for use with intermittent power supply.
• Maximum Switch Load: 16A resistive
• Insulation Class: II
• IP20
• Standards: EN60730-1 & EN60730-2-9

EASY Touch
4
ELECTRIC UNDERFLOOR INSTALLATION
see numbering on diagram
1. Connect to Fil Pilote (F.P.) - only for use in France
2. Connect to Power Supply (Live – MAX 230V)
3. Connect to Power Supply (Neutral – MAX 230V)
4. Connect to heater(s) (Neutral – MAX 3600W/16
Amps)
5. Connect to heater(s) (Live – MAX 3600W/16 Amps)
7. Connect to 1st wire of oor sensor (colour not
important)
8. Connect to 2nd wire of oor sensor (colour not
important)
EN
MOUNTING THERMOSTAT
1. Push excess wire back through the wall box and
insert thermostat back module into wall box
2. Put xing screws through mounting holes and
tighten
3. Ensure that thermostat is straight before tightening
completely
4. Replace thermostat front housing;
i) align and sit front housing on to hinges,
ii) push lower half of front housing until a
‘click’ is heard.
5. Ensure front housing is securely xed
6. IMPORTANT: Tighten both retaining screws
(NOT USED)

4 5
EN
POWERING UP
You can now power up the thermostat and begin the programming process.
This is an Easy Setup guide. For full instructions please visit rointe.co.uk.
GETTING STARTED
In order to program the thermostat all you need to do is slide the Program Slide control from the top position to the bottom
position, customising the program along the way. If you make a mistake, return the Program Slide control to the previous position
and start again. In order to change a setting value, turn the Rotary Control. Pressing the Main Button will accept the value and
move you on to the next value that needs setting.
Your thermostat can be set to run a program, hold a xed temperature, efciently protect your home from freezing or standby. You
can select these modes by moving the Mode Slide control on the bottom of your thermostat.
Standby The thermostat will not come on.
NOTE: The thermostat is still connected to the mains electricity supply and your heating system is not isolated. Always
isolate from the mains before undertaking any maintenance.
Frost Protection The thermostat will not let the temperature fall below 5°C.
Manual The thermostat will hold a xed temperature. Just turn the Rotary Control to change the temperature.
Auto In this position your thermostat will run the program you have set. If you would like to temporarily adjust the temperature,
just turn the Rotary Control. At the start of the next heating period, your thermostat will automatically resume your
programming schedule.

EASY Touch
6
EN
PROGRAMMING THE THERMOSTAT
To program your thermostat all you need to do is move the Program Slide control on the right hand side of your thermostat from
top to bottom. The table below will explain what you can do at each step.
Set Time /Day Turn the Rotary Control to change the current clock time. Once the clock time has been set, press the Main Button, you will
now be able to set the day of the week. Turn the Rotary Control to select the correct day.
Set Timing 1
2
3
4
When in any of these positions you can set the start time for “morning” (1), ”day” (2), ”evening” (3) and “night “ (4) periods.
The “morning” and “evening” periods will follow the comfort temperature, “day” and “night” periods will follow the setback
temperature. Using the Rotary Control, select the start time and press the Main Button to move to the next day.
If you hold the Main Button for 3 seconds it will copy the start time to the next day.
Tip - If you want to set the thermostat so that it is keeping the comfort temperature all day and only setback at night, then
just set the “day” start time equal to the “evening” start time.
Set
Temperatures
Here you can set the temperature which will be used for the comfort and setback temperatures.
Done Move the Program Slide control to the lowest position in order to start your thermostat. Heating will not occur if the
Program Slide control is not in this position.
ERROR MESSAGES
The thermostat is not
controlling the temperature
Ensure that the Program Slide is in the run position (lowest point) and that the Mode Slide control (bottom) is in the
manual or program positions.
Floor sensor error If you see the oor sensor error icon or “ - - “ on the screen it means that your thermostat has been unable to
detect the temperature of the oor.
Overheat If you see the overheat icon this means that your oor has become too hot and the heating has been suspended.
Low battery The low battery icon will display when the battery needs to be replaced. The thermostat must be connected to the
mains electricity supply in order to work, it is not designed to be used with an intermittent power supply. If the battery is
not installed then your thermostat will not be able to maintain the clock time if power is lost.

6 7
EN
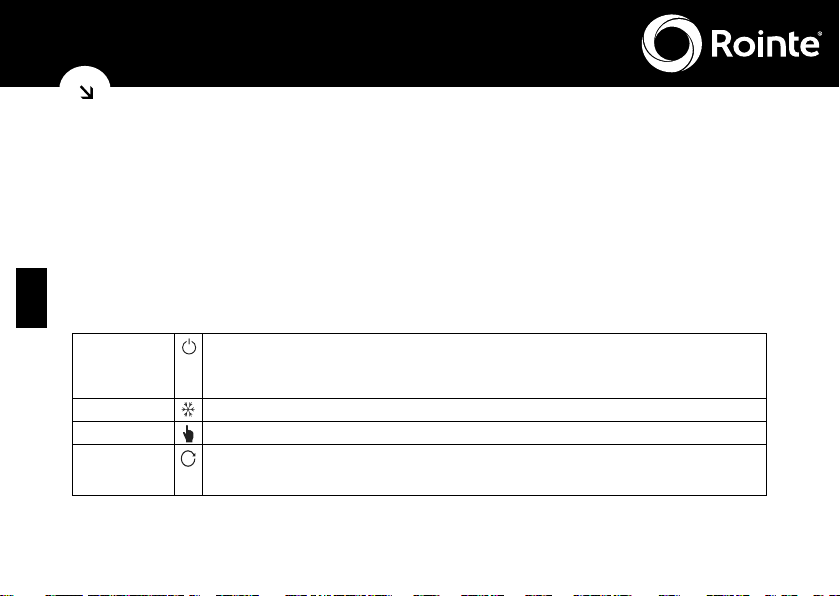
Heating starts too early If your heating is coming on too early, then this may be because the Adaptive Learning function is turned on. This
function allows your thermostat to learn how long it will take to heat up to ensure it is the correct temperature at the
start of the comfort periods. See online manual, “installer settings” section.
Incorrect calibration Your thermostat should not need any calibration, however if you would like to apply an offset to the temperature settings
see the online manual, “installer settings” section.
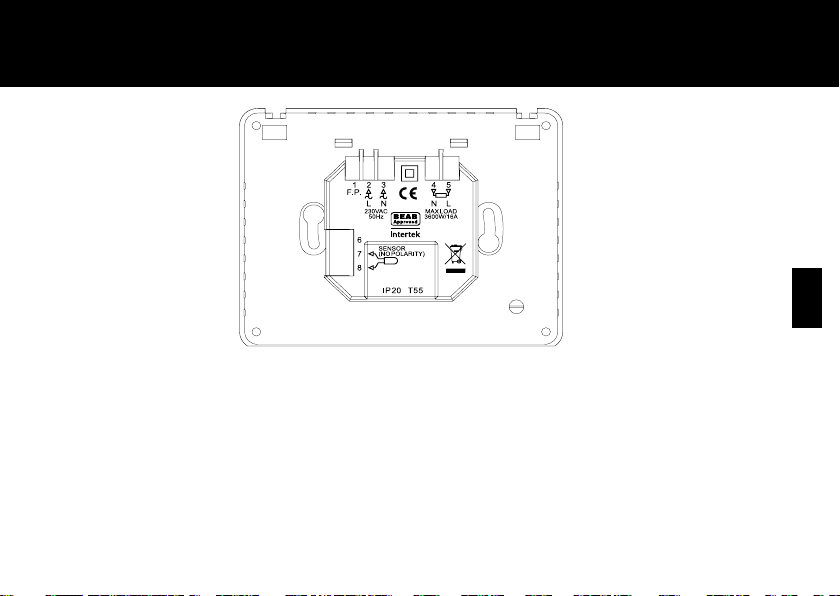
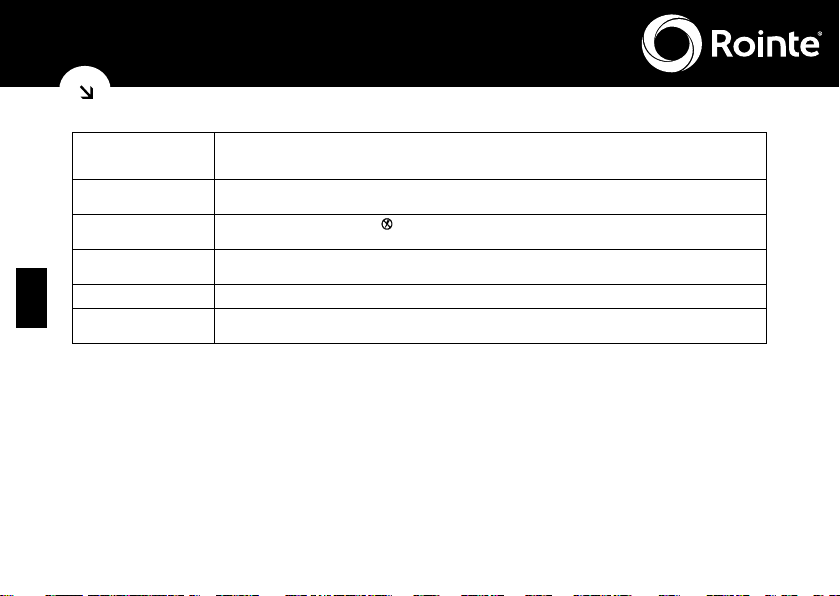
No mains electricity If you see the no mains power icon this means that the thermostat is not receiving power. Check that the thermostat
logic module is properly installed on the power module and that the 230V mains electricity supply is connected.
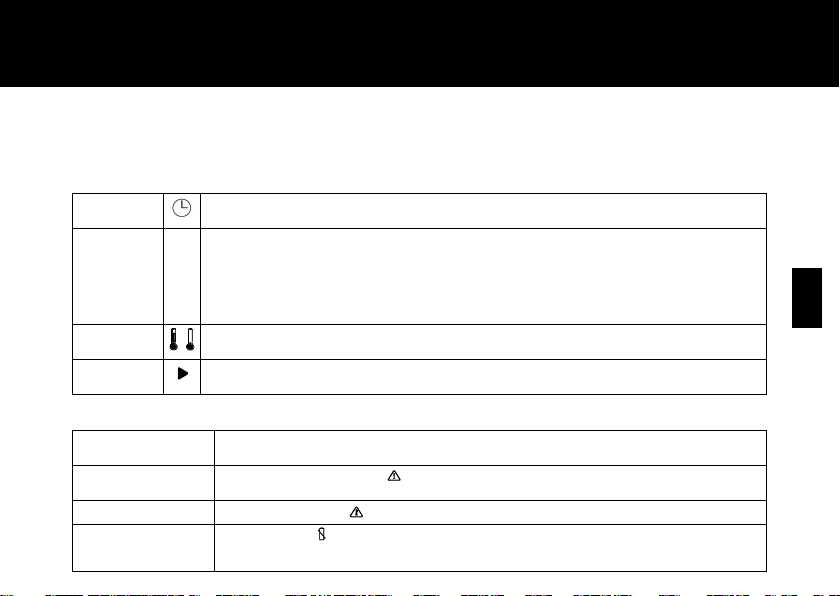
Regulator mode (Reg) is
displayed
In this mode your thermostat will come on for a set number of minutes in a 10 minute cycle. The thermostat will not use
the temperature for control. See online manual, “installer settings” section.
Fil Pilote (FP) is displayed The thermostat can obey the 6 standard commands of l pilote (pilote wire). (France only)
HI or LO is displayed The thermostat will display “HI” if the ambient temperature exceeds 50°C (122°F) and “LO” when the ambient
temperature falls below 0°C (32°F).
WARRANTY
Rointe warrants this product, to be free from defects in the workmanship or materials, under normal use and service, for a period of two (2) years from the
date of purchase by the consumer. If at any time during the warranty period the product is determined to be defective, Rointe shall repair or replace it, at
Rointe’s discretion.
If the product is defective, please either,
(i) return it, with a bill of sale or other dated proof of purchase, to the place from which you purchased it, or
(ii) contact Rointe. Rointe will determine whether the product should be returned, or replaced.
This warranty does not cover removal or reinstallation costs, and shall not apply if it is shown by Rointe that the defect or malfunction was caused by damage
which occurred while the product was in the possession of the end user.
Rointe’s sole responsibility shall be to repair or replace the product within the terms stated above.
ROINTE SHALL NOT BE LIABLE FOR ANY LOSS OR DAMAGE OF ANY KIND, INCLUDING ANY INCIDENTAL OR CONSEQUENTIAL DAMAGES
RESULTING, DIRECTLY OR INDIRECTLY, FROM ANY BREACH OF ANY WARRANTY, EXPRESSED OR IMPLIED, OR ANY OTHER FAILURE OF
THIS PRODUCT. THIS WARRANTY IS THE ONLY EXPRESS WARRANTY ROINTE MAKES ON THIS PRODUCT. THE DURATION OF ANY IMPLIED
WARRANTIES, INCLUDING WARRANTIES OF MERCHANTABILITY AND FITNESS FOR A PARTICULAR PURPOSE, IS HEREBY LIMITED TO THE TWO-
YEAR DURATION OF THIS WARRANTY.
This Warranty does not affect your statutory rights.
Please register your product at: www.rointe.co.uk

EASY Touch
8
NOTES

8 9
EASY Touch
FR

EASY Touch
10
FR
INTRODUCTION
Le thermostat a été conçu an d’améliorer le confort dans votre habitation en apportant une régulation programmée de votre
système de chauffage. Le thermostat reçoit des signaux électriques provenant des sondes suivantes:
1. Une sonde d’air est fournie avec le thermostat
2. Une sonde de sol sera fournie pour le plancher chauffant.
Le thermostat n’est pas un système de sécurité et doit seulement être utilisé avec les planchers chauffants électriques Rointe.
An d’éviter d’endommager votre revêtement de sol, veillez à bien sélectionner le type de revêtement de sol installé lors de la
programmation du thermostat.
ATTENTION – Mesure de sécurité!
Ce produit utilise un fort voltage électrique et ne doit être branché que par un électricien qualié. Vous devez toujours isoler
l’alimentation électrique avant d’essayer d’installer ou de réparer le thermostat. Le thermostat ne doit être utilisé qu’une fois que
vous êtes certain que tout le système de chauffage a été installé dans le respect de toutes les normes de sécurité électrique: NF
C 15-100 et avis technique du CSTB.
POSITION DU THERMOSTAT
Le thermostat doit être installé dans une boîte murale enfoncée d’au moins 35mm dans le mur. Pour une meilleure performance,
le thermostat doit être installé dans une zone bien ventilée. Il doit être éloigné des fenêtres, portes etc... Et ne doit pas être installé
dans un endroit où il reçoit directement le soleil ou une forte chaleur ; par exemple celle produite par des appareils électriques tel
qu’un téléviseur. Le thermostat a été conçu pour une température entre 0°C and 55°C à moins de 80% d’humidité

10 11
FR
INSTALLATION
Détachez la façade avant du thermostat:
1. Dévissez les deux vis situées au bas du thermostat jusqu’à ce qu’elles ne tournent plus
2. Sortez la façade en tirant vers vous la partie inférieure du cadre puis en la soulevant
3. Posez la façade dans un endroit sûr
4. Faites passer tous les câbles dans la boite du thermostat. Vériez que vous avez bien inclus les câbles suivants:
Electrique (phase et neutre)
Chauffant (phase et neutre)
Sonde de sol
Fil pilote (si nécessaire)
5. Tirez les câbles à travers la boite et terminez le câblage
IMPORTANT: Assurez-vous que les conducteurs multiples sont complètement insérés dans le terminal et sont fermement
attachés. Tout conducteur non sécurisé devra être coupé car il pourrait engendrer un courtcircuit. Si vous raccordez plus de 2
systèmes de chauffage, vous aurez besoin d’une boite de raccordement.
NOTE: Toujours s’assurer que la sonde de sol est installée dans un conduit séparé au câble électrique supportant le thermostat et
le système de chauffage.
SPÉCIFICATIONS ÉLECTRIQUES:
• Tension: 230V +/-10% at 50Hz
• Le thermostat n’est pas compatible avec des systèmes électriques à tension intermittente
• Charge de commutateur maximale: 16A résistant
• Classe d’isolation: II
• IP20
• Standards: EN60730-1 & EN60730-2-9

EASY Touch
12
FR
INSTALLATION AVEC PLANCHER
CHAUFFANT ÉLECTRIQUE
Regarder les nombres sur le diagramme:
1. Connectez au Fil Pilote (F.P.)
2. Connectez à l’alimentation (Phase 230V)
3. Connectez à l’alimentation (Neutre 230V)
4. Connectez au(x) plancher(s) chauffant(s) (neutre –
MAX 3600W/ 16 Amps)
5. Connect au(x) plancher(s) chauffant(s) (sous
tension – MAX 3600W/ 16 Amps)
7. Brancher au premier câble de la sonde de sol
(couleur pas importante)
8. Brancher au deuxième câble de la sonde de sol
(couleur pas importante)
MONTAGE DU THERMOSTAT
1. Poussez l’excès de câble à travers la boite de
branchement et insérez l’arrière de l’appareil dans la boite
au mur
2. Fixez des vis dans les trous prévus à cet effet et serrez
bien
3. Vériez que le thermostat est bien droit avant de serrer
complètement
4. Replacez la façade du thermostat:
A) Alignez et insérez la façade dans les charnières
B) Poussez la partie inférieure de la façade
5. Assurez-vous que la façade soit bien xée
6. IMPORTANT: Serrez bien les vis de maintien
(NOT USED)

12 13
FR
ACTIVER
Vous pouvez maintenant mettre en route le thermostat et commencer la programmation.
Il s’agit d’un guide d’installation facile. Pour obtenir des instructions complètes, veuillez visiter
rointe.fr
PREMIERS PAS
Pour programmer, il suft de faire glisser le bouton latéral droit de haut en bas en suivant les étapes. Si vous faites une erreur,
remontez ou rebaissez le bouton de programmation et modiez les paramètres avant de repartir à l’étape souhaitée. Tournez le
bouton de sélection pour choisir la valeur puis appuyez dessus pour la valider. Vous pouvez ensuite passer à l’étape suivante.
Votre thermostat peut suivre le programme choisi, maintenir une température xe, protéger votre maison contre le gel ou rester en
veille. Sélectionnez le mode de votre choix en déplaçant le bouton mode sur la position souhaitée.
En veille Le thermostat est en veille.
NOTE : Le thermostat est toujours connecté à l’alimentation mais votre plancher chauffant n’est pas isolé. Veillez à
toujours isoler du secteur avant de procéder à tous travaux de maintenance.
Antigel Le thermostat maintient une température supérieure à 5°C.
Manuel Le thermostat maintient une température xe. Pour changer la température, il suft de tourner le bouton de sélection.
Automatique Le thermostat suit le programme que vous avez précédemment établi. Si vous souhaitez ajuster la température
temporairement, tournez simplement le bouton de sélection. Au début de la période
suivante, le thermostat reprendra le programme établi.

EASY Touch
14
FR
PROGRAMMATION DU THERMOSTAT
Pour programmer, il vous suft de bouger le bouton latéral de haut en bas, en sélectionnant les paramètres voulus lors de chaque
étape. Le tableau cidessous détaille chaque étape de la programmation.
Paramétrez
heure/jour
Tournez la touche de sélection pour changer l’heure actuelle et appuyez pour valider. Une fois l’heure réglée, choisissez le
jour de la semaine en tournant le bouton jusqu’à sélectionner le jour voulu.
Programmez
plages
horaires
1
2
3
4
En position 1, 2, 3 ou 4, le bouton de programmation vous permet de sélectionner le début de chaque période “matin” (1),
”journée” (2), ”soirée” (3) et “nuit “ (4). Les périodes “matin” and “soirée” suivent la température de confort, et les périodes
“journée” and “nuit” suivent la température réduite. Tournez le bouton de sélection pour choisir le début de la période puis
pressez pour valider et passer au jour suivant. En maintenant appuyé le bouton de sélection pendant 3 secondes, le début
de la période sera copié au jour suivant.
Conseil - Si vous souhaitez une température de confort toute la journée et une température réduite seulement la nuit,
sélectionnez la même heure de début pour la période “journée” et “soirée”.
Programmez
températures
Sélectionnez la température de confort et la température réduite.
Fini Baissez le bouton de programmation jusqu’à cette position pour mettre en marche le thermostat. Veuillez noter que le
chauffage ne fonctionnera pas si le bouton n’est pas sur cette position.
MESSAGES D’ERREUR / PROBLÈMES
Le thermostat ne contrôle
pas la température
Assurez-vous que le bouton de programmation soit sur la position marche (dernière position sur le côté droit du
thermostat) et que le bouton mode soit sur la position Manuel ou Automatique.
Erreur sonde de sol Si l’icone sonde de sol ou “ - - “ apparait sur l’écran, cela signie que votre thermostat n’a pas pu détecter une
température de sol.
Surchauffe Si l’icone de surchauffe apparait, cela signie que votre sol est trop chaud et que le chauffage a été arrêté.
Batterie faible L’icone batterie faible apparait quand la pile doit être changée. Le thermostat doit être connecté au courant principal
pour fonctionner. Il n’est pas destiné à être utilisé avec un courant alternatif. En l’absence de pile, le thermostat ne
gardera pas les paramètres s’il y a une coupure de courant.

14 15
FR
Le chauffage a commencé
trop tôt
La fonction calculant le temps nécessaire de chauffage peut déclencher le chauffage trop tôt. Cette fonction étudie le
temps nécessaire pour chauffer la pièce an qu’elle soit à la température souhaitée à l’heure requise. Voir le manuel en
ligne, section “paramètres d’installation”.
Calibrage incorrect Le calibrage de votre thermostat n’est pas obligatoire, mais si vous souhaitez y procéder, Voir le manuel en ligne,
section “paramètres d’installation”.
Non connecté au
courant
Si l’icone “non connecté au courant” apparait sur l’écran, alors le thermostat ne reçoit pas d’alimentation. Vériez
que la façade du thermostat est bien installée et que le thermostat est branché au courant principal (230V).
Mode regulateur (Reg)
apparait
Dans ce mode, le thermostat fonctione par cycles de 10 minutes. Il se met en marche pour un nombre de minutes xé
(entre 0 et 10), sans tenir compte de la température. Voir le manuel en ligne, section “paramètres d’installation”.
Fil Pilote (FP) apparait Le thermostat peut répondre au l pilote 6 ordres (France uniquement).
HI ou LO apparait Le thermostat afchera “HI” si la température ambiante est supérieure à 50°C (122°F) et “LO” si la température
ambiante est inférieure à 0°C (32°F).
GARANTIE
Rointe garantit que ce produit est exempt de défauts de fabrication ou de matériaux, dans des conditions normales d’utilisation et de service, pour une
période de Deux (2) ans à compter de la date d’achat par le consommateur. Si, au cours de la période de garantie, le produit est déterminé comme étant
Défectueux, Rointe doit le réparer ou le remplacer, à la discrétion de Rointe.
Si le produit est défectueux, s’il vous plaît soit
(i) le renvoyer, avec une facture de vente ou une autre preuve d’achat datée, à l’endroit où vous l’avez acheté, ou
(ii) contacter Rointe. Rointe déterminera si le produit doit être retourné ou remplacé.
Cette garantie ne couvre pas les coûts d’enlèvement ou de réinstallation et ne s’applique pas si Rointe indique que le défaut ou un dysfonctionnement a
été causé par des dommages qui se sont produits pendant que le produit était en possession de l’utilisateur nal. La seule responsabilité de Rointe est de
réparer ou de remplacer le produit dans les termes indiqués ci-dessus.
ROINTE NE SERA PAS RESPONSABLE DE TOUTE PERTE OU DOMMAGE DE QUELQUE NATURE QUE CE SOIT, Y COMPRIS TOUTE INCIDENT OU
LES DOMMAGES CONSÉCUTIFS RESULTANT, DIRECTEMENT OU INDIRECTEMENT, DE TOUTE VIOLATION DE TOUTE GARANTIE, EXPRESSE
OU IMPLICITE, OU TOUTE AUTRE FONCTION DE CE PRODUIT. CETTE GARANTIE EST UNIQUE EXPRESSE L’ÉNERGIE DE GARANTIE FAIT SUR
CE PRODUIT. LA DURÉE DE TOUTES GARANTIES IMPLICITES,Y COMPRIS LES GARANTIES DE QUALITÉ MARCHANDE ET D’ADÉQUATION À UN
USAGE PARTICULIER SONT LIMITÉES AUXUXUX DURÉE DE CETTE GARANTIE
Cette garantie n’affecte pas vos droits statutaires.
Veuillez enregistrer votre produit à: www.rointe.fr

EASY Touch
16
REMARQUES

16 17
EASY Touch
ES

EASY Touch
18
INTRODUCCIÓN
El termostato fue ideado para proporcionar comodidad en su casa a partir de la regulación de la temperatura de su sistema de
suelo radiante eléctrico. El termostato recibe información de temperatura de los siguientes sensores:
1. Sensor de ambiente localizado en el interior del termostato
2. Sensor de pavimiento instalado en el suelo que se pretende calefactar (consulte el manual del sistema de calefacción para
más información)
El termostato no es un dispositivo de seguridad y deberá ser utilizado solamente de forma conjunta con los sistemas de
calefacción Rointe. Para evitar daños en el pavimento deberá seleccionar el tipo de pavimento correcto durante el proceso de
programación.
AVISO DE SEGURIDAD
Este producto utiliza la corriente eléctrica del cuadro y cualquier trabajo deberá ser realizado por personal qualicado. Durante su
instalación o reparación deberá cerciorarse que el suministro eléctrico haya sido cortado. El termostato solo deberá ser colocado
en funcionamiento después de haber certicado que toda la instalación del sistema cumple con las normas de seguridad en
vigor.
LOCALIZACIÓN DEL TERMOSTATO
El termostato debe ser instalado en una caja de pared con un mínimo de 35mm de profundidad. Para optimizar su
funcionamiento, el termostato debe ser colocado en una zona bien ventilada. No deberá ser colocado junto a ventanas, puertas
exteriores o cerca de otros equipamentos que produzcan calor (radiadores, TV, etc.). El termostato fue diseñado para operar en
temperaturas comprendidas entre 0°C y 50°C grados en ambientes con humedad relativa inferior al 80%.
ES

18 19
INSTALACIÓN
Remueva la carátula del termostato:
1. Desatornille ambos tornillos hasta el nal
2. Remueva la carátula a partir de la parte inferior
3. Coloque la carátula en un lugar seguro
4. Pase todo el cableado para la caja de pared. Asegúrese que incluye los siguientes cables:
Alimentación (Fase y Neutro)
Sistema de calefacción (Fase y neutro)
Sonda de pavimento
Fil pilote (solamente en Francia)
5. Realice las conexiones eléctricas en la parte trasera del termostato.
IMPORTANTE: Asegúrese de que varios cables trenzados son totalmente insertada en los terminales y asegurado rmemente.
cualquier hilo suelto debe ser recortados, ya que podría ausar un corto circuito. Si se conecta más de dos mallas calefactoras
eléctricas se requerirá una caja de conexiones.
NOTA: Asegúrese siempre de que el cable de la sonda se instala en un tubo separado de los cables de alimentación de las
mallas.
ESPECIFICACIÓN ELÉCTRICA:
• Voltaje: 230V +/-10% at 50Hz
• El termostato no deberá ser utilizado en lugares donde el suministro eléctrico sea intermitente
• Carga máxima: 16A resistivo
• Aislamiento: II
• IP20
• Normas: EN60730-1 & EN60730-2-9
ES

EASY Touch
20
INSTALACIÓN ELÉCTRICA ESTÁNDAR
ver la numeración en el diagrama
1. Conectar el l pilote (FP) - utilizado solamente en
Francia
2. Conectar el suministro eléctrico (Fase - MAX 230V)
3. Conectar el suministro eléctrico (Neutro - MAX 230V)
4. Conectar el cable de suministro del sistema de suelo
radiante eléctrico (Neutro - MAX 3600W/16A)
5. Conectar el cable de suministro del sistema de suelo
radiante eléctrico (Fase - MAX 3600W/16A)
7. Conectar el primer cable de la sonda de suelo (el color
no importa)
8. Conectar el segundo cable de la sonda de suelo (color
no importa)
MONTAJE DEL TERMOSTATO
1. Coloque el cableado sobrante dentro de la caja de pared
y monte el módulo posterior del termostato en la caja
2. Apriete los tornillos de jación
3. Verique que el termostato está recto antes de realizar los
ajustes nales
4. Coloque la carátula frontal del termostato asegurándose
que se encuentra bien ja:
A) Alinee y asiente la carátula frontal en los apoyos
B) Empuje la parte inferior hasta oír un “click“
5. Asegurarse que la carcasa frontal se ja de forma segura
6. IMPORTANTE: Apriete los dos tornillos de sujeción
ES
(NOT USED)
Table of contents
Languages:
Other Rointe Thermostat manuals