manuals.online logo
Brands
  1. Home
  2. •
  3. Brands
  4. •
  5. Roland
  6. •
  7. Music Mixer
  8. •
  9. Roland Edirol M-16DX Instruction manual

Roland Edirol M-16DX Instruction manual

1
Workshop
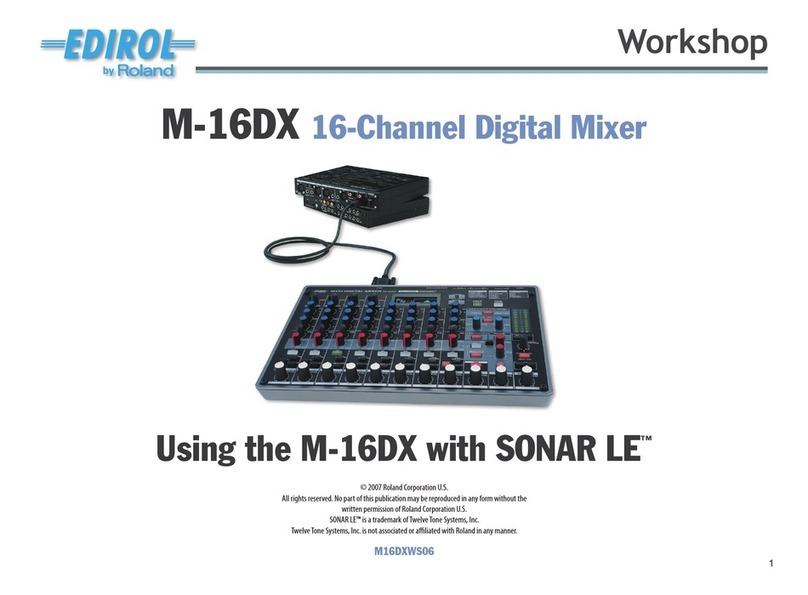
M-16DX 16-Channel Digital Mixer
© 2008 Roland Corporation U.S.
All rights reserved. No part of this publication may be reproduced in any form without the
written permission of Roland Corporation U.S.
M16DXWS15
Tuning Your Room with RAC
2
About the Workshop Booklets
The EDIROL M-16DX 16-Channel Digital Mixer delivers the power of digital
mixing to musicians at an incredibly affordable price. This crystal-clear 24-bit
digital mixer supports sample rates up to 96 kHz, and it’s extremely flexible,
with a wide range of analog and digital inputs and outputs, and effects. The
M-16DX’s USB connectivity makes it an ideal partner for a computer-based
digital audio workstation, and features such its pro EQ and the innovative
Room Acoustic Control make it an excellent live mixer as well.
Each M-16DX Workshop Series booklet focuses on one M-16DX topic, and is
intended as a companion to the M-16DX Owner’s Manual.
The M-16DX Workshop booklets require M-16DX O.S. Version 2.00 or higher.
You can download the latest O.S. for free from www.RolandUS.com/EDIROL.
About This Booklet
The M-16DX’s incredibly handy RAC—“Room Acoustic Control”—feature
optimizes the output of the M-16DX for the room in which you’re working.
When you’re recording, this helps ensure that your tracks and mixes sound
great everywhere. When you’re using the M-16DX for live mixing, RAC helps
you get the best sound for your audience. This booklet explains how to use
RAC.
Understanding the Symbols in This Booklet
Throughout this booklet, you’ll come across information that deserves
special attention—that’s the reason it’s labeled with one of the following
symbols.
A note is something that adds information about the topic at hand.
A tip offers suggestions for using the feature being discussed.
Warnings contain important information that can help you avoid
possible damage to your equipment, your data, or yourself.
Why The World Needs RAC
Just as there are all sorts of speakers in the world, there are even more kinds
of rooms in which the speakers get used. Rooms come in every sort of shape
and size, and each room contains its own unique mix of furniture, flooring,
wall materials, windows, wall hangings, and so on. Every one of these factors
affects the sound of the room, often making it tricky to get the sound you’re
looking for using even the very best speakers.
When You’re Recording
The Problem
When you’re working in a studio context,
the room in which you’re listening is likely to
cause the sound coming out of the speakers
to change in some way, resulting in your not
hearing what you’re really getting. Some
aspects of the sound may seem louder than
they really are, or quieter. This can cause you
to make serious mistakes during recording
and mixing.
Since everyone who hears your work will
be listening in their own unique listening
environment, the best strategy is to create
a mix that brings to that environment no
problems of its own. What you want to hear
when you’re mixing is as honest a sound
as possible. The speakers shouldn’t sound
good, they should sound accurate. That way,
when your mix sounds good, you can know
it’s more likely to sound good anywhere.
3
The RAC Solution
When you’ve connected your speakers to the M-16DX’s CONTROL ROOM
L and R outputs, you can apply RAC to them. RAC adds an automatically
formulated EQ curve to the CONTROL ROOM outputs that flattens your
speakers’ frequency response, fixing any problems caused by your acoustic
environment. Once you can trust what you hear, you can record and mix
with confidence that what you think you’ve got is, in fact, what you have.
When you’re recording, RAC changes only the way you listen to your
DAW tracks or mix—by altering the CONTROL ROOM outputs. It doesn’t
directly affect your DAW tracks or your mix. It just lets you hear them
accurately so you can make them sound the way you want them to.
When You’re Mixing Live Sound
The Problem
The acoustic oddities of a performance space may result in
feedback—
• when a a particular frequency range is too loud in a room.
This can cause howling when a mic picks up that frequency range and
sends it to the speakers, which sends it back into the mic even louder,
and round and round. This can cause you to turn the whole mix down
just to avoid the problem.
poor sound—
• when a room just doesn’t sound very good. This kind of
room, a surprisingly common beast at performance venues, makes
everything harder when you’re mixing since you’re always fighting
against the room’s own acoustic issues.
The Solution
In live mixing, you connect your house system to the M-16DX’s MAIN L and
R outputs, and apply RAC to them. RAC identifies any problem frequency
ranges in the room, and adds EQ to the MAIN OUT jacks to lower the volume
of any frequency ranges that are too loud, and/or increase the volume of any
that are too quiet.
In live mixing, RAC is less about creating an accurate listening environment
than it is about achieving a good, strong sound right then and there.
If you’re unclear about what EQ is, see the M-16DX EQ Workshop
booklet.
If you’d rather tweak the sound of the MAIN OUT jacks manually, you
can use the M-16DX’s 16-band graphic EQ, described in the M-16DX EQ
Workshop booklet.
The Three Flavors of RAC
RAC has three different analysis/adjustment routines it can run, depending
on what it is you want RAC to do for you.
Flat—
• strives to make your speakers accurate, with
no coloration. You’d use the Flat response curve
when you’re recording, or when you want your
speakers to sound as neutral as possible in live
mixing.
Bump—
• boosts the high-frequency content of your
speakers as well as their low end. This response
curve is handy for creating especially warm and
crisp live mixes.
Warm—
• brings out the bottom end of a live mix,
and is suitable for dance music where you want a
deep kick and bass, or for solo or small-ensemble
mixes that might otherwise sound thin.
4
The M-16DX Never Forgets
Once you’ve performed an RAC analysis and adjustment, the M-16DX stores
the resulting response curve for you in its memory. You can quickly recall
a response curve whenever you resume work in an environment you’ve
already analyzed and RAC-adjusted. You can store four Flat response curves,
four Bump Response curves, and four Warm response curves.
You can also replace individual stored curves as described later on in
this booklet. If you like, you can clear out all of your RAC response
curves at once using the UTILITY menu’s Initialize command set to its
ALL or GEQ/RAC setting, as described in the M-16DX Owner’s Manual.
When you initialize your RAC curves or perform a factory reset, all of
your stored curves are permanently erased, so only do this if you’re
sure you want to.
What Happens In an RAC Analysis and Adjustment
While you’ll be able to see what RAC is doing as it runs through its analysis
and adjustment, it goes by pretty quickly, so we thought we’d tell you what
you’ll be seeing before we actually perform the procedure—this gives us
a bit more time to explain things. The procedure is pretty much automatic
once you get it going, working first on your left speaker, and then on your
right. When you initiate an RAC analysis and adjustment procedure:
After you select a Flat, Bump, or Warm response-curve memory
1
location to use, the M-16DX sends its test signal to your left speaker
and analyzes what it “hears.”
The M-16DX tries out a handful of corrective EQ curves and listens to
2
each one until it’s satisfied that the best curve has been found, which
it then writes into the selected response-curve memory location.
(You can see the curves it’s trying out as it works.)
The M-16DX moves on to your right speaker and repeats Steps 1 and
3
2.
Setting up for an RAC Analysis and Adjustment
Selecting Your Test Mic
On the back of the M-16DX mixer, you’ll find its built-in ROOM ACOUSTIC
SENSOR.
The ROOM ACOUSTIC SENSOR is a high-quality mic designed for analyzing
your speakers as part of the RAC analysis and adjustment process. You’ll
typically get great results using the ROOM ACOUSTIC SENSOR.
Using Another Mic from Your Collection
If you’d prefer to use a high-quality mic of your own for this purpose, you
can. Here’s how:
Connect the mic to the Input 1 XLR jack.
1
On the rear of the M-16DX mixer,2
flip the RAC SOURCE switch up to its
EXT position—when you do this, the
display shows that Input 1 is being
used for RAC analysis.
If you try to change any of Channel 1’s EQ settings or press its SEL
button, the M-16DX reminds you that the channel’s currently being
used for RAC.
5
Setting a Frequency Range for Your Mic to Test
When you’re using your own mic, you should set the M-16DX to take best
advantage of the mic’s own frequency range by setting the M-16DX’s RAC
FREQ UTILITY parameters. Here’s how:
Hold down the CURSOR BWD and FWD buttons at the same time to
1
display a UTILITY screen.
Press FWD and/or BWD until the RAC FREQ >—for “RAC Frequencies
2
Greater Than”—value is highlighted.
Set the parameter to the value closest to the lowest frequency your3
mic can capture.
Press FWD once and set RAC FREQ < (“RAC Frequencies Less Than”) to
4
the value closest to the highest frequency your mic can handle.
Press DISPLAY•EXIT when you’re done.
5
When you’re using the M-16DX’s built-in ROOM ACOUSTIC SENSOR, RAC
FREQ > should be set to 40 Hz, and RAC FREQ < should be set to 16
kHz.
Positioning the ROOM ACOUSTIC SENSOR or Mic
Place the M-16DX mixer’s ROOM ACOUSTIC SENSOR or your mic
at an equal distance from, and exactly in the middle of, your two speakers—
•
with nothing in the way.
This central location is also the best place
for you to mix from, of course.
Same
distance
and dead-
center
at roughly the same height as your ears if possible—• so what RAC picks up
most closely resembles what you’ll be hearing.
where it won’t move or resonate during the procedure.
•
Setting the M-16DX’s Volume
RAC requires a strong signal to work well.While the specific levels you should
use depend on your speakers, room, ampilfier settings, and so on, here are
some starting points. If you’re performing an RAC analysis and adjustment
for studio work—
• set the MAIN LEVEL knob to its 12 o’clock position, and
set the PHONES/CTRL ROOM knob to the same position.
for live sound—
• set the MAIN LEVEL knob to its 12 o’clock position.
If you need to raise or lower this level, the M-16DX will ask you to.
If you raise your output level higher than normal as you perform the
RAC analysis and adjustment, be sure to turn it back down to a normal
listening level before sending any other signals through the M-16DX.
Otherwise, you may end up blasting your speakers and yourself.
6
The RAC Analysis and Adjustment Procedure
Now that you know what to expect, here’s how to perform an RAC analysis
and adjustment procedure.
Automatic Analysis and Adjustment
Hold down the CURSOR BWD ad FWD buttons together to get to the1
UTLILITY menu, and cursor to the RAC-FINALIZE value.
2 Set the parameter as desired. If you’re working
in a studio setting—
• set RAC-FINALIZE to CTRL, for “CONTROL
ROOM.”
on a live mix—
• set RAC-FINALIZE to MAIN.
Press the ROOM ACOUSTIC
3
CONTROL button so it lights,
turning on RAC. The M-16DX
displays the first RAC screen.
Speaker
Curve
Percent
We’ll talk about what you see on this screen more later—what you see
before doing an RAC analysis and adjustment isn’t that meaningful.
Use CURSOR FWD to highlight the curve value.4
Use the - and/or + VALUE buttons to select the desired Flat, Bump, or5
Warm memory location for the type of RAC adjustment you want.
If you’d like to replace an already-stored response curve, select it
now—your new curve will take its place.
Hold down the ROOM ACOUSTIC CONTROL button for a couple of6
seconds until it and the 16 BAND GRAPHIC EQ button blink, and the
first analysis screen appears.
Watch the display as the M-16DX works. If it asks you to turn your
output level up or down, do as instructed. If you’re working in a studio
context, adjust the PHONES/CTRL ROOM knob’s setting. If you’re doing
live sound, adjust the MAIN LEVEL knob’s setting.
As the M-16DX analyzes your left speaker’s response, it displays
“Measuring.”Next, it tries out a few corrective response curves until it
finds the best one. After it’s optimized the M-16DX’s output for your
left speaker, it repeats the process for your right-hand speaker.
When the analysis and adjustment process is complete, the M-16DX
shows you the resulting EQ settings for its left and right outputs.
The upper row of sliders shows the settings
for the 16 left-speaker EQ bands.The lower
row shows the right speaker’s EQ.
The position of the EQ sliders shows the unique response curve RAC
has just created for you. There’s not enough space on the display to
identify the EQ band associated with each slider, but we can show
you here:
25 Hz 63 Hz
40 Hz 100 Hz 250 Hz 630 Hz 1.6 kHz 4 kHz 10 kHz 20 kHz
160 Hz 400 Hz 1 kHz 2.5 kHz 6.3 kHz 16 kHz
That’s it—the RAC and 16 BAND EQ buttons have stopped flashing7
and the M-16DX’s output is now optimized for your speakers and
room.
7
We know we’ve said this before, but we can’t say it enough. If you’ve
raised your output level for the analysis and adjustment procedure
more than you normally would, make sure to turn it back down to a
normal listening level immediately after performing an RAC analysis
and adjustment to avoid damaging your speakers and/or your ears.
To give you a good look at your RAC response curve, the M-16DX8
displays the details on a few different screens. With the top line—
usually the speaker name—highlighted, use the - and/or + VALUE
buttons to get to these additional views.
The left speaker’s EQ
curve shown graphically
The right speaker’s EQ
curve shown graphically
The left speaker’s EQ
sliders
The right speaker’s EQ
sliders
The left and right
speakers’EQ sliders
Both speakers’EQ curves
shown graphically
On your screen, you’ll see your own RAC EQ curves, of course.
To hear the difference RAC is making to your sound, send some audio
through the M-16DX and listen to it while turning RAC on and off by
toggling the ROOM ACOUSTIC CONTROL button.
Manually Tweaking Your RAC Curve
While you would normally leave your RAC curve as it is for studio work—
where you’re seeking absolute accuracy—you can adjust an RAC curve. In
Live mixing, you may well want to tailor the curve to your taste. There are a
couple of ways to do this.
RAC Percentage
You can set the degree to which you want to use the RAC adjustment curve
by cursoring to the RAC percentage value and using the - and/or + VALUE
buttons to select the strength with which you want the curve applied.
Tweaking the RAC EQ
If you’d like to make changes to the adjustment curve
Turn the 16 BAND GRAPHIC EQ
1
FREQ knob to select the desired
frequency range on the left or right
side. The currently selected range’s
slider is highlighted, and its name
is also shown in the lower-left of
the screen.
Turn the 16 BAND GRAPHIC EQ GAIN knob to adjust the level of the2
selected frequency range.
FREQ
knob
GAIN
knob
8
Using Your Stored RAC Response Curves
You can use your stored RAC curves at any time by pressing the ROOM
ACOUSTIC CONTROL button so it lights—this turns RAC on and displays an
RAC screen.
To select a different stored curve, highlight the currently selected curve in
the RAC screen, and use the - and/or + VALUE buttons to select the one you
want.
Press the button again to turn RAC off.
The End
We hope you’ve found this workshop helpful. You’ll find other
M-16DX Workshop booklets available for downloading at
www.RolandUS.com/EDIROL.

Other manuals for Edirol M-16DX

7

Other Roland Music Mixer manuals

Roland PA-250 User manual

Roland

Roland PA-250 User manual

Roland BK-7m User manual

Roland

Roland BK-7m User manual

Roland VS-700C User manual

Roland

Roland VS-700C User manual

Roland Boss Dr.Groove DR-202 Operating and maintenance manual

Roland

Roland Boss Dr.Groove DR-202 Operating and maintenance manual

Roland V-mixing station VM-3100 User manual

Roland

Roland V-mixing station VM-3100 User manual

Roland Groovebox MC-505 Parts list manual

Roland

Roland Groovebox MC-505 Parts list manual

Roland MC-101 User manual

Roland

Roland MC-101 User manual

Roland CPM-300 User manual

Roland

Roland CPM-300 User manual

Roland V-02HD User manual

Roland

Roland V-02HD User manual

Roland SP-505 User manual

Roland

Roland SP-505 User manual

Roland Groovebox MC-505 Owner's manual

Roland

Roland Groovebox MC-505 Owner's manual

Roland V-Mixer VM-C7100 Quick start guide

Roland

Roland V-Mixer VM-C7100 Quick start guide

Roland SoundCanvas SC-8820 User manual

Roland

Roland SoundCanvas SC-8820 User manual

Roland GO:MIXER User manual

Roland

Roland GO:MIXER User manual

Roland TL 8 User manual

Roland

Roland TL 8 User manual

Roland V-studio VS-2480 Quick start guide

Roland

Roland V-studio VS-2480 Quick start guide

Roland Edirol V-8 User manual

Roland

Roland Edirol V-8 User manual

Roland V-Mixer VM-C7100 Instruction Manual

Roland

Roland V-Mixer VM-C7100 Instruction Manual

Roland MV-8000 Quick start guide

Roland

Roland MV-8000 Quick start guide

Roland S-1 User manual

Roland

Roland S-1 User manual

Roland MC-909 Owner's manual

Roland

Roland MC-909 Owner's manual

Roland VR-4HD User manual

Roland

Roland VR-4HD User manual

Roland MC-808 User manual

Roland

Roland MC-808 User manual

Roland VM-7000 Series User manual

Roland

Roland VM-7000 Series User manual

Popular Music Mixer manuals by other brands

Alto LEGACY Series Service manual

Alto

Alto LEGACY Series Service manual

audiophony MYA5D user guide

audiophony

audiophony MYA5D user guide

Precor P80 Console Operating and maintaining

Precor

Precor P80 Console Operating and maintaining

Studer OnAir 3000 operating instructions

Studer

Studer OnAir 3000 operating instructions

Tascam DM-24 Effects manual

Tascam

Tascam DM-24 Effects manual

Stanton RM.416 user manual

Stanton

Stanton RM.416 user manual

Phonic Powerpod 415RW user manual

Phonic

Phonic Powerpod 415RW user manual

inDESIGN ZM Series Installation & operation manual

inDESIGN

inDESIGN ZM Series Installation & operation manual

Yamaha DMC1000 Operatiing manual

Yamaha

Yamaha DMC1000 Operatiing manual

Crest Audio X-RACK XR-20 - brochure

Crest Audio

Crest Audio X-RACK XR-20 - brochure

Yamaha EMX3000 owner's manual

Yamaha

Yamaha EMX3000 owner's manual

SoundCraft Si3 user guide

SoundCraft

SoundCraft Si3 user guide

Peavey 900 Mixer owner's manual

Peavey

Peavey 900 Mixer owner's manual

Raven SCS 5000 Series Installation and operation manual

Raven

Raven SCS 5000 Series Installation and operation manual

Qtx DM-X24 user manual

Qtx

Qtx DM-X24 user manual

Fostex 350 owner's manual

Fostex

Fostex 350 owner's manual

STK Professional Audio VM11T-DRV owner's manual

STK Professional Audio

STK Professional Audio VM11T-DRV owner's manual

M-Audio Mulitmixer 6 user guide

M-Audio

M-Audio Mulitmixer 6 user guide

manuals.online logo
manuals.online logoBrands
  • About & Mission
  • Contact us
  • Privacy Policy
  • Terms and Conditions

Copyright 2025 Manuals.Online. All Rights Reserved.