* 5100013636 - 02*
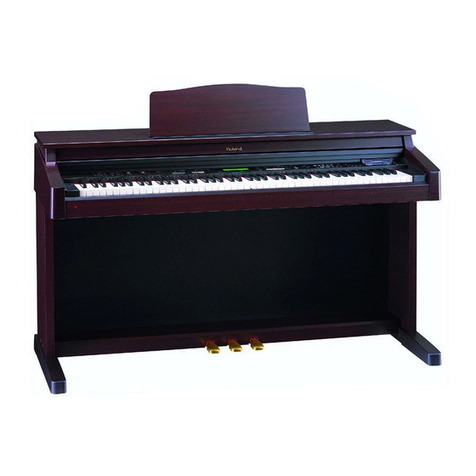
Assembling the DP990F/DP990RF
•Make sure that another person is on hand to help with the assembly and setup.
•To move the piano, lift it carefully-all the while keeping it level. Be very careful, when you assemble
and move the piano, to make sure that you do not drop it on your hands or feet.
•Should you remove screws, cord clamps, or stabilizer, make sure to put them in a safe place out
of children’s reach, so there is no chance of them being swallowed accidentally.
■Check the Parts
Before you begin assembling the DP990F, check that all the parts
were supplied.
You will also need to have a Phillips screwdriver.
* The packing sheets that are wrapped around the side
boards should not be removed until after you’ve completed
step 4. These sheets have been placed on the boards in the
interest of preventing them from being scratched during
the assembly process.
fig.st900parts.e
1: Attachment screw (M6 x 20 mm) x 8
2: Stabilizer screw (M4 x 16 mm) x 6
3: Cord clamp x 3
The speaker box can also be installed so that it faces toward the rear
instead of toward the front. Having the speaker box face out the rear
of the instrument allows the speakers to be directed toward listeners
when the back of the instrument faces the audience.
fig.stsp.e
■Assembly Procedure
• Be sure to insert the attachment screws by hand, and turn them
several times by hand before using a screwdriver to tighten
them.
• At first, assemble the entire unit in a temporary fashion, without
really tightening the screws. Then, after checking the overall
alignment of the boards (and gently shifting certain parts where
necessary), go around and tightly fasten each of the screws.
• Be careful when assembling the DP990F, so as to avoid
scratching the parts.
• When assembling the DP990F, cover your work surface with a
soft blanket or the cushioning materials in which the parts were
packed. You risk scratching the parts or the floor if you place the
parts directly on the floor.
1. Secure the right side board to the speaker box with the
attachment screws (M6 x 20 mm, in two places).
Attach so that the speaker cord at the rear of the speaker
box is directed to the left.
2. Secure the left side board to the speaker box with the
attachment screws (M6 x 20 mm, in two places).
fig.st1.e
3. Place the unit upright, and use the stabilizer screws (M4
x 16 mm; six locations) to attach the stabilizers.
When standing the assembled unit up, grasp near the
speaker box, and gently raise the assembly.
fig.st4
Take care not to attach the left and right stabilizer to the
wrong sides.
4. Place the pedal board onto the metal fixtures.
Temporarily loosen the screws you installed in steps 1 and
2, and spread the left and right side boards apart.
fig.st3.e
When placing the pedal board onto the metal fixtures, take care
not to scratch the side boards.
Speaker box
Stabilizer
(left)
Stabilizer (right)
Side board (right)
Side board
(left)
DP990F
Pedal Board
3
2
1
Packing
sheet
Packing
sheet
Normal direction When facing to the rear
RearFront RearFront
Speaker
box
Speaker
box
RMark
Speaker box
Speaker cord (rear)
Attachment screw
Side board right Front
Rear
Side board left
LMark
Left
Right
Front
Rear
Stabilizer
screws
Loosen the screws
(in four places).
fig.st5.e
5. Secure the Pedal Board to the side boards with the
attachment screws (M6 x 20 mm, in two places).
Remove the packing sheet from each side board.
fig.st6.e
Return the side panels you spread in step 4 to their original
position, and re-tighten the screws you loosened.
To stabilize the pedals
Temporarily loosen the screws that fasten the pedal board.
Step on the pedal, and after verifying that the pedal is in
firm contact with the floor, re-tighten the attachment
screws firmly.
6. Align the protruding screws (one each at right and left)
on the bottom of the piano with the openings in the
metal fittings on the side board, then slide the piano
forward until the screws are held in place.
* When handling the piano, firmly grasp it at the front and
back. Be careful, so you do not get your fingers pinched.
Place the keyboard so that it is centered, both front to back
and left to right.
* If the assembly could not be completed successfully, and
certain parts seem out of alignment in places, you may be
able to achieve a more satisfactory result if you do the
following:
1 Slightly loosen the attachment screws you fastened in
steps 1, 2, and 5.
2 Shift certain parts as necessary to eliminate any
misalignment.
3 Retighten all the screws you loosened.
7. Fasten the piano to the stand with the attachment screw
(M6 x 20 mm) (one each for the right and left).
* Make sure to insert the screws by hand and give them a few
turns by hand before using a screwdriver to tighten them.
8. Connect the speaker cord extending from the rear of the
speaker box to the DP990F’s speaker connector.
Press the speaker cord completely into the connector so
that it is securely fastened.
fig.st8.e
9. Connect the pedal cord to the Pedal jack.
* Plug the pedal cord all the way into the Pedal jack.
10. As necessary, affix cord clamps as shown in the diagram
to fasten the pedal cord.
fig.st9.e
When Moving the Instrument
Disconnect the power cord and cables from the DP990F.
Then lift the piano while keeping it level, and move it with
care, so that you do not drop it on your feet, or get your
hands caught.
Check the stability of the pedal, and make adjustments as
necessary.
When Disassembling
Disassemble the unit by carrying out assembly Steps 1–10
in reverse order.
When Changing the Orientation of the Speaker
Box
Be sure to completely disassemble the unit, change the
speaker box orientation, then reassemble it.
Extend the
pedal cord
Pedal Board
Pedal Board
Metal Fixtures
Putting the
Pedal Board
(a lateral view)
Attachment screws
Pedal Cord
6
7
Please don’t get
your fingers
pinched
Front (Keyboard)
Rear
Attachment Screw
DP990F Rear
Hold and insert the cord so that
the clip portion extends into the
stand and is securely connected.
Speaker Connector
Speaker cord
Clip
Portion
Speaker Cord
Power Cord
Pedal Cord
Cord
Clamps
Copyright ©2010 ROLAND CORPORATION
All rights reserved. No part of this publication may be reproduced in any form without the written
permission of ROLAND CORPORATION.
DP990F_l_assemble_e.fm 1 ページ 2010年4月8日 木曜日 午後6時11分

