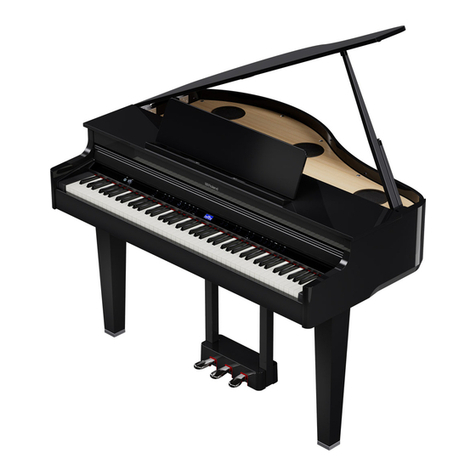
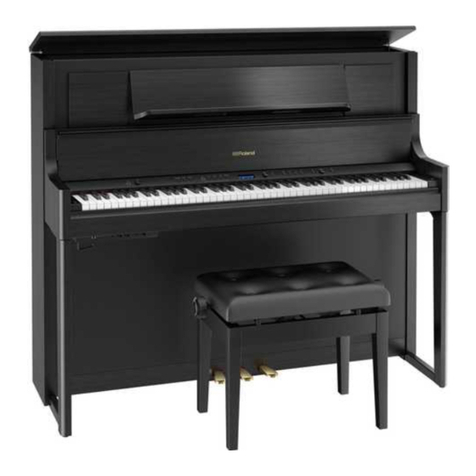
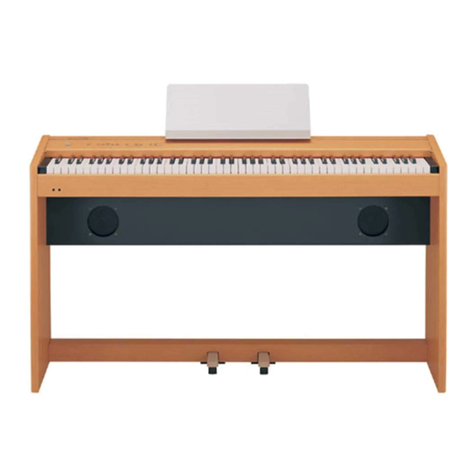
Roland HP 730 User manual

Roland
Roland
Digital
Piano
HP
730/HP530e/HP
330e
Owner’s
Manual

For
E.C.
Countries
This
product
compiles
with
EC
directives
Questo
prodotto
é
conforme
alle
seguenti
direttive
CEE
~
LOW
VOLTAGE
73/23
+
BASSA
TENSIONE
79/23
-
EMC
89/336"
-
EMC
89/336"
Dieses
instrument
entspricht
foigenden
EG-Verordnungen:
Dit
instrument
beantwoordt
aan
de
volgende
EG
richtlijnen:
+
NIEDRIGE
SPANNUNG
73/23
-
LAGE
SPANNING
73/23
-
EMC
89/236"
-
EMC
89/336"
Cat
instrument
est
conforme
aux
directives
CE
suivantes:
Este
producto
cumple
con
las
siguientes
directrices
de
la
CE
+
BASSE
TENSION
73/23
~
BAJO
VOLTAJE
73/23
~
EMC
69/336"
-
EMC
89/336"
For
the
USA
FEDERAL
COMMUNICATIONS
COMMISSION
RADIO
FREQUENCY
INTERFERENCE
STATEMENT
This
equipment
has
been
tested
and
found
to
comply
with the
limits
for
a
Class
B
digital
device,
pursuant
to
Part
15
of
the
FCC
Rules.
These
limits
are
designed
to
provide
reasonable
protection
against
harmful
interference
in
a
residential
installation.
This
equipment
generates,
uses,
and
can
radiate
radio
frequency
energy
and,
if
not
installed
and
used
in
accordance
with
the
instructions,
may
cause
harmiu!
interference
to
radio
communications.
However,
there
is
no
guarantee
that
interference
will
not
occur
in
a
particular
installation.
If
this
equipment
does
cause
harmful
interference
to
radio
or
television
reception,
which
can
be
determined
by
turning
the
equipment
off
and
on,
the
user
is
encouraged
to
try
to
correct
the
interference
by
one
or
more
of
the
faillowing
measures:
~
Reorient
or
relocate
the
receiving
antenna.
—
Increase
the
separation
between
the
equipment
and
receiver.
~
Connect
the
equipment
into
an
outiet
on
a
circuit
different
from
that
to
which
the
receiver
is
connected.
-
Consult
the
dealer
or
an
experienced
radio/TV
technician
for
help.
Unauthorized
changes
or
modification
to
this
system
can
void
the
users
authority
to
operate
this
equipment.
This
equipment
requires
shielded
interface
cables
in
order
to
meet
FCC
class
B
Limit.
For
Canada
CLASS
B
NOTICE
This
digital
apparatus
does
not
exceed
the
Class
B
limits
for
radio
noise
emissions
set
out
in
the
Radio
Interference
Regulations
of
the
Canadian
Department
of
Communications.
CLASSE
B
AVIS
Cet
appareil
numérique
ne
dépasse
pas
les
limites
de
fa
classe
B
au
niveau
des
émissions
de
bruits
radioélectriques
fixés
dans
le
Réglement
des
signaux
parasites
par
le
ministére
canadien
des
Communications.

Roland
Roland
Digital
Piano
P730/
530e/
330e
Owner's
Manual
Thank
you,
and
congratulations
on
your
choice
of
the
Roland
HP
730/530e/330e.
The
HP
730/530e
/330e
features
high-quality
grand
piano
sounds
and
hammer-action
keyboard,
allowing
you
to
enjoy
extremely
realistic
piano
performances.
Moreover,
it
is
stocked
with
many
other
sounds
that
can
be
effectively
used
for
various
different
types
of
music.
You
also
can
conveniently
use
it
for
piano
lessons,
thanks
to
its
wealth
of
23
demonstration
songs
and
a
built-in
two-track
sequencer
(which
is
as
handy
to
use
as
a
tape
recorder).
IMPORTANT
NOTES.
.snccccce.csncstassiesetinesensaetsecanendnsene
3
INTRODUCTION
Using
the
Music
Rest
How
to
Open
and
Close
the
Piano
Lid
Powering
Up...
Using
Headphones.
Using
a
Microphone(HP-730/530e)..
Panel
Descriptions.......sscsseenece:
Rear
Panel
Connecting
to
External
Devices
.
Pedal
Functions
..
PLAYING
THE
HP
730/530e/330e
Adjusting
the
Volume
and
Brightness
of
the
Sound
.
Listening
to
the
Demonstration
Songs
(All
Song
Play)
...-ccseseeceendd
Playing
with
Various
Sounds...
Mixing
Two
Sounds
(Dual
Play)
Changing
the
Keyboard
Touch
.
Adding
Chorus...
Adding
Reverb
...
Using
Two
Different
Sounds
for
Right
And
Left
Hands
(Split
Function)...
15
Playing
Any
Song
in
C
Major
(Key
Transpose
Function)
...16
Playing
to
the
Metronome
..
PRACTICING
ON
THE
HP
730/530e/330¢.
Listening
to
a
Demo
Performance
.......
Practicing
Right
And
Left
Hands
Separately.
OTHER
USEFUL
FUNCTIONS
Playing
in
the
Tuning
of
Classical
Music
..
Adjusting
the
Pitch
of
the
Sound
(Master
Tuning,
Setting
the
Tuning
Curve
(Stretch
Tuning)
Changing
the
Volume
Balance
for
Dual
Play
...
Changing
the
Demo
Song/Keyboard
Balance..
Changing
the
Assignment
to
the
Pedals...
2
Changing
the
Amount
of
Resonance
for
the
Damper
Pedal
....35
USING
MIDI..
Connecting
with
MIDI
Devices.
Setting
the
MIDI
Transmit
and
Receive
Channels
Setting
the
Local
Control...
Setting
the
Transmit
Mode
Transmitting
and
Receiving
Program
Changes
Connecting
with
a
Computer...
MIDI
Implementation
Chart...
TROUBLESHOOTING...
SPECIFICATIONS
:
DEMO
SONG
UST
ian
cccisecanneunaivecmtnsieian
eid
English
The
lightning
flash
with
arrowhead
symbol,
within
an
equilateral
triangle,
is
intended
to
alert
the
user
to
the
presence
of
uninsulated
“dangerous
voltage”
within
the
product's
enclosure
that
may
be
of
sufficient
magnitude
to
constitute
a
risk
of
electric
shock
lo
persons.
CAUTION:
TO
REDUCE
THE
RISK
OF
ELECTRIC
SHOCK,
The
exclamation
point
within
an
equilateral
triangle
is
DO
NOT
REMOVE
COVER
(OR
BACK).
intended
to
alert
the
user
to
the
presence
of
important
NO
USER-SERVICEABLE
PARTS
INSIDE.
operating
and
maintenance
{servicing}
instructions
in
the
REFER
SERVICING
TO
QUALIFIED
SERVICE
PERSONNEL.
literature
accompanying
the
product.
INSTRUCTIONS
PERTAINING
TO
A
RISK
OF
FIRE,
ELECTRIC
SHOCK,
OR
INJURY
TO
PERSONS.
@
i
IMPORTANT
SAFETY
INSTRUCTIONS
SAVE
THESE
INSTRUCTIONS
WARNING
-
When
using
electric
products,
basic
precautions
should
always
be
followed,
including
the
following:
Read
all
the
instructions
before
using
the
product.
8.
The
power-supply
card
of
the
product
should
be
unplugged
.
Do
not
use
this
product
near
water
—
for
example,
near
a
from
the
outlet
when
left
unused
for
a
ong
period
of
time.
bathtub,
washbowl,
kitchen
sink,
in
a
wet
basement,
or
near
9.
Care
should
be
taken
so
that
objects
do
not
fall
and
liquids
a
swimming
pool,
or
the
like.
are
not
spilled
into
the
enclosure
through
openings.
.
This
product
should
be
used
only
with
a
cart
or
stand
that
is
10.The
product
should
be
serviced
by
qualified
service
recommended
by
the
manufacturer.
personnel
when:
.
This
product,
either
alone
or
in
combination
with
an
amplifier
A.
The
power-supply
cord
or
the
plug
has
been
damaged;
or
and
headphones
or
speakers,
may
be
capable
of
producing
B.
Objects
have
fallen,
or
liquid
has
been
spilled
onto
the
sound
levels
that
could
cause
permanent
hearing
loss.
Do
product;
or
not
operate
for
a
long
period
of
time
at
a
high
volume
level
C.
The
product
has
been
exposed
to
rain;
or
or
at
a
level
that
is
uncomfortable.
If
you
experience
any
D.
The
product
does
not
appear
to
operate
normally
or
hearing
loss
or
ringing
in
the
ears,
you
should
consult
an
exhibits
a
marked
change
in
performance;
or
audiologist.
—.
The
product
has
been
dropped,
or
the
enclosure
.
The
product
should
be
located
so
that
its
location
or
position
damaged.
does
not
interfere
with
its
proper
ventilation.
11.Do
not
attempt
to
service
the
product
beyond
that
described
.
The
product
should
be
located
away
from
heat
sources
such
in
the
user-maintenance
instructions.
All
other
servicing
as
radiators,
heat
registers,
or
other
products
that
produce
should
be
referred
to
qualified
service
personnel.
heat.
.
The
product
should
be
connected
to
a
power
supply
only
of
the
type
described
in
the
operating
instructions
or
as
marked
on
the
product.
For
the
USA
This
product
may
be
equipped
with
a
polarized
line
plug
(one
blade wider
than
the
other)
.
This
is
a
safety
feature.
If
you
are
unable
to
insert
the
plug
into
the
outlet,
contact
an
electrician
to
replace
your
obsolete
outlet.
Do
not
deteat
the
safety
purpose
of
the
plug.
For
Canada
For
Polarized
Line
Plug
CAUTION:
TO
PREVENT
ELECTRIC
SHOCK,
MATCH
WIDE
BLADE
OF
PLUG
TO
WIDE
SLOT,
FULLY
INSERT.
ATTENTION:
pour
Eviter
Les
CHOCS
ELECTRIQUES,
INTRODUIRE
LA
LAME
LA
PLUS
LARGE
DE
LA
FICHE
DANS
LA
BORNE
CORRESPONDANTE
DE
LA
PRISE
ET
POUSSER
JUSQU'
AU
FOND.
For
the
U.K.
IMPORTANT:
THE
WIRES
IN
THIS
MAINS
LEAD
ARE
COLOURED
IN
ACCORDANCE
WITH
THE
FOLLOWING
CODE.
BLUE:
NEUTRAL
BROWN:
LIVE
As
the
colours
of
the
wires
in
the
mains
lead
of
this
apparatus
may
not
correspond
with
the
coloured
markings
identifying
the
terminals
in
your
plug,
proceed
as
follows:
The
wire
which
is
coloured
BLUE
must
be
connected
to
the
terminal
which
is
marked
with the
letter
N
or
coloured
BLACK.
The
wire
which
is
coloured
BROWN
must
be
connected
to
the
terminai
which
is
marked
with
the
letter
L
or
coloured
RED.
Under
no
circumstances
must
either
of
the
above
wires
be
connected
to
the
earth
terminal
of
a
three
pin
plug.
Copyright
1995
ROLAND
CORPORATION
All
rights
reserved.
No
part
of
this
publication
may
be
reproduced
in
any
form
without
the
written
permission
of
ROLAND
CORPORATION.
2

IMPORTANT
NOTES
In
addition
to
the
items
listed
under
Safety
Precautions
inside
the
front
cover,
please
read
and
observe
the
following:
Power
Supply
Before
connecting
this
unit
to
other
devices,
turn
off
the
power
to
all
units;
this
will
help
prevent
damage
or
malfunction.
Do
not
use
this
unit
on
the
same
power
circuit
with
any
device
that
will
generate
line
noise;
an
electric
motor
or
variable
lighting
system
for
example.
Placement
Using
the
unit
near
power
amplifiers
(or
other
equipment
containing
large
power
transformers)
may
induce
hum.
This
device
may
interfere
with
radio
and
television
reception.
Do
not
use
this
device
in
the
vicinity
of
such
receivers.
Do
not
expose
the
unit
to
temperature
extremes
or
install
it
near
devices
that
radiate
heat.
Direct
sunlight
in
an
enclosed
vehicle
can
deform
or
discolor
the
unit.
Make
sure
you
always
have
the
instrument
placed
so
it
is
level
and
sure
to
remain
stable.
Otherwise,
if
played
while
tilted,
you
risk
causing
damage
to
the
keyboard
as
a
result
of
the
unnatural
degree
of
force
that
might
be
applied
to
certain
parts
of
it.
Maintenance
‘
For
everyday
cleaning
wipe
the
unit
with
a
soft,
dry
cloth
or
one
that
has
been
slightly
dampened
with
water.
To
remove
stubborn
dirt,
use
a
mild,
non-abrasive
detergent.
Afterwards,
be
sure
to
wipe
the
unit
thoroughly
with
a
soft,
dry
cloth.
Never
use
benzene,
thinners,
alcohol
or
solvents
of
any
kind,
to
avoid
the
possibility
of
discoloration
or
deformation.
Additional
Precautions
Protect
the
unit
from
strong
impact.
Never
strike
or
apply
strong
pressure
to
the
display.
Before
using
the
unit
in
a
foreign
country,
consult
with
qualified
service
personnel.
wo
\

INTRODUCTION
Using
the
Music
Rest
How
to
Open
and
Close
the
Piano
Lid
To
open
the
lid,
hold
the
lid
with both
hands
and
lift
it
slightly,
then
slide
it
in.
To
close
it,
pull
it
slowly
forward,
then
gently
lower
it.
Gently
lift
the
music
rest
and
fix
it
in
place
as
shown
below.
To
lower
it,
hold
the
music
rest
with
your
hand,
fold
the
metal
latches
with
another
hand,
then
slowly
lower
it.
*
Be
careful
that
your
fingers
do
not
caught
under
the
lid
when
opening
or
closing
it.
Adult
supervision
is
recommended
in
households
with
small
children.
If
you
need
to
move
the
piano,
make
sure
the
lid
is
closed
first
to
prevent
accidents.
Powering
Up
1.
Connect
the
power
cord
to
the
piano,
and
plug
the
other
end
to
the
power
outlet.
2.
Press
the
Power
button,
located
at
the
far
left
of
the
keyboard.
—-_
ON
OFF
*
The
piano
requires
several
seconds
after
being
switched
on
before
it
is
ready
for
operation.
This
is
a
circuitry
protection
feature.
*
Be
sure
to
use
the
supplied
power
cord.
*
Tf
you
do
not
use
the
piano
for
a
long
period
of
time,
disconnect
the
power
cord
from
the
socket.

a
INTRODUCTION.
{
Using
Headphones
The
HP
730/530e/330e
provides
two
headphones
jacks,
thus
allowing
two
persons
to
use
headphones
at
the
same
time.
This
is
useful
when
giving
piano
lessons,
or
playing
a
piece
for
four
hands.
The
Headphones
jack
is
located
beneath
the
keyboard,
at
the
far
left.
Connecting
headphones
will
automatically
mute
the
sound
from
the
internal
speakers.
As
a
result,
you
can
play
the
piano
without
worrying
about
the
neighbors.
Headphone
jack
x
2
To
adjust
the
volume
of
the
headphones,
use
the
Volume
slider
on
the
piano.
Please
use
stereo
headphones,
such
as
Roland
RH-20/80/120
stereo
headphones.
Using
a
Microphone
The
HP
730/530e
provide
for
the
connection
and
use
of
a
microphone.
This
convenient
feature
allows
you
to,
for
example,
talk
during
a
presentation,
or
have
someone
sing
while
you
play.
*
The
HP
330e
does
not
feature
a
Mic
jack.
Mic
Jack
x1
{
HP-730/530e
only
}
The Mic
jack
is
located
beneath
the
keyboard,
at
the
far
right.
Connect
a
microphone
to
it,
then
you
can
hear
the
sound
from
the
internal
speakers.
With
headphones
connected
to
the
Headphones
jack,
the
sound
will
be
heard
only
through
the
headphones,
and
no
sound
is
heard
from
the
speakers.
To
adjust
the
volume
of
the
microphone,
use
the
Microphone
Volume
knob.
To
adjust
the
depth
of
the
Echo
effect,
use
the
Microphone
Echo
knob.
*
Be
sure
that
the
volume
is
not
too
loud
for
the
neighbors.
*
You
can
use
a
microphone
that
an
optionally
available
Roland
DR-15/25
microphone.
When
you
purchase
a
new
microphone
for
the
HP
730/530e,
please
consult
the
retailer
shop
where
you
have
purchased
the
HP
730/530e.
Notes
on
Using
a
Microphone
Before
you
connect
the
microphone
to
the
piano,
be
sure
to
lower
the
volume.
If
the
volume
is
too
high,
noise
may
be
heard
from
the
speakers.
If
the
microphone
is
pointed
toward
the
speakers,
or
is
too
close
to
them,
howling
may
occur.
Should
this
happen,
change
the
position
of
the
microphone
or
lower
the
volume.
=
~
wu
English

rs
4
i)
&
label
INTRODUCTION
Panel
Descriptions
HP
730/530e
@
®@
®©@©OOO
Brilliance
Mellow
'
Bright
Transpose
Chorus
Reverb
=
Split
Key
Touch
OLight
Cy
ED
ED
ED)
CD
owes
Odeavy
Volume
Harpsi-
Vibra-
Electric
Electric
Pipe
Min
Max
Piano
1
Piano
2
chord
phone
Pianoi
Piano2
Organ
Strings
=
(CEE
Ee
ea)
HP
330e
@
©)
|
®
|
® ©
©
@
Meow
Paliance
ie
Transpose
Chorus
Reverb
Split
Key
Touch
©
Litt
CITES
(=|
&).
2}
(=) (_)
O
Medium
Min
NoUme
s.
Diee
Piano
1
Piano
2
‘pe
6
Mba;
Bectig
Bees
ee
tings
OY
—=Aen=—
(eee
Ea
as
eS).
eas
ied
@
en
ee
eee
.
Brilliance
Slider
Adjusts
the
brightness
of
the
sound.
(p.11
)
.
Volume
Slider
Adjusts
the
volume
of
the
sound.
(p.
11)
.
Transpose
Button
Allows
you
to
transpose
keys
and
play
with
the
set
key.
(p.
16,17)
.
Chorus
Button
Turns
on
the
Chorus
effect.
(p.
14)
.
Reverb
Button
Turns
on
the
Reverb
effect.
(p.
14)
.
Split
Button
Allows
you
to
divide
the
keyboard
into
two
sections.
(p.
15)
.
Key
touch
Button
Provides
selection
of
three
levels
for
the
keyboard
touch.
(p.
13)
8.
Display
This
shows
the
Song
Number,
value
of
settings,
etc.
9.
Tone
Buttons
Press
one
of
these
to
select
from
the
8
different
sounds.
(p.
12)
Pianos
1
and
2
Harpsichord
Vibraphone
Electric
Pianos
1
and
2
Pipe
Organ
Strings
10.
Metronome
Butfon
This
turns
on
the
metronome.
(p.18,
23)

INTRODUCTION
reel
=
Track
Volume
2
:
2
"on
wa
&
ie
CC)
=
thax
Mis
Max
Metronome
All
Song
Play
Pitien
fac
fe
=)
aca
@
©
Demo
@
User
1.
Beat
[+/-]
Buttons
17.
Track
Buttons
Allow
you
to
adjust
the
timing
of
the
Allow
you
to
select
a
track
for
recording
metronome.
(p.
18)
performance
data.
(p.
26)
2.
Tempo
[+/-]
Buttons
18.
Microphone
Volume
Knob
(HP
730/530
only}
Allow
you
to
adjust
the
timing
of
demo
songs
Adjusts
the
volume
produced
by
the
:
and
the
metronome.
(p.
18,20)
microphone.
(p.
5)
3.
Song
[+/-]
Buttons
19.
Microphone
Echo
Knob
{HP
730/5306e
only)
Allow
you
to
select
a
demo
song.
(p.19)
Adjusts
the
amount
of
echo
to
apply
to
the
4.
All
Song
Play
Button
microphone’s
signal.
(p.
5
)
Pressed
to
play
the
demo
songs
as
a
continuing
series.
(p.
11)
5,
Play
Button
Press
to
play
demo
songs,
or
music
you
have
recorded.
(p.
19,25)
6.
Rec
(Recording)
Button
Press
to
record
what
you
play
on
the
piano.
(p.
24,26)

English
INTRODUCTION
0
Alternate
Button
Functions
Each
button
also
offers
another
function
if
you
hold
down
the
Transpose
button
while
you
press
it.
These
alternate
functions
are
explained
below.
After
the
desired
value
for
one
of
these
functions
has
been
set
using
the
[+/-]
buttons,
press
the
Transpose
button
(the
indicator
goes
out).
This
causes
the
new
setting
to
be
activated.
: °
Harps
Vibta
Bleciie“Eleciic
Plana
1°
Piano
2°
Sibi
«pone
«Panes
bam
ge
suis
ter]
-
Classical)’
Srached=
[Pedal]
{doa
|.
[Tx
eh
Tuning
[4
Tuning
{4
Mode
|
2
Batanc
©
Riven
alla
‘Sat
the
value
with
{
«
/~j
buttons
1,
Piano
1
Button
(Master
Tuning)
Allows
you
to
adjust
the
tuning.
(p.
30)
2.
Piano
2
Button
(Classical
Tuning
Allows
you
to
set
the
tuning
method.
(p.
28,29)
3.
Harpsichord
Button
(Stretch
Tuning}
Allows
you
to
set
the
tuning
curve.
(p.
31)
4.
Vibraphone
Button
(Pedal
Mode)
Allows
you
to
select
Pedal
modes.
(p.
34)
5.
Electric
Piano
1
Button
(Dual
Balance)
Allows
you
to
adjust
the
volume
balance
for
Dual
playing.
(p.32
)
6.
Electric
Piano
2
Button
(Tx
ch)
Allows
you
to
set
the
MIDI
transmit channel.
(p.
36)
7.
Pipe
Organ
Button
(Rx
ch)
Allows
you
to
set
the
MIDI
receive
channel.
(p.
37)
8.
Strings
Button
{Local
Switch)
Allows
you
to
select
Local
On
or
Off.(p.
37)
9.
Chorus
Button
(Transmit
Mode)
Allows
you
to
select
the
MIDI
transmit
mode.
(p.
38)
10.
Receive
Button
(PC)
Used
to
enable
transmission
/reception
of
Program
Change
messages.
(p.
38)
About
the
[+/-]
Buttons
Basically,
any
of
the
[+/-]
buttons
can
be
used
to
select
values
for
most
of
the
parameters.
However,
the
beat
can
be
set
only
with
the
Beat
[+/-]
buttons,
the
Tempo
can
be
set
only
with
the
Tempo
[+/-]
buttons,
and
Demo
Song
settings
can
be
altered
only
with
the
Song
[+/-|
buttons.

INTRODUCTION
{
Rear
Panel
Outpul,
Cstereo—
Ustereo—
The
jacks/connectors
on
the
rear
of
the
unit
A.
Pedal
Jack
function
as
follows:
Accepts
connection
of
the
cable
coming
from
1.
Computer
Connector
the
Pedal
jack
on
the
piano’s
stand.
Connect
to
a
computer
through
this
jack,
and
5.
Input
Jacks
you
can
exchange
performance
information
Connect
a
sound
generating
device
to
these
between
the
computer
and
the
piano.
(p.
39)
jacks,
and
you
can
hear
the
sound
from
that
2.
Computer
Switch
unit
through
the
HP’s
speakers.
(p.
36)
Switch
for
selecting
the
correct
configuration
6.
Output
Jacks
when
connecting
with
the
MIDI
or
Computer
Allow
you
to
output
the
piano’s
sound
to
connectors.
(p.
36,39)
sound
reinforcement
equipment
to
obtain
a
3.
MIDI
Connectors
more
powerful
sound.
Also,
by
connecting
a
Connect
a
MIDI
device
to
these
jacks,
and
recording
device
such
as
a
radio-cassette
you
then
can
exchange
performance
player,
you
can
record
your
performances
information
between
the
external
MIDI
onto
cassette
fape.
device
and
the
piano.
(p.
36)
onnecting
to
External
Devices
AUX
IN
LR
oman
[
1
|
UNE
IN
UR
[os
ae
aa
a
owe
|
o
[2—]
°
ev
ee
|
O12
To
connect
a
sound
module
and
hear
the
sound
from
the
HP’s
speakers:
Connect
the
Output
jacks on
the
external
sound
module
(e.g.,
MT-120)
to
the
Input
jacks
on
the
HP
using
audio
cable.
For
details,
read
the
owner's
manual
for
the
sound
module
you
use.
To
connect
an
audio
device
and
record
the
performance
onto
a
tape
recorder:
Connect
the
Input
jacks
on
the
audio
set,
amplifier
or
mixer
to
the
Output
jacks on
the
HP
using
an
audio
cable.
1.
Lower
the
volume
on
the
HP
and
the
device
to
be
connected.
2.
Switch
off
the
HP
and
the
device
to
be
connected.
3.
Connect
the
HP
to
the
device.
4.
Switch
on
the
HP
and
the
external
device.
5.
Adjust
the
volume
of
the
HP
and
the
external
device.
hs.
SCC‘;
CSC*~<CS:;*«~*S
oN
noglish

INTRODUCTION
Pedal
Functions
Soft
Sostenuto
Damper
1.
Soft
Pedal
Use
this
pedal
to
soften
the
sound.
f
you
play
the
keyboard
while
pressing
the
Soft
pedal,
the
obtained
sound
will
be
softer
than
normal.
The
softness
can
be
altered
subtly
by
changing
the
depth
the
pedal
is
depressed.
2.
Sostenuto
Pedal
Pressing
this
pedal
will
sustain
only
the
notes
that
were
already
playing
when
the
pedal
was
depressed.
3.
Damper
Peda
Use
this
pedal
to
sustain
the
sound.
While
pressing
the
Damper
pedal,
the
sound
will
be
sustained
even
after
you
release
the
key.
By
changing
the
depth
the
pedal
is
depressed,
the
length
of
the
sustain
can
be
subtly
altered.
*
The
amount
of
the
resonance
obtained
with
the
Damper
pedal
can
be
changed.
See
page
35.
*
The
Soft
pedal
and
Sostenuto
pedal
can
also
be
assigned
different
functions.
See
page
34,
10

PLAYING
THE
HP
730/530e/330e
Adjusting
the
Volume
and
Brightness
of
the
Sound
=}:
=
eo
dt
cal
3
OC
1.
Adjust
the
overall
volume
using
the
Volume
slider.
At
the
“Max”
position,
you
obtain
the
highest
volume,
and
at
“Min,”
it
is
at
the
lowest
volume.
2.
Adjust
the
overall
tone
with
the
Brightness
slider.
At
the
“Bright”
position,
a
bright
tone
is
obtained,
while
a
mellower
tone
is
obtained
at
“Mellow”.
re
{
Listening
to
the
Demonstration
Songs
(All
Song
Play)
)
The
HP-730/530e/330e
contain
a
great
number
of
demonstration
songs.
You
can
listen
to
them
as
follows.
HP-730/530e:
1.
Press
the
All
Song
Play
button
The
Demo
Songs
will
start
playing
from
the
currently
selected
one.
2.
Press
the
All
Song
Play
button
again
(the
indicator
goes
out)
to
stop
play.
While
the
indicator
is
lit
(the
All
Song
Play
button
is
on),
all
the
Demo
Songs
will
be
played
repeatedly.
This
is
called
“All
Song
Play”.
*
If
you
wish
to
listen
to
only
one
specific
song,
see
page
19.
*
Tf
you
wish
to
know
the
Song
Number,
Song
Name
or
Name
of
the
Composer,
see
the
Demo
Song
List
inside
the
back
cover.

PLAYING
THE
HP
730/530e/330e
Playing
with
Various
Sounds
1.
Press
any
Tone
button
you
like.
The
indicator
on
that
button
will
light,
and
you
can
play
with
the
selected
sound.
Play
the
keyboard
to
see
how
each
of
them
sounds.
Tone
Name
Description
Piano
1
Full-sized
Concert
Grand
Piano
Rich
stereo
sound,
providing
32
polyphonic
notes.
Piano
2
Full-sized
Concert
Grand
Piano
64
polyphonic
notes
Harpsichord
Delicate
and
elegant
harpsichord
sound
Vibraphone
The
sound
of
a
resonant
vibraphone
Electric
Piano
1
Sound
of
a
Rhodes
piano
Electric
Piano
2
A
synthesizer’s
electric
piano
Pipe
Organ
A
stately
pipe
organ
sound
Strings
An
ensemble
of
string
instruments
Honky-tonk
piano
Cheerful
piano
sound,
slightly
out
of
tune.
Press
Piano
1
and
Piano
2
at
the
same
time
to
obtain
the
Honky-tonk
piano
sound.
(Dual
Play
on
p.13
)
12

PLAYING
THE
HP
730/530e/330e
Mixing
Two
Sounds
(Dual
Play)
The
piano
allows
you
to
use
two
sounds
from
the
keyboard
at
the
same
time.
For
example,
you
can
mix
Piano
with
Strings.
This
is
called
Dual
Play.
Example:
Dual
Play
with
Piano
1
and
Strings
1.
Together
press
both
the
Strings
and
the
Piano
1
buttons.
The
indicators
on
the
two
Tone
buttons
you
have
pressed
will
light,
and
both
of
the
Tones
will
be
heard
when
you
play
the
keyboard.
*
You
can
adjust
the
volume
balance
of
the
two
Tones
used
with
Dual
Play.
See
page
32.
Changing
the
Keyboard
Touch
The
HP
730/530e/330e
pianos
allow
you
to
change
the
sensitivity
of
the
keyboard
touch.
This
is
a
feature
unique
to
digital
pianos,
one
which
you
cannot
obtain
with
an
acoustic
piano.
M8
Sin
Seige:
=o
RS
1.
Press
the
Key
Touch
button
to
select
a
key
touch
you
like.
Pressing
the
button allows
you
to
select
from
the
three
different
Key
Touches
in
order,
as
follows:
Light:
Fortissimo
(ff)
can
be
obtained
with
weaker
touch
than
usual,
so,
you
will
feel
that
the
keyboard
is
lighter.
This
allows
even
a
small
child
to
play
the
piano
easily.
Medium
:
This
is
the
most
natural
touch
for
the
keyboard,
and
is
closest
to
that
of
an
acoustic
piano.
This
is
automatically
selected
when
the
piano
is
switched
on.
Heavy
_:
Fortissimo
can
be
obtained
only
with
forceful
playing,
so
you
will
feel
that
the
keyboard
is
heavier.
When
this
is
selected,
you
can
express
feelings
even
more
strongly
by
playing
the
piano
dynamically.
This
can
be
selected
by
a
player
with
strong
finger
touch,
or
one
who
wishes
to
strengthen
their
fingers.
13

PLAYING
THE-HP
730/530e/330e
Adding
Chorus
The
Chorus
effect
creates
an
effect
that
sounds
like
several
instruments
are
being
played
at
the
same
time.
As
a
result,
the
sound
will
be
fatter
and
have
more
presence.
Seven
levels
of
depth
for
the
Chorus
effect
are
available
for
selection.
Fines.
Paw.
Orban
Strings
=
ad
ad
Ga:
Gl
Ne
.
Press
the
Chorus
button
and
confirm
that
its
indicator
is
lit.
*
The
Chorus
effect
can
be
applied
to
each
Tone
separately.
Changing
the
Depth
of
the
Chorus
1.
Select
the
depth
you
like
with
the
[+/-]
buttons
while
holding
the
Chorus
button
down.
1-7
can
be
selected
for
the
Chorus
Depth.
*
4
is
automatically
selected
when
the
piano
is
switched
on.
{
Adding
Reverb
|
By
using
the
Reverb
Effect,
you
can
obtain
pleasant
reverberations
like
those
in
a
concert
hall.
Seven
levels
of
depth
for
the
Reverb
effect
are
available
for
selection.
‘Ghorus-
Reverb:
"Split
"Kay
Taueh
“Ougx
fs
ees
ets
:
:
Dilber
ces
Sees
fra
Bae
Bas
Gis
Sige’
Mal
eo
a
a
Be
1.
Press
the
Reverb
button
and
confirm
that
its
indicator
is
lit.
Changing
the
Depth
of
the
Reverb
1.
Select
the
depth
you
like
with
the
[+/-]
buttons
while
holding
the
Reverb
button
down.
1-7
can
be
selected
for
the
Reverb
Depth.
*
4
is
automatically
selected
when
the
piano
is
switched
on.

PLAYING
THE
HP
730/530e/330e
Using
Two
Different
Sounds
for
Right
And
Left
Hands
(Split
Function)
>)
The
piano
allows
you
to
divide
the
keyboard
into
two
sections,
upper
and
lower,
and
to
play
two
different
Tones.
Dividing
the
keyboard
is
called
“Split”
and
the
key
where
the
keyboard
is
split
is
called
“Split
Point”.
1.
Select
two
Tones
by
pressing
the
relevant
Tone
buttons.
2.
Press
the
Split
button,
and
the
keyboard
is
split.
Play
the
keyboard
and
hear
that
two
different
sounds
are
played
in
the
upper
and
lower
sections.
Ci
C2
c3
C4
C5
C6
C7 cs
(ii
ry
am
3.
Press
the
Split
button
to
cancel
the
Split
Mode.
Split
Tone
List
Tone
Upper
Tone
Lower
Tone
Piano
1
Acoustic
Bass
Piano
1
Piano
2
Acoustic
Bass
Piano
2
Harpsichord
Strings
Harpsichord
Vibraphone
Acoustic
Bass
Vibraphone
Electric
Piano
1
Acoustic
Bass
Electric
Piano
1
Electric
Piano
2
Acoustic
Bass
Electric
Piano
2
Pipe
Organ
Pipe
Organ
Harpsicord
Strings
Strings
Piano
1
*
Chorus
cannot
be
applied
to
the
Tones
with
Acoustic
Bass.
Changing
the
Split
Point
1.
Press
a
key
on
the
keyboard
while
holding
the
Split
button
down.
Spit
=)
u
C1
C2 C3 ca
cs
C7 cs
on
LETT
down
fy
The
key
you
press
will
be
Split
Point
The
Split
Point
can
be
set
from
AO
-
C6.
The
Split
Point
you
set
will
be
retained
until
the
piano
is
switched
off.
*
When
the
piano
is
switched
on,
C4
will
be
automatically
selected.
*
If
you
split
the
keyboard
during
Dual
Play,
the
Tone
of
the
Upper
section
will
be
automatically
selected
and
the
corresponding
Split
Tone
will
be
played.
re
ee
a
ee
ae
ee
EE
15

Englis'
PLAYING
THE
HP
730/530e/330e
{
Playing
Any
Song
in
C
Major
(Key
Transpose
Function)
|
Using
the
Key
Transpose
function,
you
can
transpose
the
entire
keyboard
without
changing
the
position
of
the
keys
to
play.
Even
a
difficult
song
with
many
sharps
and
flats
can
be
changed
to
a
key
that
is
easier
for
you
to
play;
or
you
can
transpose
up
or
down
to
accommodate
the
voice
of
a
singer.
Key-Transposition
Using
the
Keyboard
ne
Bras
Bare
[ay
Saal
Sel
1.
While
holding
the
Transpose
button
down,
press
the
key
that
corresponds
to
the
main
note
of
the
pitch
you
wish
to
transpose
to.
The
indicator
of
the
Transpose
button
is
lit
and you
can
play
in
the
transposed
key.
*
The
Key
you
have
set
will
be
retained
until
the
piano
is
switched
off.
When
the
indicator
is
lit
the
Key
Transposition
is
on.
When
it
is
dark,
it
is
in
the
normal
condition
without
Key
Transposition.
*
When
the
display
shows
0,
the
indicator
for
the
Transpose
button
does
not
light
up.
Example:
To
play
an
E
major
music
in
the
key
of
C
major.
1.
Press
the
E
key
while
holding
the
Transpose
button
down,
so
that
E
will
sound
by
playing
C.
{twill
sound
E
G*
B
ON]
>
Se
Transpose
S)
While
holding
down
is

PLAYING
THE
HP
730/530e/330e
Key
Transposition
with
the
[+/-]
Button
.
Set
the
amount
of
the
key
shift
with
the
[+/-]
buttons
while
holding
the
Transpose
button
down.
Each
time
you
press
the
[+/-]
buttons,
the
key
is
shifted
by
one
semitone.
Pressing
both
[+
/-]
buttons
simultaneously
will
set
it
to
C
major(C).
‘Tempo
©
-6-
0-5
can
be
set
for
the
Key
Transposition.
*
The
Key
you
have
set
will
be
retained
until
the
piano
is
switched
off.
When
the
indicator
is
lit,
Key
Transposition
is
on.
When
it
is
dark,
it
is
in
the
normal
condition,
without
any
Key
Transposition.
*
When
the
display
shows
“0,”
the
indicator
on
the
Transpose
button
does
not
light
up.
Example:
To
play
an
E
major
piece
in
the
key
of
C
major.
If
you
consider
C
major
as
the
basic
key,
there
are
4
keys
up
to
“E”
that
corresponds
to
the
E.
So,
select
4
in
the
display.
Itwill
sound
E
G*
B
*
0
is
automatically
selected
when
the
piano
is
switched
on.
*
The
Key
Transpose
function
applies
to
only
the
Tone
you
are
currently
playing.
*
The
Demonstration
Songs
cannot
be
transposed.

PLAYING
THE
HP.
730/530e/330e
Playing
to
the
Metronome
The
HP
730/530e/330e
include
a
metronome
to
which
you
can
play
the
keyboard.
The
Metronome
can
select
the
beet
and
tempo.
The
volume
of
the
Metronome
can
be
set
in
7
levels.
English
1.
Select
a
desired
beat
by
pressing
the
Beat
[+-/-]
buttons.
*
Pressing
two
Beat
[+/-]
buttons
simultaneously
will
set
4/4
beat.
The
figures
shown
in
the
display
represent
the
beats
as
follows:
Display
Beat
Display
Beat
0.4
Only
upbeat
sounds
74
7/4
beat
24
2/4
beat
3.8
3/8
beat
3.4
3/4
beat
6.8
6/8
beat
44
4/4
beat
9.8
9/8
beat
5.4
5/4
beat
12.8
12/8
beat
6.4
6/4
beat
2.
Press
the
Tempo
[+/-]
aps
to
select
the
desired
tempo.
Tempo
can
be
set
from
¢
=
20
-
250.
Check
the
tempo
in
the
display.
3.
Press
the
Metronome
button
(the
indicator
is
lit),
and
the
Metronome
will
play.
4.
To
stop
the
Metronome,
press
the
Metronome
button
again
and
confirm
the
indicator
goes
out.
To
change
the
volume
of
the
Metronome
...
While
holding
the
Metronome
button
down,
set
the
volume
with
the
[+/-]
buttons.
The
volume
of
the
Metronome
can
be
set
in
seven
levels,
1
-
7.
*
4
is
automatically
selected
when
the
piano
is
switched
on.
18
This manual suits for next models
2
Table of contents
Other Roland Musical Instrument manuals

Roland
Roland HP-207 User manual

Roland
Roland HP 535 User manual

Roland
Roland RP301 User manual

Roland
Roland FR-2b V-Accordion User manual

Roland
Roland RD-100 User manual

Roland
Roland RD-2000 User manual

Roland
Roland FP-9 User manual

Roland
Roland GO:KEYS User manual

Roland
Roland E-X10 User manual

Roland
Roland HP 335 User manual

Roland
Roland G-70 User manual

Roland
Roland FA 08 User guide

Roland
Roland GP-3 User manual

Roland
Roland HP-1 User manual

Roland
Roland RD-170 User manual

Roland
Roland F-50 User manual

Roland
Roland Music ATELIER AT300 User manual

Roland
Roland 5500 User manual

Roland
Roland Aerophone Go User manual

Roland
Roland ATELIER 5100001499 User manual