3
Table of Contents
Table of Contents.............................3
Precautions ...................................................................4
Added functionality
(main features) .............................................................5
Mixdown using the VS-1680 alone......................5
Additional effect algorithms ................................5
Automix editing functionality .............................5
Enhanced support for
CD-R/CD-RW drives............................................5
Enhanced operations.............................................5
Enhanced screen display ......................................5
Expanding the functionality of the
VS-1680 .............................................6
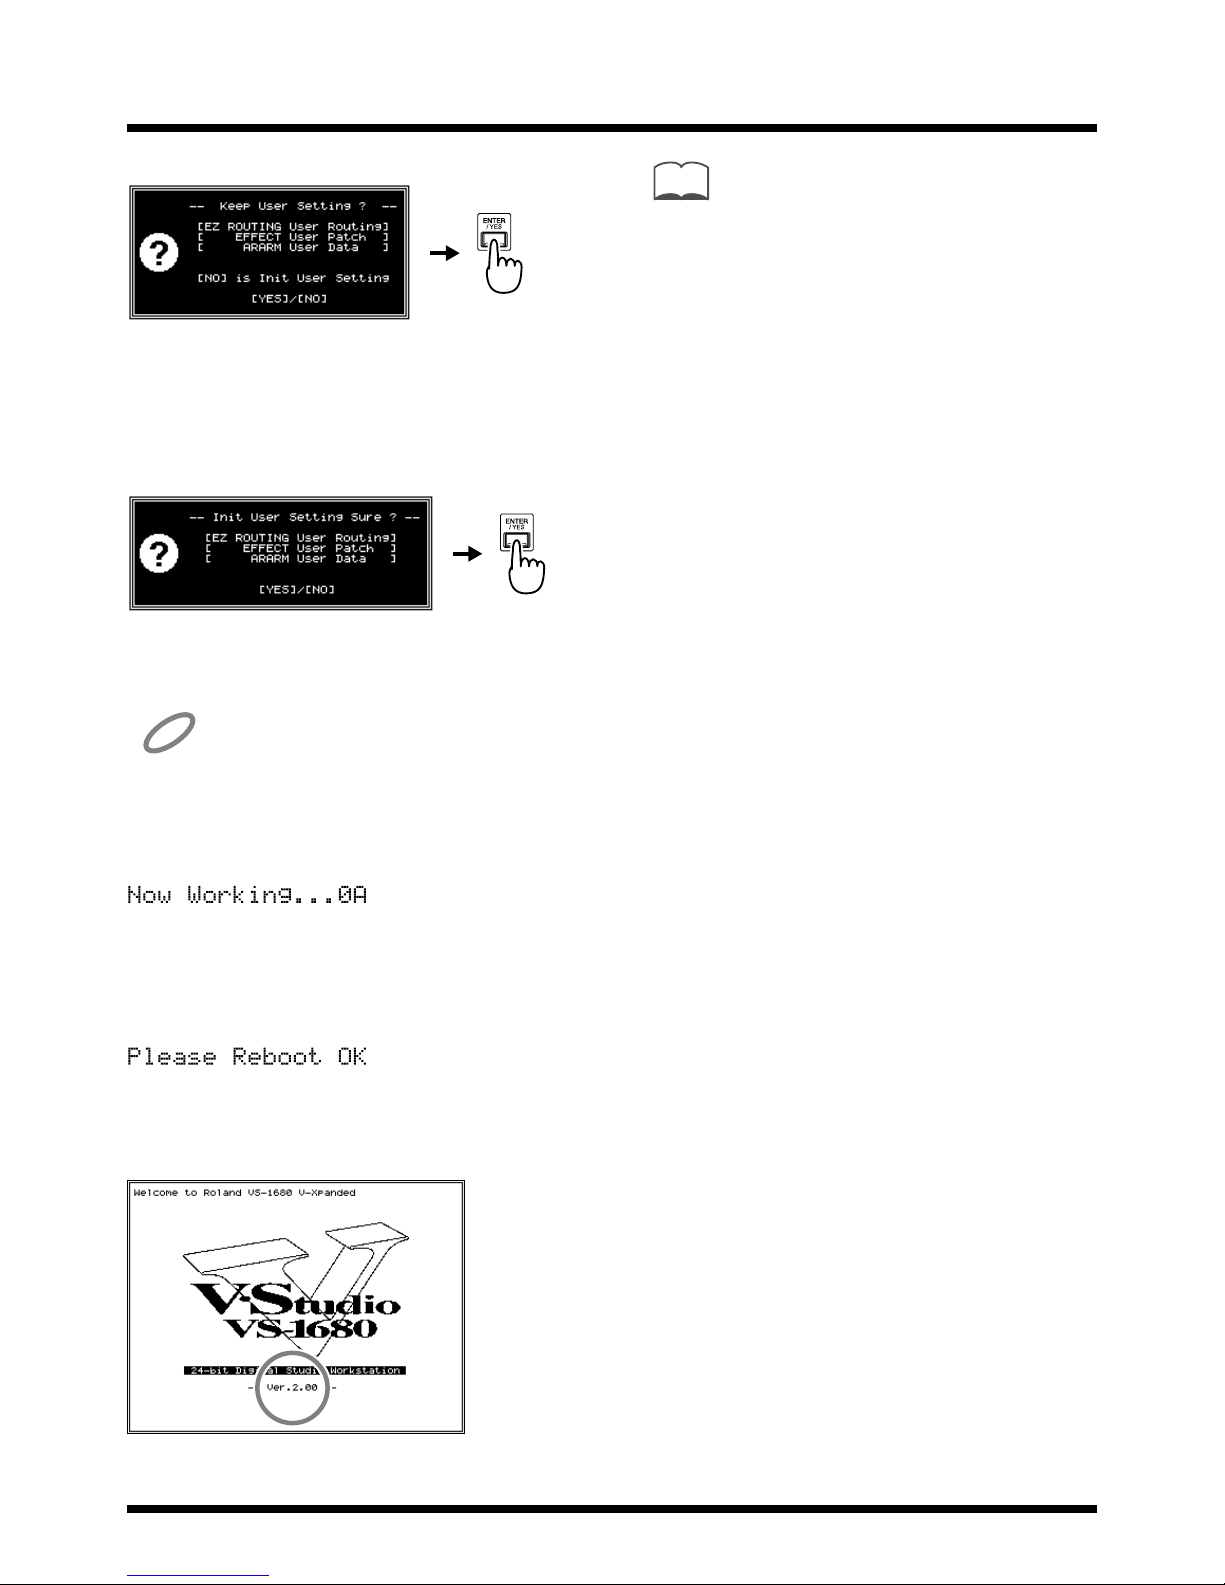
If you purchased the
VS-1680 V-XPANDED...........................................6
If you purchased the
V-XPANDED system program Zip disk ............6
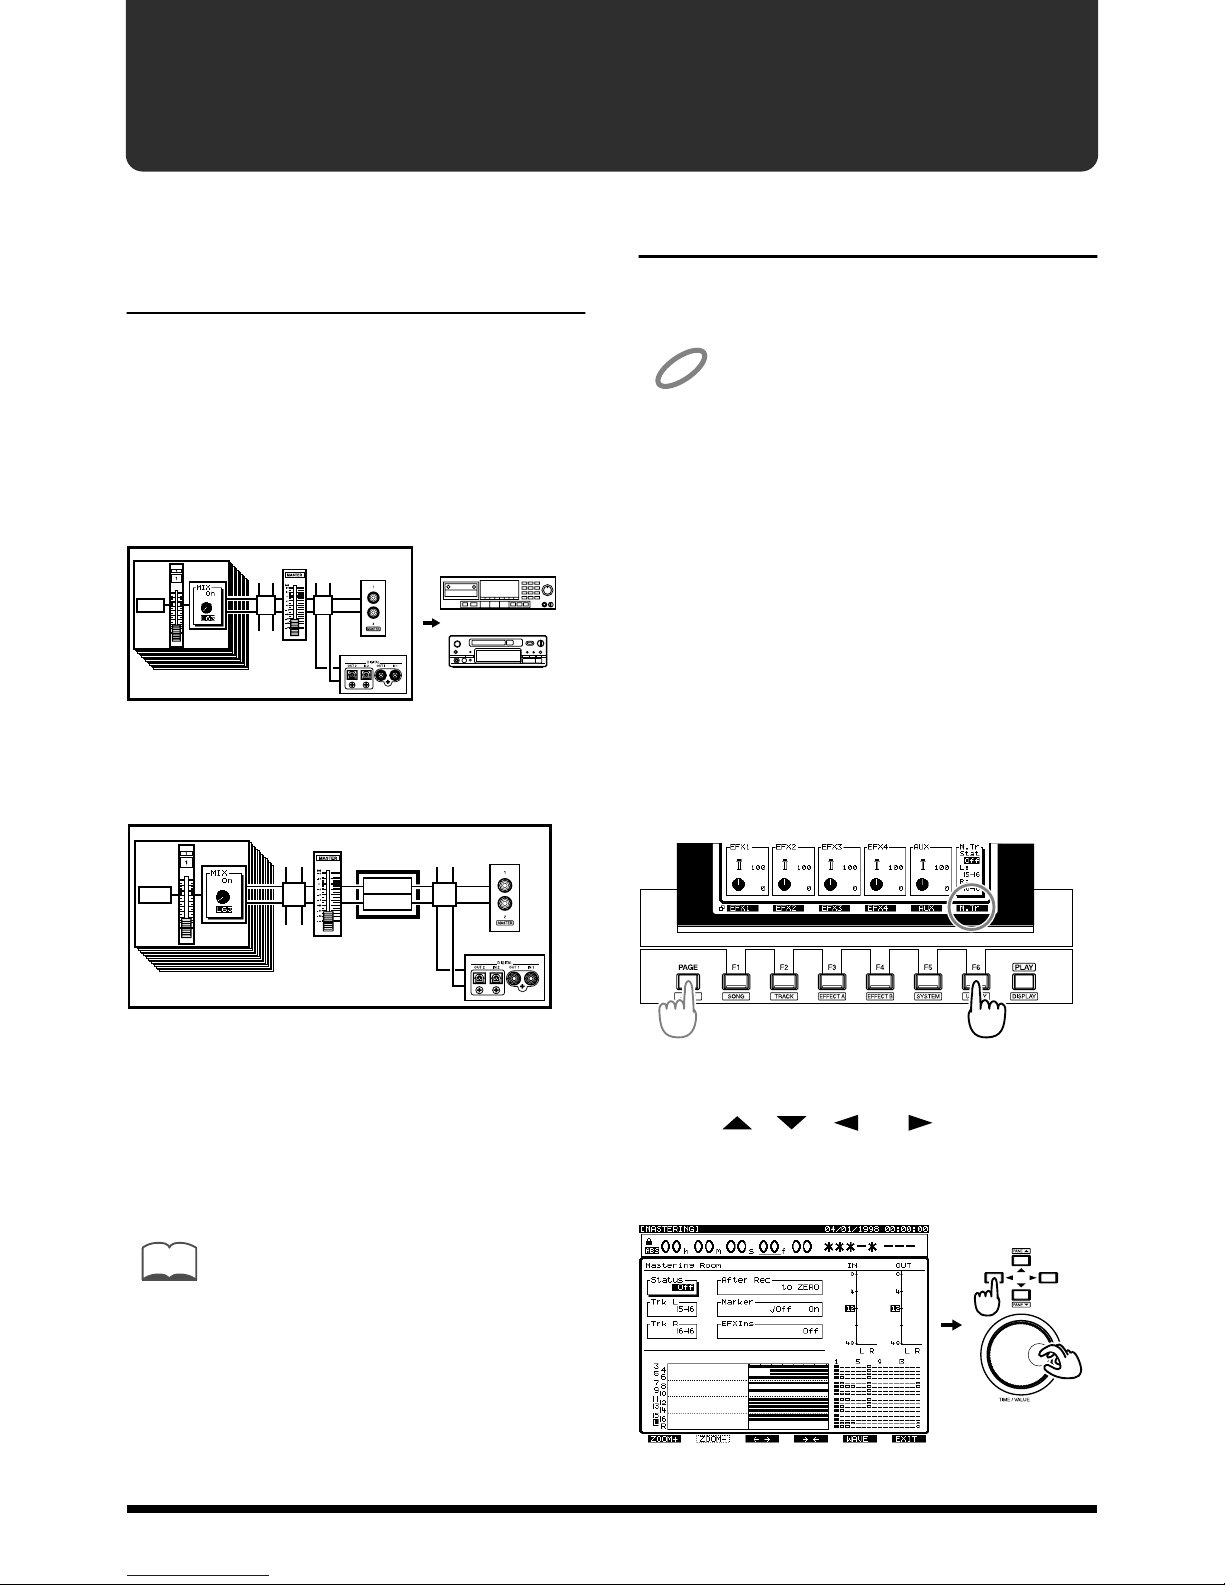
Mix 16 tracks down to 2 tracks
(Mastering Room).............................8
Added mastering tracks .............................................8
Mixing down to the mastering tracks.......................8
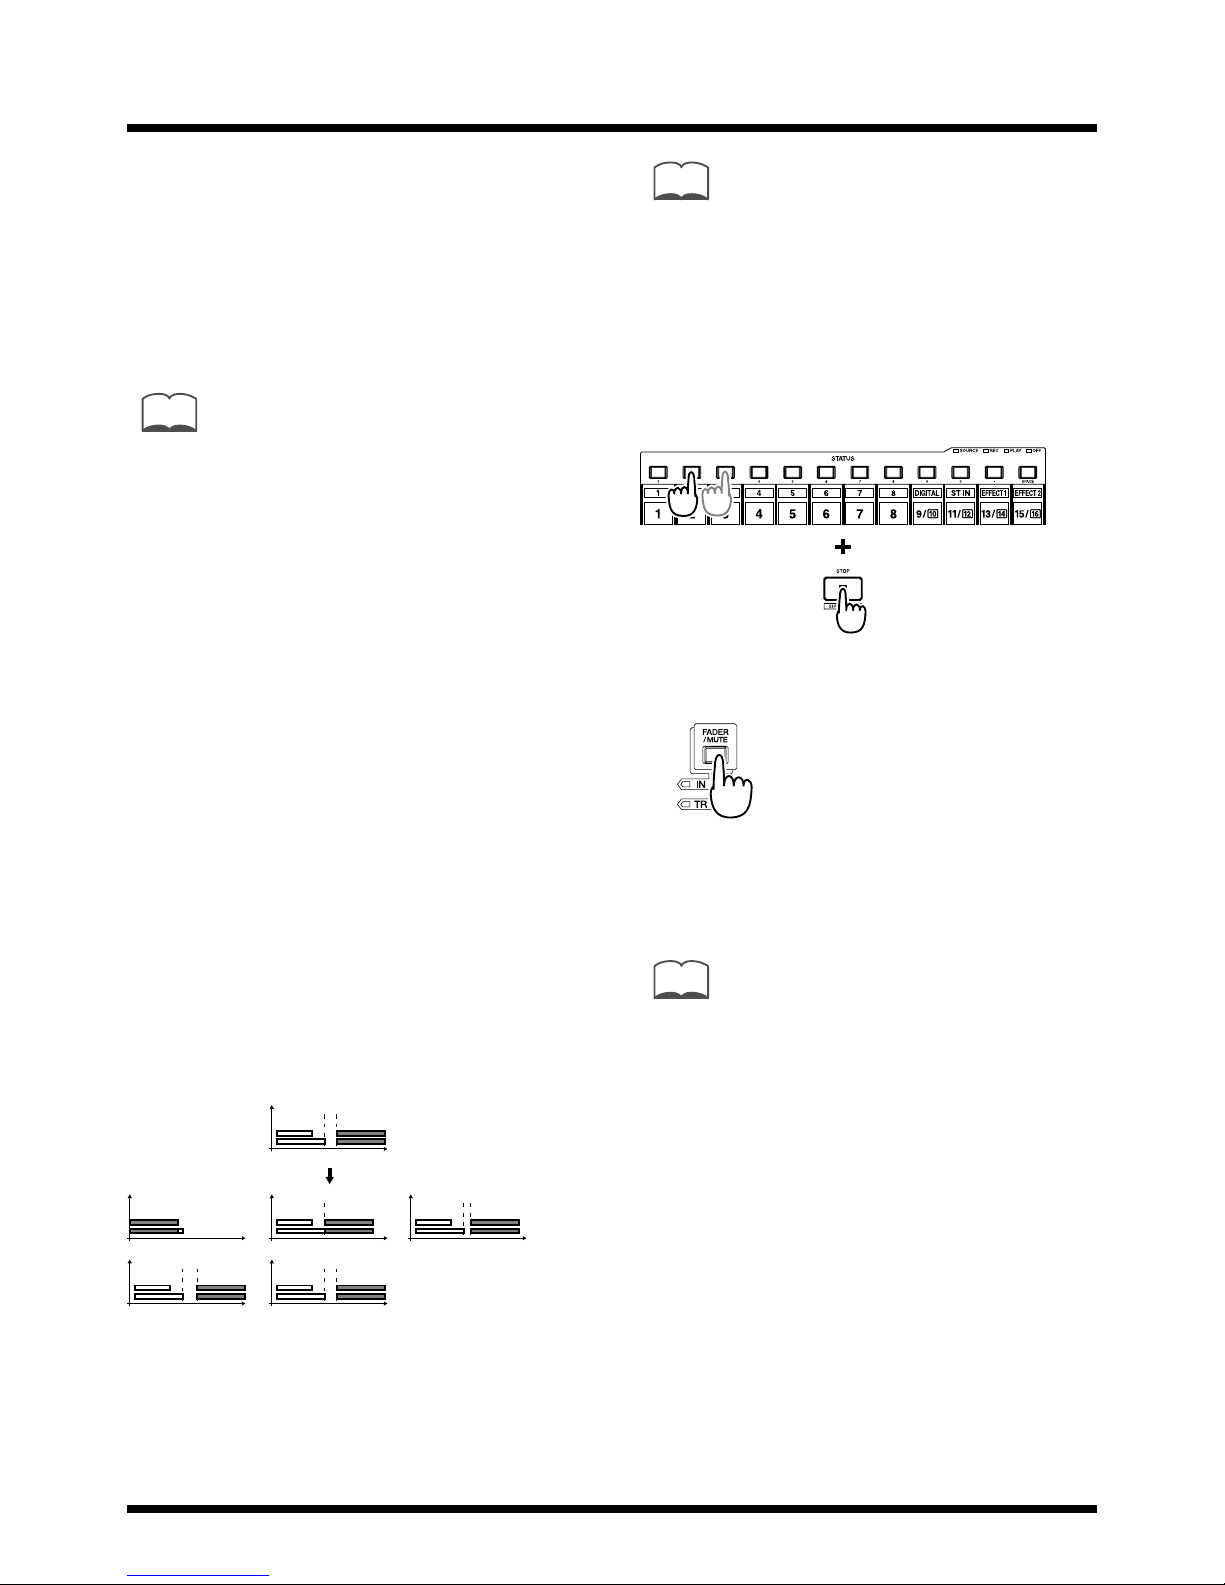
Mixdown shortcut 1 ............................................10
Mixdown shortcut 2 ............................................10
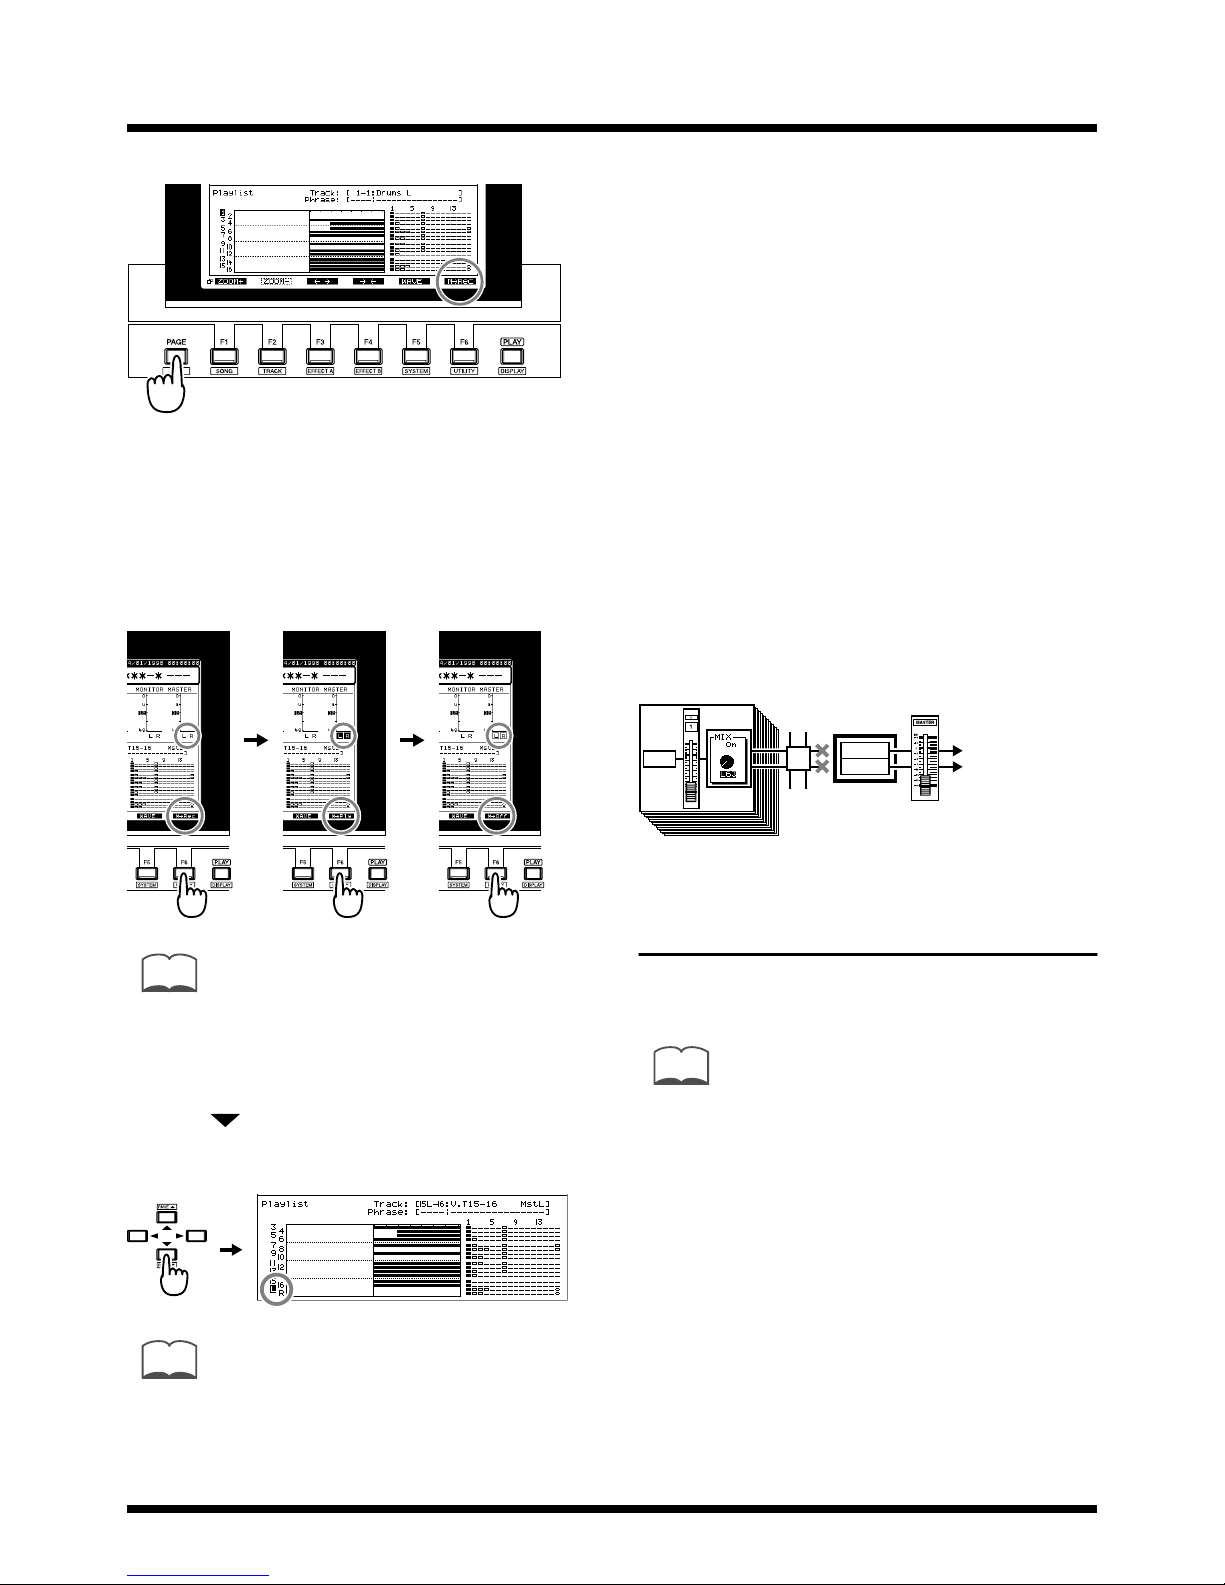
Playing back the mastering tracks ..........................10
Mixing down while inserting effects ......................11
New effects algorithms..................14
Making the volume consistent for each frequency
band
(Mastering Tool Kit)..................................................14
EQ (Equalizer) ......................................................14
BCut (Bass-cut filter)............................................15
Enh (Enhancer).....................................................15
In (Input) ...............................................................15
Exp (Expander).....................................................15
Cmp (Compressor) ..............................................16
Mix (Mixer) ...........................................................16
Lmt (Limiter) ........................................................16
Out (Output).........................................................16
Modeling various speakers (Speaker Modeling) ..17
SpMod (speaker modeling) ................................17
BCut (Bass-cut filter)............................................17
LFT/HFT (Frequency trimmer).........................17
Lmt (Limiter) ........................................................18
Effective ways to use speaker modeling ..........18
Editing an automix.........................19
Erasing data from a specific area (Erase) ...............19
Copying data to another location (Copy) ..............20
Smooth data transitions (Gradation) ......................21
Increasing or decreasing all data values (Shift/
Expand).......................................................................23
Using the VS-1680 with a CD-R/CD-
RW drive..........................................25
Creating an audio CD ...............................................25
Creating silence between songs (Disc At Once
and Track At Once)..............................................25
Specifying the writing speed (Speed) ...............25
Song writing procedure ......................................25
Saving a song to a CD-RW disc (Backup) ..............27
Checking whether the song was saved correctly
(+Verify) ................................................................27
Specifying the speed of saving (Speed) ............27
Backup procedure................................................27
Restoring songs from a
CD-RW disc (Recover) ..............................................28
Specifying the speed of recovery (Speed).........28
Recovery procedure.............................................28
Enhancements related to operation.
30
Shortcut to the Phrase Edit window .......................30
Creating a new phrase (Phrase New) .....................30
Sorting the take list (Sort) ...................................30
Deleting a take (Delete).......................................31
Naming a take (Name)........................................32
Dividing a phrase
(Phrase Divide/Split)................................................33
Automatically dividing a phrase (Phrase Divide)
33
Dividing a phrase into two parts (Phrase Split) ..
34
Using the MONITOR knob to adjust the pan
(MONITOR knob +[SELECT]).................................35
Linking the faders of two or more channels
(Fader Group)............................................................36
Copying mixer settings.............................................37
Shift Lock on/off ([SHIFT]+[YES]) .........................38
Removing direct current offset from the mix bus.38
Enhancements to the display and
specifications .................................39
Checking inserted effects (Icon and Patch Name
display)........................................................................39
Checking effects that cannot be used in other
channels (Effect insertion location display)...........39
Switching the Song Select window (List display).40
Easy Routing ..............................................................40
Additional template (Mastering).......................40
Immediate application of step-edited changes41
Settings not stored in a scene (Monitor Level) ......41
Master Send switch display has been changed
(PanÆMIX) .................................................................41
Index................................................42