manuals.online logo
Brands
  1. Home
  2. •
  3. Brands
  4. •
  5. Roland
  6. •
  7. Musical Instrument
  8. •
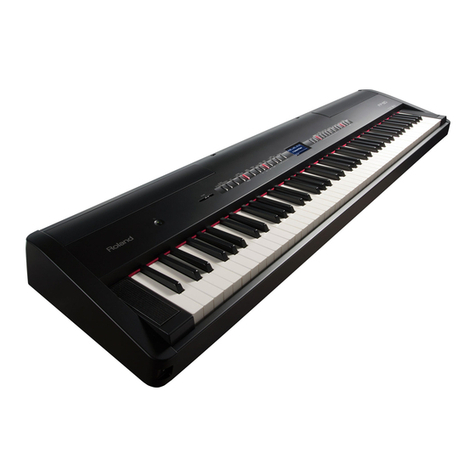
  9. Roland RD-700NX User manual

Roland RD-700NX User manual

©2011 Roland Corporation U.S. www.RolandUS.com TBS276
®ÂØÒňήRD-700NX Digital Piano
1
Welcome
Congratulations on your purchase of the Roland RD-700NX. This TurboStart contains
step-by-step instructions that will quickly introduce you to its major features.
Listening to the RD-700NX’s Preset Live Sets
The RD-700NX contains 200 Preset live sets, and you can store up to 100 of your own. Use
the following procedure to select a Preset live set on the RD-700NX.
1 Press the desired PIANO, E. PIANO, or LIVE SET button to select a category.
2 Use the INC and DEC buttons to choose live sets within the selected category.
Changing a Live Set’s Tones
The sound of each live set is a result of the tones it plays. You can have two Upper tones
and two Lower tones in a live set. The UPPER 1 and 2 and LOWER 1 and 2 buttons in
the LAYER SWITCH/CONTROL area show you the tones that are active in the current live
set—if Upper 1 or 2, or Lower 1 or 2 is turned on, its button lights. Here’s how to change
these tones.
1 Press a PIANO, E. PIANO, or LIVE SET category button so it lights, and then choose
the desired sound within that category.
2 Press LAYER EDIT so it lights.
3 Press the 6 button to highlight the desired tone onscreen.
Note: The RD-700NX’s PIANO and E. PIANO sounds are based on SuperNATURAL technology
and have a unique internal structure in which Upper 1 can’t be selected or changed.
Note: If you highlight a tone that’s not already turned on, its UPPER 1 or 2 or LOWER 1 or 2
button flashes. If you want to activate the tone, press the flashing button so it lights.
When LAYER EDIT is turned on, the PIANO, E. PIANO, and LIVE SET buttons act as
shortcut buttons that select tone categories instead of live set categories.
4 Press a PIANO, E. PIANO, or LIVE SET button to select the desired tone category.
5 Use the INC/DEC buttons or the dial to choose a tone in the selected category.
Note: You can also use these steps to change other tones in a live set.
Adding Additional Tones to a Live Set
You can layer new sounds into a live set by activating additional tones. Here’s how:
1 Select the desired live set.
2 Press LAYER EDIT so it lights.
Note: You can now see the live set’s tones.
3 To activate a tone that’s not yet in use, press its UPPER 1 or 2 or LOWER 1 or 2 button
so it lights.
4 Press the 5 and 6 buttons to highlight the newly activated tone.
5 To change the selected tone, press a PIANO, E. PIANO, or LIVE SET button to select
the desired tone category.
6 Use the INC/DEC buttons or the dial to choose a tone in the selected category.
Creating a Split
When you’ve got a live set that plays across the entire keyboard, you can divide, or “split,”
the keyboard so that each hand plays a different tone or pair of tones as follows:
1 Select the desired live set.
2 Press SPLIT so it lights—the live set’s Upper tones now play starting at the G below
Middle C, and the Lower tones play below that key.
Note: You can change the split point by holding down the SPLIT button and touching the
lowest key that you want play the Upper tones.
3 Press LAYER EDIT so it lights.
Note: You can now see the live set’s tones.
4 To turn a tone on or off, press its UPPER 1 or 2 or LOWER 1 or 2 button to light or
unlight it.
5 Press the 5 and 6 buttons to highlight the various Upper and Lower tones and
turn the dial to change the sound currently assigned to each as described earlier.
©2011 Roland Corporation U.S. www.RolandUS.com TBS276
®ÂØÒňήRD-700NX Digital Piano
2
Transposing the RD-700NX
Use the following procedure to transpose your RD-700NX.
1 Press and hold the TRANSPOSE button to display the TRANSPOSE menu.
2 While continuing to hold the TRANSPOSE button, use the INC and DEC buttons to
raise or lower the transposition amount in half-steps.
3 Release the TRANSPOSE button—it lights to indicate that the Transpose feature is
turned on.
Note: Press the TRANSPOSE button again so it’s not lit to turn off transposition. The
RD-700NX remembers the most recent Transpose value until you change it or until you turn
off the RD-700NX. This allows you to quickly re-engage transposition by simply pressing the
TRANSPOSE button again.
Recording Audio
Use the following procedure to RECORD AUDIO on the RD-700NX.
1 Insert a formatted USB memory stick in the USB slot.
2 Press SELECT so it lights.
3 Press the LAYER EDIT button to select the SONG menu in the display.
4 Press the TONE EDIT button to enter Record Standby.
5 Press the flashing PLAY/STOP button to begin recording.
6 When you’re finished recording, press the lighted PLAY/STOP button to stop the
recording process.
7 You can now name your recorded song by using the 3 and 4 buttons and the INC
and DEC buttons.
8 When you’re finished naming your song, press the flashing ENTER button to save
the song.
How to Save a Live Set
The RD-700NX has 100 live set memory locations in which you can save your favorite
settings. Use the following procedure to save your current settings as a live set on the
RD-700NX.
1 Press the WRITE button so it lights.
2 Using the 3 and 4 buttons to select character positions and the INC/DEC buttons
to select characters, enter the name you want to use for your new live set.
3 Press the 6 button to highlight the number at the bottom of the display, and then
turn the dial to select a live set memory location.
Note: The live set User memory locations contain demonstration live sets. Feel free to
replace them with your own live sets.
4 Press the flashing ENTER button to display “Are You Sure?”
5 Press ENTER once more to display “Executing...” and to finish saving your live set.
How to Load a Live Set You’ve Saved
Use the following procedure to select a live set you’ve created and saved on the
RD-700NX.
1 Press the USER button in the BANK area so it lights.
2 Use the INC and DEC buttons to select the desired live set.
How to Play a Rhythm
Use the following procedure to play a rhythm on the RD-700NX.
1 Press the SELECT button so it lights.
2 Press the LAYER EDIT button to select the RHYTHM screen.
3 Press the 4/ button to start and stop the rhythm.
Note: To change the tempo, press 5 to highlight the tempo and press the INC/DEC buttons
or turn the dial.
Note: To select a different rhythm pattern, press 6 to highlight the rhythm name and press
the INC/DEC buttons or turn the dial.

Other manuals for RD-700NX

5

Other Roland Musical Instrument manuals

Roland RG-3 User manual

Roland

Roland RG-3 User manual

Roland EP-7IIe User manual

Roland

Roland EP-7IIe User manual

Roland VS-1680 V-XPANDED Instruction Manual

Roland

Roland VS-1680 V-XPANDED Instruction Manual

Roland HPi-7 User manual

Roland

Roland HPi-7 User manual

Roland P-330 User manual

Roland

Roland P-330 User manual

Roland C-80 Operating and maintenance manual

Roland

Roland C-80 Operating and maintenance manual

Roland STUDIO M User manual

Roland

Roland STUDIO M User manual

Roland EP-9e User manual

Roland

Roland EP-9e User manual

Roland HP 147 e User manual

Roland

Roland HP 147 e User manual

Roland V-ACCORDION FR-7b User manual

Roland

Roland V-ACCORDION FR-7b User manual

Roland RP401R User manual

Roland

Roland RP401R User manual

Roland Atelier AT-90SL User manual

Roland

Roland Atelier AT-90SL User manual

Roland Classic C-200 User manual

Roland

Roland Classic C-200 User manual

Roland 6000s User manual

Roland

Roland 6000s User manual

Roland RD-100 User manual

Roland

Roland RD-100 User manual

Roland V-studio VS-2480 Assembly instructions

Roland

Roland V-studio VS-2480 Assembly instructions

Roland RG-7 User manual

Roland

Roland RG-7 User manual

Roland GC-1 GK Ready Strat Setup guide

Roland

Roland GC-1 GK Ready Strat Setup guide

Roland FP-E50 User manual

Roland

Roland FP-E50 User manual

Roland KR-770 User manual

Roland

Roland KR-770 User manual

Roland HP 237R User manual

Roland

Roland HP 237R User manual

Roland TAIKO-1 User manual

Roland

Roland TAIKO-1 User manual

Roland RD-300GX User manual

Roland

Roland RD-300GX User manual

Roland FP-90X User manual

Roland

Roland FP-90X User manual

Popular Musical Instrument manuals by other brands

Yamaha AEX500 Service manual

Yamaha

Yamaha AEX500 Service manual

SAWTOOTH ST-PKB-61 user manual

SAWTOOTH

SAWTOOTH ST-PKB-61 user manual

Casio Privia PX-765 user guide

Casio

Casio Privia PX-765 user guide

Kawai E-520 owner's manual

Kawai

Kawai E-520 owner's manual

Yamaha Electone EL-900m owner's manual

Yamaha

Yamaha Electone EL-900m owner's manual

Kawai AnytimeX owner's manual

Kawai

Kawai AnytimeX owner's manual

EMG EMG-89 instructions

EMG

EMG EMG-89 instructions

Yamaha Electone 205D Guide

Yamaha

Yamaha Electone 205D Guide

thomann DP-95 B user manual

thomann

thomann DP-95 B user manual

FAME Stagepiano SP-2 user manual

FAME

FAME Stagepiano SP-2 user manual

Adams Alpha 4.0 manual

Adams

Adams Alpha 4.0 manual

Akai Ewi4000s Reference manual

Akai

Akai Ewi4000s Reference manual

Kurzweil MPS110 user manual

Kurzweil

Kurzweil MPS110 user manual

Yamaha TYROS Data list

Yamaha

Yamaha TYROS Data list

Korg KRONOS 61 Service manual

Korg

Korg KRONOS 61 Service manual

Yamaha P-125 owner's manual

Yamaha

Yamaha P-125 owner's manual

Casio Privia PX-870 user guide

Casio

Casio Privia PX-870 user guide

Yamaha Electone FX-20 user guide

Yamaha

Yamaha Electone FX-20 user guide

manuals.online logo
manuals.online logoBrands
  • About & Mission
  • Contact us
  • Privacy Policy
  • Terms and Conditions

Copyright 2025 Manuals.Online. All Rights Reserved.