manuals.online logo
Brands
  1. Home
  2. •
  3. Brands
  4. •
  5. Roland
  6. •
  7. Recording Equipment
  8. •
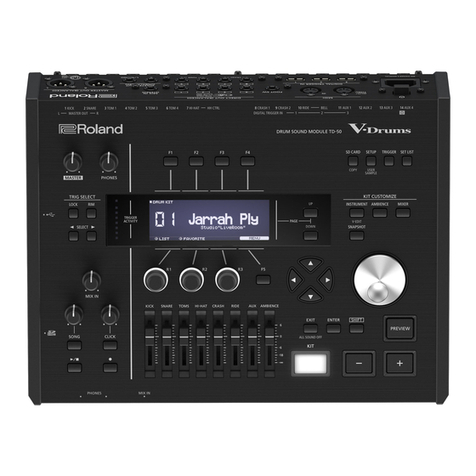
  9. Roland TD-30 TurboStart User manual

Roland TD-30 TurboStart User manual

©2012 Roland Corporation U.S. www.RolandUS.com TBS282
®ÂØÒňήTD-30 Drum Sound Module
1
Welcome
Congratulations on your purchase of the Roland TD-30. This TurboStart contains step-by-
step instructions that will quickly introduce you to a few of the TD-30’s major features.
Note: This TurboStart discusses the use of the TD-30 as a component of a Roland V-Pro
Series TD-30KV or TD-30K V-Drums kit.
Setting the Hi-Hat Offset
Adjusting the TD-30 OFFSET parameter is crucial for ensuring that your VH-13 or VH-11
hihat performs correctly. Here’s how to adjust the hi-hat’s open/close range.
1 Loosen the clutch of the top hi-hat pad, and allow it to rest on the bottom hi hat (if
you have a VH-13) or the controller (if you have a VH-11).
2 While pressing and holding the KIT button, press TRIGGER—TRIGGER starts to flash.
• If you have the VH-13—“Now Processing” appears briefly in the display
followed by “Completed!”
• If you have the VH-11—turn the thumb screw on the top of the VH-11 until
the indicator is midway between the left and right pointing arrows on the
TD-30’s display.
3 When the calibration process is completed, press KIT to exit, and then re-adjust and
tighten the hi-hat clutch.
Selecting Drum Kits
There are 100 drum kits in the TD-30: 80 factory Preset kits and 20 User kits. A kit assigns
an instrument to each of the pads, and also contains effects and other various settings.
To select different kits:
1 Press KIT so it’s lit.
2 Turn the large dial or press the +/- buttons to select a kit. If you hold the SHIFT
button, each tick of the dial or touch of a +/- button jumps 10 kits forward or back
in the list.
Tip: For a different list view of the kits, press the F1 (LIST) button below the display. You can
then press the F1 (3) or F2 (4) buttons to scroll through the kits in groups of ten.
Selecting Instruments in a Kit
Any of the TD-30’s drum kits can be customized. Instrument tuning, changing the
apparent shell depth of a tom, or adding the sound of rivets to a cymbal are just a few of
the things you can do. A good place to start is choosing your own instruments for a kit.
You can select a different instrument for each of the pads within a drum kit. Here’s how.
1 Press KIT so it’s lit.
2 Turn the dial to select a User kit, from 81 to 100.
3 Press INST so it’s lit.
4 Press F5 to turn off the onscreen H&R switch. (Its background is white when it’s
turned off.)
5 Hit the pad—or portion of the pad, such as the head or rim—that contains the
instrument you wish to change.
6 Turn the dial or use the +/- buttons to select the desired instrument.
7 Repeat Steps 5-6 for the remaining pads.
8 When you’re finished, press KIT. Your customization is automatically stored.
Playing the Patterns
There are 100 preset patterns in the TD-30’s SONG PLAYER section. Use the following
steps to select and play them.
1 Press the USB/PTN button in the upper left corner of the TD-30 so it lights.
2 Turn the dial to select one of the Preset patterns, from 1 to 100.
3 Press PLAY.
4 Press STOP when you’re finished.
Note: If you select a TAP pattern, press the PLAY button repeatedly to move, or “tap”
through the pattern. Tap patterns are identified by "4❘4❘“ shown below the pattern name
in the display.
©2012 Roland Corporation U.S. www.RolandUS.com TBS282
®ÂØÒňήTD-30 Drum Sound Module
2
Demo Mode
There are eight factory demos that show off the TD-30’s features. Here’s how to play
them.
1 While holding down CHAIN, press TRIGGER.
2 Turn the dial to select one of the demos.
3 Press F5 (PLAY).
4 Press F4 (STOP) to stop playback, and then press KIT when you’re finished.
Pattern Recording
You can use any of the 100 User pattern locations in the TD-30’s pattern sequencer
section to record your playing on the pads. Here’s how to record a basic pattern.
Note: By default, the TD-30’s pattern time signature is set to 4/4. To learn how to change it,
or to adjust other pattern parameters, refer to page 97 the TD-30 Owner’s Manual.
1 Press USB/PTN so it lights.
2 Press F5 (REC)—the PLAY button begins flashing, the metronome starts, and a new
User pattern is selected automatically.
3 If you wish, press the cursor 5button to select the current tempo value, and then
turn the dial to adjust the tempo.
4 Press the PLAY button to begin recording.
The TD-30 provides a one-measure countoff. “-1” appears in the display for the
duration of the measure.
5 After the countoff, play the pads in time with the metronome.
6 When you’re finished recording, press STOP.
7 Press PLAY to hear your new pattern.
Pad Pattern
You can hit one of the pads in a kit to start and stop—or tap through—a pattern. Use the
following steps to assign a pattern to a pad.
1 Select the desired kit.
2 Press INST so it lights.
3 Press F3 (CONTROL).
4 Hit the pad to which you want to assign a pattern.
5 Turn the dial or press +/- to select the desired pattern.
6 Strike the same pad again to start and stop the pattern.
Tip: Some of the TD-30’s Preset kits have a pattern already assigned to a pad. If you’d like to
turn off the Pad Pattern feature for such a kit, follow Steps 2-4 above. At Step 5, turn the dial
counterclockwise to select OFF.
Mix Edit
You can adjust the volume levels of instruments using the TD-30’s faders. The Mix Edit
feature presents a visual representation of volume and effect levels in the display to
help make quick adjustments easy and precise. Here’s how to use Mix Edit for adjusting
volume.
1 Press MIXER to display the mixer view.
2 While holding down SHIFT, press MIXER—the MIXER button flashes.
3 Press F1 (VOLUME).
4 Slide the faders up and down to adjust the levels of instruments as desired.
5 Press KIT when you’re finished.
Starting Over
If you’d like to redo your TD-30 settings from scratch, you can use the following
procedure to clear the TD-30’s internal memory and reload its factory settings.
Caution: When you perform the following steps, all User data will be lost. Be sure to first
back up anything you wish to keep.
1 Press SETUP so it lights.
2 Press F4 (F RESET).
3 Press F5 twice.
Note: After you perform a Factory Reset, be sure to perform the “Setting the Hi-Hat Offset”
procedure at the beginning of this TurboStart before playing the VH-13 or VH-11.

Other Roland Recording Equipment manuals

Roland R-8M User manual

Roland

Roland R-8M User manual

Roland CHORUS ECHO SRE-555 User manual

Roland

Roland CHORUS ECHO SRE-555 User manual

Roland AR-200 User manual

Roland

Roland AR-200 User manual

Roland S-330 User manual

Roland

Roland S-330 User manual

Roland FC-200 User manual

Roland

Roland FC-200 User manual

Roland R-88 User manual

Roland

Roland R-88 User manual

Roland MC-50 mkII User manual

Roland

Roland MC-50 mkII User manual

Roland TR-909 User manual

Roland

Roland TR-909 User manual

Roland TD-7 User manual

Roland

Roland TD-7 User manual

Roland super quartet mks-7 User manual

Roland

Roland super quartet mks-7 User manual

Roland SVC-350 Operating and maintenance manual

Roland

Roland SVC-350 Operating and maintenance manual

Roland AR-3000 User manual

Roland

Roland AR-3000 User manual

Roland AE-30 User manual

Roland

Roland AE-30 User manual

Roland TR-606 User manual

Roland

Roland TR-606 User manual

Roland VC-2 Manual

Roland

Roland VC-2 Manual

Roland Sonar V-Studio 100 User manual

Roland

Roland Sonar V-Studio 100 User manual

Roland HD5-IF User manual

Roland

Roland HD5-IF User manual

Roland Boss RE-1000 User manual

Roland

Roland Boss RE-1000 User manual

Roland FC-200 User manual

Roland

Roland FC-200 User manual

Roland Sonar V-Studio 100 User manual

Roland

Roland Sonar V-Studio 100 User manual

Roland A-37 User manual

Roland

Roland A-37 User manual

Roland VC-2 User manual

Roland

Roland VC-2 User manual

Roland R-8 MK II User manual

Roland

Roland R-8 MK II User manual

Roland CD-2 User manual

Roland

Roland CD-2 User manual

Popular Recording Equipment manuals by other brands

Titan Controls zephyr 4 instruction manual

Titan Controls

Titan Controls zephyr 4 instruction manual

Yamaha HY144-D-SRC owner's manual

Yamaha

Yamaha HY144-D-SRC owner's manual

Kvaser Leaf installation guide

Kvaser

Kvaser Leaf installation guide

PMFoundations ER-808 Assembly guide

PMFoundations

PMFoundations ER-808 Assembly guide

Yamaha Q2031B Operation manual

Yamaha

Yamaha Q2031B Operation manual

Pioneer H-R100 owner's manual

Pioneer

Pioneer H-R100 owner's manual

OTT IrDA-Link USB installation instructions

OTT

OTT IrDA-Link USB installation instructions

Omnitronic SPL-1 user manual

Omnitronic

Omnitronic SPL-1 user manual

LaLaLand KORG Delta MIDI installation manual

LaLaLand

LaLaLand KORG Delta MIDI installation manual

Taga Harmony TVS Series instruction manual

Taga Harmony

Taga Harmony TVS Series instruction manual

JVC SEA-E30B Service manual

JVC

JVC SEA-E30B Service manual

Razr Bee 8 quick start guide

Razr

Razr Bee 8 quick start guide

Simplex 4100 Series installation instructions

Simplex

Simplex 4100 Series installation instructions

cymatic audio uTrack 24 quick start guide

cymatic audio

cymatic audio uTrack 24 quick start guide

SMC Networks EX600-SDN2 Maintenance manual

SMC Networks

SMC Networks EX600-SDN2 Maintenance manual

Pro-face GP-4114T installation guide

Pro-face

Pro-face GP-4114T installation guide

BOSSCO Boss BE-5M owner's manual

BOSSCO

BOSSCO Boss BE-5M owner's manual

digi-tech VOCAL 300 user guide

digi-tech

digi-tech VOCAL 300 user guide

manuals.online logo
manuals.online logoBrands
  • About & Mission
  • Contact us
  • Privacy Policy
  • Terms and Conditions

Copyright 2025 Manuals.Online. All Rights Reserved.