manuals.online logo
Brands
  1. Home
  2. •
  3. Brands
  4. •
  5. Roland
  6. •
  7. Synthesizer
  8. •
  9. Roland JX-305 User manual

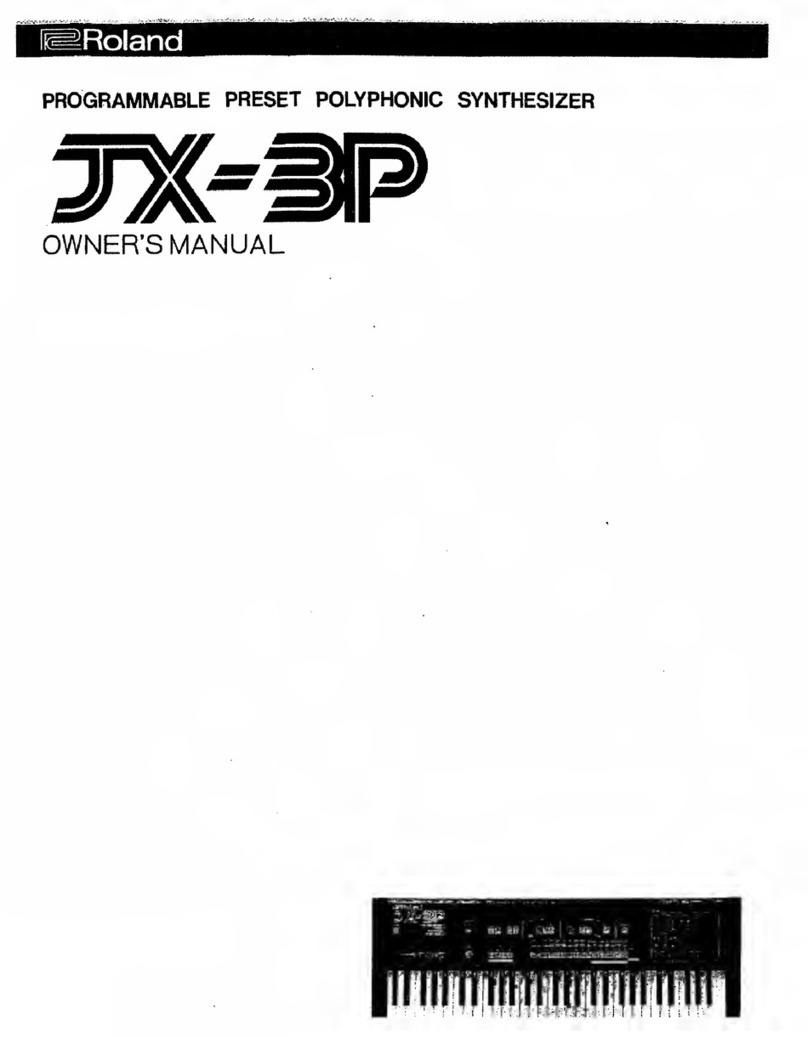
Roland JX-305 User manual

Roland
Before using this unit, care-
fully read the sections enti-
tled: "USING THE UNIT
SAFELY" and "IMPOR-
TANT NOTES" (Owner's
Manual p. 2, 3, 9). These
sections provide important
inl'ormalion concerning the
proper operation of the
unit. Additionally, in order
ined aiiood trrasri
lew imit, OuicI
Start and Owner's
should be read in its entire-
ty. The manuals should be
sayed and kept, on hand as
jx-3as
Owner's Manual
This owner's manual consists of the following 14 chapters and supplementary information.
Before you read this manual, you should read through the Quick Start manual so you're famil-
iar with the basic operation of the unit.
Chapter 1An Overview of the JX-305 HH
Tliis chapter explains liow the ]X-305's sound generator and sequencer are organized, and explains theHH
basic operation. By reading this chapter, you can gain an overall understanding of the JX-305. HjH
Chapiter 2Playing the Keyboard HH
This chapter explains the Key Mode function, the pitch bend lever, the pedals, etc., and how to use tl'<eB^J
arpeggiator. Be sure to read this chapter. ^^H
Chapter 3Playing Patterns VV
Tliis chapter explains how to play patterns, and how to use functions such as Real-Time Transpose, Mute.BCB
Part Mixer, and Play Quantize. Be sure to read this chapter, HHj
Chapter 4One-Touch Phrase Playback (RP5)
This chapter explains the various effect types and how to use them. Read this chapter when you wish to^jW
use effects. ^^^H
Chopter 5Creating Original Sounds (Patch Edit]
This chapter explains the parameters that modify the sound. Read this chapter so you better understand BiJ
how to use the knobs to control the sound when creating your own .suunds. ^^H
Chapter 6Creating an Original Rhythm Set (Rhytihim Editing)
This chapter explains the rhythm set parameters. Read this chapter when you wish to create an original^^B
rhythm set. ^^H
Chapter 7Applying Effects to the Sound (Effects)
This chapter explains the various effect types and how to use them. Read this chapter when you wish to^^fl
use effects. ^^H
Chapter 8Recording Patterns HH
This chapter explains how to record patterns. Read this chapter when you wish to record patterns. KU
Chapter 9Editing Patterns
This chapter explains how to edit patterns, and how to modify music data after it's been recorded. Read^^B
this chapter as necessary. ^^H
Chapter 10 Keeping Frequently Used Patterns Together (Pattern Set) PM
Tlris chapter explains how to use Pattern Sets and how to store patterns in aset. Read this chapter whenijfll
you wisti to use apattern set. ^^H
Chapter 1 1 Placing Patterns in Playback Order to Create aSong PH
This chapter explains haw to play back, record, and edit songs. Be sure to read this chapter if you wish to gJ|
use songs. ^^^H
Chapter 12Using Memory Cards PP^i
Here you can learn how to use memory cards to back up your data, and how to make copies of acard. Be gwA
sure to read this chapter before using memory cards, ^^H
Chapter 13Setting the Operating Environment of the JX-SOS (System) PR
This chapter explains settings that determine the overall configuration for your JX-305, such as its timing jftj
and synchronization preferences. Read this chapter as necessary. ^^^|
Chapter 14 Advanced Applications PVI
This chapter explains how the lX-305 can he used with external M115I equipment, and gives tips for creat-ltj
ing sounds and performing. Read this chapter as necessary. ^^^B
Supplementary Information HHj
Consult this chapter when the JX-305 does not function as you expect, or if an error message is displayed. ^^H
This chapter also contains information such as parameter lists and the MIDI implementation. ^^H
•SmartMedia is atrademark of Toshiba corporation.
•AH product names mentioned in this document are trademarks or regis-
tered trademarks of their respective owners.
Copyright ©1998 JUTLAND CORPOR.ATION
.'\ll rights re5er\'ed. No part of this publication mav be reproduced in any form without the written
USING THE UNIT SAFELY
INSTRUCTIONS FOR THE PREVENTION OF FIRE, ELEaRIC SHOCK, OR INJURY TO PERSONS
Abouf AWARNING and ACAUTION Notices
ZhWARNING
Used for instructions intended to alert
tlie user to the risk of deatfi or severe
injury should the unit be used
improperly.
ZL CAUTION
Used for instructions intended to alert
the user to the risk of injury or material
damage should the unit be used
improperly.
*Material damage refers to damage or
other adverse effects caused with
respect to the home and all its
furnishings, as well to domestic
animals or pets.
About the Symbols
A
c
The Asymbol alerts the user to important instructions
or warnings.The specific meaning of the symbol is
determined by the design contained within the
triangle. In the case of the symbol at left, it is used for
general cautions, warnings, or alerts to danger.
The symbol alerts the user to items that must ne\'er
be carried out (are forbidden). Tlie specific tiling that
must not be done is indicated by the design contained
within the circle. In the case of the symbol at left, it
means that the unit must never be disassembled.
The •symbol alerts the user to things that must be
carried out. The specific thing that must be done is
indicated by the design contained within the circle. Iii
the case of the symbol at left, it means that the power-
cord plug must be unplugged from the outlet.
ALWAYS OBSERVE THE FOLLOWING
AWARNING AWARNING
•Before using this unit, make sure to read the /^
instructions below, and the Owner's Manual. '•N
•Do not open (or modify in any way) the imit or its
AC adaptor.
•Do not attempt to repair the unit, or replace parts /\^
within it (except when this manual provides specific^--'
instructions directing you to do so). Refer all servicing
to your retailer, the nearest Roland Service Center, or
an authorized Roland distributor, as listed on the
"Information" page.
•Be sure to use only the AC adaptor supplied with«^
the unit. Also, make sure the line voltage at the instal- ^^
lation matches the input voltage specified on the AC /l\
adaptor's body. Other AC adaptors may use adiffer-
ent polarity, or be designed for adifferent voltage, so
their use could result in damage, malfunction, or elec-
tric shock.
•Avoid damaging the power cord. Do not bend it{\^
excessively, step on it, place heavy objects on it, etc. AV_y
damaged cord can easily become ashock or fire haz-
ard. Never use apower cord after it has been dam-
aged.
•Never use or store the unit in places that are: /S^
•Subject to temperature extremes (e.g., direct^
sunlight in an enclosed vehicle, near aheating/
duct, on top of heat-generating equipment); or are
•Damp (e.g., baths, wasluooms, on wet floors); or
are
•Humid; or are
•Dusty; or are
•Subject to high levels of vibration.
•This imit should be used only with arack or stand /|y
that is recommended by Roland. ''
•When using the unit with arack or stand recom-^^
mended by Roland, the rack or stand must be careful- ^^
ly placed so it is level and sure to remain stable. If not
using arack or stand, you still need to make siu'e that
any location you choose for placing the unit provides
alevel surface thai will properly support the unit, and
keep it from wobbling.
•This unit, cither alone or in combination with an|N/N
amplifier and headphones or speakers, may be capa- ^^-^
ble of producing sound lex'els that could cause perma-
nent heai'ing loss. Do not operate for along period of
time at ahigh volume level, or at alevel that is
uncomfortable. If you experience any hearing loss or
ringing in the ears, you should immediately stop
using the unit, and consult an audiologist.
•Do not allow any objects (e.g., flammable material, /^\
coins, pins); or liquids of any kind (water, soft drinks, V^
etc.) to penetrate the unit.
AWARNING ACAUTION
•Immediately turn the power off, remove the AC /Jv.
adaptor from the outlet, and request servicing by your '*
retailer, the nearest Roland Service Center, or an
authorized Roland distributor, as listed on the
"Information" page when:
•The AC adaptor or the power-supply cord has
been damaged; or
•Objects have fallen into, or liquid has been
spUled onto the unit; or
•The unit has been exposed to rain (or otherwise
has become wet); or
•The unit does not appear to operate normally or
exhibits amarked change in performance.
•In households with small children, an adult should /^
provide supervision until the child is capable of fol- '
lowing all the rules essential for the safe operation of
the unit.
•Protect the unit from strong impact.
(Do not drop it!) A
•Do not force the unit's power-supply cord to share f\^
an outlet with an unreasonable number of other V^
devices. Be especially careful when using extension
cords—the total power used by all devices you have
connected to the extension cord's outlet must never
exceed the power rating (watts/amperes) for the
extension cord. Excessive loads can cause the insula-
tion on the cord to heat up and eventually melt
through.
•Before using the unit in a foreign country, consult /Sy
with your retailer, the nearest Roland Service Center, ''
or an authorized Roland distributor, as listed on the
"Information" page.
•The unit and the AC adaptor should be located so /5v
their location or position does not interfere with their ''
proper ventilation.
•Always grasp only the plug or the body of the AC mm
adaptor when plugging into, or unplugging from, an ^^
outlet or this unit.
•Whenever the unit is to remain unused for an aB
extended period of time, disconnect the AC adaptor. ^^
•Try to prevent cords and cables from becoming ^\^
entangled. Also, all cords and cables should be placed ''
so they are out of the reach of children.
•Never cHmb on top of, nor place heavy objects on /\\
the unit. V_y
•Never handle the AC adaptor body, or its plugs, f
with wet hands when plugging into, or unplugging
from, an outlet or this unit.
•Before moving the unit, disconnect the AC adaptor MB
and all cords coming from external devices. ^^
•Before cleaning the unit, turn off the power and ^^
unplug the AC adaptor from the outlet (Quick Start, ^^
p. 5).
•Whenever you suspect the possibility of lightning in
your area, disconnect the AC adaptor from the outlet. ^^
Contents
Features of the JX-305
.
Important Notes
Front and Rear Panels..
...8
...9
,10
Chapter 1. an Overview of the JX-305
How the JX-305 Is Organized 13
How the Sound Generator Is Organized 13
How the Sequencer Is Organized 14
Selecting aPatch 18
Playing Two Patches from the Keyboard
(Key Mode) 18
Playing One Patch Over the Entire Keyboard (Single)....! 8
Layering Two Patches (Dual) I'J
Playing Different Patches with the Left and Right Hands
(Split) 19
Changing the Split Point 20
Selecting the Upper Part/Lower Part 20
Modifying the Key Mode Settmgs in the Editing Pages 20
Smoothly Changing the Pitch of the Sound
(Portamento) 21
Portamento On/Off 21
Changing the Time Over Which the Pitch Changes
(Portamento Time) 21
Playing Notes Which Lie Outside the Range of the
Keyboard (Octave Shift) 21
Changing the Pitch (Pitch Bend Lever) 22
Applying Modulation to the Sound 22
Using the Modulation Lever 22
Using Aftertouch 22
Chapter 3. Playin
Playing Patterns 30
Adjusting the Tempo 31
Viewing the Number of Measures in aPattern 31
Muting aSpecific Part (Part Mute/Rhythm Mute)....32
Transposing During Playback
(Real-Time Transpose) 32
Using the VALUE Dial or [INC] [DEC] 32
Using the Keyboard 33
Changing the Settings of Each Part 33
Using the Part Mixer Page to Make Changes 33
Using the Editing Pages to Make Changes 34
Saving Patterns You've Modified (Pattern Write) ....36
Copying and Initializing Settings .37
Using the Knobs to Modify the Sound During
Playback (Real-Time Modify) 38
Modifying the Sound for an Individual Rhythm Group.39
About Memory..
Basic Operation.
,.15
..16
Chapter 2. Playing the Keyboard 18
Changing the Keyboard Dynamics
(Keyboard Velocity) 22
Sustaining the Notes You Play (Hold Pedal) 23
Using aPedal to Modify the Sound
(Control Pedal) ....23
Control Pedal Settings 23
Pressing Chords to Produce Arpeggios
(Arpeggiator) 24
Playing Arpeggios 24
Creating an Arpeggio Pattern 24
Changing the Way in WWch the Arpeggio Will Play
(Arpeggio Style) 25
Adding Expression to the Arpeggio (Accent Rate) 25
Changing the Pitch Range of the Arpeggio
(Octave Range) 26
Selecting the Part in Dual Mode Which
Will Play the Arpeggio (Arpeggio Destination) 26
Making More Detailed Settings 26
Saving Arpeggio Settings (Arpeggio Write) 28
Playing aRhythm Set 28
Listening to Sound Processed by the Effects
(Audition) 29
30
Returning aPattern to Its Original State During Playback
(Pattern Reset) 39
Ensuring Correct Playback bom the Middle of aPattern ..
(MIDI Update) 40
Changing the Groove of aPattern (Play Quantize) ..40
Selecting Parts to Use with Play Quantize 41
Correcting Inaccuracies in the lyiytlim (Grid Quantize) 41
Giving Swing to the Rhythm (Shuffle Quantize) 42
Givi7ig nGroove tn the Rhythm (Groove Quantize) 43
Using Pedal for Control (Switch Pedal) 46
Specifying the Function of the Switch Pedal 46
Using the Pedal to Change the Tempo 46
Simultaneously Changing the Tempo and Pilch
(Turntable) 47
Chapter 4. One-Touch Phrase Playback (RPS) 48
Chapter 5. Creating Original Sounds (Patch Edit)....
Pressing Notes to Play Back Phrases 48
Causing aPhrase to Conliniie Playing (RPS Mold) 49
Assigning Phrases to the Keyboard 49
The Basis for the Sound of a Patch (Tones) 53
What aTone Consists of 53
Sound-Editing Procedure 53
Changing the Basic Waveform of the Sound
(Wave/FXM) 56
Pitch-Related Settings 57
Modifying the Pitch (Pitch) 57
Making the Pitch Change Over Time (Pitch Envelope) ..58
Making More Detailed Settings .'54
Brightness-Related Settings (Filter) 61
Modifying the Brightness of the Sound (Filter) 61
Making the Brightness Change Over Time
(Filter Envelope) 63
Making More Detailed Settings 65
Settings Related to Volume and Pan (Amplifier) 67
Adjusting the Volume and Pan 67
Creating Time-Variable Change in Volume
(Amplifier Envelope) 68
How aRhythm Tone Is Organized 85
Creating the Sounds 85
Specifying the Basic Waveform of the Sound
(Wave) 86
Pitch-Related Settings 87
Changing the Pitch of the Sound (Pitch) 87
Making the Pitch Change Over Time (Pitch Envelope) ..87
Making More Detailed Settings 89
Brightness-Related Settings (Filter) 90
Modifj'ing the Brightness of the Sound (Filter) 90
Making the Brightness Change Over Time
(Filter Envelope) ''1
Turning Effects On/Off 101
Adding Reverberation to the Sound (Reverb) 102
Adjusting the Overall Reverb Volume (Reverb Level)..102
Adjusting the Reverb Volume for Each Part
(Part Reverb Level) 102
Making More Detailed Settings 103
Adding an Echo to the Sound (Delay) 103
Adjusting the Overall Delay Volume (Delay Level) 104
Adjusting the Delay Volume for Each Part
(Part Delav Level) 104
Making Settings for Each Phrase 50
Using the Part Mixer to Modify Settings 50
Changing the Patch of Each RPS Part 51
Saving the Phrases You Assigned (RPS Set Write)...52
53
Chapter 6. Creating an Original Rhythm Set {Rhythm Edit)
Chapter 7. Applying Effects to the Sound (Effects)
Making More Detailed Settings 68
Applying Cyclic Changes to the Sound (LFO) 71
Selecting the Waveform That Will Modulate the Sound
(LFOl Waveform) 72
Adjusting the Speed of Modulation (LFOl Rate) 72
Adjusting the Depth of Modulation (LFOl Depth) 73
Making More Detailed Settings 74
Specifying the Parameters That Will Be Modified
by Each Controller (Control) 76
Adjusting the Range of Pitch Bend (Bend Range) 76
Control 1/2/3/4 (Control Destination 1/2/3/4) 11
Ctrl 1/2/3/4 Depth (Control 1/2/3/4 Depth) 17
Settings Common to the Entire Patch (Common) 77
Smoothly Changing the Pitch (Portamento) 77
Making More Detailed Settings 78
Saving Patches You've Created (Patch Write) 82
Copying and Initializing Settings 83
Making More Detailed Settings 92
Settings Related to Volume and Fan (Amplifier) 94
Adjusting the Volume and Pan (Amplifier) 94
Creating Time-Varying Change in Volume
(AmpUfier Envelope) 95
Making More Detailed Settings 96
Adjusting the Range of Pitch Bend (Bend Range) ....97
Adjusting the Effects for Each Rhythm Tone (Rhythm
Tone) 97
Saving Rhythm Sets You've Created
(Rhythm Set Write) 98
Copying and Initializing Settings 99
Making More Detailed Settings 105
Applying Various Effects to the Sound (Multi-Effects)
106
Selecting the Type (Multi-Effects Type) 106
Adjusting the Overall Multi-Effects Volume
(Mulli-Effects Output Level) 106
Making Multi-Effects Settings 107
Specifying the Part(s) to Which Multi-Effects Will Be
Applied (Part Multi-Effects Switch) 124
Chapter 8. Recording Patterns
Chapter 9. Editing Patterns
.
Recording Your Playing As You Perform
(Real-Time Recording) 125
Recording Procedure 125
Auditioniiig Piorases During Recording
(Rehearsal Function) 127
Recording an Arpeggio Performance 127
Recording Knob Movements (Modify Data) 128
Recording Smoothly Across Patterii Boundaries 128
Recording Part Mixer Operations 128
Recording the Mute Settings 129
Recording Changes in Tempo 129
Erasing Unwanted Data While You Record
(Rcal-Tuno Erase) 130
Editing the Musical Data of aSpecified Part
(Pattern Edit) 138
Copying aPortion of aPattern (Copy) 138
Deleting Unwanted Measures (Delete Measure) 140
Inserting Blank Measures (Insert Measure) 140
Erasing Unwanted Data (Erase) 141
Transposing the Pitch (Transpose) 142
Modifying the Strength of Notes (Change Velocity) 142
Modifying the Note Length (Change Gate Time) 143
Shifting the Timing Slightly (Shift ClocJ<) 144
Tliiiming Out Unneeded Data (Data Thin) 145
Converting the Note Timing of aPattern (Reclock) 145
Using aPattern Set to Recall Patterns 152
Assigning aPattern to be Recalled 152
Playing Back aSong 154
Recording aSong 155
Editing Songs (Song Edit) 155
Copying aSong (Song Copy) 156
Cautions When Using aMemory Card 159
Before Using aNew Card (Format) 159
Saving All Internal Settings to aCard
(User Backup) 160
Recording Notes One at aTime (Step Recording) ..131
Recording I'rocedure 131
Recording Notes One by One (Step Recording 1) 132
Various Ways to Input Notes 133
Recording Individual Notes to Grid Locations
(Step Recording 2) 134
Inputting Complex lyiytlims 136
Checking the Remaining Amount of Memory
(Memory Information) 137
Temp (Temporary) 137
User (User Memor)') 137
Card (Card Memory) 137
Using Play Quantize Settings to Modify aPattern
(Edit Quantize) 146
Individually Editing Musical Data
(Microscope Edit) 146
View the Musical Data That You Input 147
Musical Data Handled in Microscope Mode 147
Modifying the Value of Musical Data (Change Event) .148
Deleting Musical Data (Delete Event) 150
Inserting Musical Data (Insert Event) 150
Moving Musical Data (Move Event) 151
Hiding Unwanted Musical Data (View Filter) 151
Chapter 10. Collecting Frequently Used Patterns in aSet (Pattern Set) 152
Chapter 11. Connecting Patterns in Playback Order to Create aSong. 154
Chapter 12. Using Memory Cards 159
Saving aPattern Set That Was Modified
(Pattern Set Write) 153
Deleting Unwanted Patterns from aSong
(Delete Pattern) 156
Inserting aPattern (Insert Pattern) 157
Saving aSong That You Recorded (Song Write) 157
Initializing Sellings (Song hiitialize) 158
Restoring the Saved Settings Back to Internal Memory
(Backup Load) 161
Deleting the Backup File from the Card
(Backup Delete) 161
Copying an Entire Card (Card Duplicate) 161
Chapter 13. Setting the Operating Environment of the JX-305 (System). 163
Controller-Related Settings 163
Changing the Loudness of Notes Played on tlie Keyboard
(Keyboard Velocity) 163
Setting Aftertouch Sensitivity (Aftertouch Sens) 163
Specifying How the Pedal Will Function 163
MIDI-Related Settings 164
Disconnecting the Keyboard from the Internal Sound
Generator (Local Switch) 165
Using an External MIDI Keyboard in Place of the
Keyboard of the JX-305 (Remote Keyboard Switch) 165
Differentiating Between Units of the Identical Model
(Device ID Number) 165
Re-Transmitting Messages Received at MIDI IN from
MIDI OUT (Thru Function) 165
Specifying the Reception Status for Each Part
(Rx Switch) 165
Specifying How Knob Data Is Transmitted
(Edit Transmit/ Receive Mode) 165
Reception Settings for Each Type of Message 166
Transmission Settings for Each Type of Message 166
Sequencer-Related Settings 166
S)T\clironization Settings (S5mc Mode) 167
Transmitting Synchronization Messages (Sync Out) 167
Making Songs Play Continuously (Loop Mode) 167
Setting the Metronome (Metronome Mode) 167
Adjusting the Metronome Volume
(Metronome Level) 167
Specifying tlie Timing for RPS Playback
(RPS Trigger Quantize) 167
Synchronizing Arpeggios to tlie Pattern
(Arpeggio Sync) 168
Calculating aChecksum Automatically
(Auto Checksum) 168
Specifying the Resolution of the Tap Tempo
(Tap Resolution) 168
Tuning and Sound Generator Related Settings 168
Adjusting the Display Contrast (LCD Contrast) 168
Adjusting the Overall Tuning (Master Tune) 168
Tuning Each Note (Scale Tune) 168
Specifying How Patches Will Be Switched
(Patch Remain) 169
Specifying the Number of Notes for Each Part
(Voice Reserve) 169
Specifying the Variable Range of Resonance
(Resonance Limiter) 169
Specifying the Pattern at Power-On (Default Pattern) ..169
Specif\ring the Arpeggio Style at Power-On
(Default Arpeggio Style) 170
Restoring the Factory Settings (Factory Preset) 170
Chapter 14. Advanced Applications 171
Taking Advantage of MIDI 171
What Is MIDI? 171
Controlling the JX-305 from an External MIDI Device. .172
Controlling an External MIDI Device from the JX-305..174
Synchronizing an External Sequencer 175
Synchroruzing to an External Sequencer 175
Saving Pattern and Patch Data on an External Sequencer
(Bulk Dump) 176
Example of Real-Time Modify 178
Example of Multi-Effects Settings 180
Troubleshooting
Error Meggoge List <
Waveform List ,
Preset Patch List ,
Preset Rhythm Set List ,
Effects Template List ,
Preset Pattern List ,
RPS Pattern List ,
RPS Set List
Parameter List
Transmit/Receive Setting List
,
MIDI Implementation ,
Main Specifications ,
Index ,
.183
.185
.187
.190
.195
.203
.204
.210
.219
.223
.235
.236
.256
.257
High-performance synthesis engine
The all-important sound generator is ahigh-perfor-
mance synthesizer offering 64-note polyphony. Arich
array of parameters, including sharp filters and ADSR
envelopes can be modified using the knobs on the
panel to create your own sounds. The soimd generator
can also be used as amultitimbral sound module, pro-
viding up to eight parts.
Cutting-edge patterns that lead the
scene
The JX-305 contains 274 high-quality preset patterns
for immediate use and 494 RPS patterns. Since the pat-
terns cover awide range, from teclino to reggae, this
instrument provides everything you need for most sit-
uations.
Sounds that match today's trends
The diverse assortment of carefully selected sounds
and rhythm sets ranges from those from the TD-303,
JUNO, JUPITER and TR-808/909—indispensable for
the dance scene—to realistic acoustic sounds. From the
day you take the JX-305 home, you can enjoy today's
leading-edge sounds.
You can also create yoiu- own original sounds and
store them in memory for immediate recall at any
time.
Three sophisticated digital effect units
High-performance DSP (digital signal processing)
technology provides you with awide range of effects.
Three effect units are provided: Reverb adds reverber-
ation, Delay adds echo-like effects, and general-pur-
pose ffect unit provides 24 types of effect that have
been optimized for dance music.
Three key modes
The JX-305 provides three key modes: single, dual,
and split. It's ea.sy to divide the keyboard into left and
right zones, which can play different sormds simulta-
neously, or you can layer two sounds for every note.
Asequencer to help your ideas take
shape
You can construct asong in real time as you play, sim-
ply by switching the playback patterns. During
recorciing, you can switch the recording part to record
non-stop.
The JX-305's internal memory by itself can contain
approximately 75,000 notes (up to 200 patterns). By
using amemory card (SmartMedia), the capacity can
be boosted to amaximum of approximately 480,000
notes (up to 200 patterns).
Use the arpeggiator to create phrases
You can play arpeggios simply by pressing the key-
board. Your musical imagination and taste are all you
need to create completely new phrases.
RPS (Real-Time Phrase Sequence) func-
tion
Y'ou can play back phrases simply by pressing asingle
key. This has awide variety of uses, such as adding
accents during asong, or playing an entire song using
just RPS.
Play quantize changes the groove in
real time
The JX-305 provides three types of play quantize:
Grid, Shuffle and Groove. Simply by rotating aknob,
you can produce your own "groove" in real time.
Controls for live performance
The JX-305 is designed for live performance, witli fea-
tures such as amute button that lets you instantly
silence the playback of aspecific part or rhythm
instrument, and aReal-Time Transpose function that
lets you transpose during pattern playback. Of course,
you can also move knobs during pattern playback to
modifv the sound in real time.
8
Important Notes
In addition to the items listed under "USING THE
UNIT SAFELY" on page 2, please read and observe
the following:
Povs^er Supply
•Do not use this unit on the same power circuit with any
device that will generate line noise (such as an electric
motor or variable lighting system).
•The AC adaptor will begin to generate heat after long
hours of consecutive use. This is normal, and is not a
cause for concern.
•Before connecting this unit to other devices, turn off the
power to all units. This will help prevent malfunctions
and/or damage to speakers or other devices.
Placement
•Using the unit near power am^pUfiers (or other equipment
containing large power transformers) may induce hum.
To alleviate the problem, change the orientation of this
unit; or move it farther away from the source of interfer-
ence.
•Tliis device may interfere with radio and television recep-
tion. Do not use this device in the vicinity of such
receivers.
•Do not expose the unit to direct sunlight, place it near
devices that radiate heat, leave it inside an enclosed vehi-
cle, or otherwise subject it to temperature extremes.
Excessive heat can deform or discolor the unit.
Maintenance
•For everyday cleaning wipe the unit with asoft, dry cloth
or one that has been slightly dampened with water. To
remove stubborn dirt, use acloth impregnated with a
mild, non-abrasive detergent. Afterwards, be sure to wipe
the unit thoroughly with asoft, dry cloth.
•Never use benzine, thinners, alcohol or solvents of any
kind, to avoid the possibility of discoloration and /or
deformation.
Repairs and Data
•Please be aware that all data contained in the unit's mem-
ory may be lost when the unit is sent for repairs.
Important data should always be backed up on amemoiy
card, another MIDI device (e.g., asequencer), or written
down on paper (when possible). During repairs, due care
is taken to avoid the loss of data. However, in certain
cases (such as when circuihy related to memory itself is
out of order), we regret that it may not be possible to
restore the data, and Roland assumes no liability concern-
ing such loss of data.
Additional Precautions
•Please be aware that the contents of memory can be irre-
trievably lost as aresult of amalfunction, or the improper
operation of the unit. To protect yourself against the risk
of loosing important data, we recommend that you peri-
odically save abackup copy of important data you have
stored in the unit's memory on amemory card or another
MIDI device (e.g., asequencer).
Unfortunately, it may be impossible to restore the con-
tents of data that was stored in the unit's memory, a
memory card or another MIDI device (e.g., asequencer)
once it has been lost. Roland Corporation assumes no lia-
bility concerning such loss of data.
Use areasonable amount of care when using the unit's
buttons, sliders, or other controls; and when using its
jacks and connectors. Rough handling can lead to mal-
functions.
Never strike or apply strong pressure to the display.
When connecting/disconnecting all cables, grasp the con-
nector itself—never puU on the cable. Tliis way you will
avoid causing shorts, or damage to the cable's internal
elements.
To avoid disturbing your neighbors, try to keep the unit's
volume at reasonable levels. You may prefer to use head-
phones, so you do not need to be concerned about those
around you (especially when it is late at night).
When you need to transport the unit, package it in the
box (including padding) that it came in, if possible.
Otherwise, you will need to use equivalent packaging
materials.
The soimds, phrases and patterns contained in this product
are sound recordings protected by copyright. Roland hereby
grants to purchasers of this product the permission to utilize
the sound recordings contained in this product for the cre-
ation and recording of original musical works; provided
however, the sound recordings contained in this product
may not be sampled, downloaded or otherwise re-recorded,
in whole or in part, for any other purpose, including but not
limited to the transmission of all or any part of the sound
recordings via the internet or other digital or analog means
of transmission, and/or the manufactvire, for sale or other-
wise, of any collection of sampled sounds, phrases or pat-
terns, on CD-ROM or equivalent means.
The sound recordings contained in this product are the origi-
nal works of Roland Corporation. Roland is not responsible
for the use of tlie sound recordings contained in this prod-
uct, and assumes no liability for any infringement of any
copyright of any third party arising out of use of the sounds,
phrases and patterns in this product.
Important
Please observe the following points when using the JX-305.
Various types of data required for the IX-305's operation are
held in internal flash memory. If the power is turned off
while data is being written to flash memory, writing will not
he completed correctly, and .subsequent operation can be
affected.
While the following display appears, never turn off the
power or remove the memory card.
Processing. .
.
Keep F'Duet"' ON
Front and Rear Panels
Roland
(^E)
18
3^.
^O^lfffch ^tfgK jtfg?h jtffch joSSBb^ ^^DEiw
EOntvtne uvEL
€1
=o~^ '
2'^^S^JP Q s Q s ra a(3D aaQ
I
i
Front Panel
1VOLUME Knob
Controls the overall volume of the JX-305.
2REALTIME MODIFY Section
Here you can make settings for sound parameters (p. 54) and effects (p. 101). Also, in the Part
Mixer page you can make various settings for each part (p. 33).
3QUANTIZE Section
Modifies the groove of the pattern (p. 40).
4ARPEGGIATOR/RPS Section
Here you can make arpeggiator (p. 24)/RPS settings (p. 48).
5KEYBOARD Section
Here you can make settings which affect the notes played on the keyboard, such as Key Mode
(p. 18), Octave Shift (p. 21), and Portamento (p. 21).
6TRANSPOSE Button
Press this button when you wish to transpose (p. 32).
7SEQUENCER Section
Here are tlie buttons related to sequencer playback (p. 30) and recording (p. 125).
8DISPLAY Section
The parameter you wish to modify using [INC] [DEC] or the [VALUE] dial appears in the display.
9INC/DEC (Increment/Decrement) Buttons
VALUE Dial
Use these to modify the value of aparameter (p. 16).
10
10PAGE</PAGE> Buttons
Use these buttons to switch between levels of the various setting displays. In pages where
you are assigning aname, these buttons move the cursor.
1
1
SHIFT Button
This button is u.sed in conjunction with other buttons.
12 UNDO/REDO Button
Press tills button to cancel the previous operation (p. 17).
13 ENTER/EXIT Buttons
Use these buttons to execute/cancel an operation, or to exit from asetting page.
14 GROUP Section
Here you can select the group for sovinds or patterns (p. 18, 30).
15PART Section
Press these buttons when you wish to use buttons 1- 8to select or mute parts (p. 18, 32).
16 EDIT/UTILITY Section
Press these buttons when you wish to edit a sound or pattern, or to store or initialize settings.
17 1-8 Buttons
Use these buttons to select the bank and number of apatch or pattern (p. 18), to select parts or
rhythm groups, or to switch muting on/off (p. 32). Wlien editing, these buttons are used to
select parameters.
18Pitch Bend Lever/Modulation Lever
This lever lets you modify the pitch or apply vibrato. Depending on tlie settings, this can also
be used to control specific parameters {p. 22, 47).
11
SHE m
P®©©©@ooo®oo om^
Rear panel
1MEMORY CARD Slot
An optional memory card (SmartMedia) can be inserted here (p. 159).
2MIDI IN/OUT/THRU Connectors
External MIDI devices can be connected here (p. 171). Use MIDI cables (sold separately) to
make connections.
3SWITCH PEDAL Jack
Aseparately sold pedal switch or foot switch can be connected here. The pedal can be operat-
ed to apply various effects (p. 46).
4CONTROL PEDAL Jock
Aseparately sold expression pedal can be connected here. The pedal can be operated to
adjust the volume or to make the sound change in various ways (p. 23).
5HOLD PEDAL Jock
Aseparately sold pedal switch can be connected liere. The pedal can be used to sustain notes
(p. 23).
6OUTPUT Jocks (L (MONO), R)
An amp or mixer can be connected to these jacks. If outputttng in mono, make comiections to
the Ljack (Quick Start, p. 3).
7PHONES Jock
Accepts connection of headphones. Audio signals will still be output from the output jacks
even if headphones are connected (Quick Start, p. 3).
8DC IN Jock
Connect tlie included AC adapter here (Quick Start, p. 3).
9POWER Switch
This switch turns the power on/off (Quick Start, p. 5).
12
JX-305
Abrief explanation of the TX-305's internal organiza-
tion was provided in tlie Quick Start manual, but this
chapter contains amore detailed explanation of the
basic sections: the controller section, sound generating
section, and the sec;[uencer section.
How the JX-305 Is Organized
j^X.~305
Sound generator
section <^
Playback
Sequencer
section
AA
Performance l^ecording
Controller seciion (kayboard, knobs, etc.)
Playing and Operation—Controller
Controllers refer collectively to the keyboard, the
panel knobs, the pitch bend lever, and the pedal con-
nected to the rear panel etc. By operating these con-
trollers you can play sounds or modify them.
Recording Your Performance
—
Sequencer
The sequencer can record your playing and controller
operations (knob movements) as MIDI messages, and
can play back the MIDI messages that were recorded.
MIDI messages that have been recorded on the
sequencer can also be transmitted from the MIDI OUT
connector, and used to control external MIDI devices.
Producing the Sound—Sound
Generator
This is the section that produces the sound. The sormd
generator produces sound in response to data it
receives from the JX-305's controllers and its
sequencer. It can also be played by MIDI messages
that arrive from an external MIDI device.
How the Sound Generator Is
Organized
The Smallest Unit of Sound-
Tones
Tones are the smallest unit of sound used by the JX-
305. Although it is possible to create asound using
only one Tone, the sounds you will normally play on
the JX-305 are "Patches," which consist of one or more
Tones.
Sounds That You Play-Patches
Patches are the unit of sound that you normally play.
Each Patch consists of up to four Tones.
Tones and Patches are organized as follows.
tSSESM
1
Pirnw PWV 1FILTER ENU IAIUIPUFIER ENV
tA <i\h, Iho pit '
o-eftimc -'-
ll Matte axmion 6etfings t
Tlw uHUj ill which ihe four tones are combined will deter-
mine Iww liicy ivill sound. This is determined by the
Structure Type parameter.
--'-, rs "Settings Common to the Entire Patch
"~~' (Common)" (p. 77)
13
Chapter 1.an Overview of the JX'305
Playing Percussion Instruments
—
Rhythm Sets
Acollection of various percussion instruments
(rhythm tones) is referred to as aRliytlim Set. Adiffer-
ent rhythm tone can be assigned to each key (note
number), allowing you to use alarge number of
rhythm tones at once.
DBESSSSMESaf
Assigning Instruments to the
Ensemble—Parts
You can think of "Parts" as slots into which Patches
are placed. Tliey can be thought of as being alittle like
musicians. You can select apatch (instrument) for each
part (musician), and play multiple parts at once. The
JX-305 has eight parts for pattern playback, and you
can adjust the volume and pan etc. for each part.
Sound generator section
Parti
Pert 2
Part 3
jj I'.Tiiiif""'"-"'
Patch Setup parameters
Part 4Patch Setup parameters
Parts Patch Setup parameters
Parte Patch Setup parameters
Part 7
RPart
Patch Setup parameters
Rhythm Set §Setup parameters
Parts 1-7
For each of these parts, you can select apatch and play
melodic, bass or chordal instruments. Since it is also
possible to select an individual rhythm tone, you can
also use one of these parts as an auxiliary rhythm part.
Rhythm part
For this part, you can select arhythm set and play per-
cussion instrument sounds.
About simultaneous polyphony
The JX-305 is able to play up to 64 notes simultaneous-
ly. If the incoming musical data requests more than 64
notes simultaneously, some notes vvfill drop out. When
using patches with along release time or when using
RPS, be careful not to exceed the maximum simultane-
ous polyphony. The number of notes that can be
sounded will actually depend not only on the number
of notes being played, but also on the number of tones
that are used by each patch.
For example, if you are playing apatch that uses four
tones, that patch will take up four times the number of
notes that are played.
r~fl If you would like to know about the polyphony
settings...
•The Voice Priority parameter can be set for
each patch to specify how notes will be turned
off when the maximum polyphony is exceeded.
1^ "Settings Common to the Entire Patch
(Common)" (p. 77)
9The Voice Reserve parameter can be set to
specify aminimum number of notes that will
be reserved for each part.
OS" "Specifying the Number of Notes for Each
Part (Voice Reserve)" (p. 169)
How the Sequencer Is Organized
The secjuencer records your performance and con-
troller operations as musical data. Playing back the
sequencer will cause this recorded musical data to be
sent to the somid generator, making it produce sound.
In other words, the sequencer plays the instrument
instead of the musician.
In the sense that it records and plays back aperfor-
mance, asequencer is similar to atape recorder.
However, it has unique advantages: the tempo can be
modified without affecting the pitch, there is no
decrease in sound quality no matter how many times
you play somettiing back, and extremely detailed edits
can be made at wUl.
Musical Data Played Back by the
Sequencer—Patterns
Patterns are musical data of various genres for the
sequencer to play back, and can be selected even while
they play back. The data within each pattern is divid-
ed into parts, and you can record or play back each
part separately, or modify the musical data inside each
part. For each pattern, you can also specify things such
as the patch, volurne and effect settings that will be
used by each part.
14
Chapter 1.an Overview of the JX-305
You can save the data in the condition that will be
most appropriate, and chcinge the settings as awhole
simply by changing the pattern. These settings can
also be used when you play the keyboard directly.
Sound source Sequencer
section section
Parts for pattern
playbacl<
Currently playing
Pattern Parts sellings
(Patoh selection and
setup parameters)
There are two types of patterns: "Preset Patterns"
which are already built into the JX-305, and "User
Patterns" wliich can contain patterns that you create.
Collecting Frequently Used
Patterns—Pattern Sets
APattern Set lets you collect frequently used patterns
so that tliey can be recalled instantly. Sixteen patterns
can be registered in each pattern set.
Pattern set example
Registered
pattern
Arranging Patterns in Playback
Order—Songs
Asequential arrangement of two or more patterns is
called a"song." When you play back asong, the pat-
terns in the song will play back in succession. Asong
can contain up to 50 patterns.
ri>f#(^el frf|js?ft.;i''-CA|ii3- ?' '
'P:A11 U:A11 JC:A11
V..\: .
X\
^. \^
.—^'i—-V-
'P:A14 U:A17 P:A24 C:A13 .... P:A35
12 3450
.-.. ^-.- ••-"•
About Memory
"Memory" refers to the place where patch settings and
musical data for patterns and other things are kept.
Tlie memory of the JX-305 is divided into three areas:
System Memory, User Memory, and Preset Memory.
There is also a"temporary area" within memory, into
which data is placed when you select apatch or pat-
tern, and the data in the temporary area is what you
are actually playing and editing.
Memory for Settings That Affect the
Entire JX-305—System Memory
System Memory contains settings for the system para-
meters that configure the JX-305. These include para-
meters that determine the overall operation of the
sound generator or sequencer, and MIDI-related set-
tings.
Rewritable Memory—User Memory
The contents of User Memory can be overwritten, and
are used to store settings or musical data that you cre-
ate. User Memory stores 256 patches, 200 patterns, 50
songs, 60 RPS sets, and 30 pattern sets.
*At the factory settings, the User Patches and the User
Patterns have the same contents as Preset Memory.
Non-Rewritable Memory—Preset
Memory
The contents of Preset Memory cannot be rewritten.
Preset Memory contains 640 patches and 768 patterns.
n
15
Chapter 1.an Overview of the JX-305
D
Temporary Memory—The Temporary
Area (Temporary Pattern)
When you play asound or select apatch for editing,
the selected patch is called into alocation known as
the "temporary area."
When you edit or record apattern, the contents of the
pattern are automatically copied to TMP (temporary
pattern), and your operations will affect this data.
Memory Card
An optional memory card can be used to store 512
User Patches and 200 User Patterns, just as in the user
memory of the JX-305.
JX-305 MEMORY CARD
,,^. SYSTEM ^j,.
640
768
Xl3
256
200
50
30
60
-V
TEMPORARY AREA ^
512
200
^
*The dntn in memory ivill be preserved even if the power is
tiirnecl off, and am be recalled at any time. However, the
data in the temporary area zvill be lost when the pozuer is
turned off.
When you modifij the settings of apatch or the contents of
apattern, you are actually modififing the data that was
called into the temporary area or the temporary pattern.
(In other words, you are not directly modifying the data
in memory.) If you luish to keep the changes that you have
made to the patch or pattern, you must sai>e the data as a
user patch or user pattern.
f~n "^ "Saving Patches You've Created (Patch
Write)" (p. 82)
ISP "Saving Patterns You've Modified (Pattern
Write)" (p. 36)
Basic Operation
Modifying aValue
To select apatch or pattern, or to modify aparameter
value, use the VALUE dial or the INC/DEC buttons.
[3DCZD
LOWER uppin
fWWT} /REDO
CZDCZII
exrr enter
aCD CZIDCIZ)
l—DEMO—
'
INC button/DEC button
To increase avalue press [INC]. To decrease avalue
press [DEC].
If you continue pressing the button, the value will con-
tinue to change.
If you press one button while holding down, the other
button, the value will change rapidly.
If you hold down [SHIFT] and press a button, the
value will change in larger steps.
VALUE dial
To increase avalue, rotate the [VALUE] dial clock-
wise. To decrease avalue, rotate the [VALUE] dial
coimterclockwise.
If you hold down [SHIFT] as you rotate the [VALUE]
dial, the value will change in larger steps.
16
Chapter 1.an Overview of the JX-305
Canceling the Previous
Operation (Undo/Redo)
The function which lets amodified parameter value or
edited musical data to be restored to its previous state
is called Undo. The function which returns the para-
meter value or musical data from its "Undone" state
back to the edited state is called Redo.
Tine JX-305 lets you use undo/redo for the following
operations. Tliis is convenient when you wish to can-
cel achange, or to compare your edits with the origi-
nal data.
i~]~-| Pattern Edit ^^ "Editing the Musical Data of a
Specified Part (Pattern Edit)" (p. 138)
Song Edit <^^ "Editing Songs (Song Edit)" (p.
155)
Pattern Recording <^ "Recording Patterns" (p.
125)
Song Recording "S" "Recording aSong" (p. 155)
1
.
Make sure that the pattern or song select
page is displayed.
2. Press [UNDO/REDO].
The following display will appear.
B
UNDO
/REDO
IERASE I^Hre UNDO
Vou bure
3. Press [ENTER], and your changes will be
"undone," restoring the value to its
unmodified state.
4. Press [UNDO/REDO] once again.
The following display will appear.
Hre REDO
•'ou Suf"-e
5. Press [INTER], and your changes will be
"redone," returning the value to its edited state.
*Undo/Redo operations must he done immediately after
you modify the data. Once you save the modified pattern,
tlic undo/redo operation will no longer be available. Also,
if you use adifferent operation to make afurther change
to the data, it will no longer be possible to undo/redo to
the change that was madefirst.
When you execute an operation that modifies alarge
amount of data, such as during pattern editing, the
Undo operation may not be available.
17
Chapter 2. Playing the Keyboard
Selecting aPatch
The JX-305 contains atotal of 640 different patches.
By specifying the group, bank, and number, you can
select the desired patch and play it on the keyboard.
1. Press [PART SELECT].
The indicator lights.
2. Use PART [IH^] *<> select the part that you
>vish to play on the keyboard.
(^£)CzDCZD(3DC3DC3DC3DCZD
The currently selected part is referred to as the "cur-
rent part."
If the current part is apart 1-7 you can select patches.
If the current part is the rhythm part, you can select
rhythm sets.
|- y~j us- "Playing aRhythm Set" (p. 28)
3. rn the DISPLAY section, press [PATCH].
The indicator lights, and the display will show the
group, bank, number and name of the currently select-
ed patch (rhythm set).
Bank
Group INumber
V
PATCH PfiTCH^ Psflii
DLead TB 1
Current part Name
4. In the GROUP section, press [PRESET/USER/
CARD] to select the group.
Patch groups are organized as follows.
PRESET-> P: A-J (Preset Group)
USER-> U: A-D (User Group)
CARD-> C: A-H (Card Group)
GROUP
OPRESET
OUSEB
PCARD L
*The card group cannot be selected unless aseparately sold
inciiiori/ card is inserted.
rT~] *"Using Memory Cards" (p. 159)
5. In the GROUP section, use [< PREV] [NEXT
>] to select the group (A-J, A-D, A-H).
6. Press [PART SELECT] once again.
The [PART SELECT] indicator goes out, and you can
now use BANK and NUMBER [l]-[8] to select apatch.
7. Use BANK [1]-[8] to select abank.
8. Use NUMBER [1]-[8] to select anumber.
Play the keyboard, and you will hear the selected
patch.
*If the IPART SELECT! or [PART MUTE] indicators in
the PART section are lit, steps 7and 8will not be possi-
ble. In this case, press [PART SELECT] or [PART
MUTE] to make the indicators go dark.
*You can also select patches by using [INC] [DEC] or the
IVAWE] dial instead of specifying the group/bank/number.
(•~pj To view alist of the available patches...
"Sf "Preset Patch List" (p. 190)
Playing Two Patches from
the Keyboard (Key Mode)
The JX-305 lets you layer two patches, or play different
patches with the right and left hands. This function is
called tlie Key Mode.
The Key Mode setting can be stored as part of each
pattern.
pr~l "^ "Saving Patterns You've Modified (Pattern
Write)" (p. 36)
Playing One Patch Over the
Entire Keyboard (Single)
This is the state in which you will normally play the
keyboard.
1.in the KEYBOARD section, make sure that
the [DUAL] and [SPLIT] indicators are dark.
If either indicator is lit, press the button and get the
indicator to go out.
SPLIT DUAL
a
18
Chapter 2. Playing the Keyboard
Layering Two Patches (Dual)
1. In the DISPLAY section, press [PATCH].
The indicator lights.
2. In the KEYBOARD section, press [DUAL].
Tlie indicator lights.
SPLIT DUAL
When you select Dual, the following screen will
appear. The part shown in the right of the upper row
is called the "upper part," and the part shown in the
left of the upper row is called the "lower part."
Lower part Upper part
aP:B26 HP:fll58
DPortaSynLead
Patch name
When you play the keyboard, the patches of tlie lower
part and the upper part will sound simultaneously.
Next, try changing the patch of each part.
3. Press [LOWER].
The indicator lights. The group, bank and number of
the patch for the lower part will be displayed in bold
characters. Tlie lower line of the display will show the
name of the patch that is currently selected for the
lower part.
•« PAGE »- Hp:i£6 HP:fi5
iiei Bass 1
4. Select apatch.
The patch of the lower part changes.
5. Press [UPPER].
The indicator lights. The group, bank and number of
the patch for the upper part will be displayed in bold
characters. The lower line of the display will show the
name of the patch that is currently selected for the
upper part.
-^ PAGE -
upj f^
ip:B26 \n f'-mz
DPortaSynLead
6. Select apatch.
The patch of the upper part changes.
7. To return to normal playing condition
(Single), press [DUAL] once again to make
the indicator go dark.
Playing Different Patches with
the Left and Right Hands (Split)
1. In the DISPLAY section, press [PATCH].
The indicator lights.
2. In the KEYBOARD section, press [SPLIT].
The indicator lights.
SPLIT DUAL
J
When you select Split, the following screen will
appear. The part that is shown in the right of the
upper row is called the "upper part," and the part that
is shown in the left of the lower row is called the
"lower part."
Lower part Upper part
HP:B26 nP:B58
iPortaSyriLead
Patch name
In Split mode, the keyboard is divided into two areas.
Playing the left area will sound the patch of the lower part,
and playing the right area will sound the patch of the upper
part. Tlie note at which the keyboard is devided into left and
right is called the Split Point. For example if the split point is
C4, the keyboard will be divided as shown below. The split
point is included in the Upper part.
C2 C3 C4
TC5 C6 C7
Lower part
Split point
Upper part
Here's how to change the patch of each part:
3. Press [LOWER].
The indicator lights. The group, bank and number of
the patch for the lower part will be displayed in bold
characters. The lower line of the display will show the
name of the patch that is currently selected for the
lower part.
aP:B£6
a101 Bas:
ffl P:
>1
058
4. Select apatch.
The patch of the lower part will change.
B
19
Chapter 2. Playing the Keyboard
B
5. Press [UPPER].
The indicator lights. The group, bcink and number of
the patch for the upper part will be displayed in bold
clnaracters. The lower line of the display will show the
name of the patch that is currently selected for the
upper part.
-« PAGE ^HP:B26 Ep:fllS8
DPortaSynLead
6. Select apatch.
The patch of the upper part will change.
7. To return to normal play mode (Single),
press [SPLIT] once again to make the indi-
cator go dark.
Changing the Split Point
The split point can be changed freely.
1. Hold down [SPLIT] and press the key that
you w^ish to set as the split point.
D
KBD! Split Point
^C4
Selecting the Upper Part/Lower Part
Key modes other than Single use two parts (the Upper
part and Lower part). You can select which of the
eight parts will be used as the Upper part, and which
will be used as the Lower part.
*When the Key Mode is Single, the upper part will be
played by the keyboard.
1.Press [PART SELECT].
The indicator lights.
PART
SELECT
lOTZ
2. Press [UPPER].
The indicator on the PART button for the part current-
ly selected as the upper part will light.
PAGE
3. Press PART [1]-[R] to select the part you
20
want to assign to the upper part.
2233i;6fi 6O77BH""-
iCZD r^n r=i r^~i r^~i r^~i r^~i
4. Press [LOWER].
The indicator on the PART button for the part current-
ly selected as the lower part will light.
5. Press PART [1]-[R] to select the port you
vs^ant to assign to the louver part.
'""tz3 fi^ CZJ CZJ C3D C3J CZJ [^j"'""
msaim,t i
*// you assign the same part to both the upper part and
lower part, it will not be possible to select patches inde-
pendently.
Modifying the Key Mode
Settings in the Editing Pages
lijdU 11
".' 1^~ >"^v"
1FX ON/OFF )WES^ESSSm
KBD: Split Point
C4
KBD: Upper p.art
PART 1
KBD: Lower Part
PfiRT 2
1.Press [EDIT].
Tlie indicator lights, and the Edit page appears.
2. Press BANK [1] (KEYBOARD).
The display will show the Split Point setting page.
KBD: Split Point
C4
3. Use [INC] [DEC] or the [VALUE] dial to set
the value.
Range: C-1-G9
*The Split Point settings is not affected by Octave Shift.
For example, middle Cwill be "C4" regardless of the
Octave Shift setting.

Other manuals for JX-305

7

Other Roland Synthesizer manuals

Roland JUNO-D User manual

Roland

Roland JUNO-D User manual

Roland JD-800 User manual

Roland

Roland JD-800 User manual

Roland U-20 Operating and maintenance manual

Roland

Roland U-20 Operating and maintenance manual

Roland XV-88 User manual

Roland

Roland XV-88 User manual

Roland UNO-Di User manual

Roland

Roland UNO-Di User manual

Roland FANTOM-6 User manual

Roland

Roland FANTOM-6 User manual

Roland SH-1 User manual

Roland

Roland SH-1 User manual

Roland SPV-355 User manual

Roland

Roland SPV-355 User manual

Roland SH-09 Operating and maintenance manual

Roland

Roland SH-09 Operating and maintenance manual

Roland SH-101 User manual

Roland

Roland SH-101 User manual

Roland JV-1080 User manual

Roland

Roland JV-1080 User manual

Roland SH-32 User manual

Roland

Roland SH-32 User manual

Roland Fa 06 User manual

Roland

Roland Fa 06 User manual

Roland JUNO-60 User manual

Roland

Roland JUNO-60 User manual

Roland Sound Canvas SC-55ST User manual

Roland

Roland Sound Canvas SC-55ST User manual

Roland XV-5080. User manual

Roland

Roland XV-5080. User manual

Roland SH-101 User manual

Roland

Roland SH-101 User manual

Roland RS-101 Strings Quick start guide

Roland

Roland RS-101 Strings Quick start guide

Roland JUNO-106 Operating and maintenance manual

Roland

Roland JUNO-106 Operating and maintenance manual

Roland JX-10 User manual

Roland

Roland JX-10 User manual

Roland System-8 User manual

Roland

Roland System-8 User manual

Roland E-09 User manual

Roland

Roland E-09 User manual

Roland Edirol StudioCanvas SD-80 Operating and maintenance manual

Roland

Roland Edirol StudioCanvas SD-80 Operating and maintenance manual

Roland JUNO-106 User manual

Roland

Roland JUNO-106 User manual

Popular Synthesizer manuals by other brands

Kilpatrick Audio K4815 user manual

Kilpatrick Audio

Kilpatrick Audio K4815 user manual

Personal Circuits Midi-CV-8 user guide

Personal Circuits

Personal Circuits Midi-CV-8 user guide

Dave Smith Instruments Prophet Rev2 user guide

Dave Smith Instruments

Dave Smith Instruments Prophet Rev2 user guide

Polyend & Dreadbox Medusa user manual

Polyend & Dreadbox

Polyend & Dreadbox Medusa user manual

Keysight Technologies N5221BU-665 manual

Keysight Technologies

Keysight Technologies N5221BU-665 manual

Hammond XLK-3 owner's manual

Hammond

Hammond XLK-3 owner's manual

NTHSynth NTH Music Synthesizer user manual

NTHSynth

NTHSynth NTH Music Synthesizer user manual

Korg DS-8 owner's manual

Korg

Korg DS-8 owner's manual

Yamaha SY85 Job Table

Yamaha

Yamaha SY85 Job Table

Yamaha MX49 Data list

Yamaha

Yamaha MX49 Data list

DOEPFER A-190-2 manual

DOEPFER

DOEPFER A-190-2 manual

Korg DW-8000 owner's manual

Korg

Korg DW-8000 owner's manual

Oberheim OB-Mx user guide

Oberheim

Oberheim OB-Mx user guide

Wurlitzer 140 Service manual

Wurlitzer

Wurlitzer 140 Service manual

Modal CRAFTsynth 2.0 user manual

Modal

Modal CRAFTsynth 2.0 user manual

TINRS RectangularThing manual

TINRS

TINRS RectangularThing manual

Crumar MOJO CLASSI user manual

Crumar

Crumar MOJO CLASSI user manual

Synthesis Technology MOTM-485 GX-1 Diode VCF Assembly instructions & owner's manual

Synthesis Technology

Synthesis Technology MOTM-485 GX-1 Diode VCF Assembly instructions & owner's manual

manuals.online logo
manuals.online logoBrands
  • About & Mission
  • Contact us
  • Privacy Policy
  • Terms and Conditions

Copyright 2025 Manuals.Online. All Rights Reserved.