Rollei ea2020G User manual

English
www.rollei-asia.com
ea2020G
User’s Manual

Security Instructions
2
3
PORTABLE MEDIA PLAYER
For your security and to prevent any damages, please read the following safety
instructions carefully. Please read the following safety instructions carefully.
Power Related
Do not plug in multiple power
adapters simultaneously.
This may cause fire.
Don’t bend the power adapter excessively,
and keep it from being pressed against
anything heavy or being damaged.
This may cause fire
Do not touch the power adapter with
wet hands.
This may cause electric shock.
Disconnect the power cord in
case of lightning.
This may cause electric shock.
If any liquid or alien substance is spilt
or dropped onto the product, turn it off
and stop the power supply.
This may cause fire or electric shock.
If there is any abnormal sound, smell
or fumes coming from the unit, turn it
off and interrupt the power supply.
This may cause fire or electric shock.
Product Related
Do not drop any metal objects
(coins, hairpins, etc.) or inflammable
substances onto the product.
This may cause problems with the product.
Do not place heavy objects on
the product.
This may cause problems with or
damage to the product.
Do not place the product in a
moist, dusty or sooty place.
This may cause problems with the
product.
Do not press two buttons at the
same time.
This may cause problems with or
damage to the product.
Do not leave the unit in direct
sunlight or near a heater.
This may cause problems with the product.
Do not drop the product and avoid
strong pressure (vibration) or any
impact to the product.
This may cause problems with or damage
to the product.
Avoid letting any liquids, chemicals,
cosmetics, etc. come into contact with
the product.
This may cause damage to the product.
Under no circumstances turn the product on
and immediately contact a Service Center.
Lightly clean the surface of the
unit using a soft dry cloth.
This may cause problems with the
product.
Never use chemicals or cleansing
solutions. This may damage the
surface of the product.
This may cause problems with the product.
Do not place any magnetic bodies near
the product.
Magnetic bodies such as magnets, CRTs, TVs,
monitors or speakers may cause damage to
the product.
Never disassemble, fix, or
modify the unit.
This may cause problems with or
damage to the product.
Keep the adapter away from heaters.
This may cause fire or electric shock.

About the Internal Rechargeable Battery
Using the Earphones
For Your Driving Safety
● Do not use the earphones while driving a bicycle, car or motor cycle.
It is dangerous and illegal depending on your local laws.
It is dangerous to listen to music loudly while walking especially crossing the road at a
pedestrian crossing.
For Protection of Your Hearing Ability
● Do not increase the volume of your earphones to an excessive level.
Doctors warn of the dangers of listening to music at an excessive level through your earphones.
● If you are experiencing an echo in your ear, turn the volume down or stop using the earphones.
Safety Instructions
4
Never open the case!
There is a danger of electronic shock.
Risk of explosion if battery is replaced by an incorrect type.
Dispose of used batteries according to the instructions.
Caution
Avoid any contact with water or other liquids. There is a danger of electric shock or fire.
For your security, use only the power adapter (Sunny Electronics, SYS1298-1305-W2E) supplied with the
product.
(The manufacturer is not liable for damages to the product caused by using an adapter other than the
supplied one.)
Notice
Use only outlets that match the DC converter plug. There is a danger of electric shock or fire.
Firmly insert the plug of the DC converter into the power outlet.
Touching parts of the DC converter may cause electric shock.
Do not open the charger case for your own safety.
To prevent operating problems when using the DC converter, please read the User
Manual.
5
PORTABLE MEDIA PLAYER
● Do not use a damaged internal rechargeable battery or charger.
● Do not charge the rechargeable battery for longer than the specified time.
● Charge the battery fully when using the battery for the first time or when using the battery
after a few months of non-use.
● Charge the battery fully, use it until it is completely discharged, and recharge it again to
ensure a long lifetime. Charging the battery after a short use may shorten the lifetime of the
battery. In this case, repeat charging the battery completely and discharging it completely
several times. Then you can use the battery for a longer time.
● Over-charging and over-discharging shortens the life time of the rechargeable battery.
● When the use time of a rechargeable battery is significantly shorter than a new one, replace
the battery with a new one.
● Since a rechargeable battery is an expendable supply, the use time of a battery decreases
over time.
● Take care not to short-circuit the DC converter terminals or the rechargeable battery
(metallic parts) with any conductors such as a necklace, bracelet etc. There is a danger of
electric shock or fire.
Safety Instructions for Using the DC Converter
Safety Precautions
Warning
Take care when using this unit while walking. There is a danger of accidents.
● Do not operate functions which require your attention for some time while driving.
To configure functions that may require your attention for some time, stop your car before doing so.
Avoid watching the screen for long periods of time while driving. This may cause an accident.
● Do not turn the volume up excessively. Adjust the volume so that the sound of other cars and
emergency sirens can still be heard. If you cannot hear the sounds of your surroundings while
walking, this may cause an accident.

Contents
6
7
PORTABLE MEDIA PLAYER
Preparations
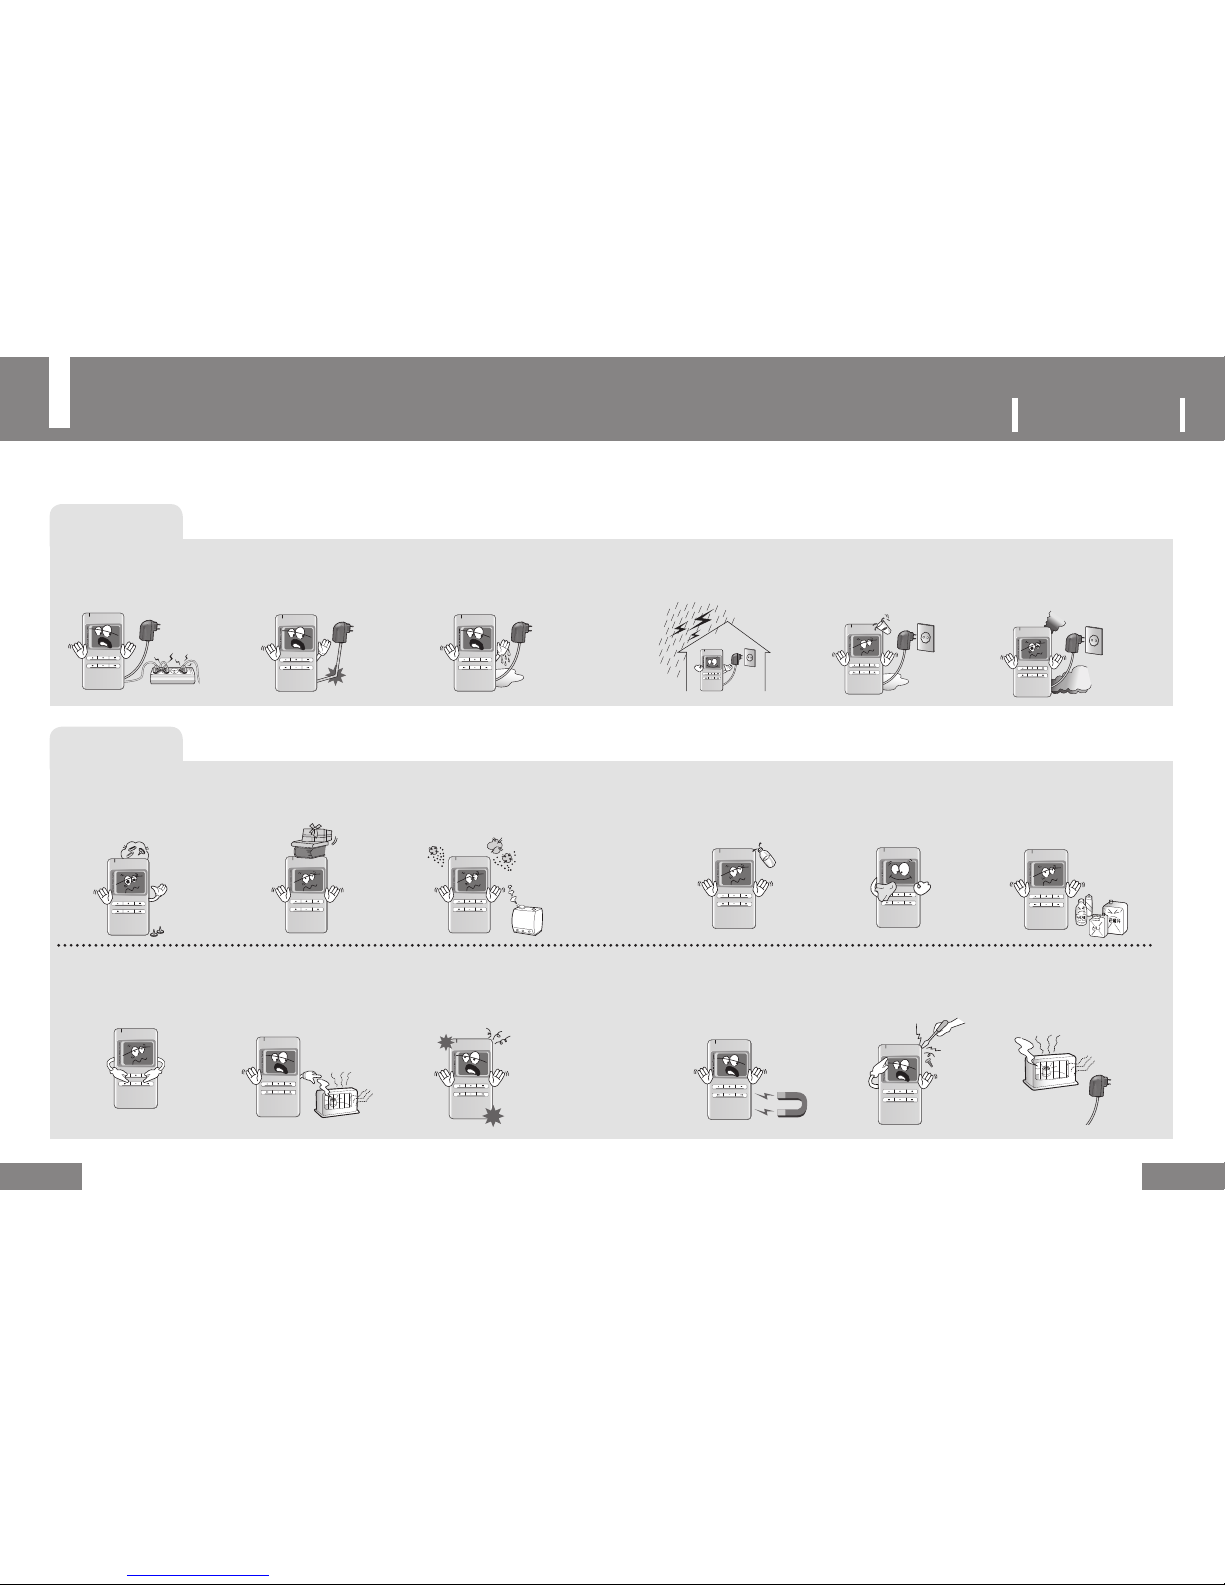
Safety Instructions ...............................................................................................2
Packages .............................................................................................................8
Part Names .........................................................................................................9
Connection
Connecting the Power (Charging) ......................................................................11
Connecting External Equipment (AV OUT Jack) ................................................12
Connecting to a PC ............................................................................................13
- Connecting to a PC using the USB cable .........................................................13
Installing the USB Driver Manually .....................................................................14
- When an Error Occurs while installing the USB Driver .....................................14
- For Windows 98SE ...........................................................................................15
Using the Removable Disk ................................................................................16
- Downloading and Uploading a File ...................................................................16
- Disconnecting the USB Cable ...........................................................................17
- Formatting .........................................................................................................17
Before Installing the Software ...........................................................................18
Installing the Codec ...........................................................................................19
Installing the DirectX9 ......................................................................................21
Installing the Transcoder ..................................................................................22
Using the Transcoder .......................................................................................23
Basic Usage
Playing a File ......................................................................................................24
Recording Voice .................................................................................................26
Recording Music .................................................................................................27
Encoding a Video ...............................................................................................28
Searching ..........................................................................................................29
Configuring Repetition (VIDEO / MUSIC / VOICE) ...........................................30
Additional Usage
Viewing File Information
(VIDEO / MUSIC / VOICE / PHOTO / FILES)
.....................31
Sorting Files (VIDEO / MUSIC / VOICE / PHOTO) ............................................32
Configuring the Playlist (MUSIC) ........................................................................33
Using the Playlist (MUSIC / VOICE) ...................................................................34
Configuring Play Mode .......................................................................................36
- Configuring Repeat in the MUSIC Menu ...........................................................36
- Configuring Repeat in the VIDEO Menu ...........................................................37
- Shuffle Play .......................................................................................................38
- Configuring EQ ..................................................................................................39
- Configuring the Bookmarks While Playing a File ..............................................40
Managing Files .................................................................................................41
- Using the USB Host Function ...........................................................................41
- Moving a File .....................................................................................................42
- Copying a File to an External USB Device ........................................................43
- Deleting a File ..................................................................................................44
Configuring a Photo File ..................................................................................45
- Configuring SlideShow ......................................................................................45
- Configuring the SlideShow interval ...................................................................46
- Rotating a Photo File While Playing the File .....................................................46
- Zooming-in on a Photo File while Playing the File ...........................................47
Listening to FM Radio .....................................................................................48
Configuring the Menu ......................................................................................50
Configuring the Display ...................................................................................50
Configuring Recording Mode ...........................................................................51
Configuring the System Environment ..............................................................52
- Firmware update ...............................................................................................54
Customer
Troubleshooting ..................................................................................................55
Product Specifications ........................................................................................57

Packages
8
Part Names
9
PMP(Portable Media Player)
Main Body
Earphones User Manual Installation CD
USB 1.1 Cable AV Cable
USB 2.0 Cable
Portable Bag
Power Adapter Remote Control Line In Cable
☞
Note
●
The contents are subject to change for the purpose of improving the performance without prior notice.
●
Dispose of the packages and the old appliance separately for recycling.
●
The supplied Line In cable can only be used to connect an external audio device for audio recording. Connect the
white plug of +(4-pole) to AV In jack and connect the black plug of +(3-pole) to Line Out jack of an
external audio device. If the jacks are not connected to the corresponding ports, recording will not properly be done.
Main Body
HOLD
HOLD
Earphone / Remote Control Jack
Hold Switch
Microphone
Charger Jack
Power On, Off /
Menu Button
Repeat Button
Record Button
Reset Hole
USB 1.1 Host Port
USB 2.0 Port
Line In Jack / Audio In Jack
Audio Out Jack
Display
Play / Pause Button
Volume / Move File
Move Menu /
High Speed Search /
Changing the
Directory
Stop/
Move To
Previous
Menu
Remote Control
Play / Pause Button
Move Menu /
High Speed Search /
Changing the Directory
Stop/Move To
Previous Menu
Volume / Move File
Hold Switch
☞
Note
●
To reset the unit, press the reset
button with a pin through the
Reset Hole.
☞
Note
●
The appearance of the contents is subject to change for
performance improvement without notice.
Connecting the Remote Control
1 Plug the remote control plug
into the Remote Control Jack on
the main body.
2 Plug the earphone plug into the
Earphone Jack of the remote control.

Part Names
10
Operating Display
Connecting the Power (Charging)
11
Before using the product, charge the battery by connecting the DC adapter supplied.
Bit Rate
Music Mode
1 Connect the DC adapter to the DC 5V jack of the product.
Firmly plug the DC adapter into the power outlet.
2 While charging the battery, the Charge Status light turns red.
When the battery is fully charged, the red light of the Charge Status light changes.
● Before using the unit, charge the battery for about 4 hours so that it is completely charged.
● Charge time: 4 hours (when completely discharged)
☞
Note
●
The playing time when the battery is fully charged is listed in the product specifications. (See page 57.)
●
An insufficient battery charge while recording video or transferring files may cause a serious system error.
Check the charge level when using the product and connect the DC adapter, if necessary.
●
Check the battery charge status and charge the battery before it is completely discharged.
●
When the battery is completely discharged, connect the power adapter for longer than one minute and then turn it on.
Radio Mode
Channel Selection
Channel Display (On / Off)
Radio Channel Information
001. Title song.mp3 - Park.HB
0:00:15 3:20:30
128Kbps 44.1KHz Rock Shuffle A-B
MUSIC ►
Oh, when I hold you tight
Battery Charge
Volume
Play Method
Total Play Time
Title (Name of the song and the artist)
EQ Repeat Mode
Sampling Rate Shuffle
Lyrics Display
Sound Output
Battery Charge
Volume
84.5 Broadcast Reception Mode
Video Mode
[MBC] Documentery1.avi
0:00:20 4:20:30
Battery Charge
Volume
Total Play Time
Play Mode / Status
Progress Time
Progress Status
File Name
Play Mode / Status
Record Mode
44.1KHz 128kbps
FILENAME : VOICE000.MP3
0:00:20
VOICE
RECORD
REC Record Status
Recording Time
Recorded File Name
Progress Status
Sampling Rate Bit Rate
Progress Time

Connecting External Equipment (AV OUT Jack)
12
Connecting to a PC
13
You can view videos and pictures saved in the unit through a TV or PC monitor
by connecting the AV OUT jack of the product.
Viewing Video/Music/Voice through the TV
1. Connect the AV cable plug to the AV OUT jack of the unit and the three RCA plugs to the
External TV In jacks. (Yellow: Video, White: Audio (Left), Red: Audio (Right))
2. Switch to Video (External In) Mode using the TV remote control so that the
signal from the PMP is selected.
● The Operating Display appears on the monitor.
● For more information on how to view video files, refer to page 24.
3. When playing the file ends, adjust the TV volume with the TV remote control.
Viewing a Picture through the TV
1. Connect the AV cable jack to the AV OUT jack of the unit, and the yellow jack of the three RCA
plugs to the yellow jack of the External TV In jacks. (Yellow: Video)
2. Switch to Video (External In) Mode using the TV remote control so that the signal from
the PMP is selected.
3. Play a picture file to view it.
● For more information on how to view picture files, refer to page 24, 45~47.
Watching a video/music/voice file Viewing a photo file
Connecting to a PC using the USB cable
Procedures to Check the USB Driver
● Windows 98/ME:
Control Panel → System → Device Manager → Disk Drive →
USB 2.0 Storage Devic/USB 2.0 Storage Device USB Device
● Windows 2000 (Professional):
Control Panel → System → Hardware → Device Manager →
Disk Drive → USB 2.0 Storage Device USB Device
● Windows XP (Professional):
Control Panel → System → Hardware → Device Manager →
Disk Drive → USB 2.0 Storage Device USB Device
☞
Note
●
If your PC monitor has a Composite Input jack, you can view video or pictures through the PC monitor.
1 Connect the DC adapter to the main body and switch it on.
● Since operating the unit in connection with a PC consumes more power than
during normal operation and insufficient unit power may cause data loss, you
need to connect the unit to the DC adapter.
2 Open the bottom cover of the main body and connect the USB 2.0 Port on the unit and
the USB port of the computer using the USB 2.0 cable.
● Do not disconnect the connected USB cable without completing the proper
procedures to prevent data loss or a system error on the PC or the PMP.
(See‘Disconnecting the USB Cable’.)
3 The ‘Searching for a new device’ message appears and the USB driver is installed.
The installation screen may not be displayed. Open the Device Manager and check
whether the device driver is properly installed.
4 When the USB driver is installed, “USB 2.0 Storage Device USB Device” will be displayed
in the [Device Manager].
5 If the USB driver has not been properly installed, install the USB driver manually
referring to “Installing the USB Driver Manually”.
Yellow
Red
White
Yellow

15
PORTABLE MEDIA PLAYER
1 Double-click Setup.exe in the USB Driver folder.
Installing the USB Driver Manually
14
15
If the USB driver has been properly installed, skip this section and go to “Downloading
and Uploading a File”on page 16. Follow the procedures below only when the USB driver
is not installed automatically.
When an Error Occurs while installing the USB Driver For Windows 98SE
Separate the USB cable connecting the Windows™ 98SE PC and the unit and complete the
following procedures. Install the driver as follows and restart the computer.
Then you can move files between the computer and the unit using Windows® Explorer.
When you complete the installation,
restart the computer.
● Insert the supplied Installation CD-ROM into the
CD-ROM drive.
● Open the Installation CD and double-click the USB
Driver folder to open it.
1 Check the Device Manager.
● Windows 98/ME:
Control Panel → System → Device Manager
● Windows 2000 (Professional):
Control Panel → System → Hardware → Device Manager
● Windows XP (Professional):
Control Panel → System → Hardware → Device Manager
2 Check if there is a device marked by an exclamation mark or
question mark (represented as an Unknown Device or USB Device)
3 Double-click a device marked by an exclamation mark or question mark.
☞
Note
●
When the USB driver is not recognized in Windows 2000, Connect to windowsupdate.microsoft.com and download
and install the latest service pack.
●
The procedures to install the drive may vary depending on the model or settings of the computer.
In this case, ask your computer provider or service center about the installation procedures.
●
If the USB driver installation error occurs continuously, restart the computer and connect the USB cable again.
4 Select the driver and click [Driver Update]. 5 Select Compatible Driver and click [Next].
2 Follow the instructions on the windows.
☞
Note
●
Unless the PMP program is installed, you cannot use the unit as a removable disk in Windows 98.
Make sure to install the USB driver file first.

17
PORTABLE MEDIA PLAYER
Using the Removable Disk
16
17
Downloading and Uploading a File Disconnecting the USB Cable
When you finish transmitting the files, unplug the cable according to the procedures below.
Formatting
1 Turn the unit on and connect the unit to the computer.
2 Launch Windows Explorer on the computer.
● The unit is represented as a Removable Disk in Windows Explorer.
3 Select a folder on the removable disk to save the files and drag and drop the files to this location.
The saved files are played in the filename order. To change the order, rename the files.
● If you rename the files to 001***, 002***... in Windows Explorer, the files are played in the
order of the numbered filenames.
☞
Note
●
When the unit is connected through the USB connection, the USB Connected message appears.
Since separating the cable while downloading or uploading files may cause a file system error on the unit,
separate the cable according to the procedures in ‘Disconnecting the USB Cable’ (See page 17.).
●
The order of the files when they are displayed when the Removable Disk is selected in Windows Explorer is
not the playing order.
●
If a file is not copied to the corresponding playback folder, it will not be played.
(For example, if Love.avi (a video file) is copied to the MUSIC menu folder, the files will not be played.)
1 Double-click the green arrow in the notification area.
2 Select the USB device and press the [Stop] button.
When the Stop Hardware Device screen appears, click the [OK] button
and remove the USB cable.
☞
Notice
●
Separating the cable while downloading or uploading files may cause data loss.
Make sure to finish all file operations before separating the cable.
It is recommended closing all opened file folders before removing the cable.
1 Select a removable disk, right-click, and select Format from the popup menu.
2 Press the [Start] button.
● All saved files are deleted.
● You can rename the removable disk in the volume label.
☞
Notice
●
The format operation deletes all folders and font files used by the unit.
After formatting, copy the PMP.exe file from the CD to the root
directory of the unit and double-click the file to generate the system
folders and font files. If you launch PMP.exe, MUSIC, MOVIE, and PHOTO
folders are created on the hard disk of the unit, and the UNICODEF.FON
font file is created. Since the UNICODEF.FON file is required for the proper
operation of the unit, make sure that this file is not deleted.
●
Note that the files on the disk will not be recovered after the format operation.

Before Installing the Software
18
Installing the Codec
19
For the proper operation of the video playback function, converting file formats using the supplied
Transcoder is recommended. Files using formats not supported by this product will not play unless
they are converted using the Transcoder. You may experience unstable video playback even when
playing files of a supported format. In this case, it is recommended converting the file using the
supplied Transcoder.
Supported Video Specifications
Item
File Formats
Audio Formats
Video Formats
Video Bit Rate
Audio
Resolution
Video Frame Rate
Specifications
AVI, MPG, MPEG
MPEG 1/2/2.5, Layer 3
MPEG-1, MPEG-2, Divx 3.1/4.xx/5.xx, Xvid, ISO MPEG-4 SP
Up to 4Mbps
8Kbps ~ 192Kbps
Equal to or less than 720 X 480 pixels
Equal to or less than 30 fps
The following files will not be played without conversion.
● Video files encoded by a video codec other than MPEG-1, MPEG-2, Divx 3.11, 4.0, 5.x, Xvid, and ISO
MPEG-4 SP. (WMV, etc...)
● Video files encoded by an audio codec other than MPEG 1/2/2.5, Layer 3. (AC3, DTS, etc...)
● Video files that exceed the supported bit rate, resolution, or frame rate.
● The supplied Transcoder does not support the WMV and DTS formats.
Before Installation....
About the PMP Media Converter
The conversion software converts various video files to the Divx-AVI type video format.
In addition, you can change the screen resolution and the image quality during the
conversion process.
Required Programs
The Transcoder will only work properly when the following programs have been properly installed.
- MS DirectX 9.0b or later (Required)
- MS Windows Media Player 9
- DivX 5.1.1 codec or later
Notice
When the integrated codec is improperly installed, the program may malfunction.
If the conversion is not performed properly or the program does not respond, remove the
integrated codec and re-install the DivX codec and WMP9.
Some corrupted files may not be converted. Files whose video or audio codec information is not
properly displayed in the list window may not be converted.
To use the Transcoder, the following DivX codec, MP3 codec, and AC3 codec program
must be properly installed. Install the programs according to the instructions using the
supplied CD-ROM.
To Install the DivX Codec
● Insert the supplied Installation CD-ROM into the CD-ROM drive.
● Open the Installation CD and double-click the Codecs folder.
You may select
“Include the FREE Google Toolbar”.
Alternatively, select “Do not install the
Google Toolbar”. Click “Install”.
When you complete the
installation, restart the
computer.
1 Double-click the from among the 3 setup files within the Codecs folder.
2 Select the language option to install.
3 Follow the instructions in the windows.

Installing the Codec
20
Installing the DirectX9
21
To Install the AC3 Codec
To Install the MP3 Codec
To Install DirectX9
To Check the Installed Codecs
1 Double-click the from among the 3 setup files within the Codecs folder.
2 Select [Yes] to complete the installation.
When you complete the
installation, restart the
computer.
1 Double-click the from among the 3 setup files within the Codecs folder.
2 Select [Yes] to complete the installation.
When you complete the
installation, restart the
computer.
☞
Note
●
Even if you lose the supplied CD, you can download the required 3 codecs from the following sites.
DivX 5 or higher: http://www.divx.com/download
AC3 codec: http://fcchandler.home.comcast.net/
MP3 codec: http://lame.sourceforge.net/
The version and installation procedures of the software may change without prior notice on the
sites. Check the versions and installation procedures on the corresponding sites prior to installation.
1 Double-click dxsetup.exe to launch it.
2 Follow the instructions in the windows to complete the
installation.
When you complete the installation,
restart the computer.
1 Select Device Manager and double-click on Audio Codecs.
● Windows 98/ME:
Control Panel → System → Device Manager
● Windows 2000 (Professional):
Control Panel → System → Hardware → Device Manager
● Windows XP (Professional):
Control Panel → System → Hardware → Device Manager
2 Select the Properties tab and check that the codecs
are properly installed.
● Insert the supplied Installation CD-ROM into the CD-ROM drive.
● Open the Installation CD and double-click the DirectX9 folder.

Installing the Transcoder
22
Using the Transcoder
23
To install the software
Before connecting the computer and the PMP, install the USB driver.
if the ‘Add New Hardware Wizard’appears, click the [Cancel] button and install the USB driver.
Requirements
The software requires the following computer system requirements.
● Pentium 3 500MHz or faster ● Windows 98SE/ME/2000/XP
● 50MB of free hard disk drive space ● USB (2.0) Support
● CD-ROM Drive (2x or faster)
● 128MB of memory or larger (256MB or larger is recommended)
● DirectX 9.0 or later and a Graphic Cards with at least 8MB of video memory
(64MB or larger of video memory is recommended)
● When the software installation is complete, connect the unit to the computer and use
it according to the figure on the following page.
To Convert to a File
You can change the file to be created and the
location to save the file to.
Video Bit Rates: Although a Lower Bit Rate degrades the screen quality, it offers a smaller file size using a
higher compression rate. Alternatively, a High Bit Rate provides a higher screen quality with a larger file size.
Normal is recommended for general use.
Video Size: Determines the screen quality of the converted file.
Example) Converting a 320X240 video file (low resolution) to a 640X480 file (high resolution) degrades the
screen quality when playing the file.
4:3 Ratio: This option keeps the horizontal and vertical ratio of the screen at 4:3.
Transcod Audio Only: This option converts the audio format of the video file. That is, this option converts the
AC3 format to the MP3 format. If you select the Audio option and convert a file, only audio data is converted.
The location of the original file.
Original File Information
Target File Information
1 Insert the Installation CD into the CD-ROM drive.
The following figure will appear.
Double-click [Setup.exe].
2 Follow the instructions on each of the screens
and complete the installation.
1 Double-click the Maxian Transcoder icon on the Desktop.
2 Click the [Source] button.
Select a video file to convert and click the [Open] button.
3 Configure the options and click the [Start] button.
4 While the conversion is in process, a dialog box
appears.
To cancel the operation, click [Abort].
● You can view the information of the file to be
converted in the right pane.

25
PORTABLE MEDIA PLAYER
Playing a File
24
25
To Play a File (Turning the Power on)
Press and hold the MENU button on the main body when it is turned off.
The main menu screen will appear.
●
Select a menu using the on the unit or the remote control and press the button to
enter the menu.
●
Select the file to play using the + / – buttons on the unit and press the button to play the file.
: Moves to the high-level folder or cancels a folder.
/
: Move to a sub folder, Enters the folder
+ / – : Moves the folder or file in a directory.
To Stop Playing (Turning the Power off)
Press and hold the MENU button on the main body to turn the unit off.
● Pressing the
buttons on the unit or the remote control during playback pauses play.
It also darkens the LCD screen if there are no additional keystrokes for longer than the
configured time period. And if there are no keystrokes for 1 minute, the unit automatically
turns off. To exit the configured mode, press the button. The previous menu appears.
To Adjust the Volume
You can adjust the volume by using the + / – buttons
on the unit or the remote control during playback.
● You can select a volume level between 00 and 99.
● Pressing once briefly, adjusts a single volume level.
Press and hold the button to accelerate the volume
adjustment speed.
Hold Function
If you set the Hold function, pressing buttons
during playback will not work.
● To set the function, slide the HOLD switch on the
unit or the remote control in the direction of the
arrow.
● Even if the Hold function of the unit is selected, the
buttons on the remote control will work.
● Even if the Hold function of the remote control is
selected, the buttons on the unit will function.
● When the Hold function is selected, is displayed
on the Operating Display.
MOVIE ►
1. [KBS] Sesatv-1.avi
2. [KBS] Sesatv-2.avi
3. [KBS] Sesatv-3.avi
4. [MBC] Lovemovie-1.avi
5. [MBC] Lovemovie-2.avi
6. [MBC] Documentery1.avi
7. [MBC] Documentery2.avi
8. [MBC] Documentery3.avi
[MBC] Documentery1.avi
0:00:20 4:20:30
MOVIE ►
1. [KBS] Sesatv-1.avi
2. [KBS] Sesatv-2.avi
3. [KBS] Sesatv-3.avi
4. [MBC] Lovemovie-1.avi
5. [MBC] Lovemovie-2.avi
6. [MBC] Documentery1.avi
7. [MBC] Documentery2.avi
8. [MBC] Documentery3.avi
[MBC] Documentery1.avi
0:00:20 4:20:30
MOVIE ►
1. [KBS] Sesatv-1.avi
2. [KBS] Sesatv-2.avi
3. [KBS] Sesatv-3.avi
4. [MBC] Lovemovie-1.avi
5. [MBC] Lovemovie-2.avi
6. [MBC] Documentery1.avi
7. [MBC] Documentery2.avi
8. [MBC] Documentery3.avi

Recording Voice
26
Recording Music
27
Since pressing the RECORD button during MUSIC/VIDEO/RADIO/PHOTO playback does not
start recording, press the button to move to the previous menu and to the main menu.
Since pressing the RECORD button during MUSIC/VIDEO/RADIO/PHOTO playback does not
start recording, press the button to move to the previous menu and to the main menu.
1 Press the RECORD button on the left side of the unit.
2 Select VOICE Recording using the + / – buttons and press the
button to start voice recording.
● Press the
button to pause recording.
Press the
button once again to resume recording.
3 To stop recording, press the button while recording voice.
● This returns to the previous menu and saves the recorded voice as a file.
☞
Note
●
After recording, the recorded files are automatically saved in the VOICE folder within the RECORD folder
of the MUSIC menu. If the VOICE folder does not exist, the VOICE folder is automatically created.
●
The recorded files are saved as VOICE000, VOICE001... in this order.
●
You can create up to 1000 files (000 ~ 999).
●
While recording, you cannot change the volume.
●
While recording, face the microphone towards the audio source.
●
When the memory is full, voice recording is automatically stopped.
●
For procedures to configure the sound quality of voice, refer to page 51.
1 Connect the Line Out jack of the external audio equipment and the AV IN jack of
the unit with the Line In cable.
2 Press the RECORD button on the left side of the unit.
3 Select AUDIO Recording using the + / – buttons and press the
button to start music recording.
● Press the
button to pause recording.
Press the
button once again to resume recording.
4 To stop recording, press the button while recording voice.
● This returns to the previous menu and saves the recorded voice as a file.
☞
Note
●
After recording, the recorded files are automatically saved in the AUDIO folder within the RECORD folder of the
MUSIC menu. If the AUDIO folder does not exist, the AUDIO folder is automatically created.
●
The recorded music is saved as an MP3 file in the sequence of AUDIO000, AUDIO001, and so on.
●
You can create up to 1000 files (000 ~ 999).
●
While recording, the volume cannot be changed.
●
When the memory is full, recording is automatically stopped.
●
For procedures to configure the sound quality of audio, refer to page 51.
☞
Notice
●
When the remaining battery charge is too low, recording is not possible.
●
Adjust the volume of the external audio equipment to an appropriate level before
recording music. If the volume is too high or low, the sound quality of the recorded music may not be good.
●
The supplied Line In cable can only be used to connect an external audio device for audio recording.
Connect the white plug of +(4-pole) to AV In jack and connect the black plug of
+(3-pole) to Line Out jack of an external audio device. If the jacks are not connected to the
corresponding ports, recording will not properly be done.
44.1KHz 128kbps
FILENAME : VOICE000.MP3
0:00:20
VOICE
RECORD
REC
44.1KHz 128kbps
FILENAME : VOICE000.MP3
VOICE
RECORD
Press PLAY to Start
44.1KHz 128kbps
FILENAME : AUDIO000.MP3
AUDIO
RECORD
Press PLAY to Start
44.1KHz 128kbps
FILENAME : AUDIO000.MP3
0:00:20
AUDIO
RECORD
REC

Encoding a Video
28
Searching
29
Since pressing the RECORD button during MUSIC/VIDEO/RADIO/PHOTO playback does not
start recording, press the button to move to the previous menu and to the main menu.
To Search for a Part during Playback (VIDEO/MUSIC/VOICE)
● To search for a part, press and hold the
buttons during playback.
● If you stop pressing the button, the file is played in normal speed.
● Pressing the
button briefly during video playback, starts a high speed search.
At the desired point, press the
or buttons to play the file from that point.
● To skip the current file and play the next file, press the button once, briefly.
● If you briefly press the button within 5 seconds of playback starting, the previous file is played.
● If you briefly press the button, the current file is played from the beginning.
1 Connect the out ports (3 RCA ports) of external video
equipment and the AV IN jack of the unit with the AV
cable. (Yellow: Video, White: Audio (Left), Red: Audio
(Right))
2 Press the RECORD button on the left side of the unit.
3 Select VIDEO Recording using the + / – buttons and press the
button to start video recording.
● Press the
button to pause recording.
Press the
button once again to resume recording.
4 To stop recording, press the button while recording voice.
● This returns to the previous menu and saves the recorded voice as a file.
☞
Note
●
After recording, the recorded files are automatically saved in the VIDEO folder within the RECORD folder of the
MOVIE menu. If the VIDEO folder does not exist, the VIDEO folder is automatically created.
●
The recorded video is saved as an AVI file in the sequence of VIDEO000, VIDEO001, and so on.
●
You can create up to 1000 files (000 ~ 999).
●
While recording, the volume cannot be changed.
●
When the memory is full, recording is automatically stopped.
●
For procedures to configure the visual quality of video, refer to page 51.
☞
Notice
●
When the remaining battery charge is too low, recording is not possible.
It is recommended connecting the unit to the adapter when recording video.
●
Adjust the volume of the external video equipment to an appropriate level before recording video.
If the volume is too high or low, the sound quality of the recorded video may not be good.
To Search for a File during Playback (MUSIC/VOICE)
☞
Note
● VBR (Variable Bit Rate) file: A file that has a dynamically changing compression rate according to the
tune of the file.
● If the current file is a VBR file, pressing the button within 5 seconds of playback starting may not
play the previous file.
● MP2 or MP1 format files may not be played even if they have the MP3 extension.
● Video files with the AC3 or DTS audio format will not be played.
Yellow
Red
White
0:00:20
REC VIDEO000.AVI HIGH
Press PLAY to Start

Configuring Repetition (MUSIC / VOICE)
30
Viewing File Information (VIDEO / MUSIC / VOICE / PHOTO / FILES)
31
You can only configure this in the MUSIC menu. You can only configure this in the VIDEO/MUSIC/PHOTO/FILES menu.
1 From the point where repetition is started, press the A ► B button while playing the file.
● A is displayed on the Operating Display.
2 At the point where repetition is stopped, press the A ► B button again.
● A – B is displayed on the Operating Display.
● The configured section is repeated continuously.
☞
Note
● To cancel the configured repetition, press the A ► B button on the unit once again briefly.
● You cannot configure repetition for the last 10 second section of a music / voice file.
1 Select a menu from the main menu using the
buttons and press the button.
● The file list of the selected menu will be displayed.
2 Select a file to view information for using the + / – buttons.
3 Press the MENU button.
● The sub-menu will be displayed.
4 Select Information using the + / – buttons and press the button.
● The information will be displayed for about 3 seconds.
☞
Note
● You can file information during a video / music / voice / photo file playback, by pressing
the MENU button, selecting Information and then pressing the button.
● You can view the information of the saved files by selecting HDD from the FILES menu.
● You can view information such as the Playing Time, File Size, Video Size, Video Bit Rate, Audio Format and
Audio Bit Rate in the video information.
● You can view information such as the Playing Time, File Size, Title, Artist, Album and Year in the music information.
● You can view information such as the Photo Dimensions and the File Size for a photo file.
● You can also view the recorded (music / voice / video) file information.
001. Lovesong.mp3 - Park.HB
0:00:15 3:20:30
128Kbps 44.1KHz Rock Shuffle A
MUSIC ►
001. Lovesong.mp3 - Park.HB
0:00:30 3:20:15
128Kbps 44.1KHz Rock Shuffle A-B
MUSIC ►
MOVIE ►
1. [KBS] Sesatv-1.avi
2. [KBS] Sesatv-2.avi
3. [KBS] Sesatv-3.avi
4. [MBC] Lovemovie-1.avi
5. [MBC] Lovemovie-2.avi
6. [MBC] Documentery1.avi
7. [MBC] Documentery2.avi
8. [MBC] Documentery3.avi
Information
Sort
►
Repeat
Delete
MOVIE ►
1. [KBS] Sesatv-1.avi
2. [KBS] Sesatv-2.avi
3. [KBS] Sesatv-3.avi
4. [MBC] Lovemovie-1.avi
5. [MBC] Lovemovie-2.avi
6. [MBC] Documentery1.avi
7. [MBC] Documentery2.avi
8. [MBC] Documentery3.avi
Sesatv-3.avi ► Information
Play time ► 0:03:32
File size ► 37.36 MB
Video size ► [DIVX] 720X400
Video bitrate ►1.2Mbps
Audio format ►MP3 48.0KHz
Audio bitrate ► 160Kbps
Video Mode

Sorting Files (VIDEO / MUSIC / VOICE / PHOTO)
32
Configuring the Playlist
(MUSIC)
33
To Add to the Playlist
You can only configure this from the MUSIC menu.
You can sort files in the VIDEO/MUSIC/PHOTO menu.
You can sort the file list by the name or the date registered.
1 Select a menu from the main menu using the
buttons and then press the button.
● The file list of the selected menu will be displayed.
2 Select a file using the + / – buttons.
3 Press the MENU button.
● The sub-menu will be displayed.
4 Select Sort using the + / – buttons and then press the button.
● The sub-menu of the Sort menu will be displayed.
5 Select Sort by Name using the + / – buttons and then press the button.
● The files are sorted on the basis of the file name.
Files whose names begin with A~Z appear first followed by files beginning with 0~9.
● To cancel the sort operation, select Unsort.
1 Select MUSIC from the main menu using the
buttons and then press the button.
● The MUSIC file list will be displayed.
2 Select a file using the + / – buttons.
3 Press the MENU button.
● The sub-menu will be displayed.
4 Select the Add to Playlist using the + / – buttons and then press the button.
5 When registration is complete, the “Added in playlist” message will be displayed.
● The file is added to the Playlist.
☞
Note
● You can add the current music file to the playlist while playing the file by
pressing the MENU button, selecting Add to Playlist using the + / – buttons and
then pressing the button.
● Since the file added to the Playlist is a copy of the original file, the original file remains in its original location.
● You can also register recorded (music / voice) files to the playlist according to the procedures above.
MOVIE ►
1. [KBS] Sesatv-1.avi
2. [KBS] Sesatv-2.avi
3. [KBS] Sesatv-3.avi
4. [MBC] Lovemovie-1.avi
5. [MBC] Lovemovie-2.avi
6. [MBC] Documentery1.avi
7. [MBC] Documentery2.avi
8. [MBC] Documentery3.avi
Information
Sort
►
Repeat
Delete
MOVIE ►
1. [KBS] Sesatv-1.avi
2. [KBS] Sesatv-2.avi
3. [KBS] Sesatv-3.avi
4. [MBC] Lovemovie-1.avi
5. [MBC] Lovemovie-2.avi
6. [MBC] Documentery1.avi
7. [MBC] Documentery2.avi
8. [MBC] Documentery3.avi
Unsort
Sort by Name
Video Mode
MUSIC ►
Playlist
RECORD
1. Loving Day. mp3
2. Title song. mp3
3. My heart. mp3
4. Spring. mp3
5. Trumpet. mp3
6. Goodbye. mp3
Information
Sort ►
Add to Playlist
Repeat ►
Shuffle ►
Equalizer ►
Delete
MUSIC ►
Playlist
RECORD
1. Loving Day. mp3
2. Title song. mp3
3. My heart. mp3
4. Spring. mp3
5. Trumpet. mp3
6. Goodbye. mp3
Added in playlist
☞
Note
● You can also sort the files in the file list within the folder of the video / music / voice / photo menu.

To Delete a File from the Playlist
The Playlist provides the following functions.
● Select a file from the Playlist and then press the
MENU button.
- The sub-menu will be displayed.
● Select Delete from the Playlist using the + / – buttons
and then press the button.
- The selected Playlist is deleted.
Using the Playlist (MUSIC / VOICE)
34
Using the Playlist (MUSIC / VOICE)
35
To Play the Playlist
1 Select the Playlist using the + / – buttons and then press the button.
● The configured Playlist will be displayed.
2 Select a file to play using the + / – buttons and then press the button.
● The selected file is played.
3 Pressing the button to stop playing the file and display the file list of the previous menu.
: Moves to the high-level folder or cancels a folder.
/
: Move to a sub folder, Enters the folder
+ / – : Moves the folder or file in a directory.
: Plays the Playlist
● You can move another folder according to the above procedures.
☞
Note
● When you enter a folder (RECORD or user-created folder) including recorded files in the MUSIC menu, the
Playlist is displayed. You can play the Playlist immediately.
To Delete All Files in the Playlist
● Select the files from the Playlist and then press the
MENU button.
- The sub-menu will be displayed.
● Select Clear Playlist using the + / – buttons and then
press the button.
- All saved Playlists are deleted.
To View File Information from the Playlist
● Select the files from the Playlist and then press the
MENU button.
- The sub-menu will be displayed.
● Select File information using the + / – buttons
and then press the button.
● The Playing Time, File Size, Title, Artist, Album and Year
information are displayed for about 3 seconds.
PlayList files
1. Loving Day. mp3
2. Title song. mp3
3. My heart. mp3
MUSIC ►
Playlist
RECORD
1. Loving Day. mp3
2. Title song. mp3
3. My heart. mp3
4. Spring. mp3
5. Trumpet. mp3
6. Goodbye. mp3
PlayList files
1. Loving Day. mp3
2. Title song. mp3
3. My heart. mp3
Delete from Playlist
Clear Playlist
File information
PlayList files
1. Loving Day. mp3
2. Title song. mp3
3. My heart. mp3
Delete from Playlist
Clear Playlist
File information
PlayList files
1. Loving Day. mp3
2. Title song. mp3
3. My heart. mp3
Delete from Playlist
Clear Playlist
File information

37
PORTABLE MEDIA PLAYER
Configuring Play Mode (VIDEO / MUSIC / VOICE)
36
37
Configuring Repeat in the MUSIC Menu
2 Select a file using the + / – buttons and then press the MENU button.
● The sub menu will be displayed.
3 Select Repeat using the + / – buttons and then press the button.
●
When files within the folder are selected by All
:
All files within the folder are played repeatedly.
The Repeat operation is not applied to the files in the subfolders included in the folder.
●
When you have selected all files in the file list of the MUSIC menu:
Only files are played repeatedly.
●
1
: Only the selected file is played repeatedly.
● Select Repeat off to cancel the repetition configured by selecting All or 1.
☞
Note
● You can configure Repeat during music/voice file playback by pressing the MENU button and then selecting
Repeat using the + / – button.
1 Select MUSIC from the main menu using the
buttons and then press the button.
● The MUSIC file list will be displayed.
MUSIC ►
Playlist
RECORD
1. Loving Day. mp3
2. Title song. mp3
3. My heart. mp3
4. Spring. mp3
5. Trumpet. mp3
6. Goodbye. mp3
Information
Sort ►
Add to Playlist
Repeat ►
Shuffle ►
Equalizer ►
Delete
001. Lovesong.mp3 - Park.HB
0:00:30 3:20:15
128Kbps 44.1KHz
Rock Shuffle
MUSIC ►
Information
Repeat ►
Shuffle ►
Equalizer ►
Add to Playlist
Delete
MUSIC ►
Playlist
RECORD
1. Loving Day. mp3
2. Title song. mp3
3. My heart. mp3
4. Spring. mp3
5. Trumpet. mp3
6. Goodbye. mp3
Repeat Off
All
1
Repeat Off
All
1
Configuring Repeat in the VIDEO Menu
2 Select a file using the + / – buttons and then press the MENU button.
● The sub menu will be displayed.
3 Select Repeat using the + / – buttons and then press the button.
● The Repeat ON message will be displayed.
● To cancel, select Repeat again, and press the
button.
The Repeat OFF message will appear and Repeat is canceled.
☞
Note
●
You can configure Repeat during video file playback by pressing the MENU button and
then selecting Repeat using the + / – buttons.
● When Repeat ON is configured, the video file is played repeatedly.
To play another file, stop the current video file and then play another file.
1 Select VIDEO from the main menu using the
buttons and then press the button.
● The VIDEO file list will be displayed.
MOVIE ►
1. [KBS] Sesatv-1.avi
2. [KBS] Sesatv-2.avi
3. [KBS] Sesatv-3.avi
4. [MBC] Lovemovie-1.avi
5. [MBC] Lovemovie-2.avi
6. [MBC] Documentery1.avi
7. [MBC] Documentery2.avi
8. [MBC] Documentery3.avi
Information
Sort
►
Repeat
Delete
MOVIE ►
1. [KBS] Sesatv-1.avi
2. [KBS] Sesatv-2.avi
3. [KBS] Sesatv-3.avi
4. [MBC] Lovemovie-1.avi
5. [MBC] Lovemovie-2.avi
6. [MBC] Documentery1.avi
7. [MBC] Documentery2.avi
8. [MBC] Documentery3.avi
Repeat ON
Information
Repeat
Delete
When Repeat is configured
in the menu,
When Repeat is configured
during playback,
When Repeat is configured
in the menu,
When Repeat is configured
during playback,

Configuring Play Mode (MUSIC / VOICE)
38
39
PORTABLE MEDIA PLAYER
Shuffle Play
2 Select a file using the + / – buttons and then press the MENU button.
● The sub menu will be displayed.
3 Select Shuffle using the + / – buttons and then press the button.
1 Select MUSIC from the main menu using the
buttons and then press the button.
● The MUSIC file list will be displayed.
4 Select Shuffle On using the + / – buttons and then press the button.
● To cancel, select Shuffle Off.
MUSIC ►
Playlist
RECORD
1. Loving Day. mp3
2. Title song. mp3
3. My heart. mp3
4. Spring. mp3
5. Trumpet. mp3
6. Goodbye. mp3
Information
Sort ►
Add to Playlist
Repeat ►
Shuffle ►
Equalizer ►
Delete
001. Lovesong.mp3 - Park.HB
0:00:30 3:20:15
128Kbps 44.1KHz
Rock Shuffle
MUSIC ►
Information
Repeat ►
Shuffle ►
Equalizer ►
Add to Playlist
Delete
Shuffle On
Shuffle Off
MUSIC ►
Playlist
RECORD
1. Loving Day. mp3
2. Title song. mp3
3. My heart. mp3
4. Spring. mp3
5. Trumpet. mp3
6. Goodbye. mp3
Shuffle On
Shuffle Off
☞
Note
●
You can configure Shuffle during music/voice file playback by pressing the MENU button and
then selecting Shuffle using the + / – buttons.
● If you select Shuffle On within a folder, only the files within the folder will be played in random order.
The Shuffle operation is not applied to the subfolder files included in the folder.
● If you select Shuffle On for the files saved in the MUSIC menu, only the files within the MUSIC menu will be played in
random order.
Configuring EQ
2 Select a file using the + / – buttons and then press the MENU button.
● The sub menu will be displayed.
3 Select Equalizer using the + / – buttons and then press the button.
1 Select MUSIC from the main menu using the
buttons and then press the button.
● The MUSIC file list will be displayed.
4 Select EQ using the + / – buttons and then press the button.
● You can select a sound effect.
☞
Note
●
You can configure the Equalizer during music/voice file playback by pressing the MENU button
and then selecting Equalizer using the + / – buttons.
You can configure the EQ to select various sound effects.
MUSIC ►
Playlist
RECORD
1. Loving Day. mp3
2. Title song. mp3
3. My heart. mp3
4. Spring. mp3
5. Trumpet. mp3
6. Goodbye. mp3
Information
Sort ►
Add to Playlist
Repeat ►
Shuffle ►
Equalizer ►
Delete
001. Lovesong.mp3 - Park.HB
0:00:30 3:20:15
128Kbps 44.1KHz
Rock Shuffle
MUSIC ►
Information
Repeat ►
Shuffle ►
Equalizer ►
Add to Playlist
Delete
MUSIC ►
Playlist
RECORD
1. Loving Day. mp3
2. Title song. mp3
3. My heart. mp3
4. Spring. mp3
5. Trumpet. mp3
6. Goodbye. mp3
Normal
Jazz
Rock
Classic
Ultrabass
Pop
Normal
Jazz
Rock
Classic
Ultrabass
Pop
When Equalizer is configured in
the menu,
When Equalizer is configured
during playback,
When Shuffle is configured in
the menu,
When Shuffle is configured
during playback,
Table of contents