Roma Heating RWI5 User manual


RWi5 Wi-Fi Digital Heating Thermostat User Manual
Thank you for purchasing one of our products and for your support.
About Your Thermostat
The RWi5 Wi-Fi series range has been developed to control electric underfloor, water heating or
water/gas boiler systems, all designs have a screen backlight function.
Appearance
Product Specifications
Functions
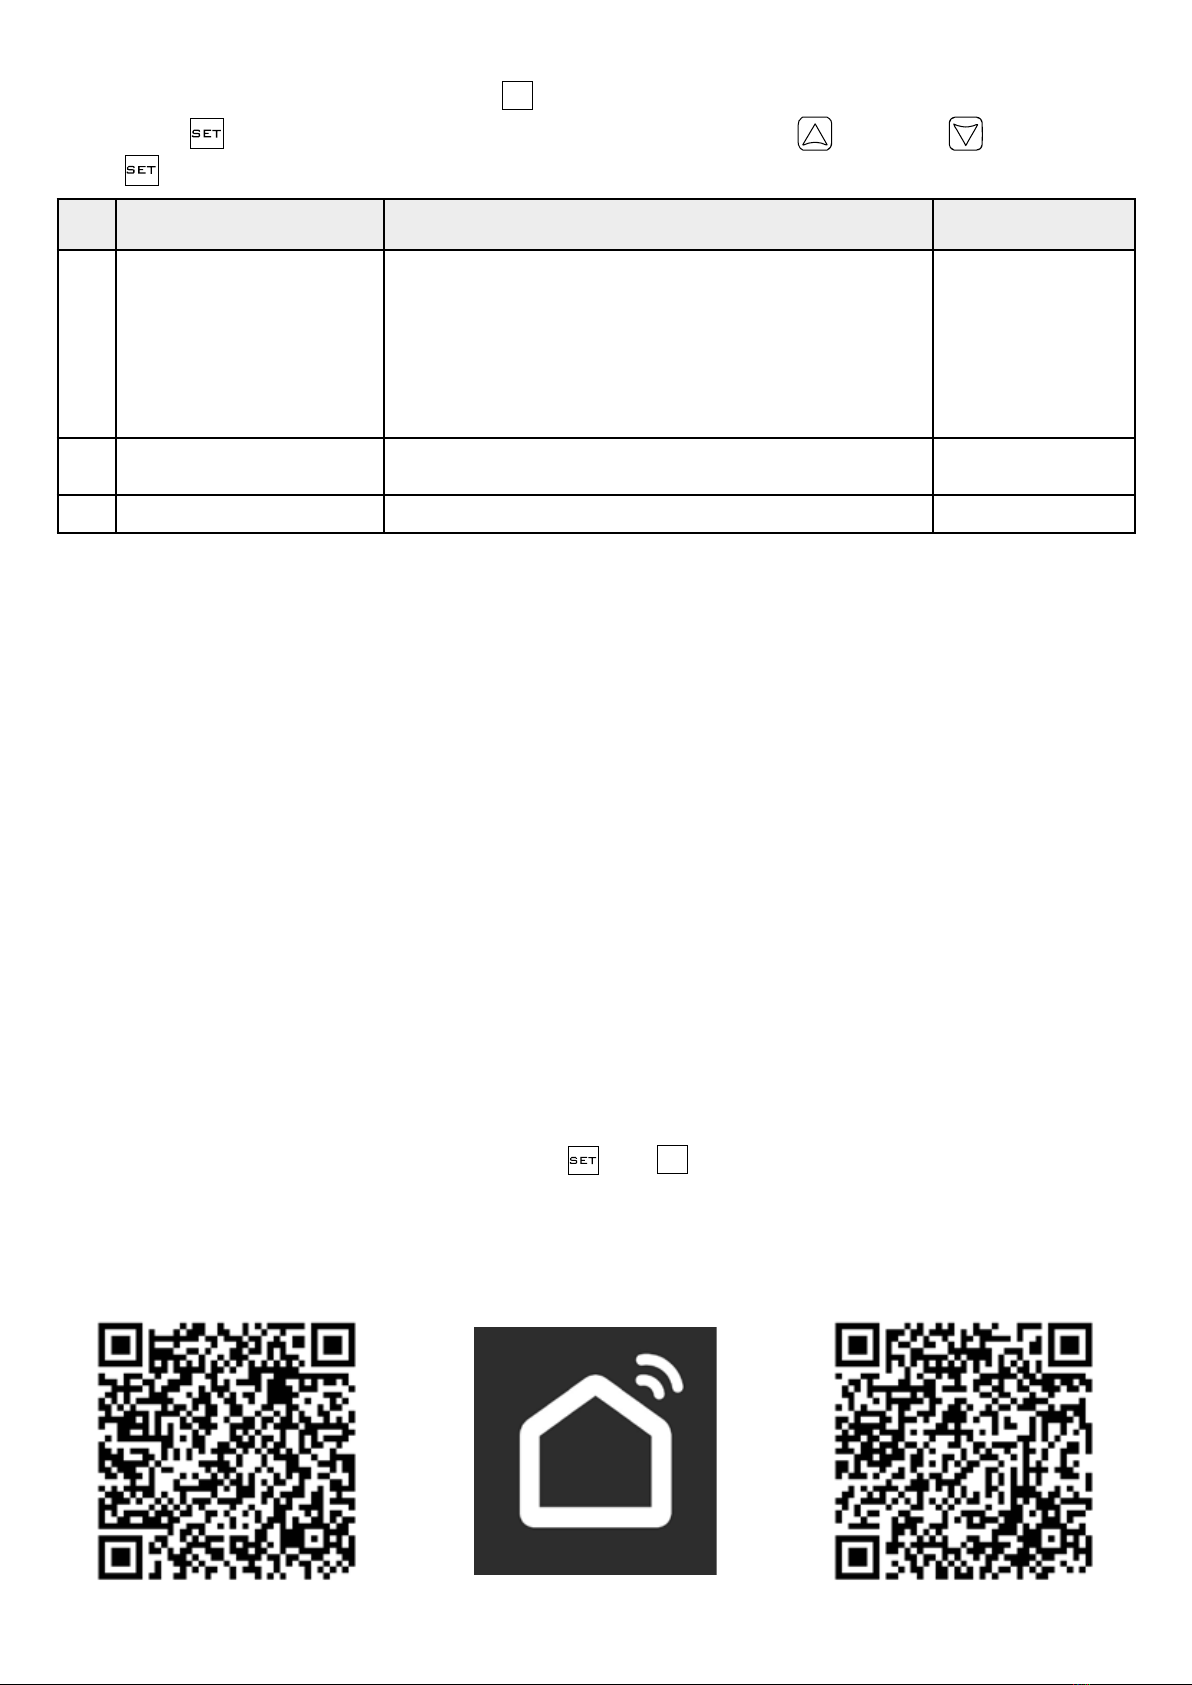
For Android users, search
“Smartlife” at Google Play,
for iPhone users, search
“Smartlife” at App Store.
Turn on the thermostat, long press
and OK
for pairing thermostat with APP, the
APP advanced setting password is 123456.
FEATURES
1.) Dimensions are 86 x 86 mm.
2.) Touch buttons for operation.
3.) The thermostat is only 15mm in depth.
4.) 86mm Hidden box and 60mm European box.
5.) Flat mounting and is easy to install.
6.) Display size: 64 x 64mm.
7.) Colour: White.
Power: 90~240Vac 50/60HZ.
Display accuracy: 0.5°C.
Probe sensor: NTC(10k)1%.
Contact capacity: 3A/250V(WW);16A/250V(WE).
Working environment temperature: 0~90°C.
Range of temperature adjustment: 5~35°C.
Range of temperature display: 1~70°C.
Insulating condition: Normal environment.
Running program: Set per 1 week as a cycle.
Output: Switch relay.
Installation: Wall mounted or on battery seat.
Dimensions: 86 x 86 x 27mm.
A.) Includes built-in sensor and external sensor.
B.) 0.5°C accuracy keeps temperature within the level you set.
C.) Child lock to prevent children from operating the thermostat.
D.) Data memory when power is off.
E.) Holiday mode to allow you to enjoy a more comfortable temperature for when you get back home.
Before Wiring & Installation
1.) Read these instructions carefully. Failure to follow them could damage the product or cause harm.
2.) Check the ratings given in the instructions and on the product to make sure the product is suitable
for your application.
3.) The installer must be a trained experienced service technician.
4.) After installation is completed, follow the steps in these instructions to operate your thermostat.
ELECTRICAL SHOCK OR EQUIPMENT DAMAGE HAZARD OR EQUIPMENT SHORT CIRCUITRY
DISCONNECT POWER SUPPLY BEFORE INSTALLATION
DO NOT CONNECT TERMINAL
“CLOSE 4” OF ELECTRIC VALVE
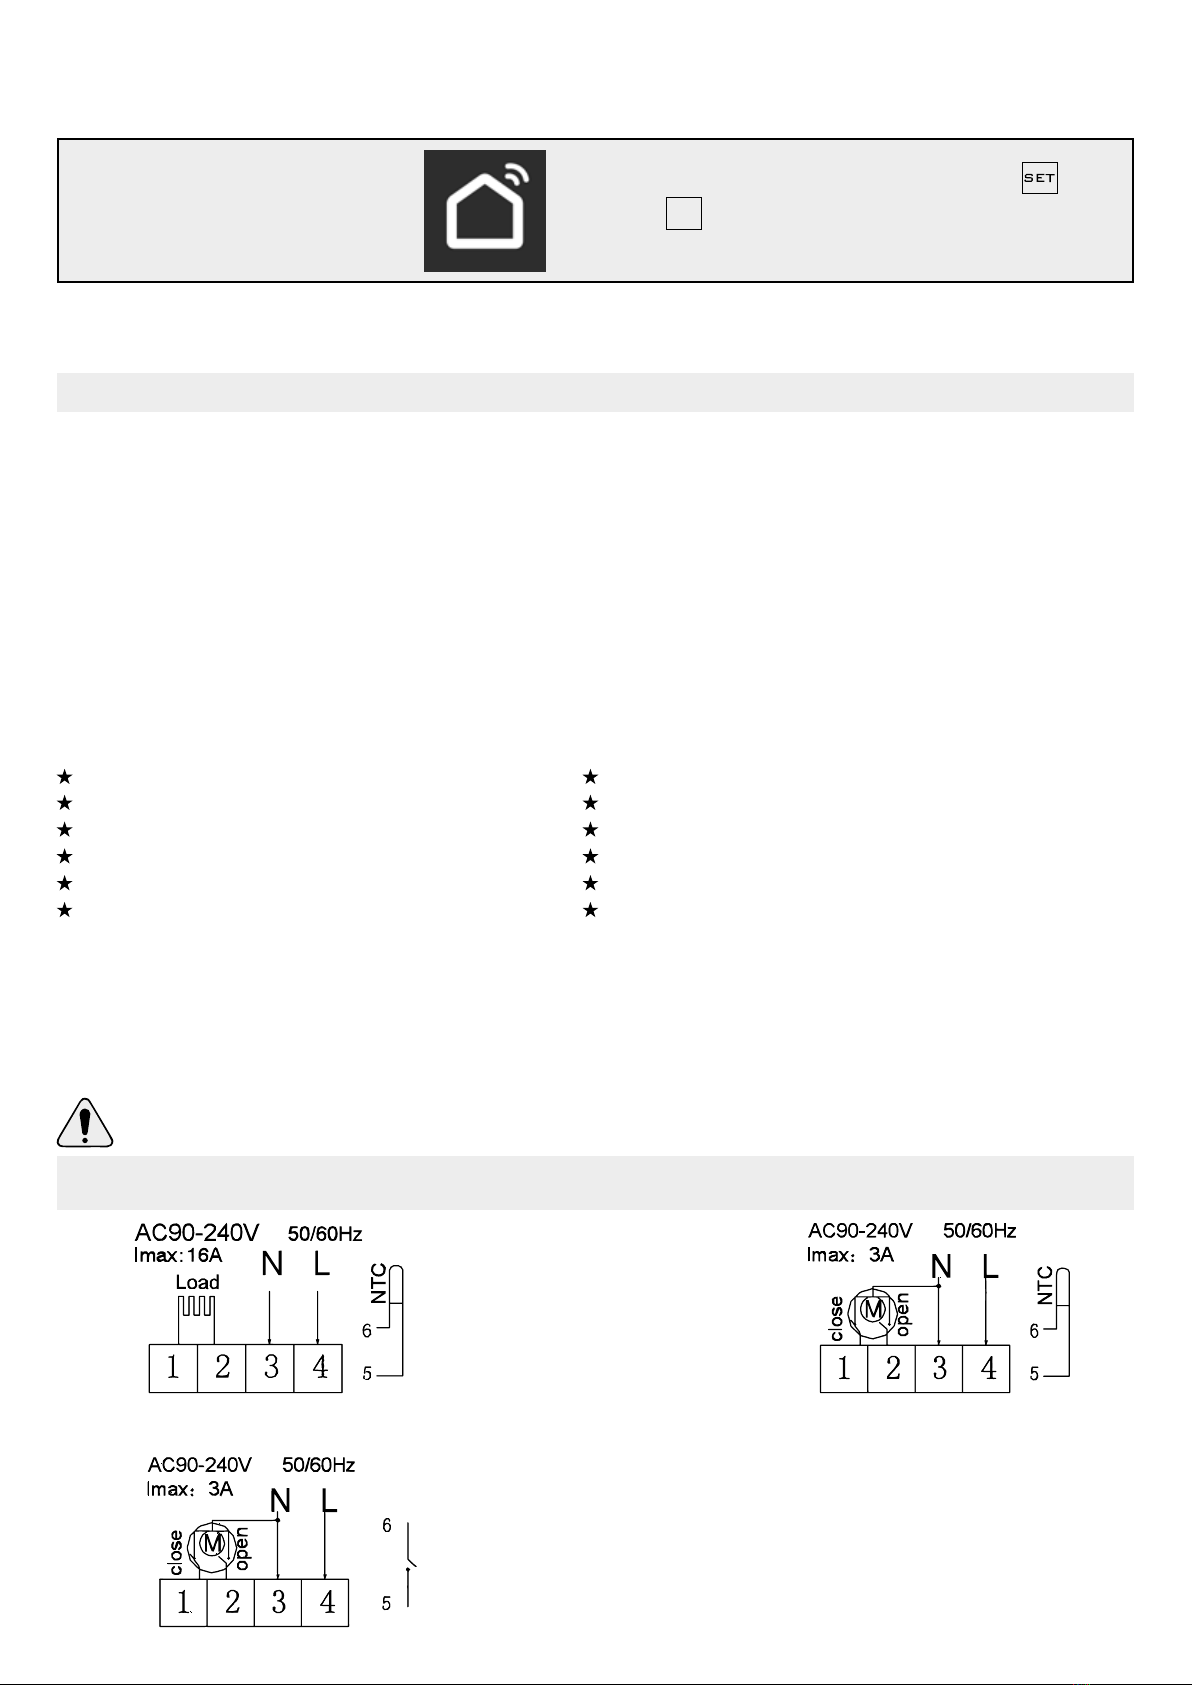
ELECTRIC HEATING WIRING DIAGRAM WATER HEATING WIRING DIAGRAM
CAUTION
WIRING DIAGRAM
Water heating and gas wall-hung boiler heating, no contact wiring
diagram, (disconnection when electric valve close).
Note: 3 & 4 Connect with power, 5 & 6 connect with gas boiler,
1 & 2 connect with thermal actuator, please do not connect 1
& 2 to gas boiler, If you connect it wrongly there will be short
circuit, our gas boiler board will be damaged.
(do not connect terminal “close 4” of electric valve)

DISPLAYS
Description of screen icons
Operation Key
Auto Mode: Run Preset Program
Manual Mode
Holiday Mode
Press power key 3-5 secs. to Lock/Unlock
Wi-Fi Status: is disconnected
Heating ON / OFF = No Icon
Clock
NTC Floor Sensor
Wi-Fi Signal
Connected to cloud
NO Symbols Represents
AShort press to turn thermostat either ON or OFF.
B
1.) Short press to switch between manual and automatic mode.
2.) Turn ON thermostat - Long press for 3-5 secs. to enter into
PROGRAMMABLE MODE.
3.) Turn OFF thermostat - Long press for 3-5 secs. to enter into
ADVANCED MODE.
C
1.) Confirm key: Use it with key.
2.) Only short press to set time.
3.) Turn on thermostat, long press for 3-5 secs. to enter holiday
mode setting. OFF Will appear use the up and down
arrows to change to ON and then press the to confirm
holiday mode set.
D1.) Down Arrow = Decrease Value Key
2.) Long press to LOCK or UNLOCK
E
1.) Up Arrow = Increase Value Key
2.) Long press to access external sensor temperature reading
3.) In Auto Mode, press the up or down arrow to enter
temporary manual mode.
OK
OK

Wake Up Outdoor Back Home Leave Home Back Home Sleep
6:00 20
°C
8:00 15
°C
11:30 15
°C
13:30 15
°C
17:00 15
°C
22:00 15
°C
Thermostat Program Mode Setting
There are 3 period modes: 5 (weekdays) + 2 (weekend days), 6 + 1 and 7 days. Choose period of your
choice by long pressing for 3-5 secs. Enter into prgrammable mode. Then short press
choose: hour, minute time period and press and to increase and decrease values.
Once finished setting after 10 seconds thermostat will automatically save & exit.
Advanced Options A
The optimum comfort temperature is 18
°C
- 22
°C
With the thermostat turned off, long press for 3-5 secs. to access advanced option A.
From A1 to AE short press to choose the option and adjust data by using the up and down
arrows. Short press to go to next option. After about 5 secs. the thermostat will auto save and exit.
NO Settings Options Data Setting Function Factory Default
A1 Measure temperature
calibration
Change value range -9
°C
to + 9
°C (Displayed as the corrected
room temperature value)
-1
A2
Start/stop working
temperature difference
setting
Change value range 0.5
°C
to + 2.5
°C
1
°C
A3 Children lock setting 0: Half Lock 1: Full Lock 0
A4 Power on/off state memory
after electricity cut
0: Thermostat on/off with memory when electrify
1: Thermostat off when electrify
2: Thermostat on when electrify
0
A5 Backlight show time 5 - 30 sec. 10
A6 Program mode type
0: 5 + 2
1: 6 + 1
2: 7
0
A7 Setting temperature
minimum limit 1
°C - 10°C
5
°C
A8 Setting temperature
maximum limit 20
°C - 70°C
35
°C
A9 Low temperature protection 1
°C - 10°C When setting temp = 10°C if press will display
, cancel low temperature protection
5
°C
AA Low temperature protection
for external sensor
20
°C - 70°C When setting temp = 20°C if press will display
, cancel high temperature protection
45
°C
AB
High temperature protection
temperature difference
setting
1
°C - 9°C
2
°C
AC Window function triggers
temperature
10
°C - 20°C Setting termperature is 10°C, decrease it, will
display , then cancelled this function
--
AD Window function running
time 10 - 20 min 10
AE Restore factory defaults Display Ao, long press key till all icons show --
OK

Roma Heating The Professionals Choice - www.romaheating.co.uk
Return Difference
Sensor Fault Display
Warranty
Limit value of external sensor is 45
°C
for factory default (A6), value of external sensor control return difference
(AB) is 2. When temperature rise to 45
°C
, then relay stop working and will activate high temperature production
alarm. If temperature decline to 43
°C
relay continue to work and heating alarm will be deactivated. (it can be
operated, only when indoor temperature is lower than setting temperature).
Please choose correct working way of built-in and external sensor, if you choose incorrectly or sensor fault
(breakdown), “E1” or “E2” will be displayed on the LCD screen. The thermostat will then stop heating until the
fault is eliminated.
This product comes with a warranty of 12 months from the date of purchase.
ANDROID APP IOS APP
Smartlife App Download
The Smartlife APP allows you to setup and control your Wi5 Wi-Fi thermostat from anywhere in the world where
you have a Wi-Fi or data connection. The APP is available on both IOS and also Android.
To download the APP please scan the following respective QR Codes with your phone. You may have to install
QR Code scanning software or apps on your device for this step.
Wi-Fi Connection
Once you have the APP installed on your device, you will either need to login to the APP or create an account.
Once logged in you will be able to connect to the Wi5 Thermostat. When you connect the Thermostat ensure the
Wi-Fi icon is flashing on the screen, if not long press and at the same time until the Wi-Fi icon starts to
flash. You can then complete the connection routine from within the APP. You will also need your Wi-Fi password
to complete the connection to the Thermostat.
OK
Advanced Options B
With the thermostat turned off, long press for 3-5 secs. to access advanced option B.
Short press to choose the option and adjust data by using the up and down arrows. Short
press to go to next option. After about 5 secs. the thermostat will auto save and exit.
NO Settings Options Data Setting Function Factory Default
BN Sensor type
N1: Internal sensor (high temperature protection close)
N2: External sensor (high temperature protection close)
N3: Internal sensor control temperature, external sensor limit
temperature (external sensor detect the temperature is higher
than highest temperature of external sensor, thermostat will
close relay, turn off load)
N1
BC Descaling function 0: Disable descaling function
1: Enable descaling function 0
Bo Production information Can’t be changed --
OK
RWI5 WI-FI Thermostat Instructions 09112023
Table of contents
Other Roma Heating Thermostat manuals