INSTALLATION INSTRUCTIONS:
1. Familiarize yourself with the construction details shown on this sheet.
2. Mark out the location for your fire pit. Note dimensions shown are nominal so mark an area slightly larger than shown.
3. Excavate for drain stone base (approx. 6”)
4. Fill excavated area with drain stone. Level, and compact the stone.
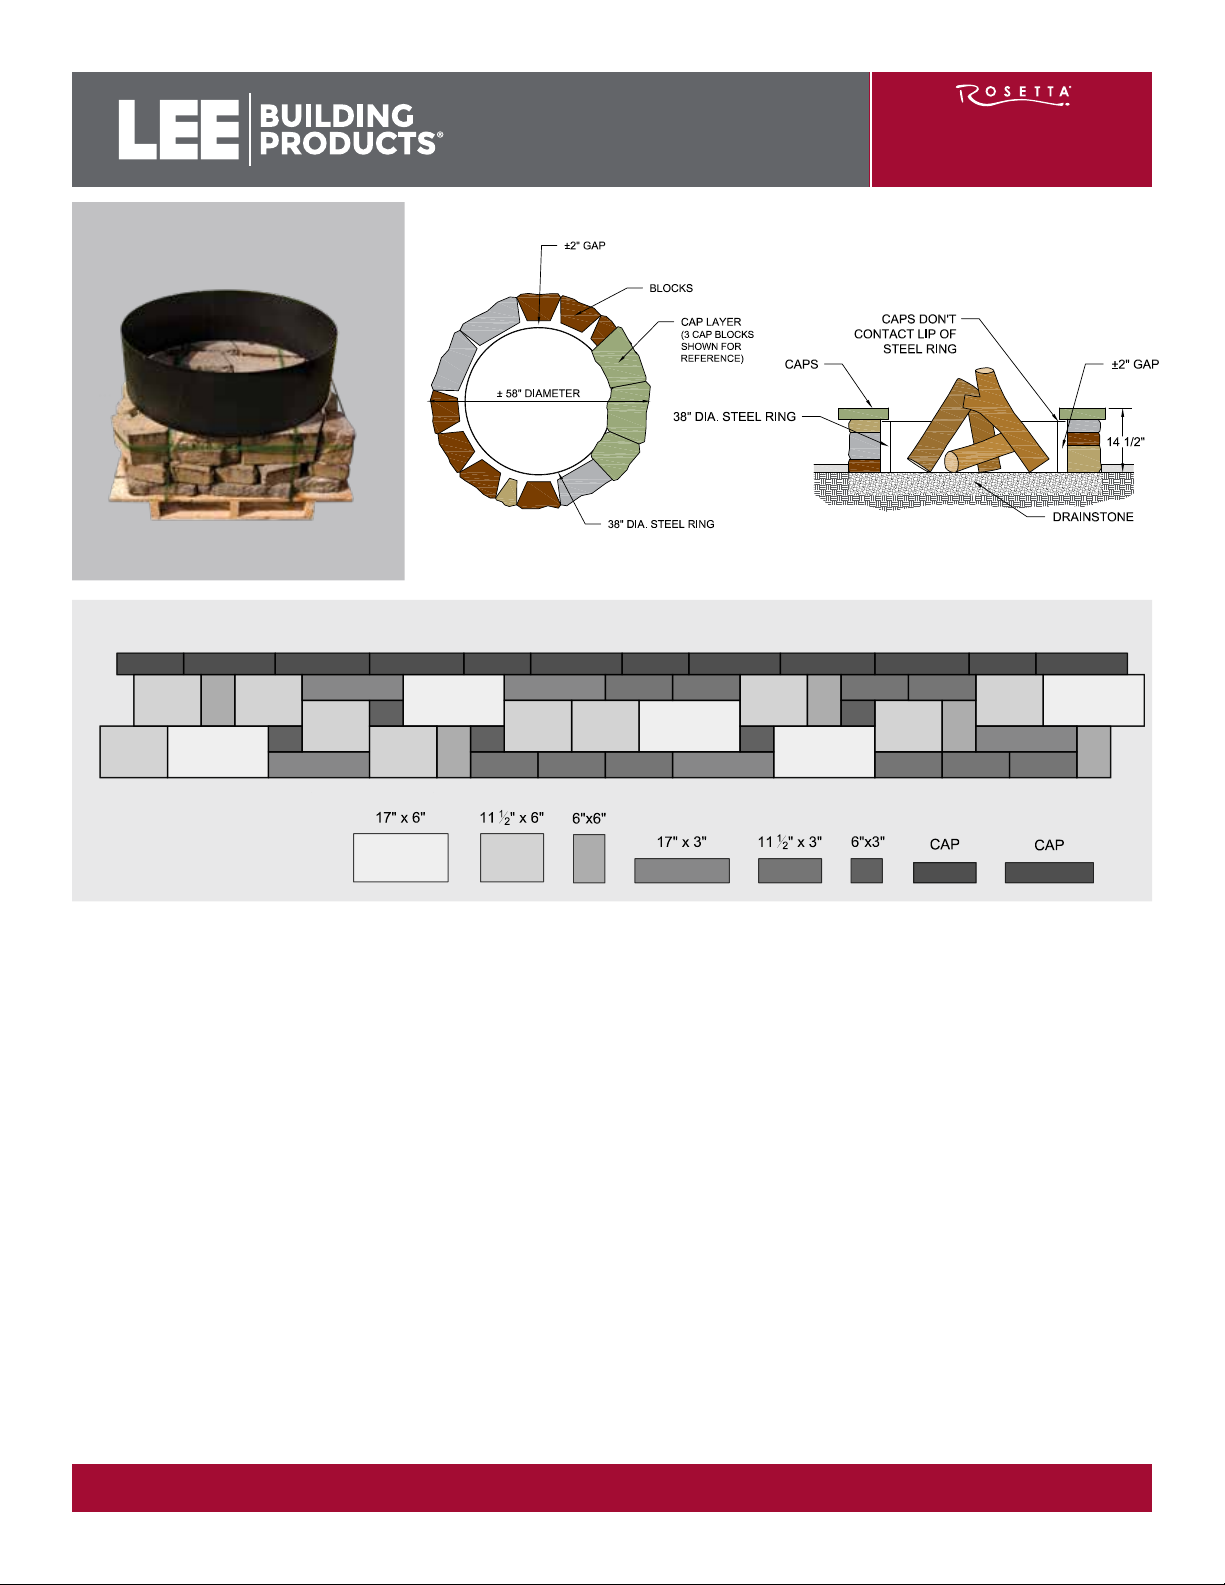
5. Place and center steel ring on prepared base.
6. Place blocks per the pattern. (For Round Kit, keep Blocks 1 1/2” off steel ring)
7. WARNING: Do not place Rosetta Fire Pits directly on Rosetta Flagstone products or any comparable concrete product as high heat
can adversly affect the integrity of the product.
8. After placing blocks around the ring, adjust the blocks in or out to make the circle close and fit tight. If the blocks do not close the
circle, move all blocks slightly in. If the blocks seem too long, move the blocks slightly out.
9. Place caps in circle around fire pit. Adjust the caps in or out to make them fit tightly together.
10. Note: Not suitable for large fires. Fire size should not allow flame to contact Caps on Round Fire Pit.
*Gas Conversion Kits Available
Belvedere Fire Pit Kit Pallet: 1,275 lbs
TOP VIEW CROSS-SECTION
BLOCK LAYOUT PATTERN FOR BELVEDERE FIRE PIT
BELVEDERE FIRE PIT KIT
BLOCK KEY
(Nominal Dimensions)
AA
A
A
A
B B
BB B B
B B B B
C
CC
C
C
D
D D
D
D
E E E
E E E E
E E E
F
FFF
F
G1
G2 G2 G2 G1 G2 G1 G2 G2 G2 G1 G2
BLOCK KEY
(Nominal Dimensions)
A
B
C
DE
F
G2
G1
G2 G2 G2 G1 G2 G1 G2 G2 G2 G1 G2
BLOCK LAYOUT PATTERN
Matches Belvedere Texture
IMPORTANT NOTE: Burning large items or trash in re pits may cause damage to block units. Our re features are desinged strictly for small campres. We recommend using a steel insert to protect block
and coping units. Failure to use an insert couild cause damage to the block or coping.
LEEBP.COM
12/22
BELVEDERE
FIRE PIT KIT


