Rossum ASSIMIL8OR User manual

ASSIMIL8OR
Multi-Timbral Phase
Modulation Sampler
Copyright 2018 Rossum Electro-Music LLC
www.rossum-electro.com
Operation Manual
_040618

2 |
Contents
1. Introduction 3
2. Module Installation 4
3. Assimil8or Overview 5
4. Basic Functionality 7
5. The Main Display 11
6. Managing SD Cards, Folders, Presets, and Samples 13
7. Sampling 19
8. Sample Start and End 24
9. Channels 27
10. Zones 32
11. Play Mode/Latch 35
12. Envelope 36
13. Loop Mode 38
14. Loop Start and End/Length 39
15. Pitch 42
16. Level 43
17. Phase Modulation 44
18. Mutate 45
19. Shuttle and Scrub 47
20. Pan/Mix 49
21. Utilities 50
22. Sample Sounds and Demos 55
23. Calibration 59
24. Specifications 61
25. From Dave’s Lab: Intro to Phase Modulation 62
26. From Dave’s Lab: Circuit Protection 65
27. Acknowledgements 66

| 3
1. Introduction
Thanks for purchasing (or otherwise
acquiring) the Assimil8or Multi-Timbral Phase
Modulation Sampler.
This manual will give you the information you
need to get the most out of Assimil8or. The
manual assumes you already have a basic
understanding of synthesis, synthesizers and
samplers. If you’re just starting out, there
are a number of good reference and tutorial
resources available to get you up to speed.
One that we highly recommend is:
Power Tools for Synthesizer Programming
(2nd Edition)
By Jim Aikin
Published by Hal Leonard
HL00131064
Support
In the unlikely event that you have a problem
with your Assimil8or, tell us about it here:
http://www.rossum-electro.com/support/
support-request-form/
…and we’ll get you sorted out.
If you have any questions, comments, or just
want to say “Hi!,” you can always get in touch
here:
http://www.rossum-electro.com/about-2/
contact-us/
…and we’ll get back to you.
Happy music making!

4 |
2. Installation
As you will have no doubt noticed, the rear of
Assimil8or is a circuit board with a daughter
board, exposed parts, and connectors. When
handling Assimil8or, it’s important that the
back of the module never come in contact
with any metal (e.g. rails, patch cords, etc.)
while under power. Consequently, power
never be applied unless the module is
screwed in to the rack, and no loose patch
cords can find their way behind the panel
through adjacent empty spaces.
Additionally, there is alway a small risk of
damage by static electricity. Particularly on
dry, cold days (or if you’ve just shued across
your shag carpet in fuzzy slippers), make a
point of touching the metal panel first, before
touching any other part of the module.
While all Rossum Electro-Music modules are
protected against reverse polarity damage,
both to your module and your system, care
should still be taken to connect the power
cable correctly. (For more detail on our
unique protection method, check out Dave’s
discussion of Circuit Protection in Chapter
26.)
Plug the included 16-pin connector into the
header on the rear of the module such that
the red stripe on the cable (the -12V side) is
on the same end of the header as the “Red
Stripe (-12V)” text on the PCB.
Assimil8or requires, 220mA of +12V and
30mA of -12V, so be sure your power supply
has sucient capacity to handle it.
We have included both M3 and M2.5 (for
vector rails) mounting screws. Use what fits
your system.
If rack rash is of concern to you, use the
included nylon washers when mounting
Assimil8or in your case.
Be Sure You Have the Latest
Firmware
If we’ve released an updated version of
firmware after your module was shipped to
your dealer, you should update to that latest
version(s) before proceeding.
To check:
>Press the UTILITY button to bring up the
Utilities screen. Scroll down to About this
Module and click the encoder to see the
currently installed version.
>On the web, go to the Downloads tab at
www.rossum-electro.com/ products/
assimil8or/ and note the latest firmware
version.
>If it’s the same as the version in your
module, you’re good to go. If not, follow
the instructions there to update your
module.

| 5
3. Overview
What is Assimil8or?
Designed to provide a powerful, flexible
sampling engine for modular synthesis, the
Assimil8or Multi-Timbral Phase Modulation
Sampler module is the latest incarnation of
Dave Rossum’s decades-long pioneering of
aordable professional sampling technology.
Assimil8or provides eight independent
channels of sampled sounds (or control
voltages), transposable over an astonishing
range of up to +6 octaves (at 48kHz sample
rate) and virtually limitlessly downward, with
sound quality that can range from extremely
hi-fi to low-fi, all with extensive real-time CV

6 |
control.
Key Assimil8or features include:
>Eight-channel multi-timbral operation.
Each channel is available from its own
independent output as well as (optionally)
appearing in the stereo mix output.
>422MB of sample memory, freely
allocatable between the 8 channels.
>Eight sample zones per channel, for CV-
controlled sample selection.
>Superb 24-bit A/D and D/A conversion.
>Mono or stereo sampling. Channels can
be configured as eight mono voices, four
stereo voices, or any combination. (Well,
any combination that adds up to eight).
>Link Mode to create multilayered sounds
under the control of a single trigger
>Cycle Mode to allow one trigger source
to sequentially trigger multiple channels,
allowing repeatedly triggered sounds (e.g.,
a ride cymbal) to overlap (among other
eects).
>Crossfade Groups to crossfade between 2
to 8 channels under CV control.
>Unique timbral capabilities with the ability
to phase modulate samples by external
analog signals or by other samples (a first,
we believe).
>24 CV inputs that can be arbitrarily
assigned to any parameters on any
channels.
>Variable sample fidelity with independently
controllable anti-aliasing and bit depth
under CV control.
>Extensive sample manipulation and
looping capabilities.
>One-shot or gated sample playback with
variable attack and release times.
>24 CV inputs that can be arbitrarily
assigned to any parameters on any
channels.
Examples include:
Pitch
Level
Bit Depth
Aliasing
Phase Modulation
Mix Pan
Sample Start
Sample Length
Loop Start
Loop End/Length
Envelope Attack and Release
Channel Zone
Crossfade Group Crossfade
And more…
>A front panel accessible SD card for
sample and preset storage.
In the following sections, we’ll look at each of
Assimil8or’s functions in turn.

| 7
4. Basic Functionality
Before we jump into individual functions, let’s
take a look at Assimil8or’s basic organization.
Power Up
When Assimil8or powers up, it remembers
the most recently loaded folder and preset.
If the appropriate card is present, it will
automatically load that folder and preset.
Inputs
Sample Inputs
Here’s where you input the signals
to be sampled by Assimil8or. The
inputs can be treated as stereo
inputs or independent mono inputs. Sampling
is configured in the Sampling Setup module
described in Chapter 7.
A signal at a sample input can also be
selected as a phase modulation source in the
Phase Modulation module.
The Inputs accept a signal level up to +/- 10V
full scale.
NOTE: Assimil8or is DC coupled
throughout, so CVs as well as audio can
be sampled (although you can choose to AC
couple sampling in the Sample Setup screen if
you so desire).
Gate/Trigger Inputs
Each of Assimil8or’s 8 channels has a
dedicated Gate/Trigger input with a
trigger threshold of 1.6V. A rising edge
at a Gate/Trigger input will initiate
playback of the associated channel
if the channel is in Master Mode
and, depending on your preset, may
trigger other channels in Link, Cycle
or Stereo/Right Modes. (See the
Channels chapter for details about
Channel Modes.)
Control Voltage Inputs
Assimil8or provides 24 CV
inputs that can be arbitrarily
assigned to any parameters
on any channels. A single
CV can be assigned to
multiple parameters on
multiple channels (although
each individual parameter
can only have one CV
assigned to it).
The CV inputs accept
voltages in the range of -5V
to +5V, and voltages above
or below this level are seen
as +5.000V or -5.000V
respectively.
Each Channel’s CV A input is sampled at
96kHz and anti-aliased down to a 20kHz
bandwidth. CV B and CV C inputs are
sampled at 48kHz and are not anti-aliased.
Relative vs. Absolute Modulation
Assignments When selecting a modulation
source for a parameter, you will notice the
the first 3 choices (after “O”) are always CV
A, CV B, and CV C, followed by all of the 24
inputs numbered: 1A, 1B, 1C, 2A, 2B,… etc.
The CV A, CV B, and CV C inputs are what
we call “relative” inputs. The numbered
inputs are “absolute” inputs. Here’s what that
means:
CV A, CV B, and CV C always refer to the 3
physical inputs associated with the channel
you’re editing. For example, if you’re editing
Channel 2 of a preset and assign CV A to
modulate pitch, the channel would look for a
CV at the “A” jack of the second row of inputs.
If you then copied that channel to Channel
7, the channel would look for a CV at the “A”
jack of the seventh row of inputs. The inputs
are always relative to the physical channel.

8 |
Controls
DATA 1 Encoder
The DATA 1 encoder is used
to select and, with the DATA 2
knob, to set the value of various
parameters (see the Setting
Parameters section below). It also selects
Folders, Channels, or Samples for loading.
The encoder includes an integrated
pushbutton that is typically used to load
the currently selected Folder, Channel,
or Sample, to enter a currently selected
parameter value (see individual parameters
for details), or to confirm some action.
DATA 2 Knob
The DATA 2 knob is used to set the
values of parameters.
Additionally, for real-time control, in each
preset you can assign the DATA 2 knob to
replace any one of the 24 CV inputs when
you’re on the home preset screen. (Great
for live performance.) Make the assignment
at the bottom of the Channels page or by
holding down the Play Mode button and
turning DATA 2 while on the home page.
Any voltage at the assigned CV’s input jack is
ignored.
Setting Parameters
On each parameter screen, use the encoder
to highlight a parameter and then use the
DATA 2 knob to set its value. If you need
a more precise setting, click the DATA 1
encoder to edit at the maximum resolution.
Click the encoder again to enter the selected
value.
IMPORTANT NOTE: Whenever there are
any unsaved parameter changes in a
preset, a yellow warning sign will appear in the
lower left-hand corner of the home display.
If you select a new preset before saving the
current one, the changes will be lost.
If however, in the example above, when
editing Channel 2, you assigned input 2A to
modulate pitch, for that channel the result
would be the same. It would still look for
a CV at the “A” jack of the second row of
inputs. But if you then copied that channel to
Channel 7, that channel would still look for a
CV at the “A” jack of the second row of inputs
(i.e., 2A) as you would have assigned that
absolute input.
Outputs
Individual Channel Outputs
Each of Assimil8or’s 8 channels has
a dedicated individual output. Each
channel’s signal always appears at its
individual output (and may optionally
appear at the Mix Outputs described
below).
Mix Outputs
Each channel can optionally be
assigned to the Mix Outputs with
a mix level and pan setting. The
mix level is an oset (either higher or lower)
based on the channel’s individual output
level.
NOTE: Both the individual and mix outputs
are active during the process of sampling,
so channels may be played and resampled in
real time.
A TIP: While the individual outputs are
monophonic, since you can sample the
mix output, you could create a submix to the
mix output, sample it, and then have it available
at one (if mono) or two (if stereo) individual
outputs.

| 9
Channel Buttons 1-8
Pressing a Channel Button will trigger
the associated channel and also select
that channel for editing. The associated
LED will light whenever the channel is
triggered, whether via the button or via
an external trigger or gate.
NOTE: If you want to select a
channel for editing without
triggering it (in a live performance, for
example), press and hold the Channels/
Select button and press the desired
channel button. The channel will be
selected, but it will not be triggered.
ANOTHER NOTE: A channel button will
always trigger the associated channel,
even if the channel is in a mode (i.e., Link,
Cycle, or Stereo/Right) that results in its
getting triggered by another channel’s trigger.
This allows you to audition the channel
during editing without interference from any
associated channels. It will, however, also
be triggered when you press the associated
Master channel’s button.
Load Button
This button allows you navigate the
files on an inserted micro SD card. See
Chapter 6 for details.
Save Button
This button allows you to save presets
to an inserted micro SD card. Presets
are always saved to the currently loaded
folder. Details in Chapter 6.
Utility Button
Pressing this button brings up a
menu where you will have access
to Assimil8or’s various housekeeping and
maintenance functions. See Chapter 21 for
details.
Channels/Select Button
Pressing this button brings up
the Channels screen, where you
configure your presets by assigning samples
to the various channels and setting Channel
Modes and Crossfade Groups. See Chapter 9
for details.
Additionally, pressing and holding this
button and then pressing a Channel Button
will select that channel for editing without
triggering it.
Zones/Select Button
Pressing this button brings up the
Zones screen, where you can assign
up to 8 samples to the current channel
for selection under CV control, along with
adjusting the CV voltage range for selecting
each sample. See Chapter 10 for details.
Additionally, pressing and holding this button
and then pressing a Channel Button will
select the Zone whose number matches the
Channel Button number. For example, if you
are editing Channel 3, which has 8 zones
assigned to it, and press and hold the Zone
button and then press the Channel 5 button,
you will select Zone 5 on Channel 3.
Sample and Sampling Setup
These buttons allow you to set
the various options involved
in the sampling process and to initiate the
actual sampling. See Chapter 7 for details.
Channel Parameters
The following
buttons each open
a screen with one
or more related parameters that aect the
currently selected channel. They will be
described in detail in their own chapters.
Pitch Lets you set the channel’s initial
transposition (if any) and program linear and/
or exponential frequency modulation. Also
lets you set a pitch oset for each zone in the
channel.
Level Lets you set the channel’s initial level
and program linear and/or exponential
amplitude modulation. Also lets you set a
level oset for each zone in the channel.

10 |
Additionally, holding down this button and
pressing any of the channel buttons causes
that channel button to be “held down” (and
its LED to flash) until the channel button is
pressed again.
Envelope Lets you set the attack and
release times of the built-in envelope
as well as set the modulation of those
times. Also allows you to set the channel
to Auto Mode, which causes the channel
to automatically start playing as soon as its
preset is loaded.
Loop Mode Lets you set the loop to
O, On (once in the loop the loop
repeats indefinitely), or Gated (the
loop repeats as long as the gate is high and
continues into any remainder of the sample
once the gate falls).
Memory Card
Assimil8or can store and recall folders,
presets and samples onto and from an
inserted micro SD card. We’ve tested cards
of up to 200GB is size, although there is no
reason larger ones shouldn’t work as well.
A TIP: In addition to sampling directly
into Assimil8or, you can also use your
computer to create folders at the root level
of your SD card and put WAV files in those
folders. (Assimil8or is compatible with 8, 16,
24, or 32 bit integer mono or stereo WAV files
at any sample rate.) While sample names may
be up to 47 characters long, we recommend
that both folder and sample names be both
relatively short and descriptive. Trust us, it really
makes things easier when you’re working with
them on your Assimil8or.
IMPORTANT NOTE: There are a lot of
squirrely cheap micro SD cards out there.
There are also cards that appear to be from
major suppliers that are actually counterfeit.
While many cheap cards may be fine, we’d
recommend that, for the security of your
data, you use cards from known reliable
manufacturers purchased from trusted
sources.
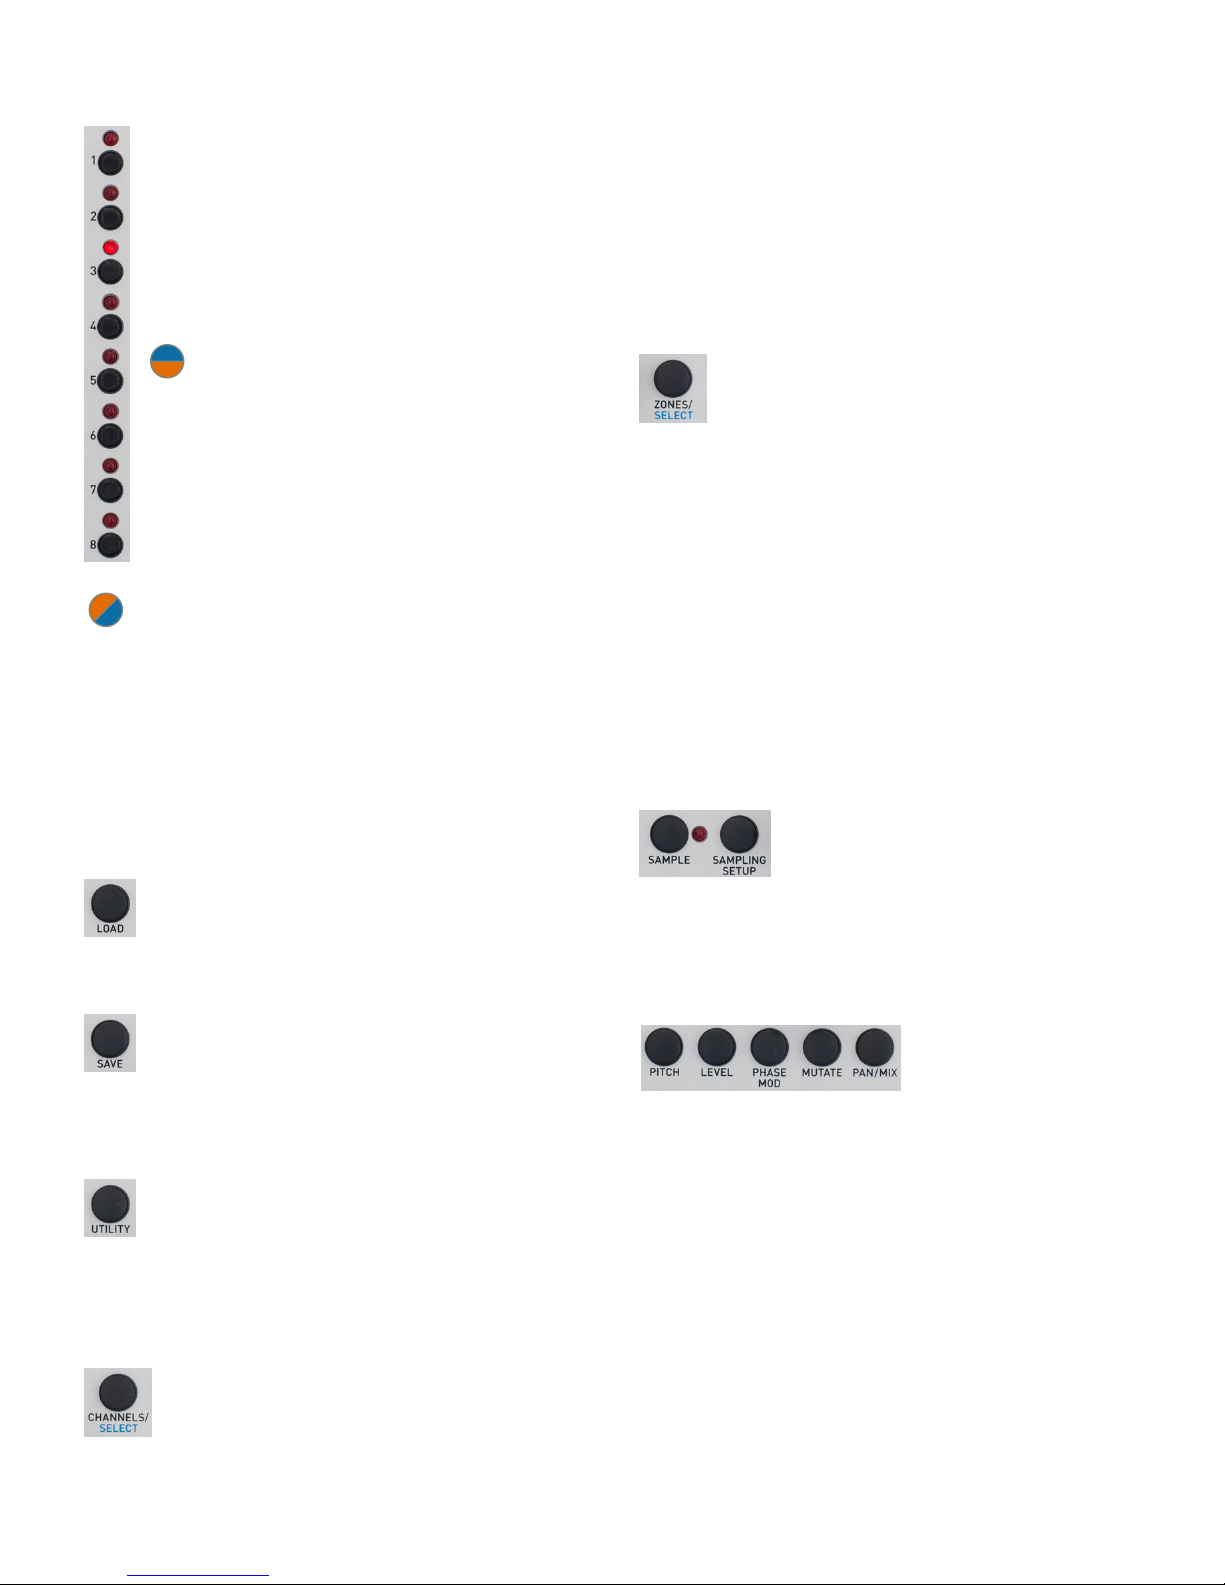
Phase Modulation Lets you select the phase
modulation source (channel, sample input,
or CV) and set the modulation index and any
modulation index modulation (modulation
modulation!).
Mutate Provides a variety of functions that
aect the channel’s audio quality. Includes
the ability to modify the channel’s bit depth
(from 1 to 32 bits, including fractional bits), to
disable Assimil8or’s anti-aliasing technology,
to reverse the channel’s audio, and to turn on
or o Sample Smoothing, which minimizes
artifacts from non-optimum loops, real-time
zone switching, and sample re-attacks.
Pan/Mix Lets you set the channel’s level and
pan in the mix output, set pan modulation,
or remove the channel from the mix output
altogether.
Sample Start/End Lets you set
the points within a channel’s
sample (or individually for its
zones) at which playback starts and stops,
as well as program modulation of the start
and stop positions. Also lets you truncate the
sample to the selected points and save the
truncated sample as a new sample (leaving
the original sample intact).
Loop Start/End/Length Lets
you define a loop within
a channel’s sample (or
individually for its zones), as well as program
modulation of the loop parameters.
Loops can be in Start/End mode (you
independently define the loop start and end
point) or Start/Length mode (you define the
loop start and loop’s length).
The loop is turned on or o and its behavior
is set by the Loop Mode button below.
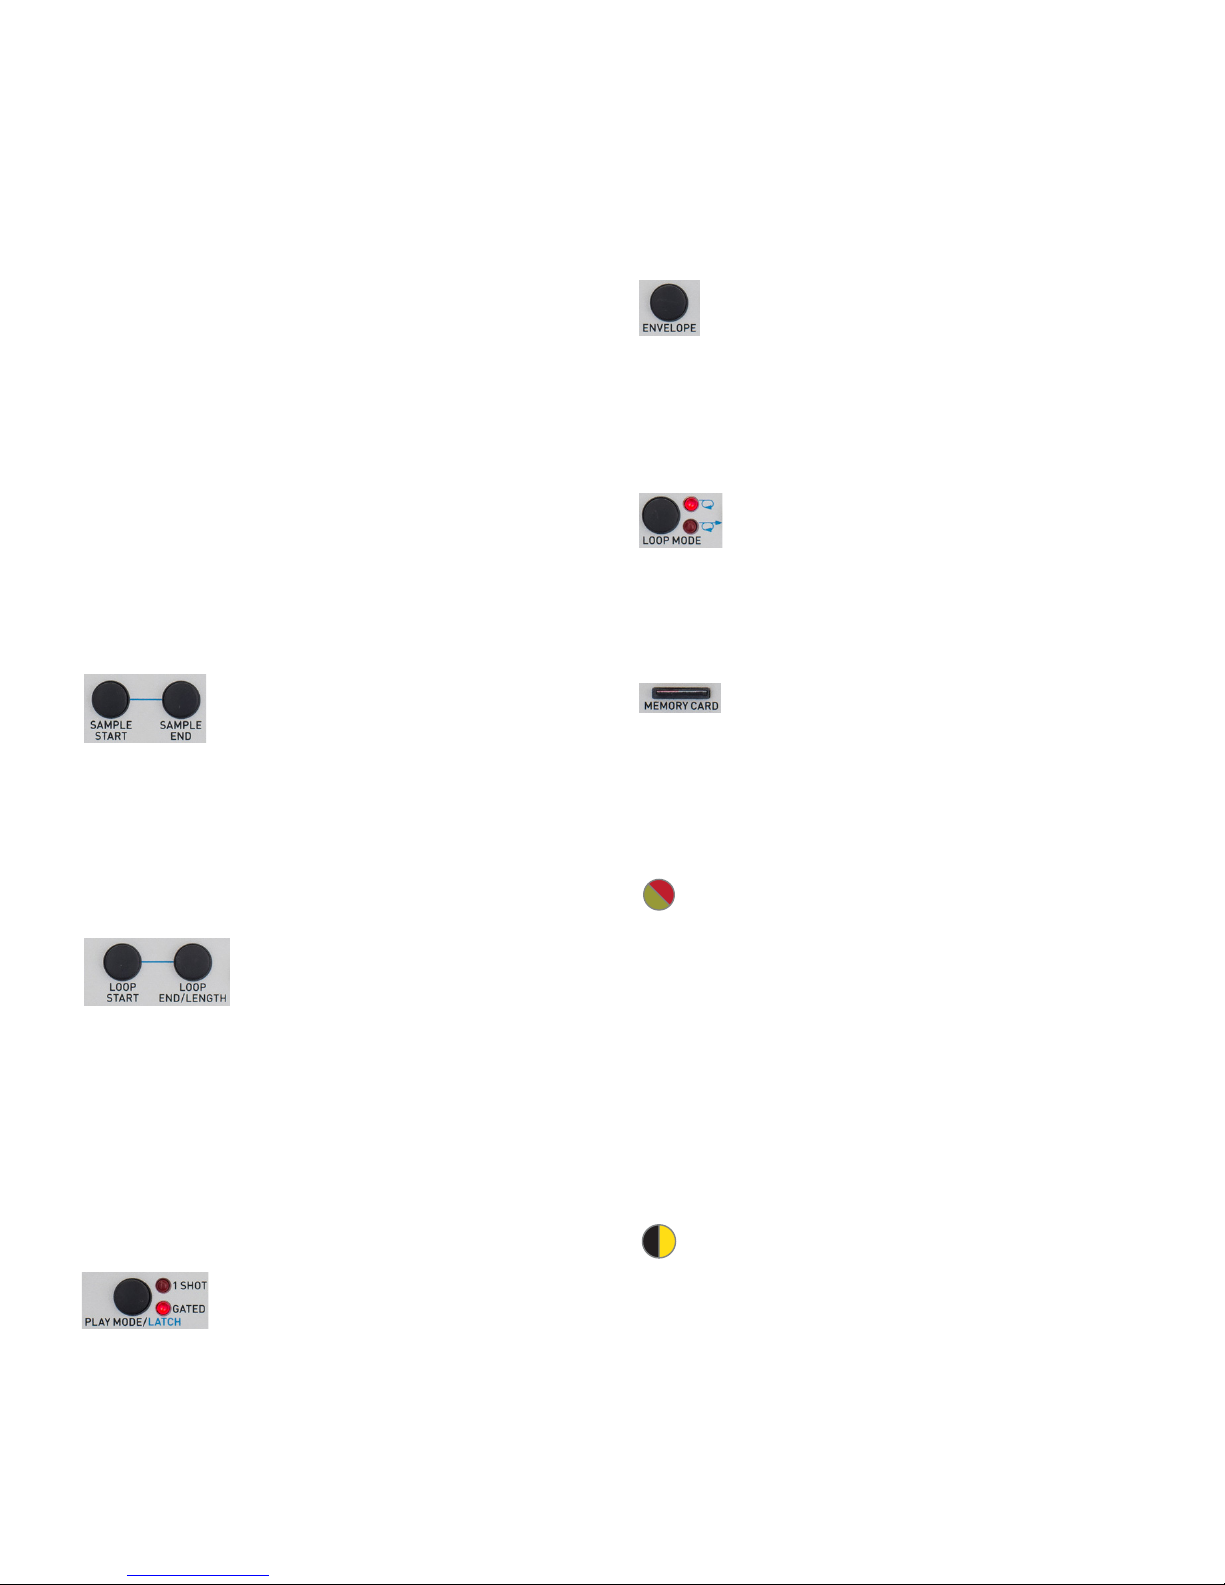
Play Mode/Latch Selects 1 Shot
Mode (a trigger or gate starts
playback of the channel and the
channel continues to play independent of
trigger or gate length) or Gated Mode (the
channel continues to play only as long as the
gate is high).

| 11
5. The Main Display
Assimil8or’s main display provides an
overview of the currently selected preset,
along with some basic indication of what’s
happening in the module. Additionally, there
are dedicated displays for loading and saving
presets, programing channel parameters, and
executing utility functions.
In this chapter, we’ll describe the main
display. The rest will be described in their
own chapters.
IMPORTANT: OLED displays (which is
what the Assimil8or display is) have long
lifetimes under normal use, but if you leave
your system on 24/7 (or just want to ensure
the longest possible life for your display),
Assimil8or provides the ability to adjust the
brightness of the display (which is also useful
for optimizing it for the ambient lighting level
of your work environment) and, optionally,
to set a time after which the display enters a
screensaver mode. Both of these can help
extend the life of your display. They are set in
the Utilities menu. Details for setting them will
be found in Chapter 21.
The main display provides the following:
The Number and Name of the Currently
Selected Preset
8 Channel Status Displays
For each channel, there is a display of:
>The channel number (if a sample or zones
are assigned to that channel).
If the number is black on a bright red
background, that channel contains a
sample and is selected for editing.
If the number is black on a dimmer red
background, that channel’s sample is
loaded, but not selected for editing.
If instead of a number, there is a red dot
in the number field and a sample name
in the sample field, there is a sample
assigned to that channel, but it has not yet
finished loading into memory.
If there is a red dot in the number field and
no sample name in the sample field, there
is no sample assigned to that channel.
If there is a red dot in the number field
with a bright red frame around it, that
channel is selected, but there is no sample
assigned to the channel.
>3 tiny CV indicators that show the CV level
at that channel’s CV A, CV B, and CV C
inputs.
NOTE: The channel may have
additional CVs modulating parameters
beyond those three.
>The name of the sample assigned to that
channel or, if zones are assigned, the
name of the sample in Zone 1.
NOTE: The sample name display is
limited to 6 letters. If the sample name
is longer than that, the remaining letters
are not displayed here. For that reason, it’s
usually a good idea to name your samples
such that the first 6 letters are descriptive
enough for you to recognize the sample
from them.
Left and Right VU Meters
These display an indication of the left and
right channel levels at the MIX output.

12 |
Waveform Display
A real-time display of the waveform of the
currently selected channel. Only appears
when the channel is actually playing.
Yellow “Unsaved Changes” Indicator
When the little yellow caution triangle
appears in the lower lefthand corner of
the display, it indicates that you have made
changes to the current preset that have not
been saved. If you select another preset or
load a new folder before saving the current
preset, your changes will be lost.
Folder Name
The name of the currently loaded folder
appears at the bottom of the display.
DATA 2 CV
The CV for which the DATA 2 knob is
currently substituting (if any) is displayed in
the lower righthand corner of the display. You
can change the assigned CV from this screen
by holding down the Play Mode button and
turning the DATA 2 knob. An edit field will
pop up allowing you to select the desired CV
(or turn the function o).

| 13
6. Managing SD Cards, Folders,
Presets, and Samples
File Organization
Assimil8or’s files are organized in the
following hierarchy:
Micro SD Card
Assimil8or’s front panel micro SD card stores
all of the folders containing the files required
to play your stored presets. The card is strictly
a storage medium. Audio is never played
directly from the card.
Folders
An Assimil8or SD card contains one or
more folders. Each folder contains one or
more presets and all of the presets’ samples.
Each folder may contain up to 199 presets
(memory allowing).
Additionally, a folder may contain one or
more samples not used in any of the folder’s
presets.
Presets
A preset contains all of the information
necessary to play up to 8 programmed
channels.
Channels
A channel contains the information
necessary to play one of Assimil8or’s 8
channels.
Samples
Samples are the actual WAV files that contain
the audio or control voltages that are the raw
material for your channels.
NOTE: When scrolling through samples
and folders on various screens, the
order in which the samples and/or folders
appear can be unpredictable. We’re currently
evaluating whether we can make this better. If
so, there will be a software update.
Micro SD Card
The micro SD card is essentially a library
of folders you’ve created (along with a few
housekeeping files you don’t really need to
worry about). Content may either be written
directly to the card by your Assimil8or or, in
the case of folders and WAV files, copied to
the card from a computer.
All preset and sample files on the card are
stored in folders at the root level of your card.
No nested folders.
If you’re copying files from a computer,
create a folder on your SD card and give it
a descriptive name. Put the WAV files (also
descriptively named) you’ll want for your
preset(s) into the folder, keeping in mind that
Assimil8or has 422MB of sample memory.
Assimil8or is compatible with 8, 16, 24, or 32
bit integer mono or stereo WAV files at any
sample rate.
WARNING: It’s an extremely unwise idea
to remove an SD card while Assimil8or is
executing any load, save, or browse function.
Or, in fact, any function that might even
possibly require accessing the card (formatting
is an obvious example). Seriously, just don’t do
it.
IMPORTANT NOTE: As mentioned in
Chapter 4 (but it’s worth mentioning
again), there are a lot of squirrelly cheap micro
SD cards out there. There are also cards that
appear to be from major suppliers that are
actually counterfeit. While many cheap cards
may be fine, we’d recommend that, for the
security of your data, you use cards from
known reliable manufacturers purchased from
trusted sources.

14 |
Folders
Folders are Assimil8or’s file storage construct.
Assimil8or can have one folder at a time in
its memory. That folder contains a number
of presets and all of the samples necessary
to play those presets. It may also contain
samples not used in any presets (if, for
example, you placed samples in the folder
from a computer or sampled multiple sounds
or CVs into the folder, but have not assigned
them to any preset).
NOTE: Although only one folder at a time
may be in Assimil8or’s memory, when
creating presets, you can import channels or
samples from other folders on your SD card
into your current folder. See the chapters on
Channels and Zones for details.
Loading Folders
To load a
folder into your
Assimil8or,
press the LOAD
button and use
the encoder to
scroll through
the folders
on your card.
When you’ve
highlighted the
desired folder,
click the encoder to load the folder’s presets
and the samples used in the presets. You will
immediately be transferred to the main home
screen while the folder loads.
On-Demand Loading
Loading a folder into your Assimil8or uses a
process we call “On-Demand Loading.” Its
intent is to manage the loading of samples
such that you can start playing your presets
as soon as possible.
Here’s what happens when you click the
encoder to load a folder:
>Assimil8or starts by loading the preset
data for all presets in the folder, along
with the headers (but not the audio data)
for all the samples in the folder, whether
used in a preset or not. While this is
happening, you will see a green progress
bar across the middle of the home screen
that indicates the loading process. (If the
folder contains only a few presets and/or
samples, the progress bar may barely flash
on the screen.)
>Once the preset data and sample headers
have been loaded, Assimil8or selects the
lowest numbered preset in the folder
as the current preset and starts loading
the samples used in that preset. You will
see a green progress bar along the top
of the display that will indicate the load
process of each sample. As each channel
is loaded, its channel number will appear
in its number field in the main display
and that channel becomes immediately
playable.
>Once all of the samples of the first preset
are loaded, Assimil8or continues through
the remaining presets in numerical order
until every preset’s samples are loaded.
Unassigned samples are not loaded.
>However, if, while presets are loading,
you to scroll to a preset that is beyond
the currently loaded presets and select it,
Assimil8or completes the loading of any
channel that it was in the midst of loading
and then jumps to your selected preset
and begins loading its samples. After
loading that preset, it continues loading
the numerically higher presets, and then
circles back to load any presets that it
had jumped over to get to your selected
preset.
At this point, an example is probably in
order:
1. You load a folder with Presets 001-010.
Immediately the samples of Preset 001
begin loading.
2. Once it’s loaded, you start playing
channels of Preset 001 while Assimil8or
starts loading the samples of Preset 002.
3. Before Preset 002 is completely loaded,
you scroll to Preset 007 and select it.

| 15
4. As soon as Assimil8or completes loading
whichever channel of Preset 002 it was
loading when you selected Preset 007, it
immediately starts loading the samples of
Preset 007.
5. Once finished loading Preset 007,
Assimil8or continues to load Presets
008, 009, and 010 and then circles back
to Preset 002 to complete its loading,
followed by Presets 003-006.
What about those unassigned samples?
Unassigned samples remain unloaded until
you decide to assign them to a channel
or zone in a preset you’re programming.
They load at that point. See the chapters on
Channels and Zones for details.
Presets
A preset contains the information necessary
to play up to 8 of Assimil8or’s channels with
the parameters you’ve programmed. Presets
are always contained in folders, along with
their required samples. When examining the
contents of an SD card on your computer,
the preset files have a .yml sux.
NOTE: Presets files are saved in the YAML
format. Since YAML is human readable,
you could, if you wanted, open a preset file
in a text editor and examine, or even modify
it. (Keep in mind that you could mess up your
presets pretty majorly this way.) On the other
hand, someone with the appropriate skills
could, if so inclined, create a computer-based
preset editor that generated YAML files that
could then be copied onto an SD card. Just
sayin’.
We’ll be publishing the YAML preset file
format in the not-too-distant future for
anyone so interested.
Loading Presets
In the home screen, turn the encoder to
scroll through all existing presets. When you
see the one you want, click the encoder’s
switch.
If you press and hold the encoder switch and
then turn the encoder, each preset will load
immediately as you scroll to it.
IMPORTANT NOTE: Once you’ve loaded
a folder and all of its headers have been
loaded into memory, you can immediately
select any of the folder’s presets. However, if
the folder and/or the preset contains one or
more long samples, it may be the case that
the sample(s) have not yet been completely
loaded into memory. This is indicated by a red
dot on the home page next to one or more
channel names. Once a sample is completely
loaded, the dot will change to the channel
number.
ANOTHER NOTE: Channels in presets
become immediately playable as soon as
their sample(s) load, even if other channels in
the preset are still loading. This may or may not
be useful to you, depending on your situation.
Importing Presets
You can import presets from other folders
on your SD card into your current folder, in
which case the preset’s sample(s) are also
imported into the current folder.
To import a preset:
>While in the destination folder (i.e., the
folder you want to import the preset into),
press the LOAD button.
>Scroll to the Folder on your SD card that
contains the preset you want to import.
>Double-click the LOAD button to display
the contents of the selected folder.
>Scroll through the folder’s contents to
locate the preset you want to import.
>Click the encoder to bring up the File Op
window. Select “Import” and click the
encoder again.
>The preset and all of its samples will be
imported into your initial folder and you
will be returned to that folder with your
imported preset selected.

16 |
Starting with an Empty Preset
When creating presets, you may sometimes
want to start out with a completely empty
preset. When starting in a folder with no
previously saved presets, you can start
with the default “empty” preset. But once
a preset has been saved in a folder, turning
the encoder only lets you access previously
saved presets.
To start with an empty preset in this situation,
press the encoder’s switch and, while holding
it pressed, turn the encoder. This will allow
you to access all 199 of a folder’s potential
presets, whether empty or not. Select an
empty one and start programming.
Saving Presets
Press the Save
button to bring
up the Save
Preset field. The
current preset is
initially displayed.
Selecting a
Location
In the Save
Preset field, the
encoder initially
controls the Preset Number field. Scroll
through the numbers to select a destination
location (or don’t scroll to resave to the
current preset’s existing location). Note that
this scrolling does include empty (“New”)
preset locations. At the top of the scrolling list
is a special item, **ERASE**.
Saving Without Changing the Name
To save the current preset to the selected
location without changing the location’s
existing name, either press the encoder for
2 seconds, or press the Save button for 2
seconds. The display briefly displays “Saving
in 2 Seconds…” and then (after 2 seconds)
displays “Save Completed” and exits the Save
Preset screen.
If you release the button before 2 seconds
have elapsed, the display briefly shows “Save
canceled” and exits the screen without
executing the save operation.
NOTE: The Save Preset operation can also
be exited at any time without saving by
pressing any other function buttons.
Changing the Preset Name
To change the
name of the
preset at the
selected target
location, press
the encoder.
A cursor will
highlight the
first character in
the Name field.
(If the selected
location was
NEW, the Name field will change to the
name of the current preset.)
The name is changed using the encoder as
follows:
>After a highlighted character has been
selected using the encoder, either select
the new character using DATA 2 or click
the encoder to select the new character.
>If you’ve used the encoder to select the
character, click the encoder to enter
that character and return the encoder to
character location selection operation.
>If you’ve only used DATA 2 to select the
character, simply turn the encoder to
highlight the next character you want to
change.
>Repeat as necessary.
Saving After a Name Change
To save the renamed preset to the selected
location, either long press the encoder, or
long press the Save button. This can be
done while either in the character location
selection or character changing operation
for the encoder. The display briefly displays
“Saving in 2 Seconds…” and then (after 2

| 17
seconds) displays “Save Completed” and
exits the Save Filter screen. If you release the
button before 2 seconds have elapsed,the
display briefly shows “Save canceled” and
exits the screen without executing the save
operation.
Erasing the Current Preset
To erase a
preset, press
Save and then
scroll to the
beginning of the
menu to display
### **ERASE**
(where ###
is the preset
number of the
current preset
which will be
erased). While **ERASE** is displayed, either
long press the Encoder, or long press the
Save button. The display will briefly display
Erasing Preset and then exit the screen. If
you release the button while Erasing Preset
is displayed, the display briefly shows Erase
canceled and exits the screen without
executing the erase operation.
Channels
Each channel contains the information
required to play your programmed audio or
CV files through it’s dedicated channel output
and, optionally, through the mix outputs. A
channel plays either one sample or, if you are
using the Zones function, up to 8 samples
that can be selected by a CV. Channels are
configured, appropriately enough, on the
Channels screen and, optionally, the Zones
screen.
Channels can be assigned a variety of
modes that allow them to interact with other
channels in your preset in many creative
ways. Details will be found in the Channels
chapter.
Channel Parameters
The following parameters are referred to as
Channel Parameters, because while they
aect a channel’s sample(s), they are actually
owned by the channel, not the sample. If you
set up a channel and then replace the sample
in the channel with another, the new sample
inherits all of the parameter values of the
initial sample.
Channel parameters include: Pitch, Level,
Phase Mod, Mutate, Pan/Mix, Sample Start/
End, Loop Start/End/Length, Play Mode,
Envelope, and Loop Mode.
Copying and Importing Channels
Once you have created a channel, you can
copy it to other channels in your preset or
to channels in other presets in the current
folder. Additionally, you can import channels
from other folders on your SD card into
channels in the current folder, in which case
the channel’s sample(s) are also imported
into the current folder. Again, see the
Channels chapter for details.
Samples
Samples are the raw material of your
channels and presets. Samples can be
recorded directly by Assimil8or or can be
copied onto an SD card via computer.
See the Sampling chapter for details of
Assimil8or’s sampling options.
To use your computer to load existing WAV
files, create folders at the root level of your
SD card and put the WAV files in those
folders. Assimil8or is compatible with 8, 16,
24, or 32 bit integer mono or stereo WAV files
at any sample rate. While sample names may
be up to 47 characters long, we recommend
that both folder and sample names be both
relatively short and descriptive.

18 |
Renaming and Erasing Samples
To rename a
sample or to
erase a sample
from the current
folder (and from
the inserted SD
card), on either
the Channels
or Zones page,
highlight the
sample and click
the encoder to
bring up the Sample Selection field. Then
long-press the encoder switch to bring up
the Sample Op window and select Rename
or Erase as desired and click the encoder
again. Proceed with renaming or erasing.
NOTE: Erasing a sample will delete it from
every preset it appears in, so make sure
you know where it’s used before deleting it, as
the deletion is permanent.
Importing Samples
When creating
presets, samples
must be in the
currently loaded
folder in order
to be assigned
to channels or
zones. However,
samples can be
imported from
other folders
into the currently
loaded one.
To import a sample:
>With the destination channel or zone
selected (i.e., the channel or zone you
want to import the sample into), press the
LOAD button.
>Scroll to the Folder on your SD card that
contains the sample you want to import.
>Double-click the LOAD button to display
the contents of the selected folder.
IMPORTANT NOTE: Do NOT click
the encoder here. If you do, you
will actually load the folder (rather than
browse its contents) and erase any unsaved
changes in the preset you were working on.
>Scroll through the folder’s contents to
locate the sample you want to import.
>Click the encoder to bring up the File Op
window. Select “Import” and click the
encoder again.
>The sample will be imported into your
selected channel or zone and you will be
returned to your current preset with your
imported sample in place.

| 19
7. Sampling
The Sampling Setup screen lets you
configure Assimil8or’s sampling functions.
Once configured, you can choose to trigger
sampling manually with the Sample button,
automatically when the incoming signal
exceeds a programmable threshold level, or
under the control of a CV input.
NOTE: One of Assimil8or’s key
characteristics is that the module is
otherwise functional during the sampling
process, so you can not only resample
whatever it’s playing, you can trigger channels
or modify what it’s playing (by changing
parameters) while it’s sampling.
Basic Sampling Process
The basic process for recording a sample is:
1. Connect the signal source(s) to one or
both of the Sample Inputs
2. Press the Sampling Setup button to bring
up the Sampling Setup screen
3. Set all of the parameters on the screen as
desired.
4. Play your audio and adjust the sampling
level
5. If you are going to use Threshold
triggered sampling, adjust the threshold
level.
6. If you are going to use CV triggered
sampling, assign the desired CV input.
7. Unless you’re already in HOT mode (see
the Arming Safety section below), press
and hold the Sampling Setup button to
arm sampling. The Sample LED will flash
and the message “SAMPLING ARMED” will
appear at the top of the screen.
NOTE: You can long-press the
Sampling Setup button to arm
sampling from any screen. You do not have
to be on the Sampling Setup screen.
8. Once armed, sampling can be triggered
by pushing the Sample button, having the
incoming audio exceed the programmed
threshold level, or in response to the
selected CV exceeding 1.6 volts
9. Sampling will stop when either:
>The preset sampling time has elapsed
>The sample memory is filled
>You press the Sample button a second
time
>The selected CV rises above 1.6 volts for a
second time
10. Once sampling has stopped, opening
the Sampling Setup screen (if you’re not
already on it) will display an edit field that
will give you the option of keeping or
deleting the sample you just recorded.
That field will be available on the screen
for 30 seconds after sampling ends. If you
know you’re not going to want to keep the
sample, you
can delete it
here. If you
know you
want to keep
it, or are not
yet sure, keep
it for now.

20 |
NOTE: If you don’t make a choice
in this edit field for 30 seconds, the
sample will automatically be kept.
Sampling Setup
The Sampling
Setup screen
is where you
configure
the sampling
process.
Down the right
hand portion
of the screen
are the main
configuration
settings.
They are, in order:
Destination
Destination
lets you specify
where the
sample(s) you
are about to
make will end
up. The choices
are:
Unassigned The
sample will
appear in the
current folder, but will not be assigned to
any preset. You will not be able to audition
the sample until you have assigned it to
a channel. You might select Unassigned
if you were sampling many files in
succession and didn’t need to go back
and listen to them until you had finished,
at which time you could assign them one
at a time to a single channel to audition
them.
Channel 1-8 Assigns the sample to the
specified channel in the current preset.
This setting will cause the new sample to
replace whatever was previously assigned
to the channel.
Empty Channel Assigns the sample to the
lowest numbered empty channel in the
current preset. Useful if you are sampling
a series of sounds to fill the current
preset, as you won’t have to change the
destination after every sample.
NOTE: If you select Empty Channel and
no channel is empty, your sample will be
assigned to the Unassigned pool.
Record Mode
There are two
record modes,
Once and
Circular. Here’s
how they work:
Once With
Once selected,
Assimil8or will
sample for the
time set in the
Sampling Time parameter below and
then stop (if you haven’t already manually
stopped first). If you stop sampling
before the selected length, the sample is
truncated to your stop point.
Circular With Circular sampling,
Assimil8or samples for the time set in the
Sampling Time parameter below and
then circles back to the start of sample
and continues sampling, writing over what
was previously sampled as it proceeds.
It continues doing this until stopped
manually or via CV control.
If you stop sampling before the selected
length (i.e., before it cycles back for the
first time), the sample is truncated to your
stop point, just as it would be with Once
above.
If you stop sampling after sampling has
cycled back at least once, you will get
your recording of the entire programmed
sampling time.
Table of contents