R1
6.5" / 8"
Speaker
Installation Instructions
www.roswellmarine.com
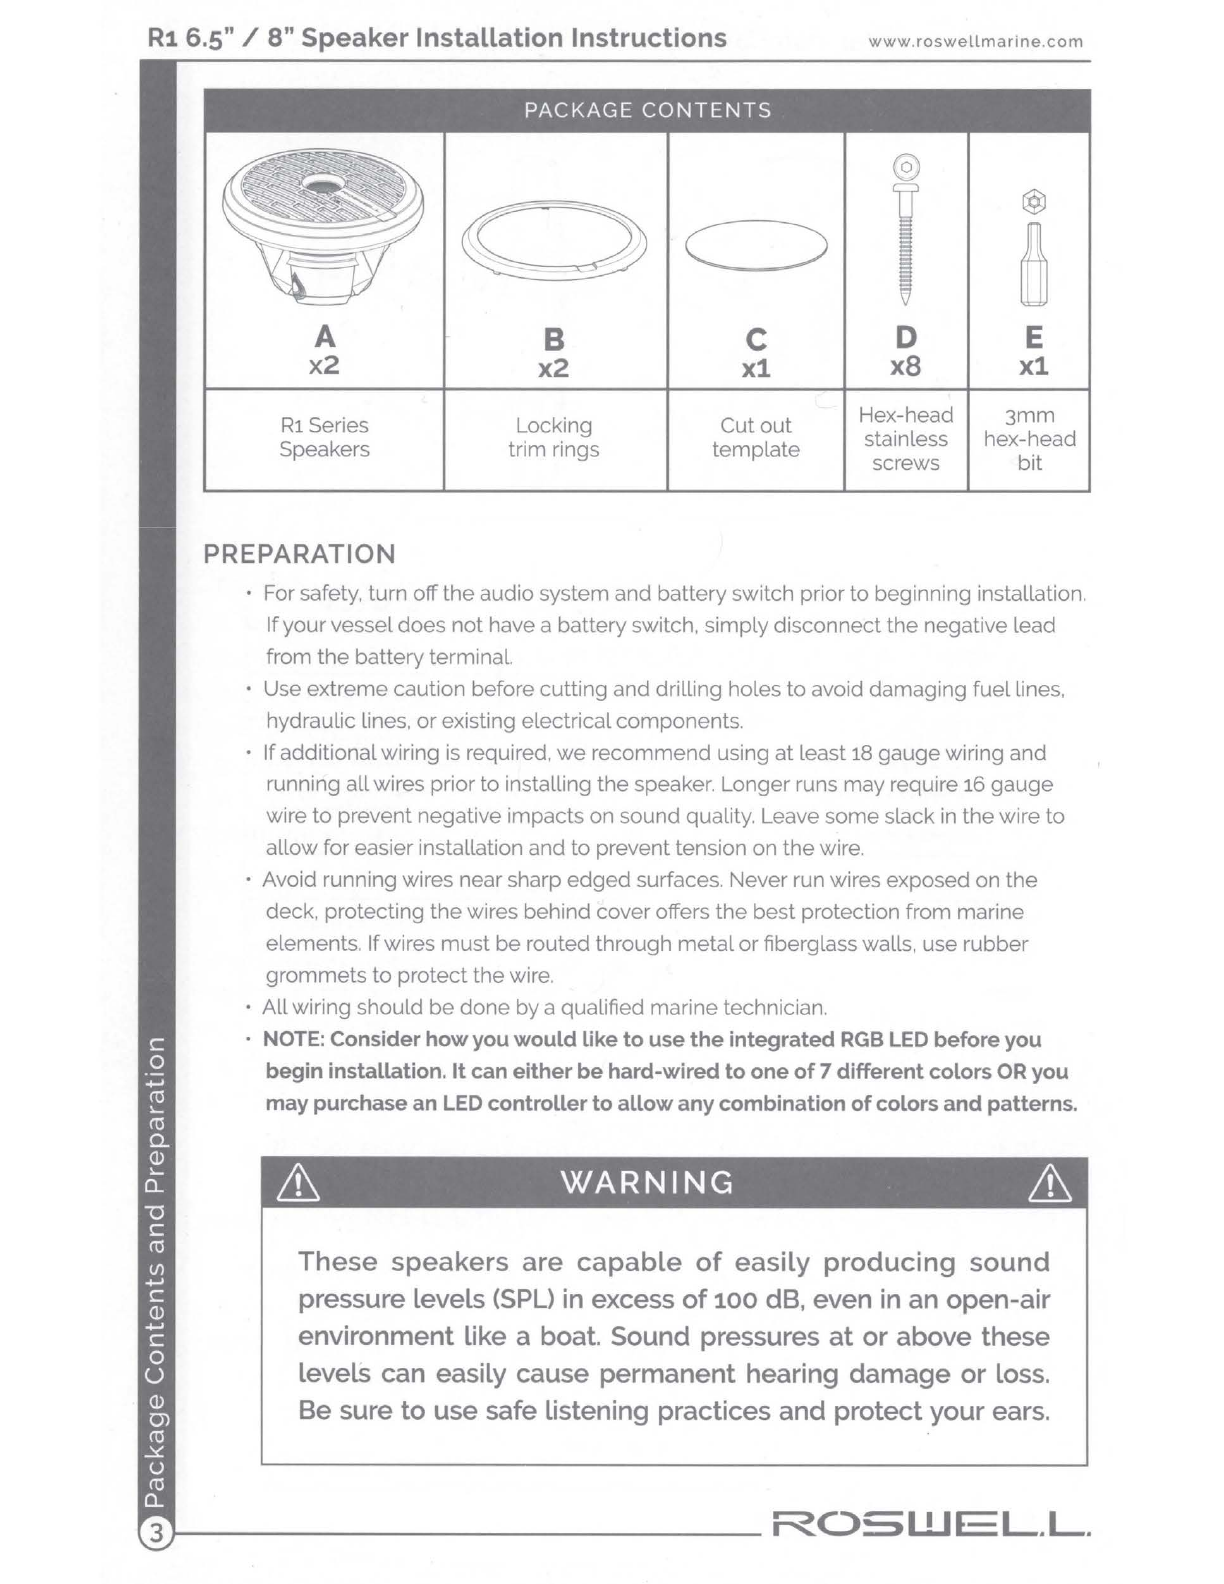
PACKAGE
CONTENTS
@
~
i @
~
8
A B C D E
x2 x2
x1
x8 x1
R1
Series Locking Cut
out
Hex-head
3mm
stainless hex-head
Speakers trim rings
template
screws
bit
PREPARATION
For safety, turn off
the
audio system and batteryswitch prior to beginning installation.
If
yourvesseldoes
not
have a battery switch, simplydisconnect
the
negative lead
from
the
battery terminal.
Use extremecaution before cutting and drilling holes to avoid damaging
fuel
lines,
hydraulic lines,
or
existing electricalcomponents.
If
additionalwiring
is
required,
we
recommend using
at
least18 gauge wiring and
running
all
wires priorto installing the speaker. Longerruns mayrequire
16
gauge
wire
to
prevent negative impactson sound quality. Leave
some
slack
in
the
wire
to
allow
for easierinstallation and to preventtension on
the
wire.
· Avoid running wires nearsharp
edged
surfaces. Neverrun wires exposed on
the
deck, protecting
the
wires behind coveroffers the best protection from marine
elements. Ifwires
must
be
routed through
metal
or fiberglass walls, use rubber
grommets
to
protect
the
wire.
• Allwiring should
be
done
by
a qualified marinetechnician.
NOTE: Consider
how
you
would
Like
to
use
the
integrated
RGB
LED
before
you
begin installation.
It
can
either
be
hard-wired to
one
of
7 different colors ORyou
may
purchase
an
LED
controllerto
allow
anycombination
of
colors
and
patterns.
&
WARNING
&
These
speakers are
capable
of
easily producing sound
pressure levels (SPU
in
excess of
100
dB, even
in
an open-air
environment like a boat. Sound pressures
at
or above these
levels can easily cause permanent hearing damage or
loss.
Be sure to use safe listening practices and protect your ears.
1----------------
ROSWEL.L.