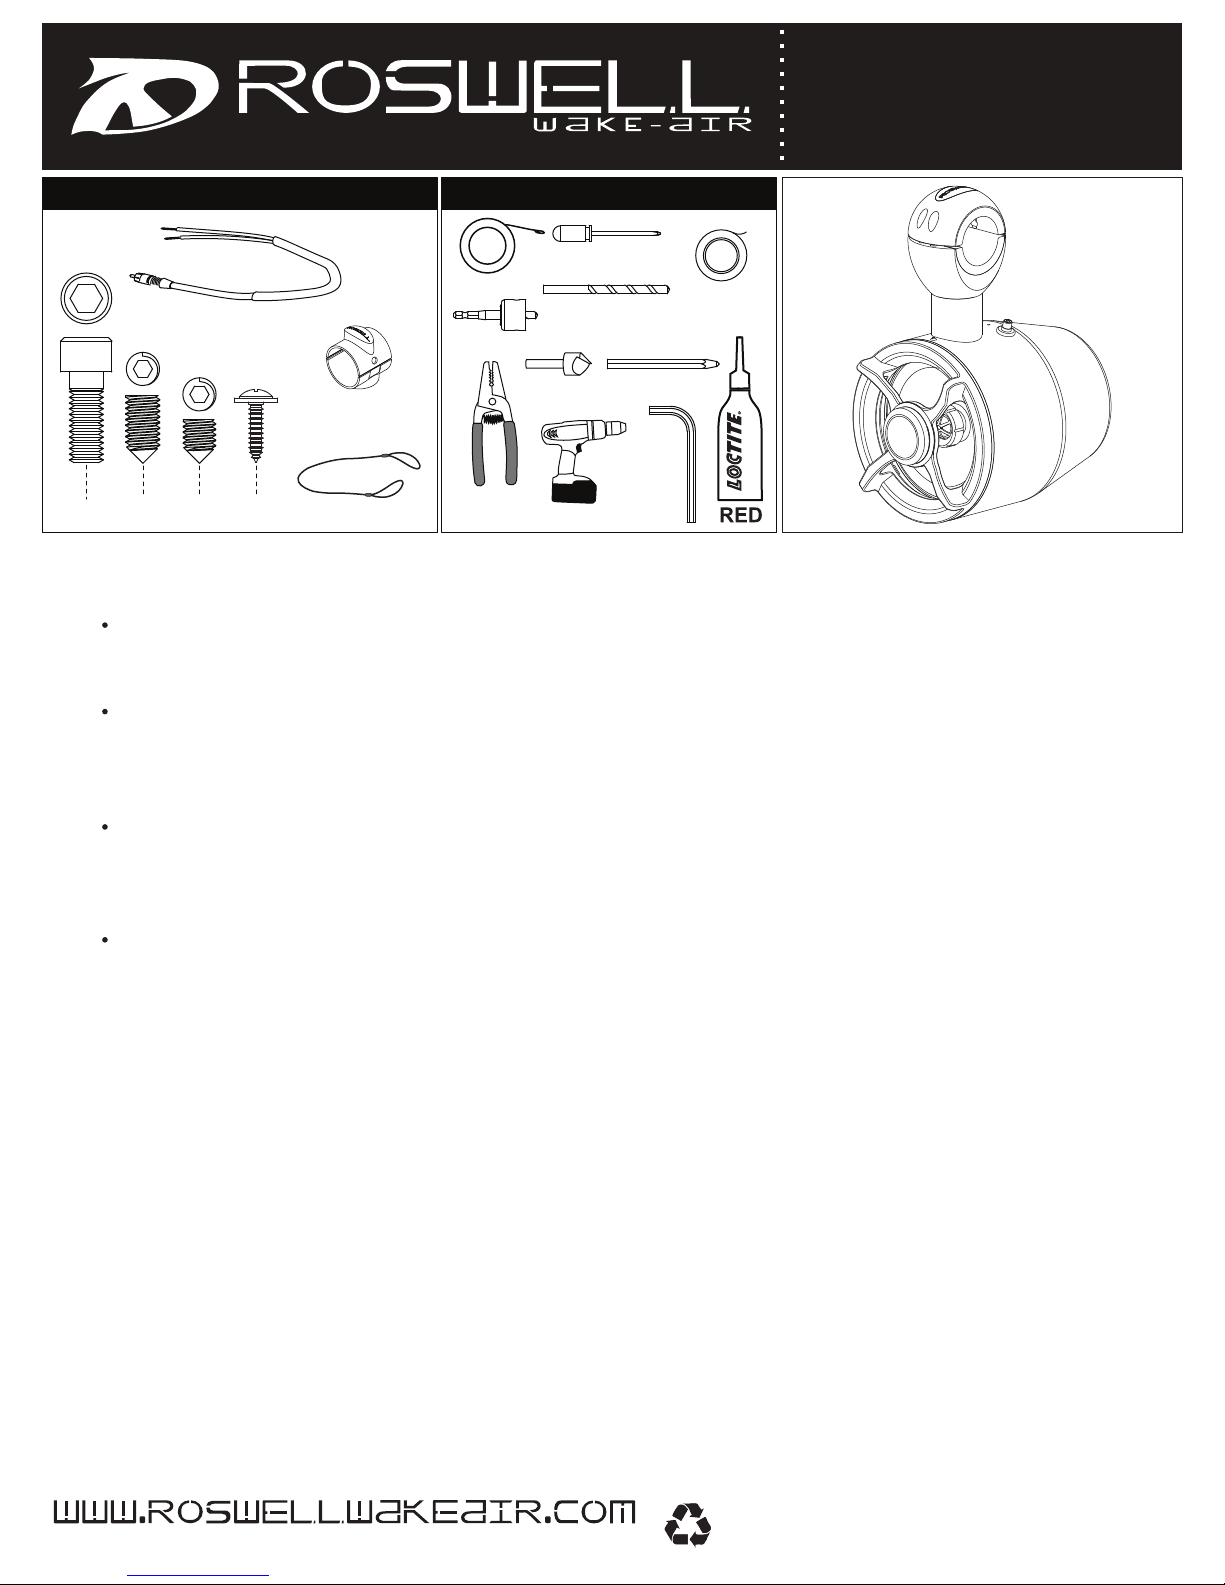
Roswell R6 User manual

R6 Speaker Hardware
Rev. 08-Mar-11 Pg. 1/6
THREADLOCKER
R6 Hanging Speaker
Installation Instructions
Tools Required
If you have any questions please call : 1-780-962-0868
7/64”Drill Bit
9/64”Drill Bit
Drill
Wire Strippers
& Crimps
Countersink
Fish Tape
1.25”Hole Saw
3/16”
5/16”
Allen Key
Phillips
Screw Driver
RCA Wiring Harness x2
NOTES
Tower Wire (not included)
If you did not purchase our Master Wiring Harness you will need to provide 16 gauge speaker wire
and 18 to 16 gauge LED wire for your tower.
Speaker Wire (not included) for wiring inside the boat
You will need to supply a length of positive and negative 16 gauge speaker wire to run from behind
the port side rear tower mount to your AMP or deck. Connections to either an AMP or deck are your
responsibility to provide.
LED Deck Wire (not included)
You will need to supply a length of positive and negative 18 to 16 gauge wire to run from behind the
port side rear tower mount to your power source. We suggest connecting the LED wires to your
boat’s switch panel for a good 12V power source.
Positioning
We suggest mounting your R6 hanging speakers on the rear crossbar of your tower facing
backwards. Many people also position them further to the sides of the tower to have more headroom
when walking around inside the boat.
Wiring for speakers is typically done along the port side as your boat’s battery is easily accessible and
offers more space for your AMP.
*BEFORE WIRING ANYTHING PLEASE MAKE SURE YOUR BOAT, DECK, AND AMP ARE ALL TURNED OFF*
Because each boat and tower setup is different there are no specific instructions for wiring the tower –
generally most people will run the wires internally through their tower. To do this you will need to drill a series
of holes that will allow you to run the wiring harness inside the tower to your desired mounting location. You
can then fish the wires through the tower using a fish tape.
Alternatively some people choose to run their wires outside the tower using zip ties or another attachment
system. The choice is yours.
Note – Be sure to run the master wiring harness up through the tower before making your connections
between the two harnesses, this will prevent having to detach the speakon or RCA connectors. Once you
have fished each wire through the holes, attach the harnesses (we recommend using butt connectors or
solder for a durable connection).
x2
Clamp Inserts
1.9, 2 3/8 - OD x2
x2
Pencil
Safety Lanyard x2
Masking Tape
x6 x2

A
Rev. 08-Mar-11 Pg. 2/6
R6 Hanging Speaker
Installation Instructions
If you have any questions please call : 1-780-962-0868
BC
RCA Wiring Harness Master Wiring Harness
Terminal FunctionWire Colour
1+
1–
2+
2–
3+
3–
4+
4–
Port Speaker +
Port Speaker –
Starboard Speaker+
Starboard Speaker –
(Optional LED +)
(Optional LED –)
(Optional Nav. Light+)
(Optional Nav. Light –)
Red
Black
Orange
Brown
Yellow
Blue
White
Green
Note – You may not end up using all wires in the
master wiring harness, they are there for your future
use and convenience.
• If you are NOT using our MASTER wiring harness you will need to connect the 12” included RCA wiring harness to
your tower wires according to the chart in STEP B.
• If you ARE using our MASTER wiring harness you will need to connect the included RCA wiring harness to the master
wiring harness according to the chart in STEP C.
* If you are using an Area 52 SI Tower (pre-wired) follow STEP B *
Port RCA
Starboard RCA
Function
Port Speaker +
Port Speaker –
Function
Stbd Speaker +
Stbd Speaker –
Wire Colour
Red
Black
Wire Colour
Red
Black
Crimp
Red Spk + Black Spk –
Port Starboard
Crimp
Red Spk + Black Spk –

HI
Rev. 08-Mar-11 Pg. 3/6
R6 Hanging Speaker
Installation Instructions
If you have any questions please call : 1-780-962-0868
J
Begin by marking the area on the deck you wish to
drill, making sure the lip of the female speakon
connector will not touch the mount.
1) Carefully drill the pilot hole. 2) Just before the hole
saw comes into contact with the gel coat run the drill in
reverse while slowly allowing the blade to contact the
deck (this will help protect the gel coat from cracking).
K
NOTES
* A CERTIFIED MARINE ELECTRICIAN IS REQUIRED FOR THE INSTALLATION INSIDE THE BOAT *
Included with your MASTER Wiring Harness is an 8-pole Female Speakon Connector, 4 5/36” screws, and 8
Sta-Kon connectors. To install the Female Speakon Connector to the deck the installer will need to drill a hole
using a 1.25” hole saw through the deck of the boat. The hole should be positioned 2” to 4” aft or behind the
rear tower mounts.
Note – Before drilling check inside the gunwales of the
boat to ensure you will not be drilling into any electrical
wires or cables!
3) Once the hole saw passes through
the gel coat, switch the drill back into
forward and 4) finish drilling the hole.
Insert the female speakon connector into your new
hole. Mark the 4 small screw holes on the speakon
with a pencil and remove it from the hole. Drill the 4
holes you just marked using a 7/64” drill bit.
With your countersink bit (we recommend 1/2”),
carefully countersink each hole—do not go past the
gel coat layer (this is to again help prevent the gel coat
from cracking).
2-4” Female Speakon
Connector
Lip
Flat Tabs
Reverse
Forward
1) 2)
3) 4)
1.25”
7/64” 1/2” Do not go past gel
coat layer

LM
Rev. 08-Mar-11 Pg. 4/6
R6 Hanging Speaker
Installation Instructions
If you have any questions please call : 1-780-962-0868
Attach 4 Sta-Kon connectors to one end of your 18-16
gauge wires (inside the boat deck).
Insert the ends of the wire (with the Sta-Kon
connectors) through the 1.25” hole.
O
Connect these Sta-Kon connectors to the corresponding
terminals (Flat Tabs) on the female speakon connector
using the chart below.
Using 4 5/36” screws fasten the female speakon
connector to the boat deck.
Sta-Kon Connectors
Female Speakon Terminals
Terminal FunctionWire Colour
1+
1 -
2+
2 -
3+
3 -
4+
4 -
Port Speaker +
Port Speaker -
Starboard Speaker+
Starboard Speaker -
(Op. LEDs +)
(Op. LEDs -)
(Op. Nav. Light+)
(Op. Nav. Light -)
Red
Black
Orange
Brown
Yellow
Blue
White
Green
PRun the speaker wires to your AMP or deck and
connect. Run the two power wires to your chosen
power source.
NOnce the wires are connected to the terminals, run a
bead of silicone caulking around the edge of the
speakon hole and a dab on each screw hole. Place
the female speakon connector back into its hole.

Loop the safety lanyard over the tower next to the
speaker clamp.
3/16”
THREADLOCKER
QR
Rev. 08-Mar-11 Pg. 5/6
R6 Hanging Speaker
Installation Instructions
If you have any questions please call : 1-780-962-0868
S
Insert the internal rotational disk at the desired angle
inside the clamp. The internal disk will rotate through
each position for perfect alignment.
Place the clamp on the speaker neck, apply RED
Loctite to 3 clamp bolts and fasten clamp to speaker.
T
Select the appropriate clamp inserts* for your tower,
for the 2 3/8” clamp inserts use the shorter set screws.
Apply RED Loctite to the two clamp bolts and set screw.
Holding the speaker in the desired position, place the clamp
around the tower tubing and close. Replace hardware and
tighten.
UV
Note - To ensure tight fit use the correct plastic clamp inserts
and set screws.
*You will have two sets of clamp inserts and two set screws
remaining after installation. Keep for future use or recycle.
5/16”
x2
x2
With your stereo/amp switched off, 1) plug the RCA
jacks into the speakers, 2) then insert the male
speakon into the female on the deck, and twist
clockwise to engage.
THREADLOCKER
Rotational Disc
x6
2 3/8”1.9”
2)1) TOWER

WX
Rev. 08-Mar-11 Pg. 6/6
R6 Hanging Speaker
Installation Instructions
If you have any questions please call : 1-780-962-0868
Y
Feed one end of the lanyard through the other end. Insert the screw through the washer and lanyard loop.
Using a Philips head screwdriver, securely attach the lanyard to the small hole on the speaker between the two RCA
jacks. Do not overtighten.
TOWER TOWER
x2
Other Roswell Speakers manuals

Roswell
Roswell Cobalt Boats R1 Setup guide

Roswell
Roswell C920-1902 User manual

Roswell
Roswell Cobalt Boats R1 User manual

Roswell
Roswell Cobalt Boats R1 Setup guide

Roswell
Roswell Cobalt Boats R1 Setup guide

Roswell
Roswell Centurion Series Setup guide

Roswell
Roswell Moomba User manual

Roswell
Roswell Nighthawk F65 User manual