EN
OM1606 Rev 0 4
WARNINGS!
SAFETY INFORMATION
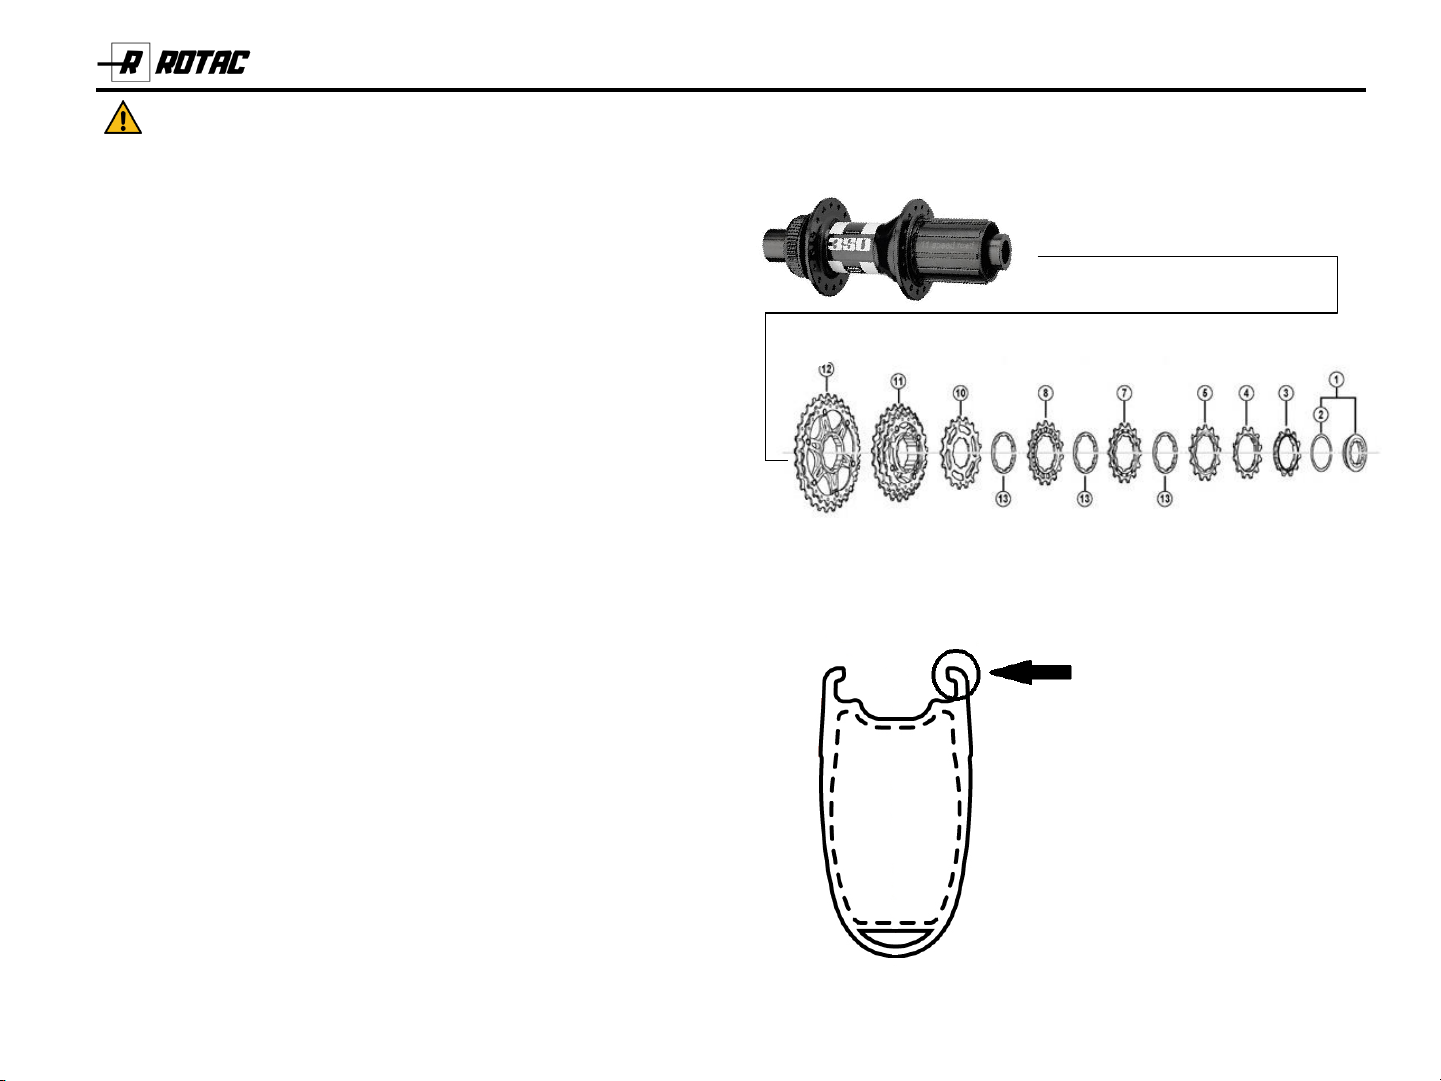
Wheel modification
Do not modify or make changes to wheels. Wheelsets are
manufactured and tested using approved components eg,
hubs, rims, spokes, spoke nipples, valves, specific tyre type.
Changing or substituting any of these parts can result in
damage to the wheel assembly leading to an accident and
voiding of warranties.
Foreign objects
Do not ride over sticks or debris (foreign objects). Foreign
objects can be kicked up, enter the spokes of the front
wheel, and be swept around and either break the fork or
stop the wheel. Riding can be littered with a great variety of
debris such as sticks, branches, auto parts and trash. Scan
ahead and if you see debris avoid as much as possible.
Before moving from your predictable path of travel, look
over your shoulder to be sure you can do so safely. If you are
riding with a group and at the front, warn rear riders and
point out debris.
Storage
Clean wheels to remove contaminants and release air
pressure before storage. Store in cool, dry areas and protect
from incidental damages during storage and from dirt
accumulation. Do not hang wheels from hooks.
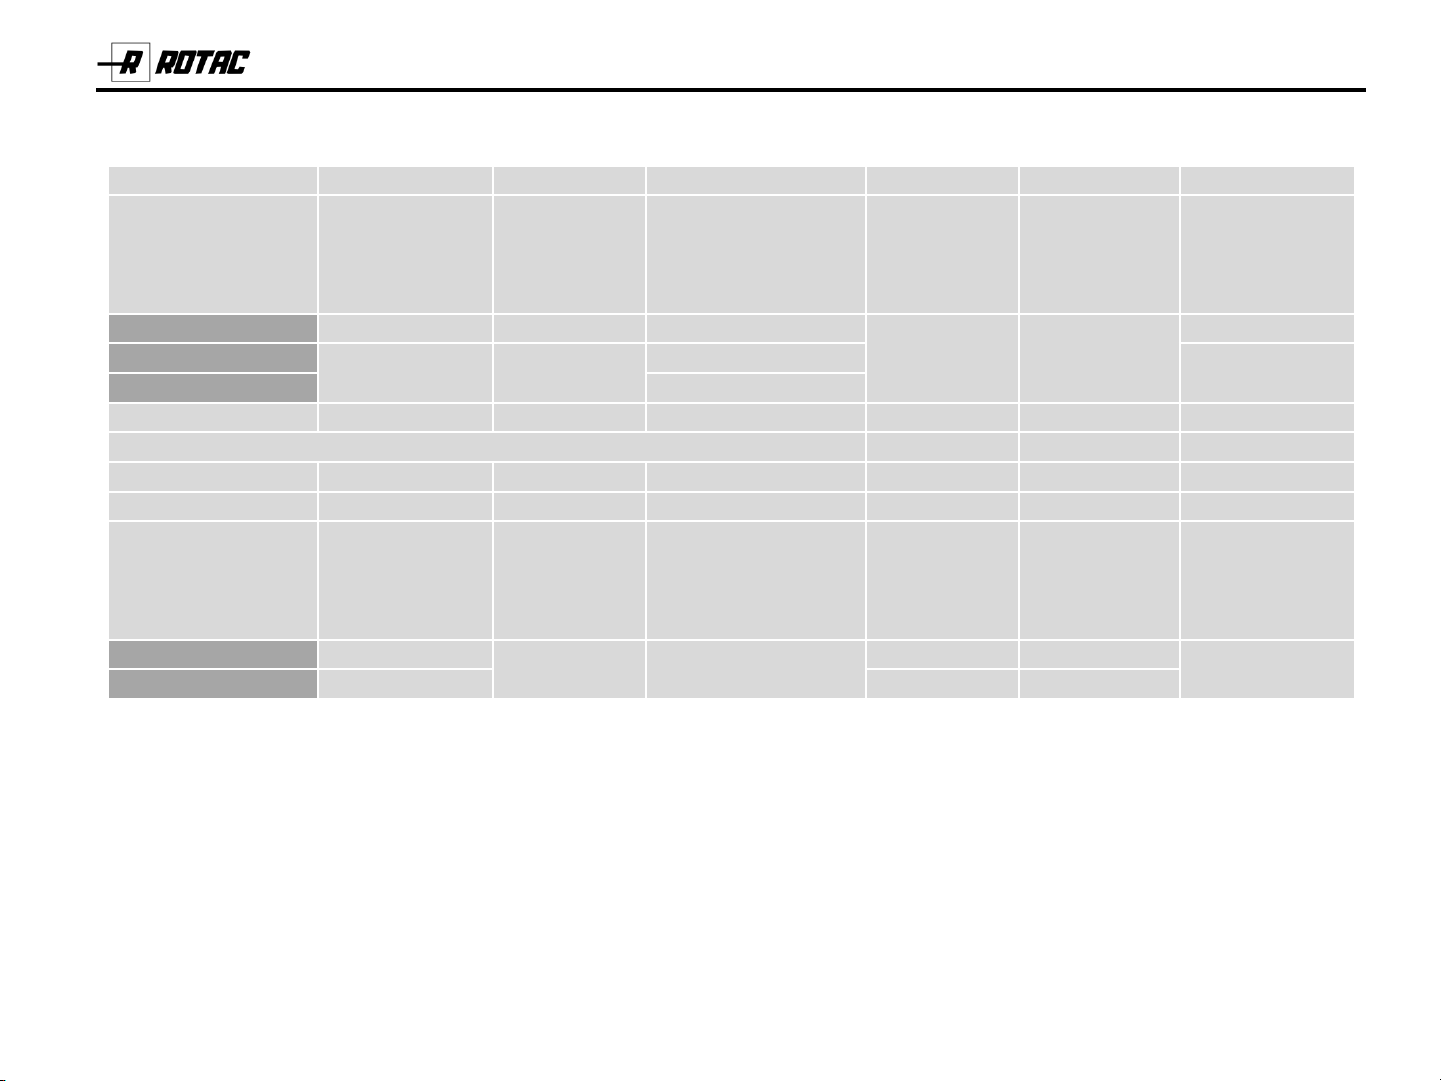
Tire Size
See “Technical Specifications”in this manual for the tire size
range applicable to your model wheel. Mounting the wrong
size tires can result in the tires hitting the fork or frame
when riding. If this happens, you can lose control of your
bike and you can be thrown off. The actual measured size of
a tire may be different than its sidewall marking from various
tire manufacturer. Follow the specified tire clearance
recommendations of the frame manufacturer. Each time you
mount a new tire, take the time to inspect the actual
clearance between the rotating tire and all parts of the
frame. The U.S. Consumer Product Safety Commission
(CPSC) requires at least 1/16”(1.6 mm) tire clearance from
any part of the bike. Allowing for lateral rim flex and a wheel
or rim that is out of-true will likely mean choosing a rear tire
that provides even more clearance than the CPSC
recommends. To measure clearance: Inflate tire to operating
air pressure. Measure the space between the tire and frame.
Take measurement along the full length of possible
interference. If the measured clearance is less than specified,
the tire is not compatible and must not be used.
Transporting
Protect the wheels from damage during storage. Do not use
a clamp on any part of the wheel rim, spokes, or hubs. When
transporting on an automobile rack, make sure wheels are
not within 18”of the hot exhaust pipe.