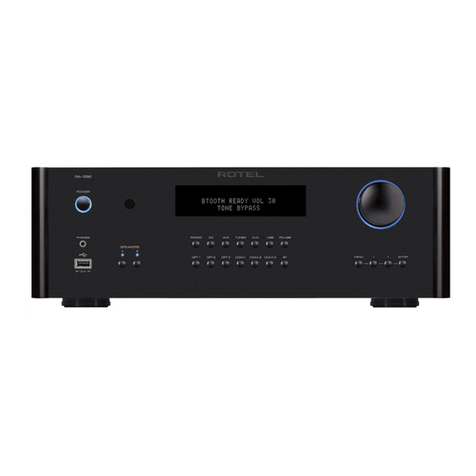
Rotel RA-05 SE User manual

RA-05 ML - c.indd, Spread 1 of 26 - Pages (52, 1) 5/11/06 9:43 AM
The Rotel Co. Ltd.(洛得有限公司)
10-10 Shinsen-Cho
Shibuya-Ku
Tokyo 150-0045
Japan
电话: +81 3-5458-5325
传真: +81 3-5458-5310
Rotel of America(美洲洛得)
54 Concord Street
North Reading, MA 01864-2699
USA
电话: +1 978-664-3820
传真: +1 978-664-4109
Rotel Europe(欧洲洛得)
Dale Road
Worthing, West Sussex BN11 2BH
England
电话: +44 (0)1903 221761
传真: +44 (0)1903 221525
Rotel Deutschland(德国洛得)
Kleine Heide 12
D-33790 Halle/Westf.
Germany
电话: +49 05201-87170
传真: +49 05201-73370
E-Mail: [email protected]
www.rotel-hifi.de
www.rotel.com
English • 中国语
使用说明书
立体声合并式放大器
Vertrieb: B&W Group Germany GmbH

251
RA-05 Stereo Integrated Amplifier
Important Safety Instructions
WARNING: There are no user serviceable parts inside. Refer
all servicing to qualified service personnel.
WARNING: To reduce the risk of fire or electric shock, be
sure that the apparatus shall not be exposed to dripping
or splashing and that no objects filled with liquids, such as
vases, shall be placed on the apparatus.
Do not allow foreign objects to get into the enclosure. If the
unit is exposed to moisture, or a foreign object gets into the
enclosure, immediately disconnect the power cord from the
wall. Take the unit to a qualified service person for inspec-
tion and necessary repairs.
Read all the instructions before connecting or operating the component.
Keep this manual so you can refer to these safety instructions.
Heed all warnings and safety information in these instructions and on the
product itself. Follow all operating instructions.
Clean the enclosure only with a dry cloth or a vacuum cleaner.
You must allow 10 cm or 4 inches of unobstructed clearance
around the unit. Do not place the unit on a bed, sofa, rug, or similar
surface that could block the ventilation slots. If the component is placed in
a bookcase or cabinet, there must be ventilation of the cabinet to allow
proper cooling.
Keep the component away from radiators, heat registers, stoves, or any
other appliance that produces heat.
The unit must be connected to a power supply only of the type and voltage
specified on the rear panel of the unit.
Connect the component to the power outlet only with the supplied
power supply cable or an exact equivalent. Do not modify the
supplied cable in any way. Do not attempt to defeat grounding and/or
polarization provisions. Do not use extension cords.
Do not route the power cord where it will be crushed, pinched, bent at severe
angles, exposed to heat, or damaged in any way. Pay particular attention
to the power cord at the plug and where it exits the back of the unit.
The power cord should be unplugged from the wall outlet if the unit is to
be left unused for a long period of time.
Immediately stop using the component and have it inspected and/or serviced
by a qualified service agency if:
• The power supply cord or plug has been damaged.
• Objects have fallen or liquid has been spilled into the unit.
• The unit has been exposed to rain.
• The unit shows signs of improper operation
• The unit has been dropped or damaged in any way
Please use Class 2 Wiring when connecting the speaker terminals of the unit
to ensure proper insulation and minimize the risk of electrical shock.
Place the unit on a fixed, level surface strong enough to
support its weight. Do not place it on a moveable cart
that could tip over.
This symbol means that this unit is double insulated. An earth con-
nection is not required.
Rotel products are designed to comply with international di-
rectives on the Restriction of Hazardous Substances (RoHS) in
electrical and electronic equipment and the disposal of Waste
Electrical and Electronic Equipment (WEEE). The crossed
wheelie bin symbol indicates compliance and that the products
must be appropriately recycled or processed in accordance
with these directives.
12-В триггерные выходы \
Некоторые аудио компоненты могут
автоматически включаться при получении
12-Вольтового “триггерного” сигнала. Каждый
из выходов RA-05 “12-V TRIGGER OUT”
обеспечивает такой сигнал. Совместимые
компоненты подсоединяются к этим выходам
кабелями с 3,5-мм мини-штекером. Когда RA-05
находится в состоянии готовности, триггерный
сигнал прерывается и подсоединенные
компоненты выключаются.
Схемы защиты 3
Этот усилитель оснащен схемами защиты от
перегрузки по току и от перегрева, которые
предохраняют его от повреждения в случае
экстремальных или неправильных условий
эксплуатации. Схемы защиты независимы
от сигнального тракта и никак не влияют на
качество звучания. Фактически они следят
за температурой выходных транзисторов и
отключают усилитель, если она превышает
безопасные пределы.
Скорее всего, вам ни разу не удастся наблюдать
срабатывание этих схем защиты. Однако как
только возникнет опасная ситуация, усилитель
отключится и на его передней панели загорится
индикатор (светодиод).
Если это случилось, выключите усилитель,
дайте ему остыть в течение нескольких минут,
а затем попытайтесь выявить и устранить
причину, которая могла вызвать срабатывание
схем защиты. При повторном включении
усилителя схема защиты автоматически
перезапустится и светодиод погаснет.
В большинстве случаев защита срабатывает из-за
таких неисправностей, как короткое замыкание
колоночных проводов или же недостаточная
вентиляция (доступ воздуха), приводящая в
перегреву аппарата. В очень редких случаях
ее срабатывание может быть вызвано слишком
низким импедансом колонок или же чересчур
реактивным характером нагрузки.
Если защита срабатывает повторно, и вы не
можете обнаружить и устранить причину этого,
немедленно свяжитесь с вашим авторизованным
дилером Rotel и он окажет вам помощь в
устранении неисправности.
Технические характеристики
Номинальная выходная мощность
(20 Гц – 20 кГц, <0,03%, на 8 Ом) 40 Вт/канал
Общие гармонические искажения (20 Гц – 20 кГц) <0,03% при,
1/2 мощности или 1 Вт номинальной мощности
Интермодуляционные искажения (60 Гц : 7 кГц, 4:1) <0,03% при
1/2 мощности или 1 Вт номинальной мощности
Частотная характеристика
Вход Phono 20 Гц – 15 кГц, +0,3 дБ
Линейные входы 10 Гц – 40 кГц, +1 дБ
Демпинг-фактор (20 Гц – 20 кГц, 8 Ом) 180
Чувствительность/сопротивление входов
Вход Phono 2,5 мВ/ 47 кОм
Линейные входы 150 мВ/ 24 кОм
Перегрузка входов
Вход Phono 180 мВ
Линейные входы 5 В
Уровень/импеданс выхода предусилителя 1 В/ 470 Ом
Регуляторы тембра Bass/Treble ±6 дБ на 100 Гц/ 10 кГц
Отношение сигнал/шум (взвешенное по кривой “А”)
Вход Phono 80 дВ
Линейные входы 100 дВ
Требования к электропитанию 230 В, 50 Гц
Потребляемая мощность 220 Вт
Габариты (ШхВхГ) 437 х 72 х 342 мм
Высота панели 60 мм
Масса нетто 5,9 кг
Все технические характеристики соответствуют действительности на дату издания.
Компания Rotel оставляет за собой право модернизировать изделия без предварительного уведомления.
Диагностика и устранение
неполадок
Большинство неполадок в аудиосистемах
происходит из-за неправильных соединений или
неправильных установок органов управления.
Если, несмотря на тщательную проверку
соединений и установок, Вы не можете добиться
звука от RА-05, просмотрите представленный
ниже список.
Не светится индикатор питания
Когда кнопка питания RA-05 нажата, и вилка
его шнура питания вставлена в сетевую розетку,
должен светиться индикатор питания. Если он
не светится, проверьте наличие напряжения
в сетевой розетке другим электроприбором,
например, лампой. Убедитесь, что розетка не
контролируется каким-либо выключателем,
который в данный момент выключен.
Замена предохранителя
Если другой электроприбор, подключенный к той
же розетке, работает, а RА-05 – нет, возможно,
перегорел внутренний плавкий предохранитель.
В этом случае обратитесь в авторизованную
сервисную службу Rotel.
Нет звука
Проверьте кабели, подсоединяющие вход RA-05
к источнику сигнала; убедитесь, что селектор
входов установлен в нужное положение.
Проверьте также подсоединение RA-05 к
колонкам.
Русский
RA-05 ML - c.indd, Spread 2 of 26 - Pages (2, 51) 5/11/06 9:43 AM

警告: 连接前请关掉本装置和整个系统的电源!
图1:控制和连接 图2:信号输入和音箱输出连接

警告: 连接前请关掉本装置和整个系统的电源!
图1:控制和连接 图2:信号输入和音箱输出连接

48 5
-37>54 I6>2:7S6577585
=H4:9?376J 6
B9%/*('<*/'()%)+$9"')%N($#($/%;9'
/)6%$&;'2)/"$%1)*%%*6*'8'($<&9%)='
*"''8&,"$9'K9':$6*($?)<$-"9'96*,')%$@9'
2)/"$%1)*%%*9'8'($<&9%)9'%9'E829"'
($E*"$",9'K$'($E*"*/'*/*E%*/",'/9%/*($'
+*?9"'"$#?9''*<&)=",'=(#)-'/<9",'*/*E9%%*'
/*&%9@%;-B')'%9#*"*(;9'")';')/#8//"<9%%*6*'
*/<9.9%)=,'%$'()+9(,'6$&*69%*<;9'&$+';,'
:%$@)"9&,%$='@$/",'/'9#"($'#*"*(;5'
%$5*2)"/='<')%N($#($/%*+'2)$'$:*%99'
R$#?9'2)/"$%1)*%%*9'8'($<&9%)9'
:$"(82%=9"/=''()')/"*.9%))'A&9+9%"*<'
')"$%)=''8&,"$9
"3F5254;3 H43I5>2545T75>26
*%!N1O0"!1: !*'):E9?$%)9''*<(9?29%)='
#*+'*%9%"*<'/)/"9+;,'</9''*2/*92)%9%)='
)'*"/*92)%9%)=''(*):<*2)"9''()'
<;#&>@9%%*+'')"$%))9' G(9?29'@9+'
<#&>@$",'')"$%)9,'8E92)"9/,,'@"*'/*92)%9%)='
<;'*&%9%;''($<)&,%*')'%$29?%*9'4/*E*9'
<%)+$%)9'829&)"9'#*&*%*@%;+''(*<*2$+9'
K9'2*&?%*'*/"$<$",/='D($:&*5+$@9%%;5C'
?)&,' #*"*(;9'+*68"':$+#%8",/='+9?28'
/*E*-')&)'%$'#*('8/9
G*?$&8-/"$,'<%)+$"9&,%*''(*@")"9'2$%%*9'
(8#*<*2/"<*9'F/&)'<*:%)#%8"'<*'(*/;,'
*E($")"9/,'#'$<"*():*<$%%*+8'2)&9(8'
<=>?@9'!/9'+;,'/*"(82%)#)'<=>?@,'6*"*<;'
*"<9")",'%$'!$D)'<*'(*/;')''()%=",'!$D)'
:$+9@$%)=9
B*5($%)"9'#*(*E#8')'</9'*/"$&,%;9'
8'$#*<*@%;9'+$"9()$&;,'@"*E;'<'2$&,%9-D9+'
)+9",'<*:+*?%*/",'<*/'*&,:*<$",/=')+)9'
R($%/'*(")(*<#$'<I;)2'<%9':$<*2/#*-'
8'$#*<#)'+*?9"'<;:<$",'/9(,9:%;9'
'*<(9?29%)='8/)&)"9&=9
4E=:$"9&,%*'/*5($%)"9'@9#')'6$($%")-%;-'
"$ &*%9' 7"*'6& $<%;9 '2* #8 +9%"; ,'
82*/"*<9(=>.)9'2$"8''*#8'#),' <'
/&8@$9'*E($.9%)=':$'6$($%")-%;+'
*E/&8?)<$%)9+9
%:CB3D3763
H$#')'</9'#*+'*%9%";,'*E($E$";<$>.)9'
/&$E;9'A&9#"()@9/#)9'/)6%$&;,'<A;)2'
'*2<9(?9%'<&)=%)>'*#(8?$>.9-'/(92;'
)'2(86*6*'*E*(82*<$%)=9'B"$($-"9/,'%9'
/"$<)",'<A;)2'%$'2(86)9'#*+'*%9%";'
)'%9 '' ( * # &$ 2 ;< $ " , '/)6 % $& ,%; 9'
#$E9&)'(=2*+'/*'D%8($+)'')"$%)=9'
7"*'/% ) :) "'<9 (* = "% */ " ,'' * +9 59
!''(*19//9'%*(+$&,%*-'($E*";'<A;)2'<;29&=9"'
"9'&*9'K9':$6*($?)<$-"9'<9%")&=1)*%%;9'
*"<9(/")=9'4/"$<,"9'%9'+9%99'1)'/+'/<*E*2%*6*'
'(*/"($%/"<$'<*#(86'#*('8/$')'*E9/'9@,"9'
2*/"$"*@%;-'<*:285**E+9%9
':K3?6
T%8(;'')"$%)=,'1)N(*<;9')'$%$&*6*<;9'
$82)*'#$E9&)'2*&?%;'%$5*2)",/='#$#'
+*?%*'2$&,D9'2(86'*"'2(86$9'!'A"*+'
/&8@$9'+9%,D9'D$%/*<,'@"*'$%$&*6*<;-'
/)6%$&'E829"':$6(=:%9%'D8+*+')''*+95$+)'
*"'/)&*<;5')'1)N(*<;5'#$E9&9-9'
B'"*-'?9'19&,>')/'*&,:8-"9'"*&,#*'
<;/*#*#$@9/"<9%%;9'A#($%)(*<$%%;9'
#$E9&)9
*62:763 =>6?623?J
%:CP3B I?J >3239585 M7=4: p
R*#,' '*"(9E&=9+;-' <A;)2' *"'/9"),'
%9'/&)D#*+'<9&)#9'R9+'%9'+9%99,''*'
<*:+*?%*/"),'/&9289"'<#&>@$",'96*''(=+*'
<'2<85#*%"$#"%8>'%$/"9%%8>'(*:9"#89'
K9''*&,:8-"9/,'82&)%)"9&=+)9'U*?%*'
)/'*&,:*<$",'($:<9"<)"9&,'')"$%)='
<;/*#*-'+*.%*/"),'9/&)'*%':)'/"9%%$='
(*:9"#$7'/'*/*E%;'<;29(?$",'/8++$(%;-'
"*#''*"(9E&9%)='8/)&)"9&=')'2(86)5'
'*2#&>@9%%;5'#'%9+8'8/"(*-/"<9
<I;)2'%$/"(*9%'%$':$<*29'<'/**"<9"/"<))'
/*'/"$%2$("$+)'A&9#"()@9/#*-'/9")'
<'!$D9- '/"($% 99' H*% N)68( $1) ='
A&9#"(*')"$%)='*E*:%$@9%$'%$':$2%9-'
'$%9&)'$''$($"$9
*%!N1O0"!1: F/&)'!;''9(9929"9'<'
2(868>'/"($%8,' +*?%*''()/'*/*E)",'
8 / ) & ) "9 & , '#'2 ( 8 6 *+ 8 '/9" 9 <*+ 8'
%$'(=?9%)>9' 42%$#*,' %9'';"$-"9/,'
/29&$",'A"*'/$+)9' 4E($")"9/,'#'
#<$&)N)1)(*<$%%*+8'+$/"9(8')&)'<'
/9(<)/%8>'/&8?E8'<=>?@9
F/&)'!;'%$2*&6*'89:?$9"9'):'2*+$,'
%$'()+9(,'%$'+9/=1,'($:8+%*'E829"'<;%8",'
<)&#)'D%8(*<'')"$%)='8/)&)"9&=')'2(86)5'
#*+'*%9%"*<'/)/"9+;'):'(*:9"*#9
/;F?LE:23?@ H62:76J 2s 6
67I6F:254 H62:76J 1
P"*E;'<#&>@)",'8/)&)"9&,,'%$?+)"9'
#%*'#8'<;#&>@$"9&='')"$%)='2'%$'
'9(92%9-''$%9&)9'V$6*()"/=')%2)#$"*('
')"$%)='19'P"*E;'<;#&>@)",'8/)&)"9&,,'
/%*<$'%$?+)"9'A"8'#%*'#89
H*62$'<;#&>@$"9&,'')"$%)='%$''9(92%9-'
'$% 9&) '%$5 *2) "/= '<''*& *?9 %))'
D<#&>@9%*C,' +*?%*''(*):<*2)",'
'9(9#&>@9%)9'+9?28'<#&>@9%%;+'
/*/"*=%)9+')'/*/"*=%)9+'6*"*<%*/")'
#%*'#*-'d'%$''8&,"99
Q+99"/='<*:+*?%*/",'/)%5(*%%*6*'/'
<A;)('<#&>@9%)=')'<;#&>@9%)='2(86)5'
#*+'*%9%"*<':/+9'($:29&'D1/;!'"()669(%;-'
<;5*2C79'
/A5I; =>6?623?J
(>B. 46>. 2)
*%!N1O0"!1: !*'):E9?$%)9'6(*+#*6*'
D8+$,' %9'()="%*6*'2&='!$/')'!$D)5'
#*&*%*#,' <;#&>@$-"9'')"$%)9'</9-'
/)/"9+;,' '(9?29'@9+''(*):<*2)",'
&>E;9'/*92)%9%)=9
/A5I I?J H45684;9:23?J
84:BH?:>2675F r6 F?3BB:
C:C3B?376J e
G*2/*92)%)"9'#$E9&,'*"''(*)6(;<$"9&='
#'/**"<9"/"<8>.)+'6%9:2$+'INQXQ'
:&9<*+8'd\]U')''($<*+8'<YaNU79'F/&)'8'
'(*)6(;<$"9&='9/",'#&9++$':$:9+&9%)=,'
'*2/*92)%)"9'99'#'#&9++9':$:9+&9%)='
8/)&)"9&=9'7"*'/'*/*E/"<89"'8+9%,D9%)>'
D8+$')''*+959
/A5I; ?673<7585 =4597J t
7"*'<5*2;'[O,'ULX\<,'ALM9'4%)'
'(92%$:%$@9%;'2&=''*2/*92)%9%)='
$%$&*6*<;5'<;5*2*<'[O''(*)6(;<$"9&9-,'
#$//9"%;5'29#,'($2)*">%9(*<')'"9'9
!5*2;'&9<*6*')''($<*6*'#$%$&*<'
'*+9@9%;')'2*&?%;''*2/*92)%=",/='
#'/**"<9"/"<8>.)+'#$%$&$+'#*+'*%9%"$;
)/"*@%)#$9'0%9:2*'&9<*6*'#$%$&$'E9&*9,'
'($<*6*'0'#($/%*99'M&=''*2/*92)%9%)='
)/'*&,:8-"9'<;/*#*#$@9/"<9%%;9'#$E9&)'/*'
D"9#9($+)'<[A9
RA-05 !"#$%&'(!) *+,-.+/0$1,)
About Rotel
A family whose passionate interest in music led
them to manufacture high fidelity components
of uncompromising quality founded Rotel over
40 years ago. Through the years that passion
has remained undiminished and the family goal
of providing exceptional value for audiophiles
and music lovers regardless of their budget, is
shared by all Rotel employees.
The engineers work as a close team, listening
to, and fine tuning each new product until it
reaches their exacting musical standards. They
are free to choose components from around
the world in order to make that product the
best they can. You are likely to find capacitors
from the United Kingdom and Germany, semi
conductors from Japan or the United States,
while toroidal power transformers are manu-
factured in Rotel’s own factory.
Rotel’s reputation for excellence has been
earned through hundreds of good reviews and
awards from the most respected reviewers in
the industry, who listen to music every day.
Their comments keep the company true to its
goal - the pursuit of equipment that is musical,
reliable and affordable.
All of us at Rotel, thank you for buying this
product and hope it will bring you many hours
of enjoyment.
Getting Started
Thank you for purchasing the Rotel RA-05
Stereo Integrated Amplifier. When used in a
high-quality music audio system, it will provide
years of musical enjoyment.
The RA-05 is a full featured, high performance
component. All aspects of the design have been
optimized to retain the full dynamic range and
subtle nuances of your music. The RA-05 has
a highly regulated power supply incorporat-
ing a Rotel custom-designed toroidal power
transformer. This low impedance power supply
has ample power reserves, which enables the
RA-05 to easily reproduce the most demand-
ing audio signals. This type of design is more
expensive to manufacture, but it is better for
the music.
The printed circuit boards (PCB) are designed
with Symmetrical Circuit Traces. This insures that
the precise timing of the music is maintained
and faithfully recreated. The RA-05 circuitry
uses metal film resistors and polystyrene or
polypropylene capacitors in important signal
paths. All aspects of this design have been
examined to ensure the most faithful music
reproduction.
The main functions of the RA-05 are easy to
install and use. If you have experience with
other stereo systems, you shouldn’t find any-
thing perplexing. Simply plug in the associated
components and enjoy.
The RR-AT94 Remote
Control
Some functions can be done with either the front
panel controls, or the supplied RR-AT94 remote
control. When these operations are described,
the call out number for both controls is shown.
For example, you can adjust the volume with
either the front panel Volume control -or
the remote control buttons f.
See the “IR Inputs and Output” section for more
information on ways to expand the IR control
capabilities of your system.
NOTE: Remove the batteries from the
remote control if it will not be used for a
long period of time. Do not leave run down
batteries in the remote control. Exhausted
batteries can leak corrosive chemicals which
will damage the unit.
NOTE: The RR-AT94 can be used to oper-
ate the basic function of other certain other
Rotel components, including Tuners, CD
Players and DVD Players.
To operate a Rotel Tuner —
1) Select the tuner function of the RR-AT94.
2) Press “Power” and “1” (RT-06) or “2”
(RT-940AX).
3) Press the key for Tuner operation.
To operate a Rotel CD Player —
Select the CD function of the RR-AT94
To operate a Rotel DVD Player —
Select the AUX 1 function of the RR-AT94.
English
Contents
Figure 1: Controls and Connections 3
Figure 2: Signal Input and
Speaker Output Connections 4
Important Safety Instructions ..................2
About Rotel ............................................ 5
Getting Started.......................................5
The RR-AT94 Remote Control..................... 5
Remote Sensor 6 6
A Few Precautions 6
Placement 6
Cables 6
AC Power and Control ............................6
AC Power Input p6
Power Switch 2s and
Power Indicator 1 6
Input Signal Connections.......................... 7
Phono Input rand Ground Connection e7
Line Level Inputs t 7
Recorder Connections y........................ 7
Preamp Outputs u................................7
Speaker Outputs io
Speaker Selector Switch 7.....................7
Speaker Selection 7
Speaker Wire Selection 7
Polarity and Phasing 7
Speaker Connection 7
Phones Output 4..................................8
Media Player 5....................................8
Audio Controls ........................................8
Volume Control -f 8
Balance Control =8
Tone On/Off Switch 08
Bass and Treble Controls 89 8
Function Control wd 8
Monitor Control q8
Mute Control a8
IR Inputs and Outputs .............................8
External Remote Input [8
IR Output ]8
12 Volt Trigger Outlet \.......................9
Protection Indicator 3 9
Troubleshooting.......................................9
Power Indicator Is Not Lit 9
Fuse Replacement 9
No Sound 9
Specifications .........................................9

647
Remote Sensor 6
The Remote Sensor picks up the infrared
signals from the remote control. Do not cover
or block the sensor. It must be unobstructed or
the remote control will not work properly. The
operation of the Remote Sensor can also be
affected if it is exposed to bright light, particu-
larly sunlight. Certain types of lighting, such
as halogen lights, that emit a fair amount of
infrared light, can also interfere with proper
operation. In addition remote control functions
may not work reliably if the batteries in the
RR-AT94 are weak.
A Few Precautions
WARNING: To avoid potential damage to
your system, turn off ALL the components in
the system when connecting or disconnect-
ing the loudspeakers or any associated com-
ponents. Do not turn the system components
back on until you are sure all the connec-
tions are correct and secure. Pay particular
attention to the speaker wires. There must
be no loose strands that could contact the
other speaker wires, or the chassis of the
amplifier.
Please read this manual carefully. It provides
information on how to incorporate the RA-05
into your system as well as information that
will help you get optimum sound performance.
Please contact your authorized Rotel dealer
for answers to any questions you might have.
In addition, all of us at Rotel welcome your
questions and comments.
Save the RA-05 shipping carton and all en-
closed packing material for future use. Shipping
or moving the RA-05 in anything other than
the original packing material may result in
severe damage to your amplifier.
Fill out and send in the owner’s registration
card packed with the RA-05. Also be sure
to keep the original sales receipt. It is your
best record of the date of purchase, which
you will need in the event warranty service is
ever required.
Placement
Like all audio components that handle low-
level signals, the RA-05 can be affected by
its environment. Avoid placing the RA-05 on
top of other components. Also avoid routing
audio signal cables near power cords. This
will minimize the chance it will pick up hum
or interference.
The RA-05 generates heat as part of its normal
operation. The heat sinks and ventilation open-
ings in the amplifier are designed to dissipate
this heat. The ventilation slots in the top cover
must be open. There should be 10 cm (4 inches)
of clearance around the chassis, and reason-
able airflow through the installation location,
to prevent the amplifier from overheating.
Remember the weight of the amplifier when
you select an installation location. Make sure
that the shelf or cabinet can support it. We
recommend installing the RA-05 in furniture
designed to house audio components. Such
furniture is designed to reduce or suppress
vibration which can adversely affect sound
quality. Ask your authorized Rotel dealer for
advice about component furniture and proper
installation of audio components.
Cables
Be sure to keep the power cords, digital signal
cables and regular audio signal cables in
your installation away from each other. This
will minimize the chance of the regular audio
signal cables picking up noise or interference
from the power cords or digital cables. Using
only high quality, shielded cables will also help
to prevent noise or interference from degrad-
ing the sound quality of your system. If you
have any questions see your authorized Rotel
dealer for advice about the best cable to use
with your system.
AC Power and Control
AC Power Input p
The RA-05 does not draw high levels of current
from the power outlet. However, whenever pos-
sible, it should be plugged directly into a 2-pin
polarized wall outlet. Do not use an extension
cord. A heavy duty multi-tap power outlet strip
may be used if it (and the wall outlet) can handle
the current demanded by the RA-05 and all
the other components connected to it.
Your RA-05 is configured at the factory for the
proper AC line voltage in the country where
you purchased it (either 120 volts AC or 230
volts AC with a line frequency of either 50 Hz
or 60 Hz). The AC line configuration is noted
on a decal on the back panel.
NOTE: Should you move your RA-05
amplifier to another country, it is possible
to reconfigure it for use on a different line
voltage. Do not attempt to perform this
conversion yourself. Opening the enclosure
of the RA-05 exposes you to dangerous
voltages. Consult a qualified service person
or the Rotel factory service department for
information.
If you are going to be away from home for an
extended period of time such as a month-long
vacation, it is a sensible precaution to unplug
your amplifier (as well as other audio and video
components) while you are away.
Power Switch 2s and
Power Indicator 1
Press the front panel Power Switch button, to
turn the RA-05 on. The Power Indicator light is
illuminated when the RA-05 is on. Press Power
Switch button again to turn the RA-05 off.
Once the RA-05 has been turned on with the
front panel power switch, it can be switched
between normal operating mode and standby
mode with the Power button son the RR-AT94
remote control.
See the “12V Trigger Outlet” section for more
information on ways you may be able to turn
on and off other components in your system
along with the RA-05.
RA-05 Stereo Integrated Amplifier
#5I34T:763
%6>9!65!+48:7;!=H4:9?376J!6!4:CP3B;!......47
%6>9!75!*5I>53I673763!6>25E76F59!>687:?:!6!
:F=>26E3>F6A!>6>23B!...............................47
/:T7;3!67>24=FS66!H5!K3C5H:>75>26 ........46
+!F5BH:766!0:;<=! 47
*349;3!M:86!47
*=?@2!G&!008+.>? ............................. 47
M$"@)#''8&,"$'MJ'648
U9(;''(92*/"*(*?%*/")'47
S$:+9.9%)9 48
H$E9&)'' ' 48
*62:763!=>6?623?J!...........................48
S$:L9+'2&='/9"9<*6*'D%8($ p48
!;#&>@$"9&,'')"$%)=''2s )'
Q%2)#$"*('')"$%)='148
*5I>53I673763!9A5I7;A!>687:?59!! 48
C*%*'<5*2'r)':$:9+&9%)9'e48
O)%9-%;9'<5*2;'t48
*5I>53I673763!C:H6>;9:LD6A!
=>245<>29!y..............................................48
/;A5I;!H43I=>6?623?J!u................49
/;A5I;!7:!F5?57F6!io
#3?3F254!F5BH?3F259!F5?575F!7..49
!;E*('#*&*%*#'' 49
!;E*('$#8/")@9/#)5'#$E9&9-'49
G*&=(%*/",')'N$:$'49
G*2/*92)%9%)9'#*&*%*#'49
/;A5I!7:!7:=M76F6!! 4.................49
Media Player 5..................................50
0=I65!438=?6459F6!..........................50
S968&="*('6(*+#*/")'-d 50
3$&$%/ =50
!;#&>@$"9&,'(968&)(*<*#'"9+E($'QW*QRR'050
S968&="*(;'<;/*#)5')'%):#)5'@$/"*"'89 50
S968&)(*<#)'N8%#1)-'ws 50
S968&)(*<#)'+*%)"*()%6$'q50
G()6&8D9%)9'6(*+#*/")'Ee>?' a50
!'!9A5I;!6!9;A5I;!.............................50
!5*2'2&='<%9D%96*'QH;/)6%$&$'8'($<&9%)=![50
QH'<;5*2''' ]50
%:CP3B!I?J!67!/!24688347585!>687:?:!\50
#A3B;!C:D62; 3!.............................51
+K7:4=T3763!6!=>24:73763!
736>H4:975>23<!.................................51
Q%2)#$"*('')"$%)='%9'6*()"'51
V$+9%$''(92*5($%)"9&='51
K9"':<8#$'51
+!F5BH:766!0#.'$
H*+'$%)='<QU\d'*/%*<$%$'E*&99'()'&9"'
%$:$2'/9+,9-,'#*"*($='):;:$'/"($/"%*-'
&>E<)'#'+8:;#9':$%=&$/,''(*):<*2/"<*+'_G;RG'
#*+'*%9%"*<9'B'6*2$+)'A"$'/"($/",'%9'8")5&$,'
)'/96*2%='/"(9+&9%)9'/9+,)'#'*E9/'9@9%)>'
$82)*N)&*<')'+9&*+$%*<,'%9:$<)/)+*'*"'
)5'N)%$%/*<*6*''*&*?9%)=,'$''$($"8(*-'
<;/*@$-D96*'#$@9/"<$,'($:29&=>"'</9'
/*"(82%)#)'<=>?@9
M(8?%$='#*+$%2$')%?9%9(*<''(*/&8D)<$9"'
)'%$/"($)<$9"'#$?2*9'%*<*9'):29&)9,''*#$'
*%*'%9'E829"'/**"<9"/"<*<$",'/$+;+'<;/*#)+'
/"$%2$("$+9' Q+''(92*/"$<&9%$'/<*E*2$'
<;E*($'#*+'&9#"8>.)5''*'</9+8'+)(8,'
@"*E;'/29&$",'$''$($"'#$#'+*?%*'&8@D99'
!9(*="%*,'<;'/+*?9"9'%$-")'#*%29%/$"*(;'
):'!9&)#*E()"$%))')'09(+$%)),'
'*&8'(*<*2%)#)'):'W'*%))')'BTI,'$'"$#?9'
"*(*)2$&,%;9'/)&*<;9'"($%/N*(+$"*(;,'
):6*"*<&9%%;9'%$'/*E/"<9%%*+':$<*29'<QU\d9
S9'8"$1)='#*+'$%))' <QU\d' #$#'
'(*):<*2)"9&=''(9<*/5*2%*-'"95%)#)'
'*2"<9(?29%$'/*"%=+)''*&*?)"9&,%;5'
*":;<*<')'%$6($2'*"'%$)E*&99'8<$?$9+;5'
A#/'9("*<,' #*"*(;9'/&8D$>"'+8:;#8'
9?92%9<%*9' Q5'#*++9%"$())''*+*6$>"'
#*+'$%))'"*@%*''()29(?)<$",/='99'#8(/$'
%$''(*):<*2/"<*'#$@9/"<9%%*6*,'%$29?%*6*'
)'2*/"8'%*6*'*E*(82*<$%)=9
U;,' /*"(82%)#)'#*+'$%))' <QU\d,'
E&$6*2$()+'!$/':$''*#8'#8'A"*6*'):29&)=,')'
%$299+/=,'@"*'*%*'2*/"$<)"'<$+'+%*6*'@$/*<'
82*<*&,/"<)=9
*349;3!M:86
3&$6*2$()+'!$/':$''*#8'#8'
)%"96()(*<$%%*6*'8/)&)"9&=' <=>?@' <I;
)29'!'/*/"$<9'<;/*#*#$@9/"<9%%*-'
$82)*/)/"9+;'*%'E829"'2*/"$<&=",'!$+'
82*<*&,/"<)9'+%*6)9'6*2;9'
< A ; ) 2 0 ' * & % * N 8 % # 1 ) * % $ & , % ; -'
#*+'*%9%"'/'*"&)@%;+)'($E*@)+)'
5$($#"9()/")#$+)9' !/9'$/'9#";'96*'
#*%/"(8#1))'*'")+):)(*<$%;'2&='
'*&8@9%)=''*&%*6*'2)%$+)@9/#*6*'
2)$'$:*%$')''9(92$@)'"*%@$-D)5'
%>$%/*<'+8:;#)9' !;/*#*/"$E)&,%;-'
)/"*@%)#'')"$%)=' <A;)2' <#&>@$9"'
<'/9E='N)(+9%%;-'"*(*)2$&,%;-'
"($%/N*(+$"*('<=>?@,'*E&$2$9"'%):#)+'
<;5*2%;+'/*'(*")<&9%)9+')'E*&,D)+'
:$'$/*+''*'+*.%*/"),' '*:<*&=>.)+'
<A;)2' <*/'(*):<*2)",'/$+;9'/&*?%;9'
$82)*/)6%$&;9' B"*)+*/",'):6*"*<&9%)='
2$%%*-'#*%/"(8#1))'<;D9,'%*'*%$')+99"'
'(9)+8.9/"<$'/'"*@#)':(9%)='+8:;#)9
M*(*?#)''9@$"%;5''&$"'8/)&)"9&='
($/'*&*?9%;'/)++9"()@%*9' 7"*'
*E9/'9@)<$9"'"*@%*9'/*E&>29%)9'
<(9+9%%;5''$($+9"(*<'+8:;#$&,%*6*'
/)6%$&$9'!'/)6%$&,%*+'"($#"9''()+9%9%;'
+9"$&&*'&9%*@%;9'(9:)/"*(;')'
'*&)/")(*&*<;9')&)''*&)'(*')&9%*<;9'
#*%29%/$"*(;9' H$?2;-'A&9+9%"'/59+;'
'*2<9(6$&/='".$"9&,%*+8'($//+*"(9%)>,'
@"*E;'2*E)",/='+$#/)+$&,%*'2*/"*<9(%*6*'
<*/'(*):<929%)='+8:;#)9
<A;)2''(*/"'<'%$/"(*-#9')'A#/'&8$"$1))9'
F/&)'!;'8?9')+9&)'29&*'/*'
/"9(9*/)/"9+$+),' 8'!$/'%9'<*:%)#%9"'
<*'(*/*<9'G(*/"*''*2#&>@)"9'*/"$&,%;9'
#*+'*%9%";')'%$/&$?2$-"9/,9
*=?@2!008+.>?
K9#*"*(;9'*'9($1))'8'($<&9%)='
+*?%*'<;'*&%)",'#$#'/''8&,"$,'"$#')'/'
'9(92%9-''$%9&)9'G()'*')/$%))'"$#)5'
*'9($1)-'8#$:;<$>"/='//;&*@%;9'
%*+9($'*E*)5'*(6$%*<'8'($<&9%)=9'
K$'()+9(,' (968&)(*<$",'6(*+#*/",'
+*?%*'(8#*="#*-' `=@ef?' -'&)E*'
#%*'#$+)'%$''8&,"9's9
!'($:29&9' D!5*2')'<;5*2'QH'MJC'
*')/$%*,' #$#'($/D)()",'<*:+*?%*/")'
2)/"$%1)*%%*6*'8'($<&9%)='!$D9-'
/)/"9+*-9
*%!N1O0"!15!!;%,"9'):''8&,"$'A&9+9%";'
')"$%)=,' 9/&)'*%)')/"*.9%;')&)'
9/&)'!;'%9'/*E)($9"9/,''*&,:*<$",/='
'8&,"*+'2&)"9&,%*9'<(9+=9' G(*"9@#$'
($:(=?9%%;5'A&9+9%"*<'')"$%)='+*?9"'
'()<9/")'#''*<(9?29%)>'$''$($"$9
*%!N1O0"!15!B''8&,"$'<<;AU8('+*?%*'
8'($<&=",'%9#*"*(;+)'2(86)+)'
#*+'*%9%"$+)'<=>?@9''' ' '
G?J!=H4:9?376J!2L7345B!0:;<=!@! !
17'!;E9()"9'N8%#1)>'">%9($'%$'
''''<<;AU8(9' ' ' '
/7'K$?+)"9'#%*'#8'DI=g?KC')'D1C'
'''':<U;)67')&)'D/C':<U;8()AM79
-7'K$?)+$-"9'#%*'#)'8'($<&9%)='''''
'''''">%9(*+9
G?J!=H4:9?376J!#A!H45684;9:23?3B!0:;<=!@!
!;E9()"9'N8%#1)>'BO'%$'<<;AU8(9''
G?J!=H4:9?376J!A"A!H45684;9:23?3B!0:;<=!@!!
!;E9()"9'N8%#1)>'ALM1'%$'<<;AU8(
Ðóññêèé

46 7
/:T7;3 67>24=FS66 H5
K3C5H:>75>26
DGOA4PJOGOQO!<O: ;%=08$ %60 9&/06@, -"/0=B%+, -')
"5/'=:$*&%$) B"'(E"*&06'L. A"*68)@06 "5/'=:$*&%$6
3*&'$C$2$8"*&%%"#= B68/"%&'=.
DGOA4PJOGOQO!<O: A') /%$:6%$) "B&/%"/0$ *"E7"8&%$)
$'$ B"8&:6%$) K'6308$96/3$# 0"3"# %6 B"-*687&@06 -&%%+@
&BB&8&0 *"E-6@/0*$L -":-) $'$ *'&7$. !6 -"B=/3&@06
B"B&-&%$) B"/0"8"%%$, B86-#60"* *%=08( 3"8B=/&. O/'$
*%=08( 3"8B=/& B"B&'& *'&7& $'$ B"/0"8"%%$@ B86-#60,
%6#6-'6%%" *+%(06 *$'3= H%=8& B$0&%$) $E 8"E603$. A"/0&*(06
&BB&8&0 3 3*&'$C$2$8"*&%%"#= /B62$&'$/0= -') "/#"08& $
*"E#":%"7" 86#"%0&.
G(9?29'@9+''*2/*92)%=",'$''$($"')'8'($<&=",')+,' '(*@")"9'</9'
)%/"(8#1))9'B*5($%)"9'(8#*<*2/"<*''*'A#/'&8$"$1))'2&='2$&,%9-D96*'
)/'*&,:*<$%)=9
4E($.$-"9'<%)+$%)9'%$''(92*/"9(9?9%)=,'8#$:$%%;9'%$'#*('8/9'
$''$($"$')'<'2$%%*+'(8#*<*2/"<99'J'($<&=-"9'$''$($"*+'<'/**"<9"/"<))'
/')%/"(8#1)=+)9
G(*):<*2)"9'*@)/"#8'#*('8/$'"*&,#*'/85*-'"#$%,>')&)'';&9/*/*+9
4/0&*(06 %6 #6%66 10 /# /*"5"-%"7" B8"/08&%/0*& *"38=7
&BB&8&0& -') "56/B696%$) 2$83=')2$$ *"E-=,&.'K9'/"$<,"9'
$''$($"'%$'#(*<$",,'2)<$%,'#*<9(')&)''*2*E%8>'+=6#8>''*<9(5%*/",,'
#*"*($='+*?9"':$6*(*2)",'<9%")&=1)*%%;9'*"<9(/")=9'F/&)'$''$($"'
</"($)<$9"/='<'D#$N')&)'2(86*-'#*('8/,'A"*"'#*('8/'2*&?9%'<9%")&)(*<$",/='
2&='*E9/'9@9%)='*5&$?29%)='$''$($"$9
M9(?)"9'$''$($"''*2$&,D9'*"'($2)$"*(*<'*"*'&9%)=,'*E*6(9<$"9&9-,'
'9@9-')'&>E;5'2(86)5'8/"(*-/"<,'<;29&=>.)5'"9'&*9
B9"9<*9'%$'(=?9%)9,'#'#*"*(*+8''*2/*92)%=9"/='$''$($",'2*&?%*'
/**"<9"/"<*<$",'"(9E*<$%)=+,'8#$:$%%;+'%$':$2%9-''$%9&)'$''$($"$9'
K9''9(929&;<$-"9'<5*2=.)-'<'#*+'&9#"'D%8('')"$%)=9'K9''*&,:8-"9/,'
82&)%)"9&=+)9
K9''(*#&$2;<$-"9'D%8('')"$%)='<'+9/"$5,'629'*%'+*?9"'E;",''*<(9?29%'
)&)''9(96(9"9'4E($.$-"9'*/*E*9'<%)+$%)9'%$'/9"9<8>'<)')'+9/"*'
<;5*2$'D%8($'):'$''$($"$9
F/&)''(92'*&$6$9"/='2*/"$"*@%*'2*&6*'%9')/'*&,:*<$",'$''$($",'<;%,"9'
<)'D%8($'')"$%)='):'(*:9"#)9
K9+92&9%%*''(9#($")"9''*&,:*<$",/='$''$($"*+')'*E($")"9/,'#'
#<$&)N)1)(*<$%%*+8''9(/*%$&8,'9/&)P
h' G*<(9?29%;'D%8('')"$%)=')&)'<)&#$9
h' !%8"(,'$''$($"$''*'$&)''*/"*(*%%)9''(92+9";')&)'?)2#*/",9
h' I''$($"''*'$&''*2'2*?2,9
h' I''$($"'%9'N8%#1)*%)(89"'2*&?%;+'*E($:*+9
h' I''$($"'8(*%)&)')&)'*%''*<(9?29%'2(86)+'/'*/*E*+9
Q/'*&,:8-"9'#$E9&)'/':$.)"*-'[@HTT'/''()''*2/*92)%9%))'#*&*%*#'#'
#&9++$+'8/)&)"9&='2&='*E9/'9@9%)='%$29?%*-'):*&=1))')'+)%)+):$1))'
()/#$'82$($'A&9#"()@9/"<*+9
S$/'*&$6$-"9''()E*('%$'8/"*-@)<*-,' (*<%*-'
'*<9(5%*/"),'2*/"$"*@%*''(*@%*-,'@"*E;'<;29(?$",'
96*'<9/9'K9'/"$<,"9'96*'%$''9(92<)6$9+8>'"9&9?#8,'
#*"*($='+*?9"'*'(*#)%8",/=9
7"*"'/)+<*&'*:%$@$9",'@"*'$''$($"'*E&$2$9"'2<*-%*-'
):*&=1)9-')'%9'%8?2$9"/='<':$:9+&9%))9
G(*28#";'<=>?@'/'(*9#")(*<$%;'"$#,'@"*E;'/**"<9"/"<*<$",'
"(9E*<$%)=+''+9?28%$(*2%;5'2)(9#")<''*'*6($%)@9%)>'
'()+9%9%)='<(92%;5'<9.9/"<'<'A&9#"(*"95%)@9/#*+')'
A&9#"(*%%*+'*E*(82*<$%))':<?T>KG^>G=W'=R'NHiHKF=eT'
ZeVT>HW^?T';'<=NZ7,'"$#?9''*'*E($.9%)>'/'*"/&8?)<;
D)+'/<*-'/(*#'A&9#"(*"95%)@9/#)+')'A&9#"(*%%;+'
*E*(82*<$%)9+':jHT>?'\@?^>KG^H@'HWF'\@?^>K=WG^'\keGlf?W>'
;'j\\\79'Q:*E($?9%)9''9(9@9(#%8"*6*'+8/*(%*6*'E$@#$'
%$'#*&9/$5'*:%$@$9"'"$#?9'"*,'@"*'A")''(*28#";'2*&?%;'
E;",'<"*()@%*')/'*&,:*<$%;':(91)#&)(*<$%;7')&)'?9'*E($E*"$%;'<'
/**"<9"/"<))'/'8'*+=%8";+)'<;D9'2)(9#")<$+)9
RA-05 !"#$%&'(!) *+,-.+/0$1,)
RA- 05
AUX 1
AUX 2
CD
TUNER
PHONO
PHONE S
MEDIA
PLAYER
BALAN CE
POWER
SOURCE
TAPE
A
OFF B
A+B
TREBL EBASS
SPEAK ERS
TONE
ON
Input Signal Connections
[See Figure 2.]
NOTE: To prevent loud noises that neither
you nor your speakers will appreciate, make
sure the system is turned off when you make
any signal connections.
Phono Input rand
Ground Connection e
Plug the cable from the turntable into the ap-
propriate left and right phono inputs. If the
turntable has a “ground” wire connect it to the
screw terminal to the left of the Phono inputs.
It will help prevent hum and noise.
Line Level Inputs t
The CD, Tuner, and Aux inputs of the RA-05
are “line level” inputs. These are for connect-
ing components such as CD players, Hi Fi or
NICAM Stereo video cassette recorders, tuners,
Laser Disc players or the analog output from
a CD ROM drive.
The Left and Right channels are labeled and
should be connected to the corresponding
channels of the source component. The Left
connectors are white, the Right connectors
are red. Use high quality RCA cables for
connecting input source components to the
RA-05. Ask your authorized Rotel dealer for
advice about cables.
Recorder Connections y
[See Figure 2.]
The Tape inputs and outputs can be connected
to any record/playback device that accepts
standard line level analog input and output
signals. Typically that will be a conventional
tape recorder.
When connecting a recorder to the RA-05
remember that the outputs of the recorder must
be connected to the tape inputs of the RA-05.
Similarly the tape outputs of the RA-05 must
be connected to the inputs of the recorder. As
with other sources be sure to connect the Left
and Right channels of each device to the proper
channels on the associated components. Use
high quality connecting cables to prevent loss
of sound quality.
NOTE: The Tape Outputs are not affected
by the Volume, Balance or Tone controls.
They receive a fixed level signal.
Preamp Outputs u
The RA-05 has a set of preamp outputs. The
signal from the source selected with the Func-
tion Selector is always available from these
outputs. Typically these outputs are used to
provide a signal to another integrated ampli-
fier or power amplifier, which is used to drive
remote speakers
NOTE: Changes to the settings of the Vol-
ume, Balance or Tone controls affect the
signal from the Preamp Outputs.
Speaker Outputs io
Speaker Selector Switch 7
[See Figure 2.]
The RA-05 has two sets of speaker outputs,
labeled “A” iand “B” o. The speaker
outputs are controlled by the switch 7on
the front panel.
Speaker Selection
If only one set of speakers will be used at any
given time, the speakers may have an imped-
ance as low as 4 ohms. If there are times when
both the A and B speakers will be used, all
the speakers should have an impedance of 8
ohms or more. Speaker impedance ratings
are less than precise. In practice, very few
loudspeakers will present any problems for
the RA-05. See your authorized Rotel dealer
if you have any questions.
Speaker Wire Selection
Use insulated two-conductor stranded wire to
connect the RA-05 to the speakers. The size
and quality of the wire can have an audible
effect on the performance of the system. Stan-
dard speaker wire will work, but can result in
lower output or diminished bass response,
particularly over longer distances. In general,
heavier wire will improve the sound. For best
performance, you may want to consider special
high-quality speaker cables. Your authorized
Rotel dealer can help in the selection of cables
for your system.
Polarity and Phasing
The polarity – the positive/negative orientation
of the connections – for every speaker and
amplifier connection must be consistent so all
the speakers will be in phase. If the polarity
of one connection is reversed, bass output will
be very weak and stereo imaging degraded.
All wire is marked so you can identify the
two conductors. There may be ribs or a stripe
on the insulation of one conductor. The wire
may have clear insulation with different color
conductors (copper and silver). There may be
polarity indications printed on the insulation.
Identify the positive and negative conductors
and be consistent with every speaker and
amplifier connection.
Speaker Connection
Turn off all the components in the system before
connecting the speakers. The RA-05 has color-
coded binding post type speaker connectors on
the back panel (except in European Community
countries where their use is not permitted). These
connectors accept bare wire, connector lugs,
or dual banana type connectors.
Route the wire from the RA-05 to the speakers.
Give yourself enough slack so you can move
the components to allow access to the speaker
connectors. If you are using dual banana plugs,
connect them to the wires and then plug into the
backs of the binding posts. The thumbscrews
of the binding posts should be screwed in all
the way (clockwise).
If you are using terminal lugs, connect them
to the wires. If you are attaching bare wires
directly to the binding posts, separate the wire
conductors and strip the insulation from the end
of each conductor. Be careful not to cut into the
wire strands. Unscrew (turn counterclockwise)
the binding post thumbscrews. Place the connec-
tor lug or wire around the binding post shaft.
Turn the thumbscrews clockwise to clamp the
connector lug or wire firmly in place.
NOTE: Be sure there are no loose wire
strands that could touch adjacent wires or
connectors.
English

845
Phones Output 4
The Phones output allows you to connect
headphones for private listening. This output
accommodates standard stereo phone (1/8”)
plugs. Plugging in a set of headphones does
not cut off the signal to the outputs. Use the
Speaker Selector to turn off the speakers. The
settings of the Function Selector and the Tape
Monitor Control determines which source is
heard. To listen to or monitor the component
connected to the Tape input set the Monitor
Control to the Tape position. For all other
inputs leave the Monitor Control in the Source
position and select the source you want to
listen to with the front panel Function Selector
or press the corresponding source button on
the remote control.
NOTE: Because the sensitivity of speakers
and headphones can vary widely, always
reduce the volume level before connecting
or disconnecting headphones.
Media Player 5
A 3.5mm (1/8”) stereo input socket for a
“Media Player” is provided on the front of the
amplifier and is selected by setting the function
control to (AUX2). Any portable stereo cassette,
compact disc player or hard disc playback
device can be connected via this input. If
the device you are connecting has its output
via the headphone socket then note that you
must adjust the volume control on the player
for sound to be heard. Should the sound be
loud and distorted turn down the volume on
the player and if it is only just audible through
the speakers even when the amplifier volume
control is turned up fairly high then adjust the
volume control on the player.
NOTE: When the 3.5mm (mimi jack) is inserted
into the Media Player socket the rear input called
AUX2 is disconnected. Removing the 3.5mm plug
from the Media player socket will allow the rear
AUX2 input to function.
Audio Controls
Volume Control -f
Turn the controls clockwise to increase the vol-
ume, orcounterclockwisetodecrease the volume.
Or use the remote control volume buttons. Press
the ▲button to increase the volume, or the ▼
button to decrease the volume.
Balance Control =
The Balance Control adjusts the left-to-right
balance of the sound output. Normally the
control should be left in the center position.
In some situations, typically when the main
listening position is not ideally centered be-
tween the speakers, it may be necessary to
adjust the control to achieve proper left-to-right
balance. Turning the control counter-clockwise
shifts the sound balance to the left. Turning
the control clockwise shifts the sound balance
to the right.
Tone On/Off Switch 0
When the Tone Switch is in the Off position the
Bass and Treble Control (Tone Control) circuits
are bypassed to ensure the purest possible
sound. Leave the Tone Switch in the Off posi-
tion unless you want to use the Tone Controls.
Turn the Tone Switch to the On position if you
want to adjust the Tone Controls.
Bass and Treble Controls 89
When the Tone Switch is in the On position,
turning the Bass and Treble Controls adjusts the
tone balance of the sound. Turn the Controls
clockwise to increase the bass or treble output.
Turn the Controls counterclockwise to decrease
the bass or treble output.
A properly set up high-performance audio
system produces the most natural sound with
little or no adjustment of the tone controls. Use
these controls sparingly. Be particularly careful
when turning the controls up (clockwise). This
increases the power output in the bass or treble
range, increasing the load on the amplifier
and speakers.
Function Control w d
The Function control selects the input signal
source. The signal selected by the Function
control is the one you hear, as long as the
Monitor control is set to the Source postion.
(See the following section.) The signal selected
by the Function control also goes to Preamp
Outputs and the Tape Outputs. Turn the front
panel Listening Selector to the source you want
to listen to. Or press the corresponding source
button on the remote control.
Monitor Control q
When the Monitor Control is set to the Source
position, the signal you hear, and which goes
to the Preamp Outputs, is selected by the
Function Control. To listen to the signal from a
recorder connected to the Tape Inputs, set the
Monitor Control to the Tape position. When
the Monitor Control is in the Tape position,
the signal from the Tape Input also goes to the
Preamp Outputs.
The signal that goes to the Tape Output is always
selected by the Function Control. When you
are recording with a unit that has monitoring
capabilities, you can listen to the sound just
recorded by setting the Monitor Control to the
Tape position.
Mute Control a
Remote Only
To temporarily mute the sound of the system
press the Mute Button on the RR-AT94 remote.
The volume Control LED blinks when the sound
is muted. Press the button again to return the
sound volume to the original level.
IR Inputs and Outputs
External Remote Input [
This 3.5 mm mini-jack (labeled EXT REM IN)
receives command codes from an industry-
standard infrared receiver (Xantech, etc.)
located in the main listening room. This feature
is useful when the unit is installed in a cabinet
and the front-panel sensor is blocked. Consult
your authorized Rotel dealer for information
on external receivers and the proper wiring of
a jack to fit the mini-jack receptacle.
NOTE: The IR signals from the EXTERNAL
REMOTE IN jack can be relayed to source
components using external IR emitters or
hardwired connections from the IR OUT
jacks.
IR Output ]
The IR OUT jack sends IR signals received at the
EXTERNAL REM IN jack to an infrared emitter,
or to Rotel CD players, cassette decks, or tuners
with a compatible rear panel IR connector. This
allows you to use IR control features to oper-
ate other components when the IR sensors on
those components are blocked or obstructed
by installation in a cabinet.
See your authorized Rotel dealer for informa-
tion on IR repeater systems.
NOTE: The EXT REM IN jack located next
to the the IR OUTPUT jack is for use with an
external IR sensor which duplicates the front
panel IR sensor.
RA-05 Stereo Integrated Amplifier
Specifikationer
Kontinuerlig uteffekt 40 watt/kanal
(20-20 kHz, <0.03%, 8 ohm)
Harmonisk distortion (20-20 kHz) <0.03%
Intermodulations distortion (60 Hz :7 kHz, 4:1) <0.03%
Frekvensomfång
Phono ingång 20Hz-15kHz, ±0.3dB
Linjeingångar 10Hz-40kHz, ± 1dB
Dämpfaktor (20-20.000 Hz, 8 ohm) 180
Ingångskänslighet / Impedans
Phono ingång 2.5mV / 47k Ohm
Linjeingångar 150mV / 24k Ohm
Ingångsöverbelastning
Phono ingång 180mV
Linjeingångar 5V
Utsignal/impedans, förförstärkare 1V / 470 Ohm
Bas/diskant, tonkontroller ± 6dB vid 100Hz / 10kHz
Signal/brus-förhållande (IHF A)
Phono ingång 80 dB
Linjeingång 100 dB
Strömförsörjning 230 Volt, 50 Hz (CE versionen)
Europa 230 volt, 50 Hz
USA USA 120 volt, 60 Hz
Strömförbrukning 220 watt
Mått (B x H x D) 437 x 72 x 342 mm
Fronthöjd 60 mm
Vikt 5.9 kg
Alla specifikationer är korrekta vid tid punkten de trycks.
Rotel reserverar sig för framtida förändringar utan vidare meddelande.
Svenska
Felsökning
De flesta problem som uppstår i en anläggning
beror på felaktiga anslutningar eller inställn-
ingar. Om du stöter på problem försöker du
lokalisera felet och kontrollerar dina inställ-
ningar. Försök hitta orsaken till felet och gör
sedan de ändringar som behövs. Om du inte
får något ljud ur RA-05 så kommer här ett par
förslag på vad du kan göra:
Strömindikatorn (POWER)
lyser inte
Ström (Power)-lampan skall lysa när RA-05 är
ansluten till ett vägguttag och Ström-knappen är
intryckt. Om den inte lyser kontrollera väggut-
taget med t.ex. en bordslampa för att avgöra
om det finns ström tillgängligt. Kontrollera att
vägguttaget inte är avstängt med en switch
på annat ställe.
Säkring
Om en annan elektrisk apparat fungerar när
den ansluts till vägguttaget, men POWER-
lysdioden inte tänds när RA-05 ansluts och
strömbrytaren trycks in, kan det bero på att
förstärkarens inre säkring har löst ut. Om du
misstänker att detta kan vara felet så kontaktar
du din auktoriserade Rotel-återförsäljare och
ber dem hjälpa dig att byta ut den.
Inget ljud hörs
Kontrollera signalkällan och försäkra dig om att
den fungerar som den ska. Se till att kablarna
från signalkällan till RA-05 är anslutna på rätt
sätt. Se till att Ingångsväljaren och Tape Moni-
tor-knappen står i rätt lägen. Kontrollera också
att högtalarkablarna är rätt anslutna.

44 9
Ljudkontroller
Volymkontrollen -f
Vrid volymkontrollen medsols för att höja voly-
men och motsols för att sänka den. Du kan också
använda volymknapparna på fjärrkontrollen.
Tryck på #för att höja volymen och på !
för att sänka den..
Balans =
Balanskontrollen (BALANCE) justerar balan-
sen mellan höger och vänster högtalare. I
de flesta fall ska kontrollen stå i mittenläget
och peka rakt uppåt. I en del fall, oftast när
lyssningsplatsen inte befinner sig mittemellan
högtalarna, kan du behöva justera balansen
för att ljudet ska låta lika högt ur båda hög-
talarna. Vrid balanskontrollen medsols för att
förskjuta balansen åt höger och motsols för
att förskjuta den åt vänster.
Tonkontrolle 0
När TONE-knappen inte är intryckt passerar
ljudsignalen förbi tonkontrollerna för att ljudet
ska bli så rent som möjligt. Om du inte vill
använda tonkontrollerna ska du alltså inte
ha TONE-knappen intryckt. Tryck in knap-
pen om du vill justera ljudet med hjälp av
tonkontrollerna.
Bas och diskant 89
När TONE-knappen är intryckt justerar BASS-
och TREBLE-kontrollerna ljudets bas- och
diskantnivåer. Vrid kontrollerna medsols för
att höja bas- och diskantnivåerna och motsols
för att sänka dem.
En korrekt inställd ljudanläggning av hög
kvalitet låter bäst med små eller inga justerin-
gar av bas- och diskantnivån. Använd därför
tonkontrollerna sparsamt. Var särskilt försiktig
med att höja nivåerna kraftigt, eftersom det
ökar effekten i bas- eller diskantregistret och
leder till större påfrestningar för förstärkaren
och högtalarna
Ingångsväljare ws
Ingångsväljaren väljer signalkälla. Signalen
som väljs är den du lyssnar på, så länge Tape
Monitor-kontrollen står i läge SOURCE (se nästa
stycke). Signalen som väljs med Ingångsväljaren
skickas också till PRE OUT- och TAPE OUT-ut-
gångarna. Vrid kontrollen så att den pekar på
den signalkälla du vill lyssna på, eller använd
knapparna på fjärrkontrollen..
Tape Monitor q
När Tape Monitor-kontrollen står i läge SOURCE
väljer du vilken signalkälla du vill lyssna på
(och som ska skickas ut ur PRE OUT-utgången)
genom att vrida på Ingångsväljaren. Om du
vill lyssna på signalen från en inspelare som
är ansluten till TAPE IN-ingången så vrider du
Tape Monitor-kontrollen till läget TAPE. I detta
läge skickas signalen från TAPE 1-ingången
även till PRE OUT-utgången.
Signalen som skickas till TAPE OUT-utgången
väljs alltid med Ingångsväljaren. När du spelar
in på en komponent med Monitor-funktion så
kan du lyssna på ljudet som spelas in genom att
ställa Tape Monitor-kontrollen i läge TAPE .
Dämpa ljudet a
Endast på fjärrkontrollen
Tryck på MUTE-knappen på fjärrkontrollen om
du vill dämpa ljudet helt och hållet. Lysdioden
på volymkontrollen blinkar så länge ljudet är
dämpat. Tryck på knappen en gång till när du
vill återgå till den ursprungliga volymen.
In och utgångar för IR-
signaler
Ingång för extern styrning [
Denna 3,5-millimeters minijack-kontakt (märkt
EXT REM IN) tar emot IR-kommandon från en
infraröd mottagare eller från en motsvarande
EXT REM OUT-utgång på någon annan
komponent. Funktionen kan vara praktisk om
förstärkaren står i ett skåp eller på ett sådant
sätt att IR-sensorn på fronten blockeras och inte
kan nås av fjärkontrollens signaler. Kontakta din
auktoriserade Rotel-återförsäljare om du vill ha
mer information om IR-mottagare eller kablar
och kontakter som passar denna ingång.
OBS! IR-signalerna från EXT REM IN-ingån-
gen kan överföras till signalkällor med hjälp
av externa IR-sändare eller kablar från IR
OUT-utgången.
IR-utgång ]
IR OUT-kontakten överför IR-signaler från EXT
REM IN-ingången till infraröda sändare eller
direkttillCD-spelare, kassettdäckeller radiodelar
från Rotel som är utrustade med en motsvarande
IR-anslutningpåbaksidan.Dennafunktioninnebär
att du kan använda IR-funktioner för att styra
andra komponenter även om deras IR-sensorer
blockeras eller är övertäckta, till exempel om de
är placerade i ett skåp.
Kontakta din auktoriserade Rotel-återförsäl-
jare om du vill ha mer information om IR-
funktioner.
12-volts styrsignaler \
En del komponenter kan slås på och stängas
av automatiskt om de tar emot en 12-volts
”trigger-signal”. De två 12V TRIGGER OUT-
utgångarna på RA-05 lämnar en sådan
signal. Kompatibla komponenter ansluts till
förstärkaren med en vanlig 3,5-millimeters
minijack-kabel. När RA-05 försätts i Standby-
läge avbryts styrsignalen och de anslutna
komponenterna stängs också av.
Circuit de protection 3
Le RA-05 bénéficie à la fois d’une protection ther-
mique etd’une protection contreles surcharges en
courant,permettantdeprotégerl’amplificateurcon-
tredesconditionsdefonctionnementextrêmes.Ces
circuitsdeprotectionsonttotalementindépendants
dusignalaudio,etn’ontdoncaucuneinfluencesur
laqualitésonore.Cependant,cescircuitscontrôlent
en permanence la température des transistors de
sortie,etcoupentl’amplificateursicettetempérature
dépasse certaines limites.
Dans la très grande majorité des cas, vous ne
verrez jamais ces circuits de protection entrer en
action. Cependant, si l’amplificateur détecte un
défaut de fonctionnement, il s’arrêtera de fonc-
tionner instantanément, et la diode LED en face
avant s’allumera.
Sicelaarrive,éteignezimmédiatementl’amplificateur.
Laissez-le refroidir pendant plusieurs minutes, et
tentez dedétecteretde corrigerleproblèmeayant
entraînél’interventiondelaprotection.Lorsquevous
rallumerezl’amplificateur,sescircuitsdeprotection
seront automatiquement réinitialisés et la diode
LED s’éteindra.
Dans la plupart des cas, la protection entre en jeu
suiteàundéfautdefonctionnementcommeuncourt-
circuitentredeuxcâblesdesenceintesacoustiques,
ouuneventilationinsuffisantedansuneatmosphère
très chaude. Dans de très rares cas, des enceintes
acoustiques à trèsfaibleimpédance ouprésentant
une charge très réactive peuvent entraîner la mise
en service des protections.
Si ces circuits s’activent très souvent et que vous ne
parvenez pas à en déterminer la cause, contactez
votre revendeur agréé Rotel pour assistance.
RA-05 Integrerad Stereoförstärkare
12 Volt Trigger Outlet \
Some audio components can be turned on
automatically when they receive a 12V turn
on “signal”. The two12V Trigger Outputs of the
RA-05 provide the required signal. Connect
compatible components to the RA-05 with a
conventional 3.5mm miniplug cable. When the
RA-05 is in Standby mode, the trigger signal
is interupted, so the components controlled by
it are turned off.
Protection Indicator 3
The RA-05 has both thermal and over-current
protection circuitry that protects the amplifier
against damage in the event of extreme or faulty
operating conditions. The protection circuits
are independent of the audio signal and have
no impact on sonic performance. Instead, the
protection circuits monitor the temperature of
the output devices and shut down the amplifier
if temperatures exceed safe limits.
Most likely, you will never see this protection
circuitry in action. However, should a faulty
condition arise, the amplifier will stop playing
and the LED indicator on the front panel will
light up.
If this happens, turn the amplifier off. Let it
cool down for several minutes, and attempt to
identify and correct the problem that caused
the protection circuitry to engage. When you
turn the amplifier back on, the protection circuit
will automatically reset and the indicator LED
should go out.
In most cases, the protection circuitry activates
because of a fault condition such as shorted
speaker wires, or inadequate ventilation lead-
ing to an overheating condition. In very rare
cases, highly reactive or extremely low imped-
ance speaker loads could cause the protection
circuit to engage.
If the protection circuitry triggers repeatedly
and you are unable to isolate and correct the
faulty condition, contact your authorized Rotel
dealer for assistance in troubleshooting.
Specifications
Continuous Power Output 40 watts/ch
(20-20 kHz, < 0.03%, 8 ohms)
Total Harmonic Distortion (20Hz-20kHz) < 0.03% at rated power, 1/2 power or 1 watt
Intermodulation Distortion (60 Hz : 7 kHz, 4:1) < 0.03% at rated power, 1/2 power or 1 watt
Frequency Response
Phono Input 20Hz-15kHz, ±0.3dB
Line Level Inputs 10Hz-40kHz, ±1dB
Damping Factor (20-20,000 Hz, 8 ohms) 180
Input Sensitivity / Impedance
Phono Input 2.5mV / 47 kOhms
Line Level Inputs 150 mV / 24 kOhms
Input Overload
Phono Input 180mV
Line Level Inputs 5V
Premp Output / Impedance 1V / 470 Ohms
Tone Controls - Bass / Treble ±6 dB at 100Hz / 10kHz
Signal to Noise Ratio (IHF “A” weighted)
Phono Input 80 dB
Line Level Inputs 100 dB
Power Requirements
USA Version 120 Volts, 60 Hz
European Version 230 Volts, 50 Hz
Power Consumption 220 Watts
Dimensions (W x H x D) 437 x 72 x 342 mm
171/8x 27
/8x 131/2”
Panel Height 60 mm / 23/8”
Weight (net) 5.9 kg, 13 lbs.
All specifications are accurate at the time of printing.
Rotel reserves the right to make improvements without notice.
English
Troubleshooting
Most difficulties in audio systems are the result
of incorrect connections, or improper control
settings. If you encounter problems, isolate the
area of the difficulty, check the control settings,
determine the cause of the fault and make the
necessary changes. If you are unable to get
sound from the RA-05 refer to the suggestions
for the following conditions:
Power Indicator Is Not Lit
The Power Indicator should be lit whenever the
RA-05 is plugged into the wall power outlet
and the Power Switch is pushed in. If it does
not light, test the power outlet with another
electrical device, such as a lamp. Be sure the
power outlet being used is not controlled by
a switch that has been turned off.
Fuse Replacement
If another electrical device works when plugged
into the power outlet, but the Power Indicator
of the RA-05 does not light when plugged into
the same outlet and the Power Switch is pushed
in, it indicates that the internal power fuse may
have blown. If you believe this has happened,
contact your authorized Rotel dealer to get the
fuse replaced.
No Sound
Check the signal source to see if it is function-
ing properly. Make sure the cables from the
signal source to the RA-05 inputs are connected
properly. Be sure the Listening Selector is set
to the proper input. Check the wiring between
the RA-05 and the speakers.

注 意
请勿打开,以防触电!
注意:请勿打开机盖,以防触电危险。机内无
用户可维修部件。请合资格维修人员维修。
注意:为避免触电,请将宽片插头对准宽口插
座。完全插入。
注意: POUR EVITER LES CHOCS ELECTRIQUES,
INTRODUIRE LA LAME LA PLUS LARGE DE LA FICHE
DANS LA BORNE CORRESPONDANTE DE LA PRISE ET
POUSSER JUSQUAU FOND.
适用于美国、欧洲或其它核准使用的地方。
本标记用于提醒用户,本产品内有
未绝缘的危险电压,可能引致触电
风险。
本标记提醒用户遵从本手册及随附
文件中的操作和维护(维修)指
引。
10
洛得产品符合电气和电子设备限制有害
物质(RoHS)以及处理废旧电气和电子
设备(WEEE)的国际指令。带叉形符
号的轮式垃圾箱标志指合乎规定,且该
产品应根据这些指令以适当的方法进行
回收或处理。
重要安全指示
警告:机内无客户可以维修的部件。请合资格维修人员维修。
警告:要减少火灾或触电危险,请确保不要将本装置暴露于滴水
或喷洒的地方,并且不要将盛水容器例如花瓶放在本装置上面。
不要让异物进入本产品外壳内。如果本产品进入潮湿环境中,或
异物进入本产品内,立即从墙上拨掉电源线。将本产品送交合资
格维修人员检查或进行必要的维修。
连接或操作之前,请阅读所有说明。
请保留本手册,以便可以参照这些安全说明。
请留意这些说明和产品上的所有警告或安全信息。请遵从操作说
明。
只能用干布或真空吸尘器清洁。
本产品周围最少应有10厘米或4英寸的间隙。
不要将本产品置于床上、沙发、垫子或类似的物体上,以防堵塞
通风口。如果将本装置放在书柜或橱柜上,柜上应有通风口,以
允许适当的冷却。
请将本产品远离辐射、热源、锅炉或其它发热器具。
只能将本产品连接到后面板指定的型号和电压的电源上。
只能用本产品提供的电源线或严格等同的电源线将本产品连接到
电源插座上。不得以任何方式更改随本产品提供的电源线。不得
试图违反接地和/或两极安全规定。不要使用延长线。
不要使用变形的、收缩的、弯折的或损坏的电源线,不要将电源
线置于热源附近。请特别留意插头处和本装置后面的电源线。
本装置长时间不使用时,应将电源线从墙上插头中拨出。
在下列情况下,立即停止使用本装置,并请合格维修机构检测和
/或维修:
• 电源线或插头损坏。
• 异物或液体进入装置中。
• 本装置遭受雨淋。
• 本装置显示不正确操作的迹象。
• 本装置跌落或以任何方式被损坏。
连接本装置的音箱接线端时,请使用2类电线,以确保正确的绝
缘以及将触电的风险减至最低。
请将本装置放在能支撑其重量的固定水平表面上。
不要将本装置放在可移动的手推车上,否则有可能
翻侧。
本符号表示本装置有双重绝缘保护。无需接地。
RA-05 立体声合并式放大器

目录
图1:控制和连接 3
图2:信号输入和音箱输出连接 4
重要安全指示............................................10
关于洛得 ....................................................11
开始使用 .....................................................11
RR-AT94遥控器.....................................11
遥控感应器 ........................... 12
几点注意事项 .......................... 12
放置 ....................................... 12
电缆 ....................................... 12
交流电源和控制 ......................................12
交流电源输入 ...................... 12
电源开关 和
电源指示灯 .......................... 12
输入信号连接........................................... 13
唱盘机输入 和地线连接 ...... 13
线路电平输入 ....................... 13
录音机连接 .........................................13
前置放大输入 ....................................13
音箱输入
音箱选择器开关 .................................13
音箱选择 ................................. 13
音箱线选择 ............................. 13
极性和相位 ............................. 13
音箱连接 ................................. 13
耳机输出 ..............................................14
媒体播放机 ..........................................14
音频控制 .....................................................14
音量控制 .......................... 14
均衡控制 ............................ 14
音调开/关开关 .................... 14
重低音和颤音控制 ............. 14
功能控制 ......................... 14
监听控制 .............................. 14
静音控制 ............................ 14
红外输入和输出........................ ..............14
外置遥控输入 ...................... 14
红外输出 ............................. 14
12伏触发出口 ....................................15
保护指示灯 .......................... 15
故障排除 .....................................................15
电源指示灯不亮 ....................... 15
更换保险丝 ............................. 15
没有声音 ................................. 15
技术参数 ....................................................15
关于洛得
钟爱音乐的洛得家族40多年前创建了
洛得公司,开始致力于制造高品质的
高保真音响设备。多年以来,这种激
情丝毫未减,而为不同预算的高保真
音响发烧友和音乐爱好者提供超值产
品的目标,是洛得的所有雇员的共同
追求。
工程师密切协作,认真倾听并精确调
谐每个新产品,直到其符合苛刻的音
乐标准。他们从世界各地选择部件,
以令其产品尽善尽美。您可能会发现
英国和德国生产的电容器、日本和美
国产的半导体,以及洛得自己的工厂
制造的环形功率变压器。
洛得卓越的口碑是通过业界最受景仰
的评论家所给予的数百个称号和奖赏
赢得的,这些评论家每天都倾听音
乐。
他们的评论让本公司更致力于实现目
标 – 追求悦耳、可靠并消费得起的设
备。
洛得的全部同仁感谢您购买本产品,
并希望它为您带来美好享受。
开始使用
感谢您购买洛得RA-05立体声合并式
功率放大器。配合高质量的音乐音频
系统使用,本装置可为您提供多年的
音乐享受。
RA-05是功能齐备、品质上乘的设
备。设计的各个方面已进行优化,以
获得音乐的全部动态范围和细微差
别。RA-05配有高度规范的电源,带
有洛得自行设计的环形电源变压器。
低阻抗的电源有充足的电力储备,使
得RA-05能够轻松再现要求最苛刻的
音频信号。这种设计制造起来更加昂
贵,但对于音乐来说效果更佳。
印刷电路板(PCB)使用对称电路线
路(Symmetrical Circuit Traces)设
计。这可确保获得并忠实再现音乐的
精确定时。RA-05电路在重要的信号
通道使用金属薄膜电阻和聚苯乙烯或
聚丙烯膜电容器。这种设计已进行全
面测试,确保最忠实地再现音乐。
RA-05的主要功能均易于安装和使
用。如果你有其它立体声系统的经
验,您会发现一切均易如反掌。只要
插上关联的设备,就可以开始欣赏音
乐了。
RR-AT94遥控器
有些功能可以通过前面板控制或随本
设备提供的RR-AT94遥控器实现。说
明这些操作时,会显示两种控制的呼
出编号。例如,您可以通过前面板音
量控制 或遥控器按键 来调节音
量。
更多有关拓展系统的红外线控制功能
的方法,请参考“红外输入和输出”一
节。
注意:如果长期不使用遥控器,请将
遥控器上的电池取出。不要将没有电
的电池放在遥控器内。耗尽的电池会
泄漏腐蚀性化学物质,损坏本遥控
器。
注意:RR-AT94遥控器可用于操作某
些其它洛得产品的基本功能,包括调
谐器、CD播放机和DVD播放机。
要操作洛得调谐器
-
1)选择RR-AT94的调谐功能。
2)按“电源”和“1” (RT-06) 或 “2”
(RT-940AX)。
3)按操作调谐器的按键。
要操作洛得CD播放机
-
选择RR-AT94的CD功能。
要操作洛得DVD播放机
-
选择RR-AT94的AUX 1功能。
遥控感应器
遥控感应器接收遥控器的红外信号。
不要覆盖或遮挡感应器。遥控器和感
应器之间应畅通,否则遥控器无法正
常工作。置于强光尤其是阳光下时,
遥控感应器的操作可能也会受到影
响。某些类型的光源,例如发出一定
量红外光的卤素光源,也会影响正常
操作。另外,如果RR-AT94里的电池
电力不足,遥控功能也有可能无法可
靠地工作。
几点注意事项
警告:要避免对您的系统造成潜在的
损坏,连接高音喇叭或其它关联设备
时,关闭系统内所有设备的电源。确
保所有连接正确且可靠之前,不要打
开系统设备的电源。尤其应注意音箱
电缆。不能有可能接触其它音箱线或
放大器底座的松散线束。
请仔细阅读本手册。本手册提供如何
将RA-05连接到系统的资料,以及可
帮助您获得最佳音响效果的资料。如
果您遇到任何问题,请联络洛得授权
经销商。另外,洛得全体同仁欢迎您
提出问题或建议。
请妥善保存RA-05的包装箱和包装材
料,以备日后使用。用非原包装材料
运输或移动RA-05可能会严重损坏放
大器。
请填写并寄回RA-05包装中的用户登
记表。并请保存原始销售收据。它是
购买日期的最佳记录,您日后需要保
修时会用到它。
放置
同所有处理低电平信号的音响设备一
样,RA-05也会受环境的影响。避免
将RA-05放在其它设备的上面。也要
避免将音频信号线置于电源线附近。
这可将噪音或受干扰的机会降至最
低。
RA-05在正常工作过程中会产生热
量。放大器中的散热器和通风口用于
排出热量。上盖的通风口应该打开。
为防止放大器过热,机身周围应有10
厘米(4英寸)的间隙,且安装位置
应有合理的气流通过。
选择安装地点时应考虑放大器的重
量。请确保机架或机柜能够承载本设
备的重量。本公司建议将RA-05安装
在为安装音响器材设计的家具内。这
些家具用于降低或减少可能对声音质
量产生负面影响的振动。设备家具和
音频设备的正确安装方法,请向授权
洛得经销商寻求帮助。
电缆
请将您安装的电源线、数字信号线和
普通音频信号线分开摆放。这可将普
通音频信号电缆从电源线或数字信号
线拾取噪音或干扰的机会降至最低。
使用优质的、屏蔽的电缆也会帮助避
免噪音或干扰降低音响系统的声音质
量。如果您有任何问题,请访问授权
洛得经销商寻求有关最匹配您的音响
系统的建议。
交流电源和控制
交流电源输入
RA-05不会从电源插座接收高电平电
流。但是,如果有可能,应该将本设
备直接插到墙上的两极插座。不要使
用延长线。如果大功率多插孔插线板
(和墙壁插座)可以承受RA-05和所
有插到上面的其它器材,则可以使用
多插孔插线板。
RA-05
注意:如果您将RA-05放大器带到另
一个国家,可能需要重新设置以使用
不同的电压。不要试图自行进行转
换。打开RA-05的外壳会有触电危
险。请咨询合资格的维修人员或洛得
工厂服务部门寻求帮助。
如果您将要离家较长时间,例如一个
月,离开前请务必拔下放大器(和其
它音频视频设备)的电源插头。
电源开关 和
电源指示灯
按前面板的电源开关按钮接通RA-05
的电源。RA-05接通电源时,电源指
示灯亮。再次按下电源开关,关闭
RA-05的电源。
用前面板的电源开关打开RA-05的电
源后,可以用RR-AT94遥控器上的电
源按键 在正常操作模式和待机模式
之间切换。
更多有关打开和关闭系统中随RA-05
一起的其它器材的方法,请参阅
“12V触发输出”一节。
中文
11 12
RA-05 立体声合并式放大器
出厂时已按照您购买本设备所
在国家的交流电压妥善设置(120伏
交流 23
0伏
频率为50Hz
或
60Hz
)
。交流电压配置
标注在背面板的标签上。
,22 0伏
交流
频率为 .
,
,

耳机输出
耳机输出可让你连接耳机独自欣赏音
乐。输入接口适用标准 (1/8”) 立体
声插头。插入耳机不会切断发送到输
出接口的信号。使用音箱选择开关关
闭音箱。功能选择开关和磁带监听控
制设置确定要听哪个音源。要听或监
听连接到磁带输入的设备,将监听控
制设置到磁带位置。对于所有其它输
入,将监听控制保留在音源位置,然
后用前面板的功能选择开关或按遥控
器上相应的音源按键选择您想听的音
源。
注意:由于音箱和耳机的灵敏度差异
非常大,插上或拔下耳机时,请务必
将音量调低。
媒体播放机
放大机前面提供了一个3.5毫 米
(1/8”) “媒体播放机” 立体声输入插
口,可以通过将功能控制设置到
(AUX2) 进行选择。所有便携式磁带
播放机、CD播放机或硬盘播放设备
均可通过该输入进行连接。如果您要
连接的设备的通过耳机插孔输出,则
请注意您应该将播放机的音量控制调
整到可以听到声音的地方。如果声音
太大且失真,则调低播放机的音量,
如果放大机音量控制已调到较大时,
音箱发出的声音刚好只能听见,则应
调整播放机的音量控制。
注意:3.5mm (小型插头) 插到媒体播
放机插孔中后,AUX2后置输入被断
开。从媒体播放拔下3.5mm插可使后
置AUX2输入重新工作。
音频控制
音量控制
顺时针转动音量旋钮增加音量,或逆
时针转动音量旋钮降低音量。或使用
遥控器上的音量按键调整音量。按 +
按键增加音量,或按 - 按键降低音
量。
均衡控制
均衡控制可调整声音输出的左-右均
衡。通常,这个控制应置于中间位
置。有些情况下,一般是在主听音位
置不是位于音箱之间的正中间时,可
能有必要调整该控制以获得适当的左
右均衡。逆时针旋转控制钮将声音均
衡调到左边。顺时针旋转控制钮将声
音均衡调到右边。
音调开/关开关
音调开关位于关的位置时,重低音和
颤音控制(音调控制)电路被旁通,
以获得最纯净的声音。除非您想使用
音调控制,否则应将音调开关调到关
的位置。如果您想调整音调控制,则
将音调开关调到开的位置。
重低音和颤音控制
音调开关位于开的位置时,调整重低
音和颤音控制以调整声音的音调平
衡。顺时针调整控制钮提高重低音或
颤音输出。逆时针调整控制钮降低重
低音或颤音输出。
经过适当设置的高性能音频系统可产
生最自然的声音,而无需调整或只需
作细微调整。请谨慎使用这些控制。
向上调整(顺时针)控制钮时请特别
小心。这将加大重低音或颤音范围的
功率输出,从而增加放大器和音箱的
负载。
功能控制
本功能控制选择输入信号源。由于监
听控制被调整到音源位置,功能控制
选择的信号就是您听到的信号。(详
见以下章节。)功能控制选择的信号
也被传到前置放大器输出和磁带输
出。将前面板上的收听选择开关调到
您想听的音源。或按遥控器上相应的
音源按键。
监视器控制
监听控制被设置到音源位置时,您所
听到的信号和传到前置放大器上的信
号就是由功能控制选择的信号。要听
或监听连接到磁带输入的设备,将监
听控制设置到磁带位置。监听控制位
于磁带位置时,磁带输入的信号也会
被传送到前置放大输出。
传到磁带输出的信号通常由功能控制
选择。如果您用带监听功能的装置录
音,通过将监听控制设置到磁带位
置,您可以听到你刚刚录制的声音。
静音控制
只能通过遥控器操作
要临时关闭系统声音,请按RR-AT94
遥控器上的静音按钮。静音状态下,
音量控制指示灯会闪烁。再次按静音
键将声音音量恢复到原始水平。
红外输入和输出
外置遥控输入
本3.5毫米小型插头(标为EXT REM
IN)接收位于主听音室中的工业标准
红外线接收器(Xantech等)发送的
命令代码。本装置安装在机柜中且前
面板上的感应器被遮挡时,本功能非
常有用。请咨询授权洛得经销商寻求
有关外部接收器的资料和正确连接插
头到小型插座的方法。
注意:来自EXTERNAL REMOTE IN插
座的红外信号可传给使用外部红外线
发射器或硬线连接的IR OUT插座的音
源设备。
红外输出
IR OUT插孔将从EXTERNAL REM IN插
孔收到的红外线信号发送给红外线发
射器或带有兼容后面板红外线接头的
洛得CD播放机、磁带座或调谐器。
在这些设备的红外线感应器因安装在
机柜中而被遮挡时,您可以使用红外
线控制功能操作其它设备。
有关红外线复制系统的资料,请咨询
授权洛得经销商。
注意:位于IR OUTPUT 插孔旁边的
EXT REM IN插孔用于同复制前面板红
外线感应器的外部红外线感应器一同
使用。
输入信号连接
[见图2.]
注意:要避免您或音箱无法承受的高
噪音,进行任何信号连接时请确保系
统电源已关闭。
唱盘机输入 和
地线连接
将电缆从唱盘机插入适当的唱盘机左
右声道输入。如果唱盘机有“地线”连
接,将其连接到唱盘机输入右侧的螺
丝端口。这可以帮助避免嘈杂声和噪
声。
线路电平输入
CD、调谐器和AUX输入为RA-05的
“线路电平”输入。这些用于连接CD
播放机、Hi Fi或NICAM立体声录像
机、调谐器、镭射碟播放机或CD
ROM驱动器的模拟输出。
左右声道均已标记,且应连接到源设
备的相应声道。左声道接口为白色,
右声道接口为红色。使用优质的RCA
电缆将输入源设备连接到RA-05。请
咨询授权洛得经销商寻求有关电缆的
建议。
录音机连接
[见图2.]
磁带输入和输出可连接到可接收标准
电路电平模拟输入和输出信号的录音
/播放设备。通常是传统的磁带录音
机。
将录音机连接到RA-05上时,谨记录
音机的输出接口应连接到RA-05的磁
带输入接口。
同样,RA-05的输出接口应连接到录
音机的输入接口。对于其它音源,请
确保将各设备的左右声道连接到附属
设备的适当的声道。使用优质连接电
缆,以避免音质损失。
注意:磁带输出不受音量、均衡或音
调控制的影响。磁带输出接口接收固
定电平的信号。
前置放大输入
RA-05 有一套前置放大输出接口。可
以从这些输入接口接收来自用功能选
择器选择的音源的信号。通常,这些
输出接口用于向其它用于驱动远程音
箱的合并式放大器或功率放大器提供
信号。
注意:改变音量、均衡或音调控制设
置会影响前置放大器输出接口输出的
信号。
音箱输入
音箱选择器开关
[见图2.]
RA-05有两套音箱输出,标记为“A”
和 “B” 。音箱输出由前面板的开
关 控制。
音箱选择
如果在任何指定时间内只使用一套音
箱,音箱的阻抗最低为4 ohms。如果
有时候您使用A和B音箱,则所有音箱
的阻抗应为8 ohms或以上。音箱额定
阻抗要比实际阻抗低。实际上,极少
数高音喇叭用在RA-05上会出问题。
如果有任何疑问,请咨询授经洛得经
销商。
音箱线选择
使用绝缘的双导线连接RA-05和音
箱。电线的粗细和质量会对系统的性
能产生明显的影响。标准的音箱线也
能用,但是可能会导致输出降低或减
少低音响应,尤其是在距离较远的情
况下。通常,重量更重的线会提升音
质。为得到最佳效果,您可能需要考
虑特别的高质量音箱电缆。洛得授权
经销商可以帮助您为您的系统选择合
适的电缆。
极性和相位
每个音箱的极性或连接的正/负方向
和放大器连接应一致,以确保所有音
箱在相同相位上。如果一个连接接
反,低音输出会非常微弱,立体声效
果会降低。所有音箱线上均有标记,
您可以区别两根导线。在一股导线的
绝缘套上可能有小标签。电线绝缘套
内的导线可能有不同颜色(铜或
银)。绝缘上可能印有极性标记。找
到正负导线,并确保每个音箱和放大
器的连接一致。
音箱连接
连接音箱时请关闭系统中所有设备的
电源。RA-05的后背上有各种颜色的
接线柱型音箱接头(除禁止使用接线
柱的欧共体国家之外)。这些接线柱
可连接裸线、接线插片或双香蕉型接
线头。
将电缆从RA-05连接到扬声器上。要
留有足够的余地,以便可以移动设备
以连接到扬声器接线柱上。如果您使
用香蕉型插头,先接到线上然后插到
接线柱后面。应拧紧音箱接线柱上的
套环(顺时针)。
如果使用接线片,将其连接到电线
上。如果您直接将裸线连接到接线柱
上,请分开电线的导线,并自每根导
线的端头将绝缘剥去。请小心不要将
导线切断。将接线柱的套环拧开(逆
时针方向)。将接线片或导线绕在接
线柱轴上。顺时针拧紧套环,固定接
线片或线头。
注意:请确保没有松开的线束与邻近
的电线或导线接触。
中文
13 14
RA-05 立体声合并式放大器

12伏触发出口
收到12伏开机信号时,有些音频设备
可自动打开。RA-05的两个12伏触发
输出提供开机所需信号。用传统的
3.5毫米小型插孔电缆将兼容设备连
接到RA-05上。RA-05处于待机状态
时,触发信号被中断,它所控制的设
备被关机。
保护指示灯
RA-05装有过热和过流保护电路,可
在极端和错误的操作情况下保护放大
器免遭损坏。保护电路独立于音频信
号,对音质表现没有影响。相反,保
护电路监控输出装置的温度,如果温
度超出安全限度,将关闭放大器。
一般来说,您在操作中不会见到这些
保护电路。但是,如果出现故障情
况,放大器将停止播放,前面板上的
LED指示灯将会点亮。
出现这种情况时,关闭放大器。待其
冷却几分钟后,尝试找出并解决导致
保护电路介入的问题。重新打开放大
器时,保护电路自动重置,LED指示
熄灭。
大多数情况下,保护电路由于错误情
况例如音箱电线短路或通风不畅引起
温度过高而激活。在极罕见的情况
下,高度灵敏的或太低的音箱阻抗负
载可能造成保护电路介入。
如果保护电路重复触发,而且您无法
隔离并解决故障,请联络授权洛得经
销商帮助解决问题。
故障排除
音响系统的多数故障是由于错误连接
或控制设置不正确引致。如果您遇到
问题,请屏蔽有问题的区域,检查控
制器设置,确定故障原因并进行必要
的修正。如果RA-05仍然没有声音,
请参考以下状况的建议:
电源指示灯不亮
RA-05插入墙壁电源插座且电源开关
打开时,电源指示灯应该点亮。
如果没有点亮,用其它电气设备例如
台灯测试电源插座。确保电源插座没
有被已断开的开关控制。
更换保险丝
如果其它电气设备插到该插座时可正
常工作,但RA-05插到同一插座且电
源开关打开时指示灯不亮,表明内置
保险丝可能已烧断。如果您确信发生
这种情况,请联络授权洛得经销商更
换保险丝。
没有声音
检查信号源,看其是否正常工作。确
保连接信号源和RA-05的输入的电缆
已正确连接。确保监听选择开关已被
设置到正确的输入。检查RA-05和音
箱之间的连线。
技术参数
连续功率输出 40 watts/ch
(20-20 kHz, < 0.03%, 8欧姆)
总谐波失真(20Hz-20kHz) 额定功率、1/2功率或1瓦特时 <0.03%
互调失真(60Hz:7 kHz, 4:1) 额定功率、1/2功率或1瓦特时 <0.03%
频率响应
唱盘机输入 20Hz-15kHz, ±0.3dB
线路水平输入 10Hz-40kHz, ±1dB
阻尼系数 (20-20,000 Hz, 8欧姆) 180
输入敏感度/阻抗
唱盘机输入 2.5mV / 47 kOhms
线路水平输入 150 mV / 24 kOhms
输入过载
唱盘机输入 180mV
线路水平输入 5V
前置放大输出/阻抗 1V / 470 Ohms
音调控制 – 重低音/颤音 ±6 dB at 100Hz / 10kHz
信噪比(IHF “A” 加权)
唱盘机输入 80 dB
线路水平输入 100 dB
电源要求
美国版本 120 伏特, 60 赫兹
欧洲版本 230 伏特, 50 赫兹
中国版本 220 伏特, 50 赫兹
功率消耗 220 瓦特
尺寸(宽 x 高 x 厚) 437 x 72 x 342 毫米
17 1/8 x 27/8 x 131/2”
面板高度 60 mm / 2 3/8”
重量(净) 5.9 kg, 13 lbs.
本手册印刷时所有参数均属精确。
洛得保留修改的权利,恕不另行通知。
中文
15 12
RA-05 立体声合并式放大器
Other manuals for RA-05 SE
1
Table of contents
Other Rotel Amplifier manuals

Rotel
Rotel RB-976 MkII User manual

Rotel
Rotel RA-810A User manual

Rotel
Rotel RMB-1076 User manual

Rotel
Rotel RC-970BX User manual

Rotel
Rotel RB-971MKII User manual

Rotel
Rotel RA-2040 User manual

Rotel
Rotel RA-870BX User manual

Rotel
Rotel A12MKII User manual

Rotel
Rotel RC-1090 User manual

Rotel
Rotel RC-995 User manual