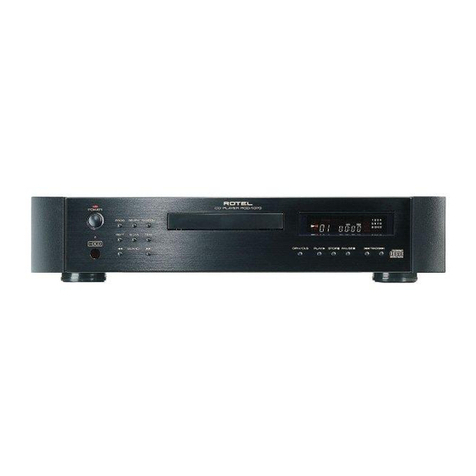
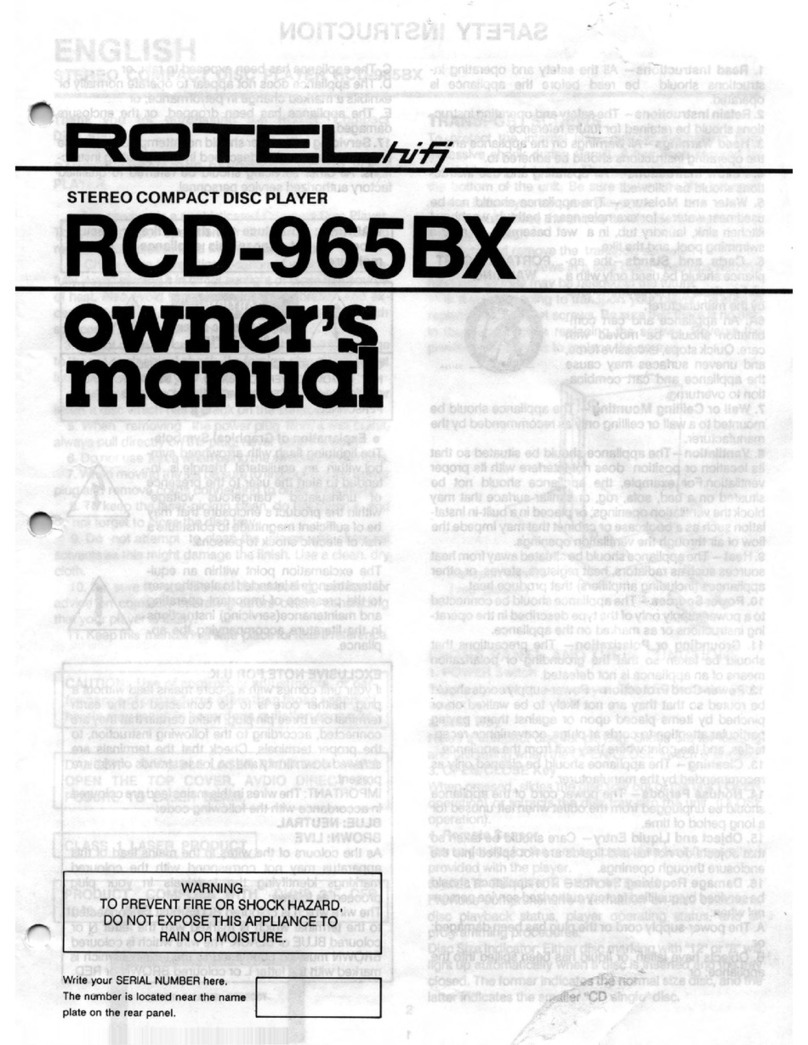
Rotel RCD-965BX User manual

RCD-965BX
owner’s
manual
WARNING
TO
PREVENT
FIRE
OR
SHOCK
HAZARD,
DO
NOT
EXPOSE
THIS
APPLIANCE
TO
RAIN
OR
MOISTURE.
Write
your
SERIAL
NUMBER
here.
The
number
is
located
near
the
name
plate
on
the
rear
panel.

SAFETY
INSTRUCTION
1.
Read
Instructions-
All
the
safety
and
operating
in¬
structions
should
be
read
before
the
appliance
is
operated.
2.
Retain
Instructions
—
The
safety
and
operating
instruc¬
tions
should
be
retained
for
future
reference.
3.
Heed
Warnings—
All
warnings
on
the
appliance
and
in
the
operating
instructions
should
be
adhered
to.
4.
Follow
Instructions-
All
operating
and
use
instruc¬
tions
should
be
followed.
5.
Water
and
Moisture-
The
appliance
should
not
be
used
near
water
~
for
example,
near
a
bathtub,
washbowl
kitchen
sink,
laundry
tub,
in
a
wet
basement,
or
near
a
swimming
pool,
and
the
like.
6.
Carts
and
Stands
-the
ap¬
pliance
should
be
used
only
with
a
cart
or
stand
that
is
recommended
by
the
manufacturer.
6A.
An
appliance
and
cart
com¬
bination
should
be
moved
with
care.
Quick
stops,
excessive
force,
and
uneven
surfaces
may
cause
the
appliance
and
cart
combina¬
tion
to
overturn.
7.
Wall
or
Ceilling
Mounting
-
The
appliance
should
be
mounted
to
a
wall
or
ceilling
only
as
recommended
by
the
manufacturer.
8.
Ventilation
-The
appilance
should
be
situated
so
that
its
location
or
position
does
not
interfere
with
its
proper
ventilation.For
example,
the
appliance
should
not
be
situated
on
a
bed,
sofa,
rug,
or
similar
surface
that
may
block
the
ventilation
openings;
or
placed
in
a
built-in
instal¬
lation
such
as
a
bookcase
or
cabinet
that
may
impede
the
flow
of
air
through
the
ventilation
openings.
9.
Heat
-
The
appliance
should
be
situated
away
from
heat
sources
such
as
radiators,
heat
registers,
stoves,
or
other
appliances
(including
amplifiers)
that
produce
heat.
10.
Power
Sources
-
The
appliance
should
be
connected
to
a
power
supply
only
of
the
type
described
in
the
operat¬
ing
instructions
or
as
marked
on
the
appliance.
11.
Grounding
or
Polarization-
The
precautions
that
should
be
taken
so
that
the
grounding
or
polarization
means
of
an
appliance
is
not
defeated.
12.
Power-Cord
Protection
-
Power-supply
cords
should
be
routed
so
that
thay
are
not
likely
to
be
walked
on
or
pinched
by
items
placed
upon
or
against
them,
paying
particular
attention
to
cords
at
plugs,
convenience
recep¬
tacles,
and
the
point
where
thay
exit
from
the
appliance.
13.
Cleaning
-
The
appliance
should
be
cleaned
only
as
recommended
by
the
manufacturer.
14.
Nonuse
Periods-
The
power
cord
of
the
appliance
should
be
unplugged
from
the
outlet
when
left
unused
for
a
long
period
of
time.
15.
Object
and
Liquid
Entry-
Care
should
be
taken
so
that
objects
do
not
fall
and
liquids
are
not
spilled
into
the
enclosure
through
openings.
16.
Damage
Requiring
Service-
The
appliance
should
be
serviced
by
qualified
factory
authorized
service
person¬
nel
when:
A.
The
power-supply
cord
or
the
plug
has
been
damaged;
or
B.
Objects
have
fallen,
or
liquid
has
been
spilled
into
the
appliance;
or
PORTABLE
CART
WARNING
C.
The
appliance
has
been
exposed
to
rain;
or
D.
The
appliance
does
not
appear
to
operate
normally
or
exhibits
a
marked
change
in
performance;
or
E.
The
appliance
has
been
dropped,
or
the
enclosure
damaged.
17.
Servicing
-
The
user
should
not
attempt
to
service
the
appliance
beyond
that
described
in
the
operating
instruc¬
tions.
All
other
servicing
should
be
referred
to
qualified
factory
authorized
service
personnel.
WARNING:
To
reduce
the
risk
of
fire
or
electric
shock,
do
not
expose
this
appliance
to
rain
or
moisture
CAUTION
RISK
OF
ELECTRIC
SHOCK
00
NOT
OPEN
CAUTION:
TO
REDUCE
THE
RISK
OF
ELECTRIC
SHOCK,
DO
NOT
REMOVE
COVER
(OR
BACK).
NO
USER-SERVICEABLE
PARTS
INSIDE.
REFER
SERVICING
TO
QUALIFIED
SERVICE
PERSONNEL.
•
Explanation
of
Graphical
Symbols
The
lightning
flash
with
arrowhead
sym¬
bol,within
an
equilateral
triangle,is
in¬
tended
to
alert
the
user
to
the
presence
of
uninsulated
"dangerous
voltage"
within
the
product's
enclosure
that
may
be
of
sufficient
magnitude
to
constitute
a
risk
of
electric
shock
to
persons.
The
exclamation
point
within
an
equi¬
lateral
triangle
is
intended
to
alert
the
user
to
the
presence
of
important
operating
and
maintenance(servicing)
instructions
in
the
literature
accompanying
the
ap¬
pliance.
EXCLUSIVE
NOTE
FOR
U.K.
if
your
unit
comes
with
a
2-core
mains
lead
without
a
plug,
neither
core
is
to
be
connected
to
the
earth
terminal
of
a
three
pin
plug,
make
certain
that
they
are
connected,
according
to
the
following
instruction,
to
the
proper
terminals.
Check
that
the
terminals
are
screwed
down
firmly
and
no
loose
strands
of
wire
are
present.
IMPORTANT:
The
wires
in
this
mains
lead
are
coloured
in
accordance
with
the
following
code:
BLUE:
NEUTRAL
BROWN:
LIVE
As
the
colours
of
the
wires
in
the
mains
lead
of
this
apparatus
may
not
correspond
with
the
coloured
markings
identifying
the
terminals
in
your
plug
proceed
as
follows:
The
wire
which
is
coloured
BLUE
must
be
connected
to
the
terminal
which
is
marked
with
the
letter
N
or
coloured
BLUE
or
BLACK.
The
wire
which
is
coloured
BROWN
must
be
connected
to
the
terminal
which
is
marked
with
the
letter
L
or
coloured
BROWN
or
RED.
1

ENGLISH
STEREO
COMPACT
DISC
PLAYER
RCD-965BX
Thank
you
for
purchasing
the
ROTEL
Compact
Disc
Player.
CAUTION
:
READ
THIS
BEFORE
OPERATING
YOUR
PLAYER.
1.
The
product
is
a
sophisticated
Compact
Disc
Player.
To
ensure
proper
operation
for
the
best
possible
sound
reproduction,
please
read
this
manual
carefully.
2.
Choose
the
installation
location
of
your
player
care¬
fully.
Avoid
placing
it
in
direct
sunlight
or
close
to
a
source
of
heat.
Also
avoid
locations
subject
to
vibration
and
ex¬
cessive
dust,
heat,
cold
or
moisture.
Keep
away
from
such
sources
of
hum
as
transformers
or
motors.
3.
Do
not
open
the
cabinet
as
this
might
result
in
damage
to
the
set
or
electrical
shock.
If
a
foreign
object
should
get
into
the
set,
contact
your
dealer.
4.
Be
sure
not
to
handle
discs
with
dirty
fingers.
Never
insert
a
disc
which
has
a
crack
on
the
surface.
5.
When
removing
the
power
plug
from
a
wall
outlet,
always
pull
directly
on
the
plug,
never
yank
the
cord.
6.
Do
not
use
force
when
using
the
switches
and
knobs.
7.
When
moving
the
set
be
sure
to
first
pull
out
the
power
plug
and
remove
cords
connecting
to
other
equipment.
8.
To
keep
the
laser-pickup
clean,
do
not
touch
it,
and
do
not
forget
to
close
the
disc
tray.
9.
Do
not
attempt
to
clean
the
player
with
chemical
solvents
as
this
might
damage
the
finish.
Use
a
clean,
dry
cloth.
10.
Be
sure
to
read
the
Troubleshooting"
section
for
advice
on
common
operating
errors
before
concluding
that
your
player
is
faulty.
11.
Keep
this
manual
in
a
safe
place
for
future
reference.
TRANSPORT
SCREWS
To
protect
the
internal
laser
pick-up
mechanism
from
excessive
shock
during
transit,
it
has
been
secured
by
special
transport
screws.
These
screws
are
attached
on
the
bottom
of
the
unit.
Be
sure
to
remove
the
transport
screws
before
you
turn
your
player
on.
1.
Carefully
place
the
unit
on
its
left
side.
Do
not
subject
it
to
any
shocks.
2.
Turn
and
remove
the
transport
screws.
3.
Place
the
screws
in
a
safe
place,
perhaps
with
this
manuals,
as
they
may
be
needed
in
the
future.
4.
If
you
are
going
to
transport
your
player,
be
sure
to
replace
the
transport
screws.
Be
sure
that
there
is
no
disc
in
the
player
before
replacing
the
screws.
Reverse
the
previous
instructions
to
replace
the
screws.
CAUTION:
Use
of
controls
or
adjustments,
or
per¬
formance
of
procedures
other
than
those
specified
herein
may
result
in
hazardous
radiation
exposure.
DANGER-
INVISIBLE
LASER
RADIATION
WHEN
OPEN
THE
TOP
COVER,
AVDIO
DIRECT
EX¬
POSURE
TO
LASER
BEAM.
CLASS
1
LASER
PRODUCT
PRODUCT
COMPLIES
WITH
DHHS
21
CFR
1040.10
AND
1040.11.
FRONT
PANEL
AND
THEIR
FUNCTIONS
1.
POWER
Switch
Supplies
power
to
your
player.
The
LED
indicator
lights
when
ON.
2.
Disc
Tray
Holds
a
compact
disc
for
playing.
Slides
out
for
loading
and
unloading
when
the
OPEN/CLOSE
switch
is
pressed.
3.
OPEN/CLOSE
Key
When
pressed,
slides
the
disc
tray
out
of
the
unit
(OPEN
operation)
or
retracts
the
disc
tray
into
the
unit
(CLOSE
operation).
4.
Remote
Sensor
The
target
eye
for
the
remote
control
handunit
(transmitter)
provided
with
the
player.
5.
MULTI-
FUNCTION
DISPLAY
Panel
Provides
comprehensive
information
on
disc
selections,
disc
playback
status,
player
operating
status,
and
all
programming
procedures.
Disc
Size
Indicator:
Either
disc
marking
with
"12"
or
"8"
will
light
up
automatically
when
a
disc
is
inserted
and
the
tray
closed.
The
former
indicates
the
normal
size
disc,
and
the
latter
indicates
the
smaller
"CD
single"
disc.
CLASS
1
LASER
PRODUCT
2

6.
PLAY
Key
Initiates
disc
playback.
7.
STOP
Key
For
stopping
play
during
playback
and
for
erasing
a
pro¬
gram
(clear
memory).
8.
PAUSE
Key
Pressing
this
key
during
playback
will
temporarily
interrupt
operation
of
the
unit
(PAUSE).
Pressing
it
again
to
dis¬
engage
the
interruption.
9.
TRACK
Keys
Pressing
these
keys
allows
you
to
move
the
laser
pick-up
sequentially
across
the
disc
to
the
beginning
of
each
selection,
in
either
a
forward
(
>
>
I
)or
reverse
(I
<
<
)
direction.
10.
PROGRAM
Key
Is
used
to
set
or
check
(REVIEW)
a
disc
selection
program.
11.
Random
Key
Randomly
and
automatically
selects
a
playback
sequence
of
the
tracks
on
a
whole
disc.
Since
the
random
selections
are
vast,
each
sequence
selected
would
never
likely
be
repeated
twice.
12.
REPEAT
Switch
Initiates
automatic
repeat
playback
of
the
entire
disc,
or
of
programmed
disc
selections.
13.
INDEX
Keys
Pressing
these
keys
allows
you
to
move
the
laser
pick-up
sequentially
across
the
disc
in
either
a
forward
or
reverse
direction
to
each
index
selection
within
a
track,
only
when
the
disc
playing
has
the
index
numbers
encoded.
NOTE:
not
all
discs
have
the
index
encoded
numbers,
in
which
case
these
keys
will
not
be
functional.
Please
check
the
information
supplied
with
each
disc
whether
the
index
selections
and
numbers
are
available.
To
select
an
index
number,
first
select
a
track
number,
press
the
STOP
key,
press
either
index
buttons
to
your
desired
index
number
(the
index
numbers
will
be
indicated
on
the
first
two
digits
of
the
TIME
digits),
and
press
the
PLAY
key
to
start
the
playback
(the
indication
on
the
display
will
go
back
to
the
time
indication).
If
too
high
index
number
is
selected,
the
ERROR
indicator
lights
up
and
then
the
playback
will
start
at
the
beginning
of
the
track.
14.
SEARCH
Control
Keys
Pressing
these
keys
allows
you
to
scan
the
laser
pick-up
sequentially
across
the
disc
in
a
forward
(
>
>
)
or
reverse
(
<
<
)
directions.
CONNECTIONS
There
are
only
three
connections
to
make
from
your
player.
1.
Make
sure
the
transport
screws
are
removed
from
the
bottom
of
the
unit.
2.
Turn
off
the
power
before
making
any
connections.
3.
Connect
the
ANALOG
(AUDIO)
OUTPUT
jacks
to
the
input
jacks
of
your
amplifier
or
receiver.
They
should
be
connected
to
the
CD
or
AUX
input
jacks.
DO
NOT
use
the
PHONO
input
jacks.
Be
sure
that
the
player
right
channel
(RED)
is
connected
to
the
right
channel
of
your
amplifier,
etc.
Likewise,
be
sure
that
the
player
left
channel
(WHITE)
is
connected
to
the
left
channel
of
your
amplifier,
etc.
4.
If
you
have
a
separate
D/A
converter
unit
or
an
amplifier
with
a
D/A
converter
built-in,
which
has
a
digital
input
socket,
you
can
connect
from
the
DIGITAL
OUTPUT
of
the
player
to
such
digital
input
using
a
proper
connecting
cable
available
in
the
market.
5.
Connect
the
power
cord
to
an
AC
outlet
or
to
the
convenience
outlet
of
your
amplifier,
tuner,
etc.
Be
sure
that
the
convenience
outlet
is
rated
for
more
than
30
watts.
LOADING
A
DISC
1.
P
ress
the
POWER
switch.
The
MULTI-
FUNCTION
DISPLAY
Panel
will
display
a
flashing
dotted
line,
informing
you
that
there
is
no
disc
loaded
in
the
player.
All
this
point,
your
player
will
only
accept
commands
from
the
OPEN/CLOSE
key.
2.
Press
the
OPEN/
CLOSE
key.
The
disc
tray
will
slide
out
from
the
unit.
If
the
disc
tray
is
obstructed
from
opening
it
will
stop
in
that
position.
Press
the
OPEN/
CLOSE
key
again
and
the
disc
tray
will
close.
Remove
the
obstruction
and
press
the
OPEN/
CLOSE
key
again.
3.
Load
a
compact
disc.
Either
5"
or
3"
(CD
single)
can
be
used.
Once
the
disc
tray
is
fully
open,
remove
a
com¬
pact
disc
from
its
case
and
holding
the
disc
by
its
edges,
put
it
into
the
tray
with
the
label
facing
upwards.
4.
Close
the
disc
tray.
You
can
close
the
disc
tray
in
three
different
ways:
by
pressing
the
OPEN/
CLOSE
key,
by
pressing
the
PLAY
key,
or
by
gently
pressing
the
tray
inward.
If
the
disc
tray
is
closed
by
pressing
the
PLAY
key,
the
compact
disc
will
immediately
start
playing
once
the
tray
is
fully
closed,
otherwise
the
unit
will
wait
for
further
programming.
3

5.
To
remove
a
compact
disc,
simply
press
the
OPEN/
CLOSE
key
and
wait
for
the
tray
to
slide
out.
Then
grasp
the
disc
by
its
edges
and
lift
it
out.
Remember
to
close
the
tray
if
you
are
not
going
to
be
using
your
player
immedi-
^
ately.
Playing
the
Complete
Disc
If
you
simply
want
to
play
the
whole
disc,
close
the
tray
by
pressing
PLAY.
Once
the
contents
list
on
the
disc
has
been
read
and
the
laser
pick-up
has
reached
the
beginning
of
the
first
track,
the
first
track
number
appears
above
TRACK
and
play
starts.
The
playing
time
of
each
track
is
counted
off
and
displayed
above
MIN
and
SEC.
As
each
track
ends
the
track
number
jumps
on,
followed
by
the
display
of
the
playing
time
of
the
new
track.
As
soon
as
all
the
tracks
have
been
played,
the
disc
stops
and
the
display
shows
the
total
number
of
tracks
on
the
disc
and
the
total
playing
time.
Going
back
to
the
Beginning
of
a
Track
You
can
go
back
to
the
beginning
of
a
track
which
is
being
played,
by
pressing
PLAY
again.
The
track
then
starts
again
from
the
beginning.
Moving
to
AnotherTrack(l<
<
TRACK
>
>1)
Selecting
a
Later
Track-Press
the
TRACK
key
to
for¬
ward
(
>
>
I)
unit
the
desired
track
number
appears
above
TRACK.
If
you
press
TRACK
when
playing
the
last
track,
the
ERROR
indicator
will
light,
reminding
you
that
there
is
no
next
track,
and
play
continues
with
the
last
track.
If
player
is
in
the
repeat
mode,
the
ERROR
will
not
light,
and
^
play
will
continue
with
the
first
track.
Selecting
a
Previous
Track-Press
the
TRACK
key
(
I
<
<
)
until
the
desired
track
number
appears
above
TRACK.
If
you
press
(I
<
<
)
during
the
first
track,
the
ERROR
will
light,
reminding
you
that
there
is
no
previous
track,
and
play
continues
with
the
first
track.
If
the
player
is
in
the
repeat
mode,
the
ERROR
will
not
light,
and
play
will
con¬
tinue
with
the
last
track
Finding
a
Particular
Passage
(<
<
SEARCH
>
>
)
During
play,
you
can
quickly
locate
a
particular
passage
in
a
track
by
pressing
<
<
SEARCH
and
SEARCH
>
>
.
While
you
hold
<
<
SEARCH
down,
the
laser
pick-up
runs
back
towards
the
beginning;
while
you
hold
SEARCH
>
>
down,
the
laser
pick-up
runs
towards
the
end.
By
using
<
<
SEARCH
and
SEARCH
>
>
alternately,
you
can
find
any
part
of
any
passage.
When
you
release
the
key,
play
restarts
at
once.
During
search,
the
laser
pick-up
moves
at
three
successive
speeds
:
for
the
first
seconds
relatively
slowly,
thereafter
faster,
and
maximum
speed
is
reached
after
approximately
10
seconds
if
you
continue
to
hold
down
the
key.
At
the
first
two
speeds
the
sound
of
the
disc
remains
audible,
though
accelerated,
unless
you
have
also
pressed
PAUSE;
after
that
it
disappears.
When
searching
for
a
passage
by
ear
it
is
advisable
to
release
the
key
at
that
moment;
you
then
keep
the
sound
as
an
aid
to
searching.
If,
by
pressing
<
<
SEARCH,
you
take
the
laser
pick-up
beyond
the
run-in
of
the
first
track,
the
ERROR
lights
and
the
laser
pick-up
stops
at
the
beginning
of
the
track.
The
disc
continues
to
spin,
however,
so
that
play
resumes
when
you
release
the
key.
If
by
pressing
SEARCH
>
>
,
you
take
the
laser
pick-up
beyond
the
run-out
of
the
last
track,
the
ERROR
lights,
and
the
laser
pick-up
jumps
back
about
10
seconds
into
the
disc
and
remains
at
that
point
until
you
release
the
key.
This
is
to
prevent
the
disc
stop¬
ping
unexpectedly
during
search.
Holding
Play
at
the
Start
of
a
Track
or
a
Pas¬
sage/
Interrupting
Play
(PAUSE)
By
pressing
PAUSE
you
can
stop
the
laser
pick-up
exactly
at
the
start
of
a
track
or
a
passage.
To
this
end,
you
first
press
PLAY,
immediately
followed
by
PAUSE,
when
starting
play
of
the
complete
disc,
going
back
to
the
beginning
of
a
track
or
beginning
play
with
a
specific
track.
When
moving
to
another
track
or
searching
quickly
for
a
particular
passage,
you
first
press
PAUSE
and
then
I
<
<
TRACK
>
>1
or
<
<
SEARCH
>
>
,
as
applicable.
To
show
that
you
have
pressed
PAUSE,
the
PAUSE
in¬
dicator
will
light.
At
the
moment
you
want
to
start
play,
press
PAUSE
again.
The
PAUSE
indicator
will
go
out.
For
short
play
interruptions,
you
can
also
press
PAUSE.
The
disc
continues
to
spin,
but
the
sound
stops,
and
the
PAUSE
indicator
now
also
lights.
If
you
press
PAUSE
again,
the
sound
re-starts
at
the
exact
point
where
it
was
interrupted.
The
PAUSE
indicator
will
go
out.
Repeating
the
Disc
(REPEAT)
If
you
want
to
hearthe
whole
disc
again,
press
the
REPEAT
key
before
play
ends.
The
REPEAT
indicator
will
light,
and
the
disc
will
play
continuously
until
you
either
press
the
REPEAT
key
again,
or
press
the
STOP
key
or
the
OPEN/SLOSE
key.
In
the
first
case
the
disc
will
play
on
to
the
end
before
stopping,
in
the
other
two
cases
play
will
stop
at
once.
The
REPEAT
indicator
will
go
out.
Stopping
Play
(STOP
or
OPEN/
CLOSE)
T
o
end
play
before
the
end
of
the
disc,
you
press
the
ST
OP
key.
The
display
then
shows
the
total
number
of
tracks
on
the
disc
and
the
total
disc
playing
time.
If
you
also
want
to
take
out
the
disc
you
end
play
by
pressing
the
OPEN
/
CLOSE
key.
The
indication
"-"
then
appears
again
on
the
display.
PROGRAMMING
Instead
of
playing
a
complete
disc,
you
can
choose
a
number
of
tracks,
and
play
only
these.
You
can
even
decide
on
the
playing
sequence.
It
is
also
possible
to
play
all
the
tracks
in
a
different
sequence
to
that
on
the
disc.
To
do
this,
it
is
necessary
to
store
your
choice
in
the
from
of
a
program
in
the
memory
of
the
player.
The
memory
will
accept
a
maximum
of
20
entries,
which
means
that
at
most,
20
tracks
can
be
stored.
You
can,
however,
only
store
each
track
once.
If
you
exceed
the
maximum
of
20
tracks,
the
ERROR
indicator
lights
to
remind
you
that
the
memory
is
full
and
cannot
accept
any
more
commands.
Programming
is
only
possible
when
the
disc
is
loaded
and
the
tray
is
closed
with
OPEN/
CLOSE.
The
highest
track
number
that
can
be
stored
is
then
shown
on
the
display
and
determined
at
the
same
time,
so
that
errors
in
this
respect
are
precluded.

To
store
the
track
numbers
that
you
want
to
include
in
a
program
(these
can
be
found
in
the
contents
list
in
the
disc
holder),
bring
up
each
track
number
in
turn
above
TRACK
using
the
I
<
<
TRACK
>
>
I
,
depending
on
which
is
quicker,
then
store
it
by
pressing
the
PROGRAM
key.
Do
not
allow
more
than
5
seconds
to
elapse
between
releasing
the
TRACK
key
and
pressing
the
PROGRAM
key,
otherwise
the
microprocessor
in
the
player
will
assume
that
you
have
changed
your
mind
and
the
flashingafter
the
track
number
will
light
continuously;
the
track
can
then
no
longer
be
stored.
However,
you
can
re-activate
a
missed
track
number
again
by
bringing
up
either
the
pre¬
vious
or
the
following
track
number
and
then
returning
immediately
to
the
one
desired.
Example-From
a
disc
containing
14
tracks,
you
want
to
listen
to
tracks
7,
3,
9,
5,
12
and
10
in
that
order.
Load
the
disc
in
the
tray
and
close
it
usinq
the
OPEN/
CLOSE
key.
When
the
contents
list
has
been
read,
the
figure
’14’
will
appear
above
TRACK.
Now
press
the
TRACK
key
until
7'
appears
and
then
press
the
PROGRAM
key.
Theafter
the
figure
will
now
disap¬
pear
and
will
be
replaced
by
'P'
(from
Program)
as
a
sign
that
this
track
has
been
stored.
The
PROGRAM
indicator
will
light.
Continue
by
going
back
to
'3’
using
the
TRACK
key
and
press
the
PROGRAM
key
again;
you
now
read
'3
P’.
You
display
the
remaining
tracks
in
turn
by
pressing
I
<
<
TRACK
>
>
I,
and
then
store
them
successively
by
press¬
ing
PROGRAM.
As
soon
as
you
have
stored
the
last
track
number
you
will
see
’10
P'.
This
remains
until
play
is
started.
If
you
make
a
mistake
and
store
a
wrong
track
number,
you
can
rectify
this
by
going
to
the
previous
or
following
number,
returning
to
the
wrong
one
and
then
pressing
the
PROGRAM
key
again.
To
show
that
the
wrong
track
num¬
ber
has
been
erased,
the
’P'
is
replaced
by
a
'C'
(from
Clear).
Using
our
example:
you
have
stored
'4'
instead
of
’5'.
You
go
back
to
’3’
using
the
TRACK
key,
return
to
’4'
using
the
TRACK
key
and
then
press
the
PROGRAM
key.
You
will
then
read
’4
C'.
Now
proceed
with
storing
’
5
’.
During
programming
or
when
you
have
finished
program¬
ming,
you
can
check
the
contents
of
the
program
by
pressing
the
PROGRAM
key
(REVIEW
indicator).
All
the
track
numbers
then
appear
in
the
programmed
sequence,
after
which
the
last
stored
number
is
once
again
displayed.
In
our
example:
’-7-’
-
'-3-'
-
’-9’
-
’-5-’
-
’-12-’
-
'-10-'
-
'10
P’.
If
you
discover
that
the
program
contains
a
track
number
you
do
not
want,
you
can
still
erase
it
by
displaying
it
using
the
TRACK
key
and
then
pressing
PROGRAM.
To
erase
the
whole
program,
press
the
STOP
key.
When,
after
pressing
PROGRAM
the
ERROR
indicator
lights,
this
means
that
the
memory
is
empty
and
no
track
is
stored.
During
programmed
play,
all
player
functions
remain
operative,
except
beginning
at
any
specific
track.
You
start
play
by
pressing
PLAY;
the
first
track
number
of
the
program
then
appears
above
TRACK.
The
progress
of
play
can
be
followed
by
the
jumping
up
or
down
of
the
numbers
above
TRACK.
You
can
see
the
number
of
tracks
still
to
be
played
at
any
time
when
you
press
PROGRAM
:
5
first
the
number
of
the
track
which
is
playing
appears,
then
all
the
remaining
tracks
are
shown
consecutively
(REVIEW).
During
program
repeat
the
numbers
of
the
tracks
already
played
are
also
shown.
You
can
go
back
to
the
beginning
of
a
track
by
pressing
^
PLAY.
If
you
want
to
go
on
to
a
following
track
number
of
the
program,
press
>
>1
;
should
you
do
this
during
the
last
track,
the
ERROR
lights
and
play
continues
with
the
first
track.
To
go
back
to
a
previous
track
number
of
the
program,
you
press
I
<
<
;
should
you
do
this
during
the
first
track,
the
ERROR
lights
and
play
continues
with
the
last
track.
Searching
for
a
particular
passage
using
<
<
SEARCH
and
SEARCH
>
>
is
limited
to
the
space
between
the
beginning
and
end
of
the
track
being
played;
you
cannot
move
the
laser
pick-up
outside
these
limits
to
prevent
arrival
in
another
track,
either
programmed
or
not
programmed,
which
would
upset
the
program.
Arrival
at
either
limit
is
indicated
by
lighting
of
the
ERROR,
upon
which
the
laser
pick-up
stops
until
you
release
the
key.
To
hold
play
at
the
beginning
of
track
or
a
passage,
or
to
interrupt
the
program,
press
PAUSE.
If
you
want
to
repeat
the
program,
press
the
REPEAT
key.
When
all
tracks
of
the
program
have
been
played
the
disc
stops.
However,
the
program
is
retained
in
the
memory
until
you
open
the
tray;
only
then
will
it
be
erased.
The
program
is
also
erased
if
you
press
the
STOP
key
during
play.
OPERATING
THE
REMOTE
CONTROL
SYSTEM
*
The
player
comes
with
the
infrared
remote
control
trans¬
mitter
handunit
to
give
you
the
conveniences
of
remote¬
controlling
most
operational
functions
available.
The
remote
handunit
will
let
you
operate
the
player
similarly
for
all
the
operational
described
above,
except
it
has
no
POWER
on/
off
and
OPEN/
CLOSE
switches.
However,
it
has
one
additional
feature
that
is
not
available
on
the
front
panel
of
the
player:
a
direct
random
access
to
select
a
desired
track
(without
going
through
selection
via
sequen¬
tial
operation
of
the
TRACK
keys).
Whenever
you
wish
to
play
the
desired
track
on
a
disc,
just
press
a
number
on
the
10-
key
numerical
system
on
the
handunit.
If
it
is
the
track
'2'
you
wish
to
play,
press
the
key
marked
’
2
’
and
then
the
PLAY
key
on
the
handunit.
If
the
operating
mode
was
already
in
the
playback
of
another
track,
just
press
the
’
2
’
key
as
the
player
will
automatically
switch
to
the
track
’2’
in
a
second.
On
the
display,
’2'
will
appear
over
TRACK
Note:
"INDEX"
cannot
be
operated
via
remote.

and
then
PLAY
symbol
will
appear.
(When
selecting
’10’,
press
’1’
and
'O’
successively
and
quickly,
and
so
on
for
’11'
and
above
correspondingly.)
-The
direct
random
access
to
the
track
selection
will
also
^make
the
programming
simpler.
Just
press
any
desired
number
on
the
10-
key
and
push
the
PROGRAM
key.
DISC
CARE
AND
HANDLING
Label
Lower
surface
has
the
recorded
signal
Your
player
has
been
specifically
designed
for
the
reproduction
of
compact
discs
bearing
the"
"
mark.
No
other
discs
should
be
loaded
into
the
player”
To
remove
a
disc
from
its
storage
case,
press
down
on
the
center
of
the
opened
case
and
lift
the
disc
out,
carefully
holding
it
by
the
edges.
Always
place
the
disc
in
the
tray
with
the
label
facing
up.
Although
compact
discs
are
impervious
to
wear
during
play,
damage
to
the
surface
of
a
disc
through
improper
handling
will
result
in
playback
irregularities.
To
preserve
your
compact
discs,
please
handle
them
with
care.
Although
minute
dust
particles
and
fingerprints
should
have
no
effect
on
playback,
you
should
keep
the
surface
of
the
recorded
side
of
your
discs
clean
by
wiping
them
with
a
clean,
dry
cloth.
Wipe
in
a
straight
motion
from
the
inside
to
the
outside.
Never
use
record
cleaner,
record
spray,
antistatic
sprays
or
liquids,
or
chemical-based
liquid
to
clean
the
surface
of
a
disc,
as
these
may
irreparably
damage
the
disc’s
plastic
^
jrface.
Always
return
a
disc
its
protective
plastic
case
when
not
using
it.
Avoid
exposing
discs
to
direct
sunlight,
high
temperature
or
high
humidity
for
extended
periods
of
time.
Long
exposure
to
high
temperatures
may
warp
a
disc.
Do
not
write
on
the
label
side
of
the
disc
with
a
ballpoint
pen,
as
this
may
damage
the
disc.
FAULTS
AND
THEIR
LIKELY
CAUSES
Although
the
greatest
care
has
been
taken
in
the
manufac¬
ture
of
this
Compact
Disc
player,
the
possibility
remains
that
a
fault
could
appear
or
that
for
some
reason
the
player
fails
to
function
to
your
complete
satisfaction.
The
cause,
however,
will
certainly
not
always
be
found
in
the
player
itself.
External
factors,
and
the
fact
that
it
takes
time
to
become
accustomed
to
the
whole
concept
of
the
new
product
and
the
new
discs,
can
also
play
a
role.
To
save
you
unnecessary
calls
on
your
dealer
or
our
Service
Organization,
we
have
compiled
a
list
of
possible
faults
and
their
causes,
To
even
mention
some
of
these
causes,
such
as
those
to
do
with
mains
connection,
may
perhaps
seem
excessive.
Our
experience
shows,
however,
that
they
are
easily
overlooked
as
sources
of
trouble.
If,
by
using
this
list,
you
do
not
succeed
in
solving
the
problem,
stop
your
investigation.
Disconnect
the
mains
plug
and
contact
your
dealer.
Under
no
circumstances
should
you
open
up
the
player;
this
will
invalidate
all
rights
under
the
guarantee.
1.
After
pressing
the
ON/
OFF
key,
the
on/
off
Indication
does
not
light.
•
The
key
is
not
pressed
in
far
enough.
•
The
plugs
of
the
AC
cord
are
not
connected
or
are
not
making
contacts.
•
There
is
no
supply
at
the
AC
outlet
plug
in
another
electrical
appliance
and
check
if
that
works.
2.
After
pressing
OPEN/
CLOSE,
the
disc
tray
does
not
slide
out.
•
The
transit
screws
have
not
been
removed.
•
The
player
is
not
switched
on.
Check
if
the
on/off
indication
’«’
is
light.
•
The
microprocessor
has
not
received
the
command
properly.
Check
if
the
tray
opens
if
you
switch
the
player
off
and
on
again,
and
then
press
OPEN/
CLOSE
once
more.
•
The
tray
drive
is
not
functioning.
You
cannot
rectify
this
yourself.
3.
After
pressing
OPEN/
CLOSE
or
PLAY,
the
disc
tray
dose
not
slide
in.
•
The
mains
supply
has
been
interrupted.
Check
if
the
on/off
indicator
is
light.
•
The
microprocessor
has
not
received
the
command
correctly.
Check
if
the
tray
closes
if
you
switch
the
player
off
and
on
again,
and
then
press
OPEN/
CLOSE
or
PLAY
once
more.
•
The
tray
drive
is
not
functioning.
You
cannot
rectify
this
yourself.
If
a
disc
is
in
position,
remove
it,
then
push
the
tray
in
carefully
to
close
it.
4.
After
closing
the
tray
the
stand-by
indication
stops
flashing
and
burns
continuously
after
a
few
seconds.
•
The
disc
is
not
inserted
with
the
label
upwards
or
there
is
no
disc
in
the
tray.
•
The
disc
is
dirty.
See
if
cleaning
the
disc,
or
using
another,
clean
disc,
clears
the
fault.
•
The
disc
is
defective.
Try
another
disc
and
see
if
that
clears
the
fault.
6

•
There
is
an
unwanted
object
in
the
disc
tray,
e.g.
a
piece
of
paper
or
a
remnant
of
packaging.
5.
The
disc
is
being
played
because
the
track
number
or
the
time
indication
moves
on
regularly,
but
there
is
no
sound.
•
The
amplifier
or
the
receiver
is
not
switched
on.
•
The
position
of
the
amplifier
source
selector
switch
dose
not
correspond
with
the
input
to
which
the
player
is
connected.
•
The
amplifier
or
the
(active)
loudspeakers
connected
to
it
are
not
working.
Check
with
another
sound
source
to
see
if
this
is
the
case.
•
The
microprocessor
has
not
received
the
command
correctly.
Check
if
switching
the
player
off
and
on
again,
and
then
re-starting
clears
the
fault.
•
The
connection
between
the
player
and
the
amplifier
is
broken.
•
The
input
to
which
the
player
is
connected
is
defec¬
tive.
Check
this
by
connecting
the
player
to
another
input
socket.
6.
The
sound
is
poor
or
distorted
or
you
can
hear
only
one
channel.
•
The
player
is
not
connected
to
the
CD,
AUX
.TUNER
or
TAPE
IN
input
of
the
amplifier
but
to
the
PHONO
input.
•
One
of
the
plugs
of
the
connection
cable
is
either
not
connected
or
not
properly
connected.
•
The
disc
is
dirty
or
badly
scratched.
See
if
cleaning
the
disc
or
using
another
clean
or
scratch-free
disc
im¬
proves
the
situation.
•
There
is
an
unwanted
object
in
the
disc
tray,
e.g.
a
piece
of
paper
or
a
remnant
of
packaging.
•
The
amplifier
or
the
(active)
loudspeakers
connected
to
it
are
not
working
properly.
Check
with
another
sound
source
to
see
if
this
is
the
case.
7.
Programming
is
not
working.
•
The
disc
is
dirty
or
badly
scratched.
See
if
cleaning
the
disc
helps
or
try
programming
a
scratch-free
disc.
•
The
microprocessor
has
not
processed
the
com¬
mands
properly.
Erase
the
program
by
pressing
STOP
and
store
it
again;
re-start
play
and
check
if
the
fault
has
cleared.
•
All
20
memory
places
are
already
occupied
and
you
have
missed
the
ERROR
indicator
that
indicates
this.
Check
this
by
pressing
PROGRAM
and
counting
the
num¬
ber
of
tracks
displayed.
8.
The
following
faults
can
be
caused
by
the
same
circumstances:
Playback
does
not
begin
with
the
first
track
number
on
the
disc
or
of
the
program,
but
with
another.
Playback
stops
before
the
end
of
the
disc
or
the
program.
•
The
microprocessor
has
not
processed
the
command
correctly.
Check
if
switching
the
player
off
and
on
again,
and
then
re-starting
clears
the
fault.
•
The
disc
is
dirty
or
badly
scratched.
See
if
cleaning
the
disc
or
using
another,
clean
or
scratch-free,
disc
clears
the
fault.
•
The
disc
is
defective.
Try
another
disc
and
see
if
that
clears
the
fault.
There
is
an
unwanted
object
in
the
disc
tray,
e.g.
a
piece
of
paper
or
a
remnant
of
packaging.
SPECIFICATIONS
RCD-965BX
AUDIO:
Number
of
Channels.2
Frequency
Range.20
TO
20,000
Hz
Amplitude
Linearity.+/-
0.05
dB
Channel
Unbalance.+/-
0.5
dB
Phase
Linearity.+/-
0.5
degrees
Signal-to-Noise
Ratio.100
dB
Dymamic
Range.96
dB
Channel
Separation.100
dB
(1
kHz)
THD
+
Noise.0.0025
%
(1
kHz)
Intermodulation
Distortion...0.0025
%
(1
kHz)
Out-Band
Rejection.>60
dB,
above
24.1
kHz
Wow
and
Flutter.Quartz
crystal
precision
AUDIO
LINE
OUTPUT:
Max
Output
Level.2
V
rms
Output
Impedance.200
ohms
Min
Load
Impedance.10
kohms
DIGITAL
OUTPUT:
Output
Level.0.5
V
P.P.
Load
Impedance.75
ohms
MISCELLANEOUS:
Power
Requirement.120
V/
60
Hz,
220
V/
50
Hz,
240
V/
50
Hz
(depending
on
destinations)
Power
Consumption.30
watts
Dimension
(overall).440
(W)
x
92
(H)
x
316
(D)
m^
17-3/8"
x
3-5/8"
x
12-7/16"
Weight
(net).5.8
Kg
/12.76
lbs
•
Specifications
and
design
subject
to
possible
modifica¬
tion
without
notice.
7
Table of contents
Other Rotel CD Player manuals

Rotel
Rotel RCD 970BX User manual

Rotel
Rotel RCD-945AX User manual

Rotel
Rotel RCD-1570 User manual

Rotel
Rotel RCD 975 User manual

Rotel
Rotel CD14MKII User manual

Rotel
Rotel CD11 User manual

Rotel
Rotel CD11MKII User manual

Rotel
Rotel RCD 975 User manual

Rotel
Rotel RCD-1570 User manual

Rotel
Rotel RCD 970BX User manual

Rotel
Rotel RCD-951 User manual

Rotel
Rotel RCD-955AX User manual

Rotel
Rotel RCD-02 User manual

Rotel
Rotel RCC-935 User manual

Rotel
Rotel RCC-1055 User manual

Rotel
Rotel RCD-855 User manual

Rotel
Rotel RCD-1072 User manual

Rotel
Rotel RCD 990 User manual
Rotel
Rotel RCD-945AX User manual
Rotel
Rotel RCC-1055 User manual