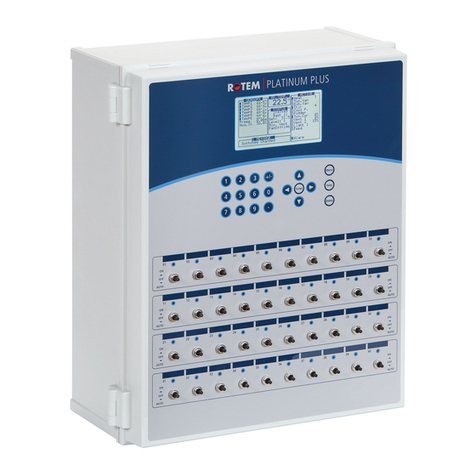
Rotem Platinum Junior User manual


Platinum Plus / Junior
W
WA
AR
RR
RA
AN
NT
TY
Y
D
Do
oc
c.
.
N
Na
am
me
e:
:
U
Us
se
er
r
M
Ma
an
nu
ua
al
l
UWARRANTY & LIMITATION OF LIABILITY
1. ROTEM warrants that the product shall be free of defects in materials or workmanship and will conform to
the technical specification for a period of 1 (one) year from the date of initial installation on sight (the
"warranty period").
2. Load cells are not covered by ROTEM’s warranty.
3. ROTEM warrants that during said warranty period, any item/items or part/parts of equipment found
defective with respect to materials or workmanship or which do not conform to the technical specification
shall be repaired or replaced (at ROTEM's sole discretion), free of charge.
4. During the warranty period, in the event of an alleged defect, authorized resellers in relevant regions should
be notified as soon as possible from the date of noticing the said defect, but no longer than thirty (30) days
from such a discovery. The report shall include (1) a short description of the defects noticed (2) type of card /
component and its matching serial number.
5. ROTEM's sole liability under this warranty is the repair or replacement of the defective item of product.
Conditions and Limitations
1. UROTEM will not be responsible for any labor costs or expenses associated with replacement of defective
items or other parts of the product or repair.
2. This warranty shall not cover: (i) product or part therein which has been modified (without prior written
approval of ROTEM), or (ii) product or part therein which has not handled or installed by an authorized
reseller of ROTEM or (iii) product or part therein which has either handled or installed not in strict
accordance with ROTEM's instructions, (iv) products which were used for function other than agriculture
industry.
3. This warranty will not apply in the following cases: (i) if all components of the product are not originally
supplied by ROTEM (ii) the defect is the result of an act of nature, lighting strikes, electrical power surge or
interruption of electricity (iii) the defect is the result of accident, misuse, abuse, alteration, neglect, improper
or unauthorized maintenance or repair.
ROTEM warns and alerts all users that the Product is inherently complex and may not be completely free of
errors. ROTEM's products are designed and manufactured to provide reliable operation. Strict tests and
quality control procedures are applied to every product. However, the possibility that something may fail
beyond our control exists. Since these products are designed to operate climate control and other systems
in confined livestock environments, where failure may cause severe damage, the user should provide
adequate backup and alarm systems. These are to operate critical systems even in case of a ROTEM system
failure. Neglecting to provide such a backup will be regarded as the user’s willingness to accept the risk of
loss, injury and financial damage.
In no event will ROTEM be liable to a user or any third party for any direct, indirect, special, consequential or
incidental damages, including but not limited to any damage or injury to business earnings, lost profits or
goodwill, personal injury, costs of delay, any failure of delivery, costs of lost or damaged data or
documentation, lost or damaged products or goods, lost sales, lost orders, lost income.
Except for the above express warranty, ROTEM makes no other warranties, express or implied, relating to
the products. ROTEM disclaims and excludes the implied warranties of merchantability and fitness for a
particular purpose. No person is authorized to make any other warranty or representation concerning the
performance of the products other than as provided by ROTEM.
Software Version: 3.00
Document Version: 2.2

Platinum Plus / Junior
T
TA
AB
BL
LE
E
O
OF
F
C
CO
ON
NT
TE
EN
NT
TS
S
D
Do
oc
c.
.
N
Na
am
me
e:
:
U
Us
se
er
r
M
Ma
an
nu
ua
al
l
UTABLE OF CONTENTS
GENERAL ....................................................................................................................................................................1
Introduction ...........................................................................................................................................................1
Keypad ...................................................................................................................................................................3
Hot Screens ............................................................................................................................................................3
Standard Display.....................................................................................................................................................4
Main Menu Icons....................................................................................................................................................5
1. CONTROL ............................................................................................................................................................6
1.1 Temperature Curve......................................................................................................................................6
1.2 Humidity Treatment.....................................................................................................................................9
1.3 Min/Max Level ...........................................................................................................................................10
1.4 Static Pressure ...........................................................................................................................................12
1.5 Control Mode.............................................................................................................................................14
1.6 System Parameters ....................................................................................................................................15
2. DEVICE ..............................................................................................................................................................16
Introduction: Levels ..............................................................................................................................................16
2.1 Levels of Ventilation...................................................................................................................................17
2.2 Speed Fan Levels........................................................................................................................................19
2.3 Vent & Curtain Levels.................................................................................................................................20
2.4 Stir Fan Levels ............................................................................................................................................22
2.5 Stir Fan Program ........................................................................................................................................23
2.6 Cool Pad.....................................................................................................................................................27
2.7 Foggers ......................................................................................................................................................29
2.8 Light...........................................................................................................................................................31
2.9 Water & Feed.............................................................................................................................................34
2.10 Extra Systems.............................................................................................................................................35
2.11 Emergency Setting .....................................................................................................................................36
3. MANAGE...........................................................................................................................................................38
3.1 Bird Inventory ............................................................................................................................................38
3.2 Feed Inventory...........................................................................................................................................39
3.3 Time & Date ...............................................................................................................................................40
3.4 Growth Day & Flock ...................................................................................................................................40
3.5 Alarm Setting .............................................................................................................................................41
3.6 Alarm Reset ...............................................................................................................................................44
3.7 Fail Safe Setting..........................................................................................................................................45
3.8 Password ...................................................................................................................................................46

Platinum Plus / Junior
T
TA
AB
BL
LE
E
O
OF
F
C
CO
ON
NT
TE
EN
NT
TS
S
D
Do
oc
c.
.
N
Na
am
me
e:
:
U
Us
se
er
r
M
Ma
an
nu
ua
al
l
4. SCALE ................................................................................................................................................................47
4.1 Scale Layout ...............................................................................................................................................47
4.2 General Settings.........................................................................................................................................48
4.3 Bird Scale Setting .......................................................................................................................................49
4.4 Feed Bin Setting .........................................................................................................................................50
4.5 Bird Curve ..................................................................................................................................................50
4.6 History .......................................................................................................................................................51
4.7 Feed Conversion ........................................................................................................................................52
4.8 Test............................................................................................................................................................52
4.9 Calibration .................................................................................................................................................53
5. HISTORY............................................................................................................................................................55
5.1 Temperature..............................................................................................................................................55
5.2 Humidity ....................................................................................................................................................55
5.3 Water.........................................................................................................................................................55
5.4 Feed...........................................................................................................................................................55
5.5 Mortality....................................................................................................................................................55
5.6 Heaters ......................................................................................................................................................56
5.7 Radiant Heaters .........................................................................................................................................56
5.8 Alarms........................................................................................................................................................56
5.9 Table of Events...........................................................................................................................................56
5.10 History View...............................................................................................................................................57
6. TEST ..................................................................................................................................................................58
6.1 Switches & Relays ......................................................................................................................................58
6.2 Switches & Relays Ext.................................................................................................................................58
6.3 Alarm.........................................................................................................................................................59
6.4 Analog Sensors...........................................................................................................................................59
6.5 Digital Sensors............................................................................................................................................60
6.6 Analog Output............................................................................................................................................60
6.7 Static Pressure ...........................................................................................................................................60
6.8 Communication..........................................................................................................................................61
6.9 Hardware Checklist ....................................................................................................................................61
6.10 Emergency Status (optional).......................................................................................................................61
7. SERVICE.............................................................................................................................................................62
7.1 Temperature Calibration ............................................................................................................................62
7.2 Humidity Calibration ..................................................................................................................................63
7.3 Static Pressure Calibration..........................................................................................................................64
7.4 Feed Calibration.........................................................................................................................................65
7.5 Water Calibration.......................................................................................................................................65
7.6 Vent Calibration .........................................................................................................................................66
7.7 Nipple Flushing ..........................................................................................................................................67
7.8 Feeders & Drinkers.....................................................................................................................................68
7.9 Save to Plug ...............................................................................................................................................69
7.10 Read from Plug...........................................................................................................................................69

Platinum Plus / Junior
T
TA
AB
BL
LE
E
O
OF
F
C
CO
ON
NT
TE
EN
NT
TS
S
D
Do
oc
c.
.
N
Na
am
me
e:
:
U
Us
se
er
r
M
Ma
an
nu
ua
al
l
8. INSTALL.............................................................................................................................................................70
8.1 Setup .........................................................................................................................................................70
8.2 Relay Layout...............................................................................................................................................71
8.3 Analog Sensors...........................................................................................................................................72
8.4 Digital Sensors............................................................................................................................................74
8.5 Analog Output............................................................................................................................................74
8.6 Curtain Setup .............................................................................................................................................75
8.7 Temperature Definition..............................................................................................................................76
8.8 Fan Air Capacity .........................................................................................................................................76
8.9 House Dimensions......................................................................................................................................77
8.10 Communication..........................................................................................................................................77
APPENDIX.................................................................................................................................................................78
SENSOR READINGS ...............................................................................................................................................78
OUTPUT LIST.........................................................................................................................................................79
STATUS READINGS ................................................................................................................................................80
TABLE OF EVENTS .................................................................................................................................................81

Platinum Plus / Junior
P
PA
AG
GE
E:
:
1
1
C
CH
HA
AP
PT
TE
ER
R:
:
G
GE
EN
NE
ER
RA
AL
L
D
Do
oc
c.
.
N
Na
am
me
e:
:
U
Us
se
er
r
M
Ma
an
nu
ua
al
l
GENERAL
Introduction
Precision Mode
Computerized Electronic Controllers such as the Platinum advance the Producer’s ability
to grow high quality poultry by accurately controlling the environment. Instead of struggling
with individual thermostats for heat zones and ventilation, the Platinum brings it all together
into one convenient place … with great accuracy. In Precision Mode, the Platinum
optimizes and precisely applies your equipment and energy sources to most benefit from
the accuracy of your computer and sensors.
Where Simplicity and Ease of Use are important benefits of Standard Mode, Features
and Precise Application characterize Precision Mode. The Platinum coordinates your
ventilation equipment in precise levels of ventilation to provide the optimal fresh air
balanced with heating costs. The light and feed clocks provide additional channels for
greater capability. Besides advanced Cool Pad methods, you benefit from superior stir fan
programs to recover ceiling heat and many other features. For the additional effort required
in Precision Mode, you can significantly improve your profitability.
The Platinum provides a variety of Management and History utilities. You can choose from
simple overviews, or if you wish, fully detailed by the minute records of minimum,
maximum and average temperatures for each individual sensor. The unique Table of
Events is one of the most liked Histories in the Platinum. It records the moment of every
significant action taken by the Platinum and, optionally, its operator.
Communication software is available to customers who wish to access their Platinum
controllers from their home or personal computers at ROTEM’s website, Uwww.rotem.comU.
ROTEM provides technical support on the website, as well as through the large dealer and
agent network.
This volume describes the Precision Mode operation of the Platinum. For greater Simplicity
and Ease of Use, you can opt to use the Standard Mode, which you will find in the previous
volume.

Platinum Plus / Junior
P
PA
AG
GE
E:
:
2
2
C
CH
HA
AP
PT
TE
ER
R:
:
G
GE
EN
NE
ER
RA
AL
L
D
Do
oc
c.
.
N
Na
am
me
e:
:
U
Us
se
er
r
M
Ma
an
nu
ua
al
l
Precision Ventilation - A Quick Look
ROTEM’s Precision Ventilation works by giving the Platinum many finely spaced levels of
ventilation to choose from. This allows it to find the right ventilation for the conditions. A
typical change in ventilation from one level to the next in Precision Mode is 20%, compared
to as much 1,000% in Standard Mode (for example, when the Minimum Ventilation Timer
setting is 30 Seconds On, 270 Seconds Off).
Consider the following simplified Ventilation Levels example:
Ventilation
Level
Diff
ºF
On Time
Seconds
Off Time
Seconds
Cycle
Fans Comments
… 0 … … … Lower Levels …
5 0 60 240 1 and 2 1 Minute out of 5 on Timer Fans
6 0 75 225 1 and 2
Current Level, 25% more than
Level 5
7 0 90 210 1 and 2
1½ Minutes out of 5, 20% more
than Level 6
… … … … … … Higher Levels
The Platinum is currently at Level 6, which in this example means two cycle or timer fans
run 1¼ minutes out of 5. If required, the Platinum will move to Level 5 or Level 7 to
maintain the Target Temperature.
Note the Diff ºF column, in this example, the Differential Temperature for each level is
Zero. This means that all these levels occur at the same temperature! In Precision Mode,
the Platinum finds that level of ventilation which precisely maintains the target temperature.
How does it do this? Very well, thank you. You will need to read deeper into this volume to
get the details!
Besides maintaining more accurate and precise temperatures, Precision Mode has other
benefits. A few examples:
1. Increased Reliability - it can ‘rotate’ minimum ventilation timer fans so that all of
your fans get a turn.
2. Save Fuel while Ventilating Better - it can automatically decrease ventilation as
fuel use increases, and increase ventilation whenever outside temperatures allow
economical use of free air. See the ‘Soft Min Vent’ section.
3. Recapture Free Heat - it has features to bring otherwise lost heat back to the birds
where it benefits them. See the ‘Stir Fans’ sections.
This volume describes the features and benefits of Precision Mode in the following pages.
Remember that additional Technical Help is always available at Uwww.rotem.comUand
through ROTEM’s network of dealers and field representatives.

Platinum Plus / Junior
P
PA
AG
GE
E:
:
3
3
C
CH
HA
AP
PT
TE
ER
R:
:
G
GE
EN
NE
ER
RA
AL
L
D
Do
oc
c.
.
N
Na
am
me
e:
:
U
Us
se
er
r
M
Ma
an
nu
ua
al
l
Keypad
Enter main menu, also acts as "ESC" or "Back" keys
Access help screens and graphs
Erase typing mistakes
Enter menus, values, open windows,
Scroll up, down, left and right
Enter values, select options and make selections
Toggle between positive and negative values and mark check boxes.
Hot Screens
Many of the keys serve as shortcuts. Here are the main ones:
Hot Screens:
-Software Version
-Return to standard main screen
-Temperature and Humidity Status
-Curve Status
-Curtain Position
-Bird Scale and Feed Bin Status
-Light Status
-Analog Output Status
-Lock password protected controller
-Scan through Hot Screens for five seconds each
Enter
Enter
Menu
Help
Delete
Enter
+/-
Help
1
2
3
4
5
6
7
9
.
Increase/Decrease
Offset from
Temperature Setting
from the Standard
display only (hold
both keys) – Defined
in the TEMPERATURE
CURVE HELP |SET

Platinum Plus / Junior
P
PA
AG
GE
E:
:
4
4
C
CH
HA
AP
PT
TE
ER
R:
:
G
GE
EN
NE
ER
RA
AL
L
D
Do
oc
c.
.
N
Na
am
me
e:
:
U
Us
se
er
r
M
Ma
an
nu
ua
al
l
Standard Display
The main screen consists of five parts.
1 Shows individual sensor readings. Temperature sensors marked with dark squares form
the current average temperature.
Filled square – indicates the sensor
participates in the average calculation.
Empty square - indicates the sensor does
not participate in the average calculation.
NOTE: Go to the USENSOR READINGSUsection to
view all the possible sensors.
2 Reports the current average temperature. This example is in Celsius, but yours may be
in Fahrenheit.
3 Shows the output relay list. The filled black boxes indicate active outputs. Controller also
informs the position of inlets and curtains, as well as the number of operating heaters or
fans.
NOTE: Go to the UOUTPUT LISTUsection to view all
the available readings (ACTIVE).
The ACTIVE screen shows rectangular
markers by the outputs. Filled rectangles
indicate operating outputs; empty
rectangles indicate outputs that are off.
1
2
3
4
5
!

Platinum Plus / Junior
P
PA
AG
GE
E:
:
5
5
C
CH
HA
AP
PT
TE
ER
R:
:
G
GE
EN
NE
ER
RA
AL
L
D
Do
oc
c.
.
N
Na
am
me
e:
:
U
Us
se
er
r
M
Ma
an
nu
ua
al
l
4 Status Window gives important general information such as the time and ventilation
mode.
EXAMPLE:
NOTE: Go to the USTATUS READINGSUsection to view all the available readings.
5 Shows important messages/alarms. The title bar shows the number of important
messages, and if there are several messages they each appear in turn.
Main Menu Icons
Set, calibrate and
test Bird Scale and
Feed Bin Scale.
Control temperature,
humidity, ventilation,
static pressure and
system parameters.
Define settings of all
equipment.
Manage inventory, livestock,
and alarm/password settings.
Install sensors, devices,
communication, etc.
Calibrate temp., humidity,
ventilation, static pressure,
feed, water, read/save to plug.
Test to see switches,
relays, communication, and
alarms are functioning
properly.
View history of all
functions and data
except for Scale.
TEMP SET TO
TIME
CONTROLLER STATE
GROWTH DAY
CURRENT LEVEL OF VENTILATION
TIME UNTIL CYCLE ENDS OPERATION

Platinum Plus / Junior
P
PA
AG
GE
E:
:
6
6
C
CH
HA
AP
PT
TE
ER
R:
:
C
CO
ON
NT
TR
RO
OL
L
D
Do
oc
c.
.
N
Na
am
me
e:
:
U
Us
se
er
r
M
Ma
an
nu
ua
al
l
1. CONTROL
1.1 Temperature Curve
Define the desired target temperature curve.
•UDayU:Set Growth Day. You can program negative growth days up to -2 for pre-warming.
To enter a negative growth day, type the day number followed by the +/- key.
•UTargetU:Set the desired temperature.
•UHeatU:Set the temperature to stop heat.
•UTunnelU:Set the temperature for Tunnel to begin.
•UAlarm Low & HighU:Set average temperature alarm limits. See UManage | Alarm
SettingsUfor zone alarm settings.
1. Temperature Curve
Enter
Menu
Temperature Curve Graph
Growth Day
Temperature
Target
Temp Curve
Heater
Temp Curve
Tunnel
Temp Curve
Target Temp Curve
approaches Heat Curve
for young chicks and
Tunnel Curve for
mature broilers.

Platinum Plus / Junior
P
PA
AG
GE
E:
:
7
7
C
CH
HA
AP
PT
TE
ER
R:
:
C
CO
ON
NT
TR
RO
OL
L
D
Do
oc
c.
.
N
Na
am
me
e:
:
U
Us
se
er
r
M
Ma
an
nu
ua
al
l
TEMPERATURE CURVE HELP |SET
HELP | SET Definitions:
•UTemperature Curve OffsetU:Adjusts all temperature curves by this amount. You can
use this to temporarily adjust all temperatures up or down for special circumstances. It
will show in the UStatus WindowU, and you can use the UENTER and UpUor UENTER and
DownUhot key combinations to change the offset.
•USet Temp. Change Reminder (Diff)U:Sets the change in set temperature that triggers a
reminder for you to set backup thermostats. Often producers forget to set backup
thermostats as their birds grow from baby chicks to market age, so the Platinum
reminds you. When you press Enter to acknowledge the reminder, the Platinum logs it
in the Table of Events.
•UTarget Temp. BandU:The size of the target temperature zone. This "Happy Zone” is
between Target Temperature and (Target Temperature + Band).
UHeater Temp. BandU: Heaters turn on at ‘Band’ degrees below Heat, and turn off at the
Heat Temperature.
NOTE: Heaters operate at Min level only; however, Radiant Heaters can operate at any
temperature or level below Tunnel.
•UCool Down Factor (%)U:Minimum percentage correction towards target during each
increase Uventilation level delayU. If average temperature does not improve by this
amount, the Platinum will increase ventilation by one level.
•UCool Down Fast Response (Deg.)U:Set a limit to the maximum degrees per minute of
cooling. If Average Temperature drops more than this in one minute, the Platinum
decreases ventilation one level to avoid overshooting. Avoid making this parameter too
small or the normal temperature variation caused by timer fans will reduce the
ventilation level.
•UMin Vent Below Heat Temp ByU:Tells controller to go directly to Min Level in some
cases.
Select from the following choices:
oNone: Operate by the normal level decrease time delay rule.
oZone: Go directly to Min level if any active temperature sensor reaches heat temp.
oAvg.: Go directly to Min level if the average temp reaches heat temp.
•UNon Brood Area Diff. From HeatU:Set differential temperature for non-brood heaters.
You normally use this to set temperatures in unoccupied areas.
NOTE: When set at -99
°
F the heaters are effectively disabled, since it will probably
never go to 99 ºF below the heater temperature. Putting this at 0º sets the non-brood
areas to the heater temperature.
Enter
Help

Platinum Plus / Junior
P
PA
AG
GE
E:
:
8
8
C
CH
HA
AP
PT
TE
ER
R:
:
C
CO
ON
NT
TR
RO
OL
L
D
Do
oc
c.
.
N
Na
am
me
e:
:
U
Us
se
er
r
M
Ma
an
nu
ua
al
l
RADIANT HEATERS HELP |SET
Note: You need at least one radiant heater
assigned to a relay to see these parameters.
Radiant Heaters HELP | SET Definitions:
•URadiant Low – Differential from Heat Set:U
Set degree of difference from Heat for LOW
Radiant Heaters to begin working. This
differential can be positive or negative. (Default: 2.0)
•URadiant High – Differential (Below Low Set):USet number of degrees below Radiant
Low Heaters for HIGH Radiant Heaters to begin working. (Default: 1.0). However, the
Radiant High heaters turn on for the Radiant Ignition Time with the Radiant Low
Heaters to ensure proper heater ignition.
•URadiant Ignition Time (sec):USet number of seconds to power radiant ignition.
(Default: 30).
Note: The Heater Temp. Band applies to radiant heaters as well. For example, if the
Heat Temperature is 80ºF and the Heater Temperature Band is 1ºF, then heaters turn
on at 79ºF and off at 80ºF. If the Radiant Low Differential is at 2.0ºF, then radiant
heaters turn off at 82ºF, and on 1ºF below that at 81ºF. However, a Radiant High
Heater turns on regardless of its temperature setting for the Radiant Ignition Time
whenever the corresponding Radiant Low Heater turns on. This feature ensures proper
flame ignition.
Radiant Heater Differentials
ºF81
ºF82
ºF80
Heat Temperature
Heaters Off
Radiant High Off Radiant Low Off
Low Radiant Diff
may be negative
Radiant Diff Hi

Platinum Plus / Junior
P
PA
AG
GE
E:
:
9
9
C
CH
HA
AP
PT
TE
ER
R:
:
C
CO
ON
NT
TR
RO
OL
L
D
Do
oc
c.
.
N
Na
am
me
e:
:
U
Us
se
er
r
M
Ma
an
nu
ua
al
l
Humidity Treatment
1.2 Humidity Treatment
Humidity treatment forces an increase in ventilation level when the humidity is too high. It
holds the increase for ‘Duration Seconds’, and checks back after ‘Interval Minutes’ for
another increase. After the Duration, the ventilation level may come back down
automatically.
•UDayU: Growth day. Can set multiple programs for same day (Max. programs 20).
•UHumidityU: Humidity at which to begin treatment.
•UInterval MinuteU:Number of minutes between increases in ventilation.
•UDuration Sec.U:Number of seconds the controller maintains the increased level of
ventilation.
HUMIDITY TREATMENT HELP |SET
HELP | SET Definitions:
•UHumidity Band (%)U:Hysteresis band for Humidity Treatment.
•UHumidity Treatment below HeatU:Select YES or NO for allowing Humidity Treatment
when heaters are operating (set in UCONTROL | Temperature CurveU).
2. Humidity Treatment
Enter
Help
Enter
Menu

Platinum Plus / Junior
P
PA
AG
GE
E:
:
1
10
0
C
CH
HA
AP
PT
TE
ER
R:
:
C
CO
ON
NT
TR
RO
OL
L
D
Do
oc
c.
.
N
Na
am
me
e:
:
U
Us
se
er
r
M
Ma
an
nu
ua
al
l
1.3 Min/Max Level
IMPORTANT: Before setting Min/Max level, go through and set up the Device Settings,
especially the Uventilation levelsU. Once you have entered the ventilation levels, use the
Min/Max to select the range of levels to apply to your situation. Typically you increase the
minimum ventilation level as litter conditions deteriorate and the birds require greater
amounts of fresh air. You may also restrict the maximum level to prevent excess air flow
on young birds.
There are three methods for setting Min/Max levels: Day, Time, and Soft Min.
Go to UCONTROL | Control ModeUto select one of the methods.
MIN/MAX LEVEL (DAY)
•UDayU:Set growth day.
•UMinU: Set minimum ventilation level for
controller.
•UMaxU:Set maximum ventilation level for
controller.
MIN/MAX LEVEL (TIME)
•UFromU:Set time of day (hh:mm) in 24 hour
format.
•UMinU: Set minimum ventilation level for
controller.
•UMaxU:Set maximum ventilation level for
controller.
3. Min/Max Level
Enter
Menu

Platinum Plus / Junior
P
PA
AG
GE
E:
:
1
11
1
C
CH
HA
AP
PT
TE
ER
R:
:
C
CO
ON
NT
TR
RO
OL
L
D
Do
oc
c.
.
N
Na
am
me
e:
:
U
Us
se
er
r
M
Ma
an
nu
ua
al
l
MIN/MAX LEVEL (DAY SOFT MIN.)
•UDayU:Set growth day.
•UMin SoftU:Set minimum ventilation level for
when temperature drops below heat
temperature.
•UMinU: Set minimum ventilation level for when
temperature is above heat temperature.
•UMaxU:Set maximum ventilation level for
controller.
Soft Min/Max Level HELP | SET
HELP | SET Definitions:
•UDifferential Below Heat for Soft MinU:Set the degree of difference from heat
temperature (set in UCONTROL | Temperature CurveU) to switch minimum level from
Min. to Soft Min.
•UTemp Choice for Soft MinU:Select inside/outside/attic temperature to control Minimum
Level changes. The minimum level adjusts towards the Soft Min as this temperature
falls. Above the heat temperature, the minimum level will be at the Min setting.
As temperature rises, INSIDE and ATTIC stay at lowest ventilation level reached until
average temperature gets to the heat setting, and then changes instantly. With the
OUTSIDE selection, the minimum ventilation level increases gradually as temperature
rises to the heat setting. This means inside and attic soft min vent choices to latch to the
lowest level reached as long as the temperature remains below the heat setting.
Enter
Help

Platinum Plus / Junior
P
PA
AG
GE
E:
:
1
12
2
C
CH
HA
AP
PT
TE
ER
R:
:
C
CO
ON
NT
TR
RO
OL
L
D
Do
oc
c.
.
N
Na
am
me
e:
:
U
Us
se
er
r
M
Ma
an
nu
ua
al
l
1.4 Static Pressure
Set target parameters for Static Pressure at High and Low Outside Temperatures, as well
as alarms for high and low static pressure.
MIN VENT
•UStatic Pressure at Low TempU: Set desired static pressure for low outside temperature
conditions. Be sure that there is proper air flow at this setting.
•UStatic Pressure at High TempU: Set desired static pressure for high temperature
conditions. Normally this pressure is lower to obtain a larger air inlet opening.
NOTE: Controller interpolates between the LOW and HIGH Temp. Static Pressure. If it
exists the outside temperature sensor controls this feature, otherwise the average
temperature does.
•ULow Static Pressure AlarmU: Set alarm for low static pressure. If you disable it by
setting zero, the Platinum warns you and enters a record in the Table of Events.
•UHigh Static Pressure AlarmU:Set alarm for high static pressure.
•UStatic Pressure BandU: Set desired band for the target pressure.
TUNNEL VENTILATION
•UTarget Static PressureU: Set desired Static Pressure for Tunnel Ventilation Mode.
•ULow Static Pressure AlarmU: Set alarm for low static pressure.
•UHigh Static Pressure AlarmU:Set alarm for high static pressure.
•UStatic Pressure BandU:Set desired band for pressure in tunnel ventilation mode.
ATTIC
•UTarget Static PressureU: Set desired Static Pressure when in attic mode.
•UStatic Pressure BandU:Set desired band for attic ventilation mode.
4. Static Pressure
Enter
Menu

Platinum Plus / Junior
P
PA
AG
GE
E:
:
1
13
3
C
CH
HA
AP
PT
TE
ER
R:
:
C
CO
ON
NT
TR
RO
OL
L
D
Do
oc
c.
.
N
Na
am
me
e:
:
U
Us
se
er
r
M
Ma
an
nu
ua
al
l
STATIC PRESSURE HELP |SET
HELP | SET Definitions:
•UWind Gust Delay Time (sec)U:Set length of time in seconds before starting Static
Pressure control after an unexpected change in air pressure.
•UStatic Pressure During TunnelU:Select YES or NO for using Static Pressure control
when in Tunnel mode.
•UTransitional TunnelU:Select YES or NO for using tunnel inlets when static pressure is
high and vents are already at 100%
•UMinVent Using vent/curtainU:Select Vent=0 or Curtain=1 for controlling static pressure
when in minimum ventilation.
•UIncoming Air Low Temp. (Deg.)U:Define low temperature for static pressure control.
•UIncoming Air High Temp. (Deg.)U:Define high temperature for static pressure control.
•UEmergency Static Pressure Delay (sec)U:Set length of time in seconds before
initiating emergency open when pressure exceeds high alarm setting.
•UCurtain Position in Emergency Static Pressure (%)U:Set the desired curtain position
(in percentage) when an emergency pressure event occurs.
•ULow Static Pressure Alarm Min. Level (MinV)U:Below this level the controller ignores
low static pressure alarms.
•ULow Static Pressure Alarm Min. Level (Tun.)U:Below this level the controller ignores
low static pressure alarms while in tunnel mode.
•UTime to Produce Static Pressure (sec)U:Enter the length of time to reach target
pressure when minimum ventilation fan cycle is on.
•UAttic Advance Opening Time (sec)U:Define the amount of time for the attic inlet to
open before min vent cycling fans turn on.
Enter
Help

Platinum Plus / Junior
P
PA
AG
GE
E:
:
1
14
4
C
CH
HA
AP
PT
TE
ER
R:
:
C
CO
ON
NT
TR
RO
OL
L
D
Do
oc
c.
.
N
Na
am
me
e:
:
U
Us
se
er
r
M
Ma
an
nu
ua
al
l
1.5 Control Mode
Choose house operating modes, turn temperature curves on or off and select which type of
min/max level method to use.
•UHouse ModeU:Select whether the house is in one of the brood set ups, or in full house.
•UEmpty House ModeU: Select YES in order to disable alarms.
•UTemperature CurveU: If you select OFF, temperature settings become fixed values until
midnight on the next setting in UCONTROL | Temperature CurveU.
•UMin. Max. Level ControlU:Set UMin/Max LevelUmethod (Day, Time, and Soft Min).
5. Control Mode
Enter
Menu

Platinum Plus / Junior
P
PA
AG
GE
E:
:
1
15
5
C
CH
HA
AP
PT
TE
ER
R:
:
C
CO
ON
NT
TR
RO
OL
L
D
Do
oc
c.
.
N
Na
am
me
e:
:
U
Us
se
er
r
M
Ma
an
nu
ua
al
l
1.6 System Parameters
System Parameters consolidates all of the HELP | SET menus into one scroll screen.
PAGESECTIONSYSTEM PARAMETER
71.1Temperature Curve HELP | SET
81.1Radiant Heaters HELP | SET
91.2Humidity Treatment HELP | SET
111.3Min/Max Level (Day Soft Min.)
131.4Static Pressure HELP | SET
182.1Levels of Ventilation HELP | SET
212.3Vent & Curtain Levels HELP | SET
282.6Cool Pad HELP | SET
302.7Foggers HELP | SET
322.8Light HELP | SET
393.2Feed Inventory HELP | SET
372.11Emergency Setting HELP | SET
423.5Alarm Setting HELP | SET
6. System Parameters
Enter
Menu
This manual suits for next models
1
Table of contents
Other Rotem Controllers manuals

Rotem
Rotem RLD 7.2 User manual

Rotem
Rotem Platinum PLUS User manual

Rotem
Rotem Platinum PLUS User manual

Rotem
Rotem Platinum PLUS User manual

Rotem
Rotem SuperGuard User manual

Rotem
Rotem SuperGuard Guide

Rotem
Rotem platinum junior xl User manual

Rotem
Rotem Platinum Pro User manual

Rotem
Rotem AC-2000 SE User manual
Popular Controllers manuals by other brands

Rosslare
Rosslare AC-225? AC-225IP? AC-225U quick guide

Daytime
Daytime Smart Control SC16 operating manual

resideo
resideo Buoy BSV-101-WC10-LF installation instructions

Luminous
Luminous SHINE Series manual

Armacost Lighting
Armacost Lighting ProLine 13421 manual

Sorel
Sorel TDC 4 Installation and operating instructions