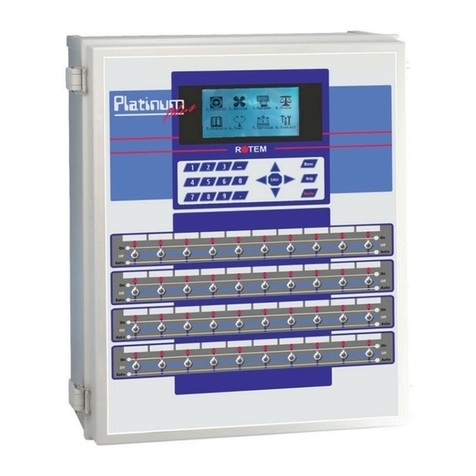
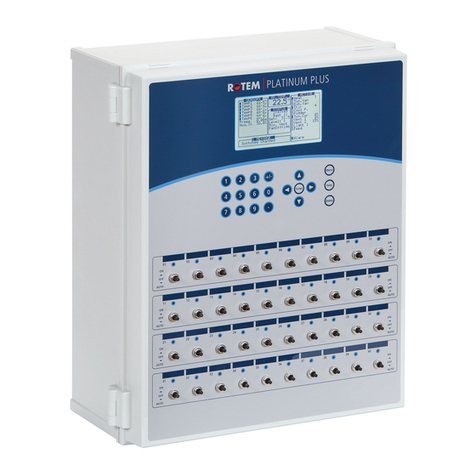
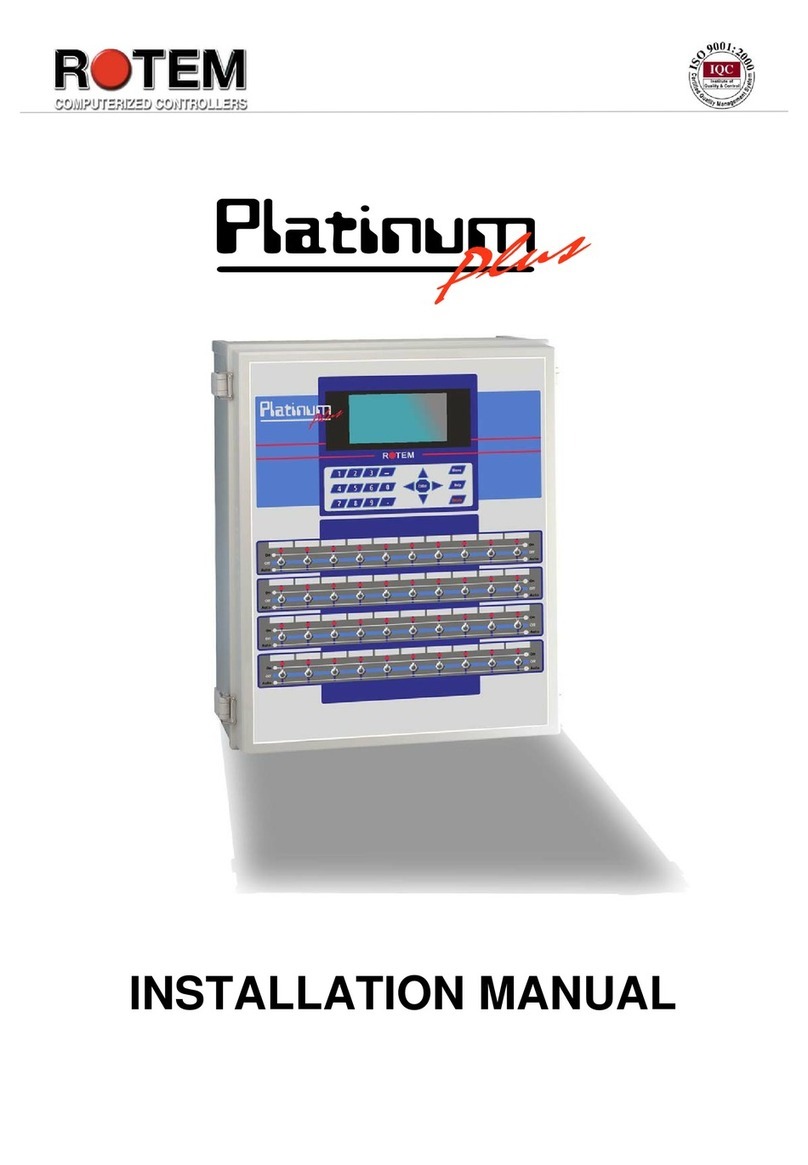
Rotem Platinum PLUS User manual

User’s
Manual

Poultry House Control
2
This manual is published by Rotem Computerized Controllers Ltd. All
rights to this publication are reserved. No part of this document may be
reproduced, transmitted, transcribed, stored in a retrieval system, or translated
into any language, in any form or by any means.
Rotem Computerized Controllers Ltd. reserves the right to make changes
or improvements to the equipment, software, and documentation herein
described at any time without notice.
© Copyright 2004 by Rotem Computerized Controllers Ltd.
Warning:Rotem products are designed and manufactured to provide
reliable operation. Strict tests and quality control procedures are applied to every
product.
However, there is the possibility that something may fail beyond our
control. Since these products are designed to operate climate control and other
systems in confined livestock environments, where failure may cause severe
damage, the user should provide adequate back up and alarm systems. These are
to operate critical systems even in case of a Rotem system failure. Neglecting to
provide such back up will be regarded as the user’s willingness to accept the risk
of loss, injury and financial damage.
Rev: 1.1
Software Version: 2.21
Rotem Computerized Controllers Ltd.
P.O.B. 3392
1 Ha'Ofan St, Kiriat Arie
Petach-Tikva 49511, Israel
Tel: +972-3-920-6200
Fax: +972-3-924-9834
Date: March 24, 2004 Rev: 2.21

Platinum Plus
3
Table of Contents
Warning..........................................................................................................2
Table of Contents...........................................................................................3
Features..........................................................................................................4
Introduction...................................................................................................5
Hot Key Functions .............................................................................................................. 7
General Description ....................................................................................12
Standard Ventilation Mode ............................................................................................... 12
Precision Ventilation Mode............................................................................................... 13
Standard & Precision, Example ........................................................................................14
Other Devices....................................................................................................................15
Standard Mode Programming Guide........................................................17
Where do I start? ............................................................................................................... 17
Standard Mode Example............................................................................23
Let’s Start Here! ................................................................................................................ 23
Install Menu....................................................................................................................... 23
Control Menu .................................................................................................................... 27
Precision Mode Programming Guide........................................................33
Where do I start? ............................................................................................................... 33
Precision Mode Example............................................................................40
Let’s Start Here! ................................................................................................................ 40
Install Menu....................................................................................................................... 40
Precision Ventilation Example.......................................................................................... 46
Control Menu .................................................................................................................... 49
Shared Menus Programming Guide..........................................................57
Detailed Description....................................................................................62
General .............................................................................................................................. 62
Installation......................................................................................................................... 63
Install Menu....................................................................................................................... 65
Control Menu .................................................................................................................... 77
Management Menu............................................................................................................ 86
History............................................................................................................................... 89
Test .................................................................................................................................... 90
Service............................................................................................................................... 91
Index .............................................................................................................92
Poultry House Control
4
Features
ROTEM Platinum Plus features:
User Friendly
Large 20 line X 40 Character Lighted Graphic Display
20 Key Keypad
Standard and Precision Programs
Extensive Historical and Management Information Collection
Communications
Programming Plug (Data Shuttle)
Exceptional Lightning Protection
Up to 40 Heavy Duty Relays
¾Recommended for 1 HP, 220 Volt Devices
¾UL Safety Rated for 2HP, 220Volt Devices
Intelligent On/Off/Auto Switches
¾Detect Operator Switch Changes
¾Guard Against Unauthorized Switch Changes
Integrated Static Pressure
Accurate Temperature Sensors
Modular Construction
Dedicated Alarm Relay
Optional Integrated Emergency System
¾Automatic Temperature Setting
¾Independent Battery Power
Many Other Options…
¾Light Dimmer
¾Bird Scales
¾Feed Silo Scales
¾Water Meter
¾Water Pressure
¾Additional Temperature Sensors
¾Humidity Sensors

Platinum Plus
5
Introduction
The Platinum Plus is a full-featured Poultry House Control. The following
sections introduce the primary features and operator screens.
Main Screen
The main screen has five parts.
1. The upper left part, Sensors, shows the individual sensor readings.
Those marked with dark squares form the current average
temperature.
2. The bottom left section, Messages, shows important messages. The
title bar shows the number of important messages, and if there are
several messages they each appear in turn.
3. The right section, Active, shows the output list. The filled black
boxes indicate active outputs. The Platinum Plus also tells you the
position of inlets and curtains, as well as the number of heaters or
fans that are on.
4. The center section, Status, gives important general information
such as the time and ventilation mode.
5. The upper center section, Average Temperature, reports the current
average temperature.

Poultry House Control
6
Keypad
Help The Help key brings context sensitive helpful information onto
the screen. To exit the ‘Help’ screens at any time, push the
‘Menu’ key.
Menu The Menu key displays the main menu from the standard screen,
and exits the menus whenever you are already in a menu. It is
like a push-push lamp switch that you push to turn on, and push
again to turn off.
Delete The Delete key erases typing mistakes. It also enables the ‘Cold
Start’ function if held at power on.
Arrow The Arrow keys move you around the menus, and help you make
selections. In some cases you can also use them to change values.
+/- Key The +/- key changes values between positive and negative, and
makes check-mark choices when checking or selecting options.
‘.’ Key The ‘.’ Key lets you enter decimal points for tenths of a degree in
the temperature settings.
The Numeric keys enter numbers and make choices in numbered
menus.
Numbers
Several numeric keys perform special Hot Key functions.
Enter The Enter key completes your entry or menu selection. The
Platinum Plus recognizes numeric values when setting
temperatures, times, etc. only after you push the enter key.

Platinum Plus
7
Hot Key Functions
Enter Up/Down – Temperature Offset
Press Enter and Up Arrow simultaneously to raise the temperature setting (or offset)
from the programmed temperature curve. Enter and Down Arrow lowers the temperature
offset from the temperature curve. If there is an offset, it is visible in the STATUS window
on the main screen.
Hot Key ‘1’ – Main Display
Pressing the ‘1’ key at one of the other hot key
displays returns the Platinum Plus to the standard
display.
Hot Key ‘2’ – Curve Status
Press the ‘2’ key at the main display to show
the ‘Curve Status’ screen. It displays the current target
temperatures, pressures, etc. These values usually
change with the age of your birds. Hot Key 2 is a
convenient way to check where your ‘targets’ are
presently.
Hot Key ‘3’ – Curtain Position
Hot Key 3 displays the ‘Curtain Position’
screen that shows the current position of each side
curtain, the tunnel inlet curtain and the side vent
inlets.
Hot Key ‘4’ – Temperature and H2O
Hot Key 4 shows the current temperature and
humidity status for the operating modes.
Hot Key ‘5’ – Scale Update
Hot Key 5 shows current scale information for
both bird scales and feed bin scales. It displays the
current weights, including the weight of the last bird
measured.
Hot Key ‘9’ – System Lock
Hot Key 9 functions only if you turn on
password protection for your controller. If you turned
on password protection Hot Key 9 locks the Platinum
Plus immediately, so the next user must enter a
password to gain access.

Poultry House Control
8
Main Menu
The main
menu screen
shows six choices.
The highlighting
on the Control
Menu icon
indicates that it is
selected. If you
press Enter at this
point, the Platinum
Plus takes you to
the Control Menu.
Choose a different menu by using the arrow keys. The Platinum Plus
highlights the icons accordingly. Alternatively, you can press the indicated
numeric key by each icon. For example, push the ‘3’ key to go directly to the
History Menu. Or, push Menu to go back to the normal main screen.
Control Menu
The highlighting on TEMP
& TIMER SETTINGS indicates
that this option is selected. If you
press Enter, the Platinum Plus
takes you to the Temperature and
Timer Setting Menu. Choose a
different option with the arrow
keys.
Alternatively, you can press
the indicated numeric key by each option. For example, push the ‘6’ key to go
directly to the Light Menu.
The Precision Mode Control Menu has additional choices. It has
additional capability in Temperature, Ventilation Levels, Humidity Treatment,
Foggers, Stir Fans and Static Pressure.
Management Menu
The management menu screen shows ten choices. This menu contains
items primarily related to proper management of your poultry house. You can
manage bird and feed inventories, and set basic items such as time, date and
growth day.

Platinum Plus
9
The alarm reset function
(Menu Item 6) recovers from
emergency pressure and feed
overrun situations.
History Menu
The history menu has ten
historical data sets.
The Heater history
shows fuel consumption by
heat zone, to help determine
where your fuel expenditures occur.
All history except ‘Alarms’ and ‘Table of Events’ erases for a new flock
(see Management | New Flock). These two histories collect particularly
important information regarding the past operation of the Platinum Plus.
Test Menu
The test menu screen
shows internal information
so you can verify that your
Platinum Plus is working
correctly.
The Hardware
Checklist identifies all
option cards the Platinum
Plus has found in your
system.
Communication test helps you find broken wires or other problems with
the communication system, and Emergency Status lets you check your
emergency operation system.

Poultry House Control
10
Service Menu
The service menu has
choices for calibration, to
save and read program
settings from the portable
plug or optional Gold Plug,
and to program a standard
US Robotics modem
connecting your system to a
telephone line. You can also
schedule nipple drinker flushing.
Installation Menu
The installation menu
screen has eight choices in
standard mode, and ten in
precision mode. When you
first install your Platinum
Plus controllers, enter the
basic installation information
in these menus. Identify
functions for your relays
(outputs), and the particular sensors (temperature, humidity, etc.) you have. Also
define the temperature sensors to use for growing and heat zones, as well as
inform the Platinum Plus about your curtains and sidewall inlets.
Switching Between Standard and Precision
To change between the Platinum Plus’s two ventilation modes, standard
and precision:
1. Enter Install menu.
2. Select Setup and press Enter.
3. Select Ventilation Mode and press Enter.
4. A small window will appear to select between precision and standard.
5. Use the up/down arrow keys to highlight your selection, standard or
precision ventilation, and press Enter.
Caution: Be sure that all Install Menu and Control Menu items are
programmed in the new mode, standard or precision. Failure to do so can
result in bird loss.

Platinum Plus
11
Manual/Auto Switches
The Platinum Plus can have up to 40 switches. Each switch usually
controls one relay to turn one device on or off. Assign functions to each switch
in the Install Menu. Initially none of the switches have a programmed function.
An indicator light by each switch indicates when that device is on.
Switch Monitor
Feature
The Platinum Plus
continuously checks the
position of each switch. If
you move a switch the
Platinum Plus asks you to
confirm the new position.
This reduces errors, and
helps you return switches
to their correct position in
case you changed them accidentally. If there is no confirmation for the new
switch position the alarm will operate. The Platinum Plus registers all confirmed
switch changes in History | Table of Events.

Poultry House Control
12
General Description
The Platinum Plus has two ventilation methods. The first is the Standard
method; the second the Precision method. You may find the Standard method
easier to learn at first, but the Precision method will give you more capability,
and may be easier in the long run. You can switch between the two methods at
any time.
Standard Ventilation Mode
Standard Operation is an established method of coordinating heating and
ventilation. In this method, you set one temperature curve for the growth cycle
of the flock. Heaters, fans, cooling systems operate at related higher and lower
set points from this curve.
For example, you may have brooders set -1ºF and space heaters -3ºF from
the Set Temperature. Then if the actual temperature is more than 1ºF cold in a
heat zone, that brooder will be on. Both brooders and space heater would be on
in zones that are more than 3ºF cold.
Usually some fans run on the minimum ventilation timer below their ON
temperature, and full time above that. Additional fans come on at higher
temperatures to provide cooling.
Temperature
Bird Age
Standard Ventilation Mode
Set
Temperature
-1.0ºF Brooder
-3.0ºF Space Heater +1.0 Fan 1
+2.0ºF Fan 2
Young Old
Cold
Hot More Fans
at higher
set temps

Platinum Plus
13
Note: Don’t confuse Set Temperature in Standard Mode with Target Temperature in Precision Mode.
The Set Temperature is generally between heat and fan on/off temperatures. However, it can be
higher or lower since it is only a reference.
The Precision Mode Target Temperature is an actual goal the Platinum Plus tries to achieve. It is not
simply a reference temperature.
Standard mode works reliably, but is not optimum for the whole growth
cycle. Precision ventilation mode provides more optimum control under various
bird age and weather conditions, but, it takes greater effort and care to program.
Precision Ventilation Mode
The Precision Ventilation provides more optimal control for the entire
growth cycle. Instead of just one curve for target temperature, it provides two
additional curves, a separate one for heating and another for tunnel entry or
cooling.
This way you can increase the difference in set point of the heaters with
bird age, so they come on at relatively lower temperatures as the birds put on
feathers. You can reduce the difference for tunnel entry, so tunnel occurs at
relatively lower temperatures for 6-week birds than for 3-week birds. This
adjusts for the greater wind chill effect of tunnel air speed on small birds
compared to large birds.
Temperature
Bird Age
Precision Ventilation Mode
Young Birds Old Birds
Cold
Hot
Heater
Temperature
Curve
Target
Temperature
Curve
Tunnel
Temperature
Curve
Larger
temperature
difference Smaller
temperature
difference

Poultry House Control
14
Standard & Precision, Example
Standard and Precision Ventilation Example
Step 1 Current Conditions for Both Standard and Precision:
2 @ 36” Min Vent Fans 60 sec on, 240 off
Target and Set Temperature: 80ºF
Outside Temperature: 60ºF
Inside Temperature: 80.5ºF
Bird Heat is Balancing Outside Temperature
Standard Mode Settings:
Fans On at 82.0ºF, Off at 81.0ºF
Heaters at 77.0ºF
Precision Mode Settings:
Next Level: 75 Sec On, 235 Off
Heaters at 79.0ºF
Step 2 Change in Outside Conditions due to Sun Rising:
Outside Temperature increases 2º to 62ºF
Step 3 Standard Mode:
1. Inside Temp goes to 82.5ºF
2. Fans go to full time
3. Ventilation, CFM goes from
4,000 cfm to 20,000 cfm
4. Inside Temperature drops
towards heater setting
5. Ventilation yo-yos between
20,000 cfm and 4,000 cfm
with temperature oscillation
Step 3 Precision Mode:
1. Inside Temp goes to 81.5ºF
2. Fans go to next level, 75
seconds on, 235 seconds off
3. Ventilation, CFM goes from
4,000 cfm to 5,000 cfm
4. Inside temperature drops back
to 80.5ºF
5. Ventilation stays at 5,000 cfm
with stable temperature

Platinum Plus
15
Other Devices
The Platinum Plus works conveniently with many optional devices. It’s
leading light program includes features such as sunrise and sunset effects, and
operates with Rotem's light dimmers. Optional scale modules allow you to
connect bird and feed weighing systems.
Here are some options you could add to your Platinum Plus:
1. Emergency Card with its own sensor and back up battery.
2. Normally Closed Switch Card.

Poultry House Control
16
3. Winch and Curtain Card
4. Light Dimmers
5. Bird Scales
6. Feed Scales
7. Cross Fill Feed Monitor
8. Water Consumption
9. External Alarms
10.Communications
11.Curtains and baffles
12.Dwyer Magnehelic
13.Cane Switch
14.Water Pressure Switch
15.Heaters

Platinum Plus
17
Standard Mode Programming Guide
Where do I start?
Start with the Install Menu. Later programming steps can depend on
earlier steps. You can use this chart as a guide.
Standard Mode Programming Steps
Step 1 … 6. Install Menu Comments:
6.1
Install | Setup
Ventilation Mode ►Standard
Language ►English
Temperature Unit ►ºF
Static Pressure Unit ►Inches water
column
Fan Air Capacity Unit►CFM
Length Unit ►Feet
Baud Rate ►9600
House Number, enter as required
Growing Zones, enter as required
Minimum Vent ►usually Yes
Natural Vent ►usually No
Tunnel Vent ►usually Yes
History Resolution ►for history view,
1 minute to 1 day
1. ‘Growing zones’ is the
number of sensor setups
including full house.
2. Minimum Vent includes
power ventilation through
transitional, but not natural
or tunnel.
3. History resolution applies
to History View in the
History Menu.
6.2
Install | Relay
Layout
Program the installed relays as the
electrician wired them.
1. Move the cursor to the relay to be
programmed.
2. Press ‘Enter’ to bring up the list of
relay types.
3. You can use the up/down arrow
keys to scroll through the list.
4. To move quickly to a relay type,
use the two digit code for the relay
type.
5. For relay types past code 99, press
the +/- key first, then the last two
digits.
6. Mark required ventilation modes
for each relay with check marks
1. Radiant Heat Low and
Heat relays operate
identically. However,
radiant low can have
associated high level and
ignition outputs.
2. AC/DC operation mode:
the AC mode keeps relays
on at half power instead of
full power to reduce heat
production.
3. Under Help | Set
Parameters, you can select
5 relays to operate in
reverse.
4. To move a single use relay
code such as heat from one
relay to another, delete the

Poultry House Control
18
Standard Mode Programming Steps
using the +/- key.
7. You can use most codes only once
(heat, fan), and some any number
of times (feed, light). To duplicate
‘once only’ relays, use the ‘Same
As…’ relay codes.
old one, then program the
new one.
6.3
Install |
Analog
Sensors
By default, the Platinum Plus comes
with six temperature sensors
preprogrammed. You can add more
sensors, as well as humidity sensors.
Program analog sensors with Enter to
pop up the list, and arrow keys just as
you program the relays.
1. Platinum Plus sensors
typically are accurate to
within 0.5ºF when
installed.
2. You can assign a
temperature sensor to
measure circuit breaker
temperature.
6.4
Install |
Digital
Sensors
1. Wind Speed: for future use
2. Feed Count: to monitor feed
consumption
3. Water Meter: to monitor water
consumption
4. Feeder Overtime: for overun timer
on feeding system
5. Auxiliary Alarms: use for other
devices such as water pressure, fan
sail switch, etc.
1. Digital sensors are bi-level
(on or off only) as seen by
the controller.
2. Feed Count and Feeder
Overtime usually use the
same sensor wired parallel
to separate digital channels.
3. Calibrate Feed Count &
Water in Service Menu.
6.5
Install |
Curtain Setup
1. Time the curtains and side inlets,
and enter the open and close times
in seconds.
2. For natural or conventional
installations, program options
under Help | Set. Except for the
hold relays at edges parameter,
they apply only to natural type
curtain houses.
3. Under Help | Set, choose whether
the Platinum Plus relays remain
continuously on at the end of
curtain or inlet travel. See the last
parameter, ‘Hold Relay At Edges.’
1. For timing, use the
Platinum Plus clock with
seconds on the main
display.
2. Options to stop fans on
tunnel curtain movement
are at Help | Set under the
Control, Pressure Menu.
3. When a curtain or inlet
reaches the fully open or
closed positions, limit
switches within the
machine stop it. However,
you can optionally have the
Platinum Plus also shut off
the relays after a 50%
delay.
6.6 Enter any bird scales or feed bin scales
in your system.
1. The digital input, Feed
Monitor, provides a low

Platinum Plus
19
Standard Mode Programming Steps
Install | Scale
You can program scale options in the
Management Menu, and calibrate
scales in the Service Menu.
cost feed inventory
method.
2. Feed Bin scales require a
key in the optional scale
card.
3. Duplicated bird scales (two
scale-1) combine for a
single data base.
6.7
Install |
Temperature
Definition
Select the temperature sensors to use
for each function using the +/- key to
apply and remove check marks.
Normally do not assign sensors
to the fans. The sensors
defined for the house operation
mode apply to any device with
no specifically assigned
sensors.
6.8
Install |
Fan Air
Capacity
Enter the fan air capacity for each of
your exhaust and tunnel fans. Under
Help | Set enter the house dimensions
so the Platinum Plus can calculate
wind chill temperature corrections.
If you group fans using the
same as # relay codes, count
the group as a single fan.
6.9
Install |
System
Parameters
You can access system parameters as
‘Set’ parameters under Help in each
menu. Press the Help key, then choose
the Set option. For experienced users,
all system parameters are available
under this menu.
Some parameters may not
appear under Help | Set if they
do not apply. For example,
they may not apply if there is
no such equipment installed.
Step 2 … 1. Control Menu Comments:
1.1
Control |
Temp &
Timer Settings
1. Set On and Off Temperatures for
all temperature related devices.
2. Assign the Minimum Ventilation
timer to the min vent fans.
3. Assign 1 of the 4 auxiliary timers
to devices if desired.
4. Under Help | Set:
a) Set the Minimum number of
Tunnel Fans On.
b) Set the Tunnel Exit Delay
c) Set Non Brood area temperature
relative to target temperature.
d) Set Stir Fan Delay from the end
of the Min Vent Timer and
Operation Duration.
e) Choose if Stir fans continue to
1. Program the minimum
ventilation timer and the
auxiliary timers in their
own menus.
2. The minimum on/off
temperature difference is
0.5ºF.
3. If temperature curve is ON
in Control, Control Mode,
you cannot adjust the set
temperature.
4. Tunnel ON and OFF
temperatures should be at
least 3.0ºF apart.
5. To prevent yo-yoing, do
not increase ventilation at
the tunnel ON temperature.

Poultry House Control
20
Standard Mode Programming Steps
operate or turn off when
reaching their ON temp.
1.2
Control |
Temperature
and Humidity
1. Assign Set Temperatures by bird
age (growth day).
2. Assign Low and High
Temperature Alarm Settings by
bird age.
3. Humidity Levels are for future use.
Precision Mode offers Humidity
Treatment.
1. Platinum Plus calculates
temperatures between those
you enter if ‘Curve On’ is
set in Control Mode.
2. See Management | Alarm
Setting, with Advanced
Alarms On to set
individual sensor alarms
(zone alarms).
1.3
Control |
Minimum
Ventilation
Timer
Set Minimum Ventilation Timer for
up to 10 different bird ages.
You may choose to turn on Minimum
Ventilation Curve in Control, Control
Mode Menu. Then Platinum Plus will
calculate intermediate cycle times.
Special Circumstance: Min Vent by
Curtains instead of Fans
1. Minimum Vent (Power) set to NO
in Install | Setup.
2. Natural Ventilation set to YES in
Install | Setup.
3. No Min Vent Timer assigned in
Control | Temp & Timer Settings.
1. For new growers,
recommend setting safe
ventilation timers for all
bird ages.
2. Advanced growers may
prefer to set min vent
timers daily. If so, use only
the 1st line so it is easy to
adjust.
3. Min Vent Timers run on
Timer BELOW the OFF
setting.
Special Circumstance: if set
this way, Control | Min Vent
Timer menu shows curtain
purge times instead of fan
cycle times.
1.4
Control |
Timer Settings
Set up to 4 independent cycle timers.
Assign particular cycle timers in Temp
& Timer Settings Menu above.
Devices assigned an auxiliary
timer run on cycle timer above
their ON temperature.
Other manuals for Platinum PLUS
4
Table of contents
Other Rotem Controllers manuals

Rotem
Rotem SuperGuard Guide

Rotem
Rotem Platinum PLUS User manual

Rotem
Rotem platinum junior xl User manual

Rotem
Rotem SuperGuard User manual

Rotem
Rotem Platinum Pro User manual

Rotem
Rotem RLD 7.2 User manual

Rotem
Rotem Platinum PLUS User manual

Rotem
Rotem AC-2000 SE User manual

Rotem
Rotem Platinum Junior User manual
Popular Controllers manuals by other brands

Extron electronics
Extron electronics Control Modules ACM Specifications

Sound Performance Lab
Sound Performance Lab Surround Monitor Controller 2489 manual

TELEDYNE OLDHAM SIMTRONICS
TELEDYNE OLDHAM SIMTRONICS WB INTERFACE user manual

Binder
Binder 33 SDV31-S Manual of Instruction

Burkert
Burkert Type 3003 quick start

AUMA
AUMA SQEx 05.2 Operation instructions