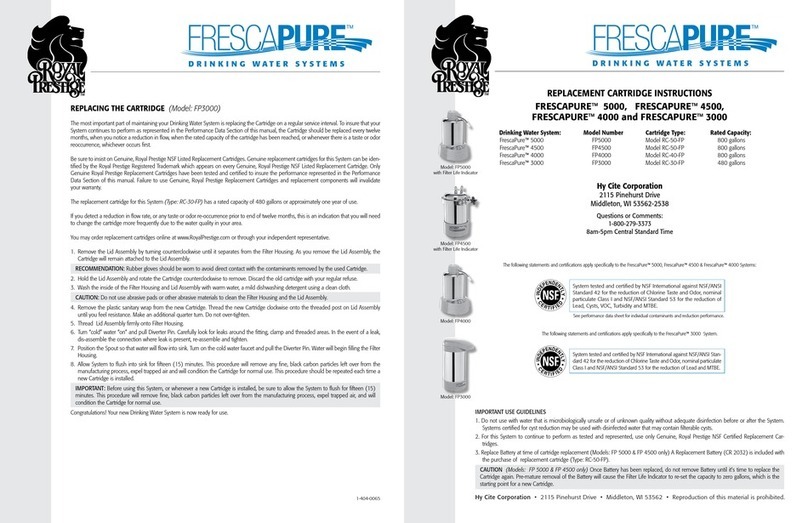
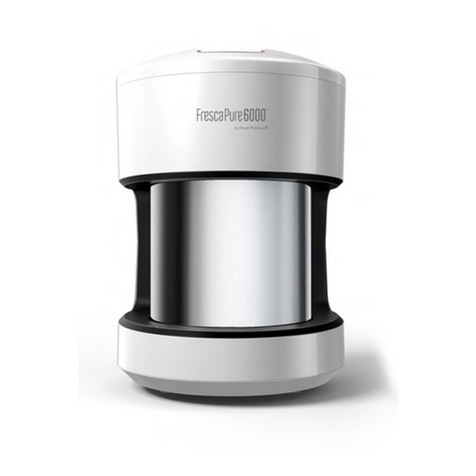
Royal Prestige FrescaPure3500 FP3500 User manual

IMPORTANT: Read and Save these Instructions.
Questions or Comments: Please refer to page 8
USE & CARE MANUAL
MODEL FP3500
WATER FILTRATION SYSTEM
System Tested and Certified by WQA against NSF/ANSI Standard
42 (Aesthetics) for the reduction of Chlorine Taste and Odor,
Chloramine and Nominal Particulate Class I; NSF/ANSI Standard
53 for the reduction of Lead, Cysts, VOCs, MTBE and Turbidity.
See performance data sheet for individual contaminants and reduction capabilities.

WHAT’S IN THE BOX
Congratulations on the purchase of your new, FrescaPure™Drinking Water
System! You have taken an important step toward improving the quality of your
drinking and cooking water. This System takes just a few minutes to install in
your home, cabin, or dorm room.
This System is designed to serve you reliably for many years to come when
operated and maintained according to the directions contained in this manual.
You have made a wise investment in providing quality drinking water for you,
and your loved ones. Now, please take a few, additional minutes to ensure that
you realize all of the benefits your new system has to offer.
INTRODUCTION .........................................1
IMPORTANT USE GUIDELINES ...............................2
SETUP AND INSTALLATION .................................3
REPLACING THE CARTRIDGE................................5
TROUBLESHOOTING ......................................7
SERVICE CENTERS........................................8
OPERATING SPECIFICATIONS ...............................9
REPLACEMENT PARTS DIRECTORY ...........................9
CUSTOMER SERVICE ......................................9
TABLE OF CONTENTS
INTRODUCTION
3 Piece Faucet Adapter Kit
(includes 3 washers)
Filter Cartridge
(ships pre-installed in
housing assembly)
1FRESCAPURE™
Diverter Assembly
Included Literature:
- Use & Care Manual
- Performance Data Sheet
Battery Shuttle
(includes battery)
Lid and Housing Assembly

FRESCAPURE™2
IMPORTANT USE GUIDELINES
Read the manual completely before attempting to install or use this product.
WATER QUALITY GUIDELINES
GUIDELINES TO PREVENT MISUSE
• Actual capacity of your Cartridge may vary from the rated capacity. This
may be due to the volume of contaminants actually present in your
water supply. To ensure best results, replace Filter Cartridge once a
year or when any of the following occur:
a. The flow rate diminishes
b. The rated capacity of the Cartridge has been reached
c. You notice a taste or odor recurrence
d. The Monitor begins blinking RED
• Do not use with water that is microbiologically unsafe or of unknown
quality without adequate disinfection before or after the System.
• Individuals requiring specific microbiological purity should consult
their physician.
• Do not allow System to sit for extended lengths of time without being
used (10 days or more). If System must be left unused for more than
10 days, drain all water from the System and use sanitary gloves to
remove the Filter Cartridge. Place Cartridge into clean pastic bag, seal
and refrigerate. Once you return, re-install Cartridge and flush for 15
minutes prior to use.
• The contaminants or other substances removed or reduced by this
product are not necessarily in all users’ water.
• Replacement cartridges may be purchased from your Authorized Royal
Prestige Distributor. For purchase information please call Customer
Service. (See page 8.)
• This system is for use on cold potable water supplies only.
DO NOT use this System with hot water.
• For this System to continue to perform as tested and represented, use
only Genuine, WQA Certified, Royal Prestige®Filter Cartridges (WF0451).
• This System must be protected from freezing, failure to do so may result
in loss of performance, damage to the parts and water leakage. If System
is exposed to freezing temperatures, drain water from Filter Housing
and remove Cartridge.
• Installation of this product must comply with all state and local laws and
regulations. Refer to your local water regulations for details.

3FRESCAPURE™
1. Unthread and remove the aerator from the
end of your kitchen faucet if it has one.
2. Thread the Diverter Valve directly onto your
kitchen faucet. DO NOT over-tighten.
3. If the threads to the Diverter Valve do not
directly attach to your kitchen faucet, use
one of the three Adapters provided.
4. Most kitchen faucets with external threads
will directly attach to the Diverter Valve.
In some instances the Diverter Valve may be
smaller than your kitchen faucet. In this case
use the Adapter with internal threads and
thread it directly to your kitchen faucet. Next,
thread the Diverter Valve to the Adapter.
5. If your kitchen faucet has internal threads,
thread one of the two Adapters with
external threads directly to your kitchen
faucet. Next, thread the Diverter Valve to
the Adapter.
6. If your kitchen faucet does not have threads,
measure the inside diameter of the kitchen
faucet then contact your Authorized Royal
Prestige Distributor or Royal Prestige
Customer Service Center. (See page 8.) Be
sure to request an Expandable Adapter.
7. If your kitchen faucet does not fit any of
the Adapters provided, send your threaded
aerator to your Authorized Royal Prestige
Distributor or to the Royal Prestige Customer
Service Center (See page 8.)
Include a note requesting an adapter that
fits your threaded aerator.
1. Open the shipping carton, remove all System parts and place them on
your kitchen counter.
2. Compare items with the parts shown in this manual to be certain all items
were included. (See page 1.)
SET UP AND INSTALLATION
BEFORE YOU START
INSTALLATION
1
2
4
5

FRESCAPURE™4
SET UP AND INSTALLATION
8. Determine your System location:
To position System on the LEFT
side of your sink: Unthread Lid
Assembly from Filter Housing, then
orient the Lid Assembly to Filter
Housing as shown. (Fig. 8A, Step 1)
Once positioned, thread Lid
Assembly clockwise onto the
Filter Housing until tightened.
(Fig. 8A, Step 2)
To position System on the RIGHT
side of your sink: Unthread Lid
Assembly from Filter Housing, then
orient the Lid Assembly to Filter Housing as
shown. (Fig. 8B, Step 1) Once positioned,
thread Lid Assembly clockwise onto the
Filter Housing until tightened. (Fig. 8B, Step 2)
9. Press the elbow fitting on Diverter Valve
Assembly into the Filter Base.
10. Insert Battery Shuttle into Lid Assembly.
Monitor will flash GREEN, YELLOW & RED
five times. This resets the Monitor capacity
counter to zero gallons. Do not remove
Battery Shuttle until it is time to replace
Cartridge as this may result in loss of data.
11. With the System placed on the counter,
position Spout so that water will flow into
kitchen sink. Turn the cold water “ON” and
position the Diverter Valve Slider to divert
water into the System. Water will begin
filling the Filter Housing. Check to see that
all hose, clamp and housing connections
are tight and do not leak.
12. When using your System for the first time,
allow the System to flush into the sink for 15
minutes. This will remove any fine, black carbon
particles left over from the manufacturing
process, expel trapped air, and will condition
Cartridge for normal use. Repeat procedure
each time a new Cartridge is installed. (This
water may be used to water plants.)
Congratulations! Your FrescaPure™System is now ready.
11
10
STEP 1 STEP 2 LEFT Placement
Spout
facing
into sink
line up
FRONT
of Lid
Assembly
with Hose
Outlet
8A
Spout
facing
into sink
line up
BACK
of Lid
Assembly
with Hose
Outlet
STEP 1 STEP 2 RIGHT Placement
8B
9
Water Diverted
to System

5FRESCAPURE™
The most important part of maintaining your FrescaPure™Drinking Water
System is replacing the Cartridge on a regular service interval. To ensure that
your System continues to perform as stated in the Performance Data Sheet,
the Cartridge should be replaced upon the first of the following: annually,
when the flow rate diminishes, when the rated capacity of the Cartridge has
been reached, when you notice a taste or odor recurrence, or when the
Monitor begins blinking RED.
1. Remove the Lid Assembly by turning
counterclockwise until it separates from
the Filter Housing. As you remove the Lid
Assembly, the Cartridge will remain attached
to the Lid Assembly.
2.
Hold the Lid Assembly and rotate the Cartridge
counterclockwise to remove. Discard the
old Cartridge with your regular refuse.
3. Wash the inside of the Filter Housing and
Lid Assembly with warm water, a mild dish
washing detergent and a clean cloth.
4. Remove the plastic wrap from the new
Cartridge. Thread new Cartridge clockwise
onto the threaded post on Lid Assembly until
you feel resistance. Make an additional
quarter turn. Do Not Over-Tighten.
REPLACING THE CARTRIDGE
IMPORTANT Be sure to insist on Genuine, WQA Certified, Royal Prestige Replacement
Cartridges. All Genuine Royal Prestige Replacement Cartridges can be identified by
the Royal Prestige Registered Trademark that appears on every Cartridge.
Only Genuine, WQA Certified, Royal Prestige Replacement Cartridges have been
tested and certified to ensure the performance represented in the Performance Data
Sheet. Failure to use Royal Prestige Replacement Cartridges and replacement
components will invalidate your Warranty.
CAUTION
Do not use abrasive pads or other abrasive
materials to clean the Filter Housing or Lid Assembly.
Rubber gloves should be
worn to avoid direct contact with the contaminants
removed by the used Cartridge.
RECOMMENDATION

FRESCAPURE™6
REPLACING THE CARTRIDGE
5. Determine your System Location:
To position System on the LEFT
side of your sink: Orient the Lid
Assembly to Filter Housing as
shown. (Fig. 5A, Step 1) Once
positioned, thread Lid Assembly
clockwise onto the Filter Housing
until tightened. (Fig. 5A, Step 2)
To position System on the RIGHT
side of your sink: Orient the Lid
Assembly to Filter Housing as
shown. (Fig. 5B, Step 1) Once
positioned, thread Lid Assembly
clockwise onto the Filter Housing
until tightened. (Fig. 5B, Step 2)
6. Remove Battery Shuttle from Lid Assembly
and remove old Battery. Place new Battery
(included with your Cartridge) into Battery
Shuttle and insert into Lid Assembly. The
Monitor lights will flash GREEN, YELLOW
and RED five times. This resets the rated
capacity counter to zero gallons. Do not
remove Battery Shuttle until it is time to
replace Cartridge as this may result in
loss of data.
7. With the System placed on the counter,
position Spout so that water will flow into
kitchen sink. Turn the cold water “ON” and
position the Diverter Valve Slider to divert
water into the System. Water will begin
filling the Filter Housing. Check to see that
all hose, clamp and housing connections
are tight and do not leak.
8. Allow the System to flush into the sink
for 15 minutes. This will remove any fine,
black carbon particles left over from the
manufacturing process, expel trapped air,
and condition the Cartridge for normal use.
This procedure should be repeated each
time a new cartridge is installed. (This
water may be used to water plants.)
Spout
facing
into sink
line up
BACK
of Lid
Assembly
with Hose
Outlet
STEP 1 STEP 2 RIGHT Placement
STEP 1 STEP 2 LEFT Placement
Spout
facing
into sink
line up
FRONT
of Lid
Assembly
with Hose
Outlet
7
6
Water Diverted
to System

7FRESCAPURE™
Genuine Royal Prestige®WQA Listed Replacement Cartridge’s may be
purchased from your Authorized Royal Prestige Distributor.
For purchase information, you may also call the Royal Prestige Customer
Service Center. (See page 8.)
TROUBLESHOOTING
White sediment is
in my filtered water.
Ice cubes appear
cloudy in the center.
Filtered water is
flowing slowly from
the System.
YELLOW Monitor
Light is flashing.
There is a presence of
calcium carbonate in
your main water supply.
This will occur any time
the filtered water is
boiled or frozen and
then melts.
Minerals such as calcium
and magnesium that are
present in your water
supply collect in the
center of the ice cubes
when water is frozen.
Your System is designed
specifically to leave
beneficial trace minerals
in your water.
Excessive amounts of
particles in the water
supply may have
caused pre-mature
Cartridge plugging.
Cartridge is reaching
the end of its rated
capacity and will need
to be replaced soon.
This condition is
normal. No action is
required.
No action is required
Cartridge must be
replaced due to poor
water quality condi-
tions in your area.
Contact your Autho-
rized Royal Prestige
Distributor to order a
new Cartridge. Once
RED Light begins
blinking, it is time to
replace the Cartridge
and Battery.
CONDITION REASON SOLUTION

FRESCAPURE™8
SERVICE CENTERS
For warranty service, please send the product to our Service Center:
For detailed warranty information, visit www.royalprestige.com:
ARGENTINA ONLY:
Shelf life: 3.5 years / 13,248 liters (3,500 gallons)
DOMESTIC NETWORK WATER CONDITIONING DEVICE
Imported by: HY CITE BA SRL - SUIPACHA 552 FLOOR 1 - C.A.B.A - RNE Nº 010046680 - RNPUD Nº
USA
HY CITE ENTERPRISES, LLC
Royal Prestige Service Center
2115 Pinehurst Drive
Middleton, WI 53562
PHONE: 1-800-279-3373
Bilingual (English & Spanish)
COLUMBIA
HY CITE ENTERPRISES
COLUMBIA S.A.S.
Calle 90 No. 12-28, PISO 3
Chico, Bogotá, Columbia
PHONE: (571) 745-8694
018000 128694
BRAZIL
ROYAL PRESTIGE DO BRAZIL
COMÉRCIO E IMPORTAÇÃO
DE UTILIDADES DOMÉSTICAS LTDA
Alameda Araguaia
2.104 - 22º Andar Salas 223 A/224 A
Centro Empresarial
Araguaia Corporate - Alphaville
Barueri - SP, CEP 06455-000
PHONE: (11) 4191-5026
MÉXICO
HY CITE MÉXICO S. DE R.L. DE CV.
Avenida Tesistan # 2450
Nave 18 Colonia El Tigre
Zapopan Jalisco C.P. 45134M
PHONE: 01-800-111-1116
PERÚ
HY CITE PERÚ S.R.L.
Calle Cantaurías #160, 170, 176
Oficina #702 - Edificio Cantuarías
Miraflores, Lima-Perú
PHONE: (511) 243-7756
(511) 243-7768
ARGENTINA
HY CITE BA S.R.L.
Suipacha 552, Piso 1,
Capital Federal, Buenos Aires,
Argentina, C.P. 10008
PHONE: 0800 4442904

ITEM PART # DESCRIPTION
1 RP6193 Lid Assembly
2 WF0451 Filter Cartridge (includes battery)
3 RP6192 Housing Assembly
4 RP6191 Battery Shuttle (includes battery)
5 RP6195 3/8” Diverter Assembly
6 RP0160 Faucet Adapter Kit (3 pieces)
1
6
2
3
5
REPLACEMENT PARTS DIRECTORY (Model FP3500)
CUSTOMER SERVICE
OPERATING SPECIFICATIONS (Model FP3500)
Installation .................................................Countertop
EPA Establishment Number..................................63018-NV-001
Rated Capacity..................................1,000 gallons (3,785 liters)
Monitor..................................................Electronic LED
Replacement Filter Cartridge (includes battery) . . . . . . . . . . . . . . . . . . . . . . . .WF0451
Rated Service Flow..............................0.75 gal/min (2.8 liters/min)
Housing Construction ......................High Impact ABS, Stainless Steel
Maximum Working Pressure ............................100 psig (689.5 kPa)
Minimum Working Pressure..............................30 psig (206.8 kPa)
Maximum Operating Temperature .............................100º F/38º C
Minimum Operating Temperature................................34º F/1º C
For customer service contact information, please refer to page 8.
For warranty service, please refer to the warranty document included with
your unit.
4
9FRESCAPURE™

FRESCAPURE™10
NOTES

1-400-0134 r19.03
Exclusively distributed by:
HY CITE ENTERPRISES, LLC
333 Holtzman Road, Madison, WI 53713
www.RoyalPrestige.com •© Hy Cite Enterprises, LLC •Printed in USA
Reproduction of this printed material is prohibited.
Due to continuing product development
and research, final specification and/or
appearance may vary.
Table of contents
Other Royal Prestige Water Filtration System manuals
Popular Water Filtration System manuals by other brands

emaux
emaux SSCnano Installation and operation manual

Watts
Watts PWDWUV3 Installation, operation and maintenance manual

Master Water Conditioning
Master Water Conditioning MBA Series Installation and operation manual

Steinbach
Steinbach speedUV instruction manual

EHEIM
EHEIM Aquaball 2206 instructions

Whole House
Whole House KDF/GAC Assembly instructions