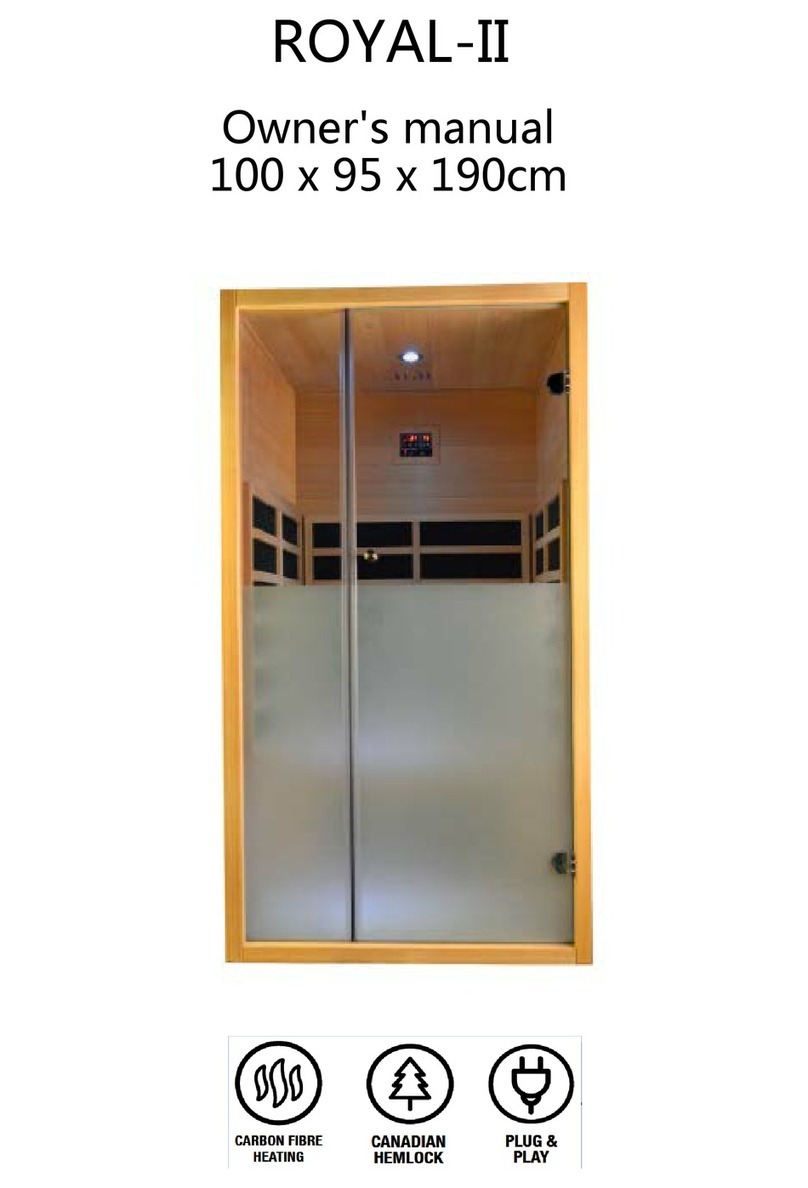
ROYAL SAUNAS 9101-CC User manual

Installation Manual
Model: 9101-CC

Index
Page
Welcome--------------------------------------------------------------1
Introduction---------------------------------------------------------- 2
Part list----------------------------------------------------------------3
Installation Requirements----------------------------------------- 4
Assembly Instructions-----------------------------------------------5
Digital Control Panel Operating Instructions----------------------9
Recommendations for Operation-----------------------------------11
Recommendation for Use-------------------------------------------- 12
Safety------------------------------------------------------------------- 13
Important Safeguards for Your Sauna------------------------------ 15
Cleaning and Maintenance------------------------------------------ 16
Troubleshooting------------------------------------------------------ 17
Warranty---------------------------------------------------------------19

1
Welcome
Thank you for purchasing our sauna products, we congratulate you on your new path to better
health. We are striving to become the best infrared sauna supplier in the world; our list of
consumers increase daily and we believe your success is our success. We attribute this growth and
success entirely to our customer satisfaction, the recognized health benefits, and the quality of our
workmanship. At our factory, we use only the finest materials coupled with state-of-art
construction and the highest safety standard in the industry.
You will be surprised at the noticeable effects of pain relief, weight control, stress reduction, skin
stimulation due to an increased blood circulation when using the sauna.

2
Introduction
We congratulate you on your new path to better health! Thousands of users enjoy the benefits of
an infrared sauna every day. Now you can enjoy the great benefits of far-infrared heat within the
privacy of your own home.
Please read this manual carefully and thoroughly before using an Infrared Sauna for the first time.
We recommend for you to keep this manual for future reference.
Benefits:
Superior Detoxification: Removes Heavy Metals & Fat-stored Toxins
Increased Cardiovascular Conditioning
Stimulated Immune System
Improved Circulation
Pain Relief
Weight Loss and Cellulite Reduction
Beautiful Skin
Stress Reduction
You will be surprised at the noticeable effects on pain relief, weight control, skin stimulation, and
stress reduction due to an increased blood circulation when using this product.
Features:
High quality wood craftsmanship
High quality electronic control system & digital control panel
Pre-assembled board and build-in electrical elements makes the installation easy
Accurate temperature sensor
Energy efficient
Considerate detailed designs
Reading light inside

3
Part List
9101-CC Part List
S/N
PART NO.
PART DESCRIPTION
QTYS
NOTE
1
HY001
Front panel
1
2
HY002
Back panel
1
3
HY003
Side panel (L)
1
4
HY004
Side panel (R)
1
5
HY005
Floor panel
1
6
HY006
Top panel
1
7
HY007
Bench
1
8
HY008
Control box
1
9
HY009
Light
1
10
HY010
Speaker
2
11
HY011
Bluetooth
1
12
HY012
Control panel
1
13
HY013
Handle
2
Interior&Exterior
14
HY014
Hinge
2
15
HY015
Heat panel for left side panel
1
16
HY016
Bottom Heat panel for back panel
1
17
HY017
Heat panel for right side panel
1
18
HY018
Top Heat panel for back panel
1
19
HY019
Glass door
1
20
HY020
Roof cover
1
21
HY021
Screws: For installing the bench &
the roof panel
6
M4*40
22
HY022
Screws:For installing the roof cover
12
M3*16

4
1. Do not plug any other appliances into the outlet with your infrared sauna.
2. The cabin must be erected on a level surface. A distance of at least
5cm from the wall must be maintained.
3. Do not spray the exterior with water. If the floor is damp, install a floor
separator to keep the sauna high & dry.
4. Do not store flammable objects or chemical substances near the sauna.
5. The sauna must be placed indoors and in a dry area. Moisture willcause
damage to the interior and exterior of the sauna.
6. Installation and connection of the electrical parts (control unit,heater,
etc.) may only be performed when the power supply is disconnected.
7. Comply with the regulations applicable at the installation location.
8. We do not recommend using an extension cord for your sauna. Please
plug the sauna directly into the wall receptacle.
9. For your own safety, consult your supplier in the event of problems
that are not explained in sufficient detail in the installation instructions.
*Manufacturer reserves the right to change the specifications.
*All designs and specifications are for reference only and is subject to change without prior notice.
*Correct specifications depend on the actual model.
Installation Requirements

5
Assembly of the sauna requires at least 2 adults to complete. Please read the instructions
thoroughly before and during assembly to ensure proper installation of the sauna.
<1>LOCATION OF SAUNA
When you find a good location for your sauna, please notice the following.
1. The main power cord on the sauna must be easily accessible.
2. The location must be dry and leveled.
<2>PLACING BOTTOM PANEL
<3>CONNECTING BACK PANEL TO BOTTOM PANEL
Attach the back panel to the bottom panel by lining up the back panel on the bottom panel.
(Please hold the back panel until one of the side-panel had been installed.)
Assembly Instructions

6
I
<4> INSTALLING SIDE PANELS
Align the side panels with back panels’ corresponding outside-buckles. Make sure the
outside-buckles on both side panels and fixed in place.
<5>INSTALLING BENCH
1. Install the bench by sliding it over the horizontal bench guides on the side panels.
2. Push the bench all the way in until it can touch the back panel and is securely in place.
3. Fix the bench by two screws (4*40mm)
Outside
buckles

7
<6>CONNECTING FRONT PANEL
1) Align the front panel with side panel corresponding buckles, and then latch it with left and right
panel respectively.
2) ) Pls take care of the glass door to avoid damage.
<7> PLACING TOPPANEL
--Lower the roof panel onto the assembled panels.
--Gently place the top panel onto the rest of the assembled panels. When four corners are in place,
gently push down the roof panel from the outside corners until it is snugly fit over the rest of
panels.
--Make sure the cables do not get pinched between the panels.
--Lead the wires of heaters onto the board through the corresponding hole.
--Fix the roof panels by 4 screws(4*40mm) to make sure it is stable enough.
Outside
buckles

8
<8> THE MAIN POWER CONNECTION ON THE TOP PANEL
1. Connect all the wires for heaters.
2. Connect the control panel wires (CTRL).
3. Check if all connections to the control box are secure.
<9> PLACE THE ROOF COVER ONTO THE ROOF PANEL
Place the roof cover onto the roof panel; connect it to the roof panel with the
provided 12 pieces screws (3*16mm).
<10> INSTALLING DOOR HANDLE
<11>ENJOY YOUR SAUNA!
Plug in the main power cord into the wall outlet and power up your sauna. Turn on the radio, grab some towels,
a glass of water and step you're your sauna and enjoy the benefits of the sauna!

9
Digital Control Panel Operating Instructions

10
1. Press quickly to switch the sauna on to a stand-by mode.
2. Set the desired temperature using buttons.
3. Set the time to desired length using buttons.
4.
Press
quickly a second time to activate the heaters.
5. When time reaches 00, all the heaters will automatically shut off.
6. Press and hold to switch the sauna off.
7. Press to turn on/turn off the interior color light. You can change the color of the
light by pressing this bottom.
8. How to use Bluetooth connector for music
a)
Turn on your sauna, then its inside Bluetooth device would be discoverable automatically.
b)
For your cell phone, Turn on Bluetooth, then select add Bluetooth
or other device > Bluetooth. Choose the device name"IR SAUNA", then select. Done.
9. Sauna Temperature Adjustment
Temperature Adjustment:The sauna will reach a maximum temperature of 150 Fahrenheit
under ideal experimental conditions. Under normal environment temperature (77 Fahrenheit),
the sauna will reach a maximum temperature anywhere from 140 to 150 Fahrenheit.

11
Recommendation for Operation
1. Set up the desired session temperature and time usingthe controlpanel.
( suggested100℉-130℉/ 37 °C~55°C )
2. Allow approximately 10~15 minutes for the sauna to warm up before beginning asession.
3. Recommend sauna session use is around 30-45 minutes.
4. The heaters automatically maintain the desired temperature inside thesauna
5. The ceiling vent can be opened at any time to for air circulation.
6. Always drink plenty of water before, during, and after a session. Doing so will replenish lost
fluids from the body through perspiration.
7. Take a hot shower or bath prior to the sauna session will further promote perspiration.
However, dry off thoroughly before going into the sauna because excessive water will stain or
warp the wood. A shower after the session is refreshing and rinsing perspiration from the
body.
8. To absorb perspiration and keep the sauna tidy during the session, place a towel on the bench
and floor of the sauna. Keep one towel handy to wipe excessive sweat from your body.
9. The interior wood is aromatic and adds to the enjoyment of your sauna session. If you feel the
odor is too strong during the first few months of usage, you can wipe the wood with a damp
cloth to minimize the odor.

12
Recommendation for Use
1. To regulate the temperature inside the sauna during your session, use the roof vent or the
door (by setting it at an angle).
2. If you need more cooling, simply leave the door open until the air around you feel
comfortable.
3. Drink plenty of fluids prior to, during, and after your sauna session.
4. If you take a hot /warm shower or bath before your sauna session, you may perspire more. Try
it with and without bathing or showering first to determine which way youprefer.
5. To utilize the sauna’s heat therapy effect, give your hair a hot oil treatment while in the sauna.
Put oil or treatment into your hair and wrap it with towel. After the session is over, rinse your
hair thoroughly.
6. Use at least 2-3 towels; sit on one towel folded over several times for added cushioning. Put
another towel on the floor to absorb excess sweat. A third towel draped over the knees may
aid you in comfort and useful to towel off the sweat.
7. Be sure to towel off excess sweat during your session to help the body perspire more freely.
8. To help relieve sore and tense muscles, massage the affected areas while in sauna to help heal
faster.
9. Do not put any lotions or oils on the body or face when using the sauna. This may block the
pores.
10. Shaving your face or legs with a razor while profusely sweating in a sauna yields an incredibly
smooth result without the use of gels or foams.
11. Do not eat anything at least an hour before your sauna session. It is better to go in the sauna
on an empty stomach. You are more likely to feel uncomfortable sitting in a sauna with a full
stomach.
12. To make the most out of your sauna session, work your muscles while in the sauna. Stretch
your arms and legs; massage your neck and feet, etc.
13. You can benefit from the relaxing and soothing effects of a regular sauna session by going to
sleep afterwards. The peaceful and relaxed state rendered by a sauna session will help you
sleep easier and better.
14. At the first sign of cold or flu, increasing your sauna sessions may be beneficial in boosting
your immune treatment and decreasing the reproductive rate of the viruses. Consult your
physician for the proper treatment and care for thisor any other conditions.
15. To treat your ankles and feet more effectively, elevate them while inside the sauna. Any area
that you wish to achieve a specific deep heating effect should be moved as close to one of the
heaters as feels comfortable.
After the session is over, do not immediately jump into the shower. Since your body was
heated up during the session, if will continue to sweat even after the heaters are off. Sit in the
sauna with the door open and allow the body to sweat a little more as it cools off. Once you
feel comfortable enough, take a warm (or cool) shower to rinse the sweat off your body
completely.If you use cell phone, MP3, etc. audio equipment when enjoying the sauna,
suggested duration is no more than 20mins. If you find the equipment is overheated, stop
using it at once.

13
Safety
Read all health and safety instructions. If in doubt as to the advisability of using your infrared
sauna, consult with your physician prior to use. If you feel light-headed or heat exhaustion
during session, exit the sauna immediately.
1. The infrared cabin has been produced in accordance with the applicable safety regulations for
technical units. However, hazards may occur during use.Therefore adhere to the following safety
information and the specific warning notices in the individual chapters.
2. When installing and using this electrical equipment, basic safety precautions should always
be followed.
3. Before the control unit is switched on, make sure that no combustible objects have been placed on
the heating elements.
4. The infrared heaters in your sauna are a potential BURN HAZARD. Do NOT touch the infrared heaters
when they are in operation and allow to cool before servicing.
5. The cabin may not be used by children under 8 years old. The cabin may be used by children over 8
yearsold, by persons with limited psychological, sensory or mental capabilities or by persons with lack
of experience / knowledge only under the fol-lowing conditions:
-They are supervised.
-Theyhave been shown how to use the device safely and are awareof the hazardsthat could occur.
6. Children may not play with the cabin.
7. Children under 14 years of age may only clean the cabin if they are supervised.
8. DO NOT use the sauna immediately following strenuous exercise.Wait at least 30 minutes to allow
the body to cool down completely.
9. Hypothermia Danger : Prolonged exposure to hot air will induce hypothermia. Hypothermia occurs
when the internal temperature of the body reaches a level several degrees above the normal body
temperature of 98.6°F (37°C).
While hypothermia has many health benefits, if is important not to allow your body's core
temperature to rise above 103°F. Symptoms of excessive hypothermia include dizziness, lethargy,
drowsiness, and fainting.The effects of excessive hypothermia may include failure to perceive heat,
failure to recognize the need to exit,unawareness of impending hazard, fetal damage in pregnant
women, physical inability to exit the sauna, and unconsciousness.
10. If you intend to use far infrared therapy for medical reasons, please consult your physician prior to
using the sauna.
11. Excessive temperatures have a high potential for causing fetal damage during the early months of
pregnancy. Pregnant or possibly pregnant women should consult their physician prior to using the
sauna.
12. The use of alcohol, drugs or medications prior to or during the sauna session may lead to
unconsciousness.
13. Persons suffering from obesity or with a medical history of heart disease, low or high blood pressure,
circulatory system problems or diabetes should consult a physician prior to using the sauna.
14. Persons using medications should consult a physician before using the sauna since some medications
may induce drowsiness while others may affect heart rate. blood pressure, and circulation.

14
Safety
15. NEVER sleep inside the sauna while the unit is in operation.
16. DO NOT use any type of cleaning agents on the interior of the sauna.
17. DONOT stack or store any object on top ofor inside the sauna.
18. If power supply cord becomes damaged it must immediately be replaced by the manufacturer, or its
agent, or a similarly qualified person to avoid a hazard.
19. DO NOT use the unit during an electrical storm, as there is a remote risk of shock.
20. For added protection during a thunder storm, or when it is left unattended and unused for long
periods of time. unplug it from the wall outlet.
21. Altering or tampering of any electrical connections on the power supply will void the manufacturer's
warranty.
22. Dry your hands before handling electrical controls. Never unplug the power cord or adjust the
controls with wet hands or when you have wet bare feet. A danger of electrical shock exists.
23. DO NOT attempt any repair without consulting the manufacturer first. Unauthorized repair attempts
will void manufacturer's warranty.
24. Power supply cords should be routed so they are not likely to be walked on or pinched by items
placed upon or against them.
25. DONOT overload walloutlets and extension cords as this can result in a riskof fire or electrical shock.
26. Always unplug this product from the wall outlet before servicing the product.
27. DO NOT remove power supply covers. No user serviceable parts are located inside the power supply.
28. If you don't feel comfortable or relaxed during a session, lower the temperature or open the door of
cabin.
*These statements have not been evaluated by the Food and Dug Administration.These statementsare for informational purposesonly and should not be used as
the basis for medical counseling. This information is not intended to diagnose,treat cure, or prevent any disease. The author and publisher shall have neither liability
nor responsibility to any person or entity with respect to any loss, damage or injury caused directly or indirectly by the information contained herein.

15
Important Safe guards For Your Sauna
1. READ INSTRUCTIONS -- All the safety and operating instructions should be read before the
sauna is installed and operated.
2. RETAIN INSTRUCTIONS -- The safety and operating instructions should be retained for
future reference.
3. FOLLOW INSTRUCTIONS -- All operating and usage instructions should be followed at all
times.
4. CLEANING -- Unplug the sauna from the wall outlet before cleaning DO NOT use liquid
cleaners or aerosol cleansers inside the sauna. Use a damp cloth forcleaning.
5. ATTACHMENTS-- Do not use any attachments that are not recommended by the
manufacturer, may be hazardous.
6. WATER OR MOISTURE—DO NOT use your sauna near water, e.g. near a bathtub, in a wet
basement, or near a swimming pool and the like.
7. POWER-CORD PROTECTION-- Power supply cord should be routed so it is not likely to be
walked on or pinched by items placed upon or against it.
8. LIGHTING-- For added protection for your sauna during a lightning storm, or when it is left
unattended and unused for long time, unplug it from the wall outlet.
9. OVERLOADING-- Do not overload wall outlet and extension cord as this can result in a risk
of fire or electric shock.
10. SERVICING-- Always unplug your sauna from the wall outlet beforeservicing.
11. REPLACEMENT PARTS--When replacement parts are required, be sure it is specified by the
manufacturer or have the same characteristics as the original parts. Unauthorized
substitutes may result in fire, electric shock or other hazards.
12. SAFETY CHECK--Upon completion of any service or repairs to your sauna, ask the service
technician to perform safety checks and determine that your sauna is in proper operation
condition.

16
Cleaning and Maintenance
1. Your sauna is made of the Natural wood. All wood products have variations in the color, grain,
and may have irregularities such as knots, fine cracks and wood natural oil stain. These reflect the natural
beauty of the wood and should not be considered defects.
2. Before using your infrared sauna for the first time, clean the inside of the sauna with a damp cloth.
3. The interior of the Infrared Sauna is made of the natural wood. It is aromatic and adds to the enjoyment
of your sauna session. If the fragrance of the fresh wood is too strong during the first few months of use,
first wipe the wood with a damp cloth to minimize the aroma.
4. Use furniture polish to clean the exterior.
5. We recommend placing a soft towel on the floor and on the bench of the sauna to absorb perspiration during
sauna use.
6. Scratches and stains on the sauna can be removed by simply using fine grade sandpaper over the damaged area.
7. The cabin may not be cleaned with steam cleaners, high-pressure cleaners or splashed water.
8. The wood may appear rough and hoarse caused by dampness sometimes. To smooth the affected areas, the
sandpaper or gritty sponge can be used, always sanding in the direction of the grain.
9. Hemlock is a solid nature wood, minor cracks, wood natural oil stain or warping might happen due to seasonal
humidity changes. This is a natural process and not a defect of the material.

17
Troubleshooting
Problems
Explanations
Solutions
1
Power indicator
light not on
Power cord is not plug-in
1.
Check for power to the outlet.
2.
Check connection between power
cord and main control unit.
The fuse is burned out
Check or replace the fuse.
2
Function indicator
light not on
The corresponding indicator light is
broken or burned out.
Repair or replace the control
panel.
The wiring or some electronic
component in the circuit has failed
Repair or replace what has failed in
that circuit.
3
Infrared Heater will
not heat up
The heater is broken
Replace with a new heater of the
same specifications.
Its life will be shortened gradually
from excessive use.
The fuse is burned out.
Check or replace the fuse.
The wiring connection for the heater
is loose or in the wrong location.
Check it, and reconnect tightly.
The circuit board is not functioning.
Check power output on the circuit
board
4
Sauna room not
maintaining correct
temperature
Problem with heater.
See Item #3.
Incorrect setting on control panel
Reset it.
The temperature sensor wire may be
loose or broken.
Check sensor wire connection and
condition.
Check to see if sensor head is visible
inside the sauna room.
5
Peculiar burning
smell
Circuit problems (broken component,
short circuit, failure of controlling
system) causing the burning of some
component in the electrical system.
1. Unplug sauna, check the voltage.
2. Find the objects with problems.
3. Replace the parts.
6
The light not
working
The light bulb is burned out.
Replace light bulb.
The bulb is not secured in the base
1.
Make sure the bulb is tight enough
to make good contact in the light
fixture.
2.
Check the lighting protection fuse.
The socket is broken.
Replace it.
Problems with electrical control
panel.
Check or replace the panel.
7
No sound or poor
sound from
speakers
The speaker is broken or speaker is
loose
1.
Check speaker wire.
2.
Check speaker
The wire connection is loose.
Check connectors to be sure they make
good contact.
CD-player is not turned on.
Turn on the CD-player.
CD-player is not functioning
1.
Check faceplate contact on the
CD-player.
2.
Check fuse in the fuse holder.

18
Disclaimers
We shall not be liable for any loss due to use (or misuse) of the sauna or other our
products or other incidental or consequential costs, expense or damages without
irrefutable foundations. Under no circumstances shall we or any of its representatives
be held liable for injury to any person or damage to any property, however arising.
Any implied warranty shall have duration equal of the applicable warranty stated
above. Specifications are subject to change without notice or obligation.
Legal Remedies
This limited warranty gives the original purchaser specific legal rights. Other rights
may vary from state to state.
Tracking Number
There is a tracking number on the exterior of the back panel and the power supply.
Table of contents
Other ROYAL SAUNAS Plumbing Product manuals
Popular Plumbing Product manuals by other brands

Delta
Delta 54613 Series Specification sheet

Hans Grohe
Hans Grohe Focus 31701001 installation instructions

Fala
Fala RETRO BRONZE 2 75838 Installation and operation instruction

StoneAge
StoneAge WARTHOG WGR MAGNUM Series user manual

Kohler
Kohler K-1107 installation guide

Felton
Felton W2RSCC installation guide

Elkay
Elkay Elite Gourmet 3626EGSF Specifications

Toto
Toto MA TX426MMA quick start guide

KWC
KWC K.26.VB.56.700.38 Features

American Standard
American Standard One 2064.461 installation instructions

Intra
Intra INBFR 21 Mounting instructions

Spectrum Brands
Spectrum Brands Pfister Jaida 8P8-WS2-JDS Quick installation guide