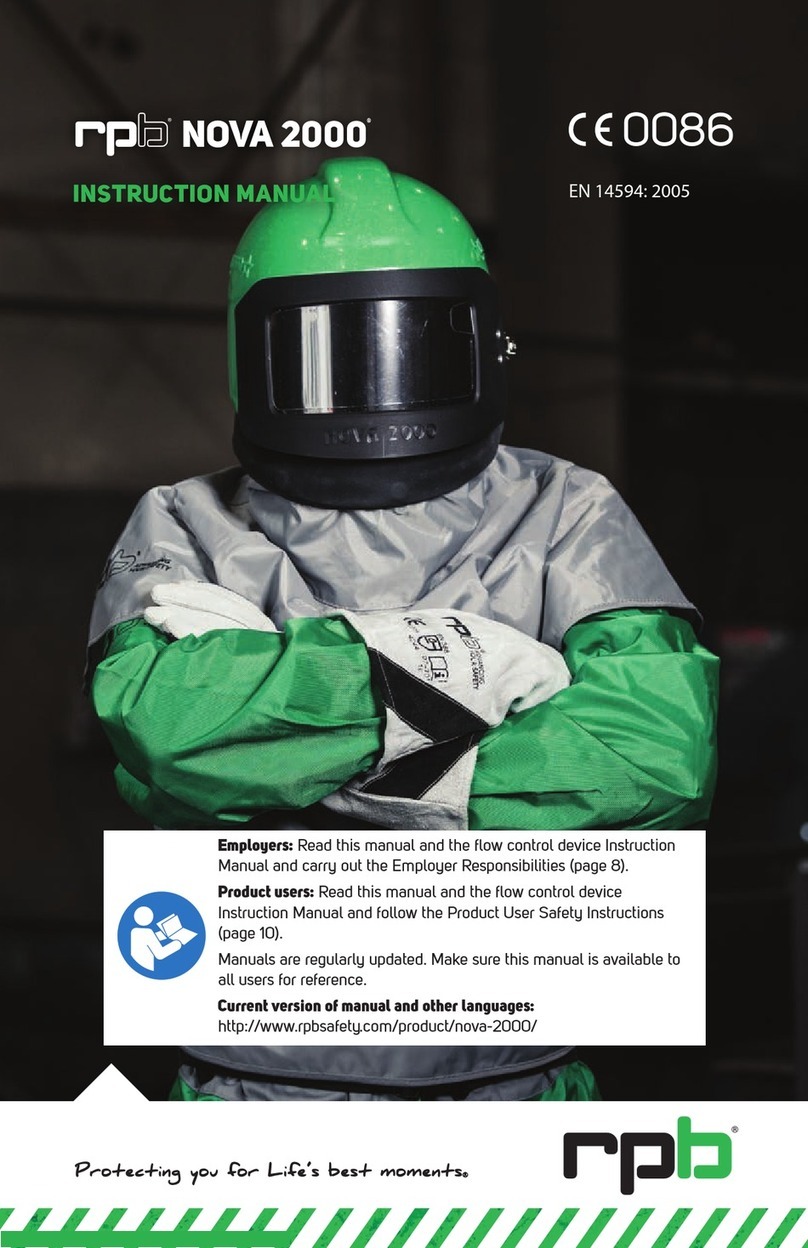
RPB Nova 3 User manual

0194
INSTRUCTION MANUAL

2
INTRODUCTION 3
APPARATUS COMPONENT CONCEPT 4
WARNINGS 5
APPARATUS OPERATION 7
SPECIAL OR CRITICAL USER INSTRUCTIONS - BREATHING AIR PRESSURE TABLE 9
APPARATUS SETUP AND USE 10
CLEANING, DISINFECTING & STORAGE 15
PARTS AND ACCESSORIES 20
CONTENTS
Read all instructions and warnings before using this product.
Keep this manual for future reference.
RPB® Safety Global Headquarters 2807 Samoset Rd, Royal Oak, MI 48073, USA.
T: 1-866-494-4599 F: 1-866-494-4509 E: sales.us@rpbsafety.com rpbsafety.com
RPB® Safety Asia Pacic Headquarters 652 Halswell Junction Road, Hornby South 8042 New
Zealand. T: +64-3-357-1761 F: +64-3-357-1763 E: sales.nz@rpbsafety.com rpbsafety.com
RPB®, Advancing Your Safety, Radex, Zytec, Nova and NOVA 3 are registered trademarks of RPB®
Safety LLC
For technical assistance contact our Customer Service Department
Form #: 7.20.525
Rev: 2

3
INTRODUCTION
The RPB® NOVA 3 is approved in two
categories as follows:
• COMPRESSED AIRLINE
BREATHING APPARATUS
EN14594 - When used with RPB®
Supplied Air Hose and Flow
Device System. This provides
respiratory protection during
Abrasive Blasting.
• Powered Air Purifying Respirator
- When used with the RPB® PX⁴
AIR PAPR unit.
The Nova 3 has been
designed for use in atmospheres NOT
IMMEDIATELY DANGEROUS TO LIFE OR
HEALTH, and from which a user can
escape without the aid of the breathing
apparatus, or that do not exceed the
concentrations allowed by Government
regulations and recommendations.
The RPB® NOVA 3 is tested and approved
to EN14594:2005 and AS/NZS 1716:2003
to provide breathing protection in
abrasive blasting applications. The cape
is designed to protect the wearer’s
upper body from rebounding abrasive.
The RPB® NOVA 3 provides an assigned
protection Factor of greater than
APF1000. Due to the high noise levels
experienced during abrasive blasting,
hearing protection must always be
worn.
The RPB® NOVA 3 is CE approved for use
with the following devices:
03-101 Constant Flow Valve
NV2016 Flow Control Valve
4000-01 Cold Air Tube
4000-20 Hot Air Tube
03-501 Climate Control Device
03-901 RPB® PX⁴ AIR Powered Air
Purifying Respirator (refer to
PAPR Instruction Manual for
instructions on setting up for
use with the PAPR.)
WARRANTY
All RPB® Safety products are covered by
a manufactures warranty of 3 months.
The manufacturer warranty covers
defects in material, workmanship and
does not cover damage caused by misuse
or abuse. RPB® Safety’s only obligation
and your exclusive remedy shall be to
repair , replace or refund the purchase
price of such parts or products upon
the presentation of proof of purchase.
Maximum liability is in no case to exceed
the value of the RPB® Safety Product
involved.

4
APPARATUS COMPONENT CONCEPT
The RPB® Nova 3 consists of 3 main components: Helmet assembly, breathing tube
and air supply hose illustrated in Fig1.1. All 3 components must be present and
properly assembled to constitute a complete EN14594, EN14 and AS/NZS 1716
approved Compressed Airline Breathing Apparatus. When congured with a PX⁴
PAPR the breathing tube will connect to the PX⁴ PAPR.
1. Apparatus Helmet Assembly
2. Apparatus Cape
Inner & Outer Lens
3. Breathing Tube Assembly
4. Air Supply Hose
or PX⁴AIR PAPR
Figure 1.1
!WARNING! Failure to use genuine parts and components that are part of
the
EN14594, EN12941 and AS/NZS 1716 approved apparatus assembly will void
the approval of the entire apparatus assembly.

5
!WARNINGS!
1. Do not use this apparatus until you
have been trained in the apparatus
use, maintenance and limitations by
a qualied individual (appointed
by your employer) who has
extensive knowledge of the RPB®
NOVA 3 Series. All training must
be in accordance with this Users
Instruction Manual.
2. Before using this apparatus ensure
your employer has determined
that airborne contaminant
concentrations do not exceed those
allowed by applicable Government
Regulations and recommendations
for a Compressed Air line Breathing
Apparatus. It is required that the
employer measures and monitors
airborne contaminant levels in the
work area.
3. Do not wear this apparatus if any of
the following conditions exist
- Atmosphere is immediately
dangerous to your life or health
- You CAN NOT escape without
the aid of the apparatus
- Atmosphere contains less than
19.5% oxygen
- Work area is poorly ventilated
- Contaminants are in excess of
regulations or recommenda-
tions
4. Do not modify or alter this apparatus.
Use only parts and components that
are part of the EN14594 and AS/NZS
1716 approved apparatus assembly.
The use of non RPB® parts voids the
EN14594 and AS/NZS 1716 approvals
of the entire apparatus assembly.
5. Inspect all components of the
apparatus daily for signs of damage
or wear and tear that may reduce
the level of protection originally
provided.
6. Do not use silica sand or abrasives
containing silica, lead, arsenic or
sharp glass particles - use of abrasive
containing these elements could
result in serious injury or death.
7. Do not wear this apparatus until
you have passed a complete
physical exam including a lung X-ray
conducted by qualied medical
personnel.
8. Improper use of this apparatus or
use not in accordance with this User
Instruction Manual may cause injury
or death. Improper use may also cause
life threatening delayed lung diseases
such as silicosis, pneumoconiosis or
asbestosis.
9. This apparatus, when properly tted
and used, signicantly reduces but
does not completely eliminate the
breathing of contaminates by the
apparatus wearer.
10. Be certain your employer has
determined that the breathing air
source provides at least EN12021,
AS/NZS 1715 breathable air. The
apparatus must be supplied with
clean breathable air at all times. For
supplied air it is recommended that
a carbon monoxide monitor be used

6
at all times. Contact your RPB® Safety
distributor for a Radex 08-200 CO
Monitor.
11. RPB® Safety cannot accept any liability
of whatsoever nature arising directly
or indirectly from the use or misuse
of RPB® Safety products, including
purposes that the products are not
designed for. RPB® Safety is not liable
for damage, loss or expense resulting
from the failure to give advice or
information or the giving of incorrect
advice or information, whether or not
due to RPB® Safety’s negligence or
that of its employees, agents or sub-
contractors.
12. Do not connect the apparatus’s air
supply hose to nitrogen, oxygen,
oxygen enriched air, toxic gases, inert
gases or other nonbreathable non
EN12021, AS/NZS 1715 breathable air
source. Check the air source before
using the apparatus. This apparatus is
not designed for use with compressed
air cylinders, i.e. SCBA cylinders.
Failure to connect the supply hose to
the proper air source could result in
serious injury or death.
13. DO NOT use this apparatus in poorly
ventilated areas or conned spaces
unless the area is well ventilated and
that the contaminant concentrations
are below those recommended for
this apparatus. Follow all procedures
for conned space entry, operation
and exit as dened in applicable
regulations and standards.
14. DO NOT wear this apparatus if the
ambient usage temperature is below
-10˚C or above +60˚C. Moisture
content of breathable air should be
controlled when the apparatus is to
be used in temperatures below +4˚C
to avoid freezing the apparatus.
15. Leave work immediately if:
- Any apparatus component
becomes damaged.
- Airow stops or slows down
- Breathing becomes dicult
- You become dizzy, nauseous,
too hot, too cold or ill.
- Vision is impaired.
- When the warning alarm
sounds.
16. NOVA 3 apparatus does not provide
hearing protection. Approved ear
plugs must be properly tted when
exposed to noise levels that exceed
Government permissible exposure
levels.
RECOMMENDATION:
When using a NOVA 3 as a Supplied Air
apparatus. It is recommended to use a
Radex Airline Filter (04-900) and a carbon
monoxide monitor (08-200)
APPROVALS
This apparatus meets the requirements
of the European Community Directive
89/686/EEC, (Personal Protective
Equipment Devices).

7
APPARATUS OPERATION
AIR QUALITY
This Apparatus must be supplied with
clean breathable air, EN12021, AS/NZS
1715 or better, at all times. The NOVA 3
does not purify air or lter contaminants.
Breathable air must be supplied to the
point of attachment of the EN14594
approved NOVA 3 air supply hose.
Supplied breathing air must at least meet
the requirements for EN12021, AS/NZS
1715 and local Government Regulations.
When using the PX⁴ PAPR with the NOVA
3, always make sure to use a clean lter
cartridge to ensure the air is clean.
AIR SOURCE
Supplied AIr
Locate the air source in a clean air
environment, always use a lter on the
inlet of your air source. Do not park
vehicles beside your air inlet as this will
cause carbon monoxide to be drawn into
your air supply.
Use suitable aftercoolers / dryers with
lters and carbon monoxide alarms to
assure clean breathable air is supplied at
all times.
The air should be regularly sampled to
ensure that it meets EN12021, AS/NZS
1715 requirements.
POWERED AIR
Check that the contaminated area is
within the limits of the use of a Powered
Air Purifying Respirator and determine
the type of contamination. Once the
contamination level has been conrmed
then you can determine the lter
cartridge to be used for the application,
to make sure that you are suciently
protected. Make sure that the area is well
ventilated and that regular air samples
are taken to conrm the atmosphere
stays within the levels recommended by
OSHA and other governing bodies.
TESTED AND CERTIFIED BY:
Certied under Article 10, the QA
systems are approved under Article 11b
and approved as an EN14594 Respirator:
INSPEC International (0194)
56 Leslie Hough Way
Salford M6 6AJ
United Kingdom
Approved as an EN12941 Respirator:
Apave Sudeurope SAS (0082)
8 rue Jean-Jacques Vernazza
CS 60193
13322 Marseille Cedex 16
France
BREATHING AIR SUPPLY
HOSES AND FITTINGS
EN14594, AS/NZS 1716 approved
NOVA 3 airline hoses must be used
between the point of attachment and
the apparatus breathing air connection
at the wearer’s belt. EN14594, AS/NZS
1716 approved NOVA 3 quick disconnect
ttings must be used to connect the
hose lengths together. The hose sections
must be within the approved length and
the amount of sections must be within
the number specied in the Breathing
Air Pressure Table.

8
BREATHING AIR PRESSURE
The air pressure must be continually
monitored at the point of attachment
while the air is owing to the apparatus.
Air pressure must be read from a reliable
pressure gauge whilst the apparatus has
air owing through it.
!WARNING!
Failure to supply the apparatus with the
minimum required pressure at the point
of attachment for the length of airline
hoses used could result in contaminants
being inhaled as the pressure in the
helmet may become negative due to
peak inhalation ow when working
at very high work rates. The NOVA 3
BREATHING AIR PRESSURE TABLE on
Page 9 denes the air pressure ranges
needed to provide the apparatus with a
volume of air which falls in the required
range of 235-425 lpm.
!WARNING!
Make sure you understand the Breathing
Air Pressure table before using this
apparatus, as a compressed airline
breathing apparatus.
1. Determine your air source (column 1)
2. Identify your breathing tube
assembly (column 2)
3. Be sure your air supply hose is
EN14594, AS/NZS 1715 approved
NOVA 3 breathing air hose.
4. Check your NOVA 3 air supply hose
is within the EN14594, AS/NZS 1715
approved length in column 4.
5. Set the air pressure at the point of
attachment within the range
specied in column 6 for your
breathing tube assembly, hose
length and amount of hose sections.
Make sure air is owing through your
apparatus when setting the pressure.

9
1.
AIR SOURCE
2.
BREATHING TUBE
ASSEMBLY AND FLOW
CONTROL DEVICES
3.
AIR SUPPLY
HOSE
4.
SUPPLY
HOSE
LENGTH
(METRES)
5.
MAX
NUMBER OF
SECTIONS
6.
PRESSURE
RANGE
(BAR AIR)
Portable or
Stationary
Compressor
NV2021B/
03-101
Constant Flow
Valve Assembly
04-312-25 (7.5m)
04-312-50 (15m)
04-312-100 30m)
7.5
15
30
45
60
75
90
1
1
1
2
2
3
3
0.76 - 0.85
0.86 - 0.96
1.03 - 1.13
1.38 - 1.48
1.59 - 1.69
1.83 - 1.93
2.07 - 2.17
BREATHING AIR PRESSURE TABLE Figure 2.1
This table lists air pressure ranges needed to provide the NOVA 3 with the volume of air
that falls within the required range of 235-425 lts/min according to GOVERNMENT
REGULATIONS. (Note: When used as a Compressed Airline Breathing Apparatus)
SPECIAL OR CRITICAL USERS INSTRUCTIONS
!WARNING! The Apparatus must be supplied with respirable air meeting the
requirements of EN12021, AS/NZS 1715 or Higher Quality.
Set the air pressure at the point of attachment to the pressure setting specied in
column 6 for your breathing tube assembly, hose length and amount of hose sections.
Make sure the air is owing through your apparatus when setting the pressure.
!WARNING!
ALWAYS WEAR EAR PLUGS WHEN WEARING THIS APPARATUS. RPB® recommends the
RPB® S100 earplugs which gives a combined NRR of 33.
RECOMMENDATION:Check that the air supply system can suciently supply every
apparatus connected to the system according to the user instructions.
FOR USE WITH RPB® PX⁴ AIR - SEE THE PAPR USER MANUAL
When the NOVA 3 Respirator is being
used in conjunction with the RPB® PX⁴
PAPR, please refer to the RPB® PX⁴ PAPR
for instruction of use and setting up the
assembly.
Note: The RPB® PX⁴ is a Powered Air
Purifying Respirator, therefore care must
be taken when selecting the correct lter
for the application the respirator will be
used in.

10
APPARATUS SETUP AND USE
Place 3 Tear O Lenses (N3-725) and 1
Outer Lens (N3-724) on top of each other,
make sure the tabs are folded the same
way.
Place RPB Inner lens (NV3-722) into the
left of the Inner lens frame (NV3-723) and
work it round locating it into the frame
and nally clipping it into place on the
right.
To remove the Inner lens frame pull
frame from the visor hinge mount rolling
it round and then dislocate the locating
pins from the Visor latch mount.
Secure locating Inner lens frame pins into
visor latch mount rolling the frame round
the inner lens seal and securing it onto
the clips at the visor hinge mount.
INNER LENS
TEAR OFF AND OUTER
LENSES
Figure 3.1
Figure 3.3
Figure 3.2
Figure 3.4

11
Connect the NV2021B Breathing Tube to
the Helmet. This end is labelled‘Attach
this end to helmet’. Turn anti clockwise
until tight.
Place the lenses onto the Lens Locator at
the centre of the visor (N3-726).
Thread on the loose running nut of
the NV2021B Breathing Tube on to the
Flow Control Device (03-101). Screw the
running nut in a clockwise direction until
tight.
Slide the lenses under the lens locators
that are positioned at the sides of the
visor.
TEAROFF AND OUTER LENSES (CONTINUED)
CONNECTING THE AIR SUPPLY
Figure 3.5
Figure 3.7
Figure 3.6
Figure 3.8

12
DONNING YOUR HELMET
Once you have set up, you are ready to
t your NOVA 3 Supplied Air Apparatus.
Firstly check inside the helmet to
ensure that it is free of dust, dirt or
contaminates.
Airow in the apparatus must be above
235lt/min and the yellow indicator is not
visible when the ow drops below this
rate. DO NOT use the apparatus when
the indicator is not showing. (Note: The
indicator is not applicable when using
RPB PX⁴ PAPR as it has its own warning
alarm.)
Now connect the Breathing Air Supply
Hose to the Flow Control Device. Air
should be now owing through the
apparatus.
!WARNING!
Check the air pressure at the point of
attachment is within the range specied
in column 6 of the Breathing Air Pressure
Table for the hose length and amount of
hose sections. Make sure air is owing
through your apparatus when setting the
air pressure.
NOTE:
Check the hose connections for any air
leaks and tighten if necessary – replace
any worn parts.
Figure 3.9
Figure 3.11
Figure 3.10
APPARATUS SETUP AND USE CONTINUED
Connect the EN14594, AS/NZS 1716
approved NOVA 3 Air Supply Hose to a
breathing air source supplying EN12021
or better quality air. Connect the
apparatus quick disconnect tting onto
the Air Supply Hose.

13
Adjust the apparatus Cape around your
body and fasten the snap hooks on each
side of the cape.
Adjust the apparatus padding size
by turning the ratchet knob located
under the cape collar at the back of the
apparatus padding.
Fold back cape, open the Inner Bib and
place your ngers on the Inner Bib and
the side of helmet at approximately ear
position. Lift the helmet and place onto
your head. Make sure air is owing into
the apparatus prior to tting.
DONNING YOUR HELMET (CONTINUED)
Figure 4.1 Figure 4.2
Figure 4.3

14
Fasten the NV2022 belt at waist or hip
level and adjust for comfort. Move the
Flow Control Device away from spine.
When you have nished working, leave
the work area wearing the apparatus
with air owing into the helmet. Once
outside the contaminated area remove
the apparatus and disconnect the air
supply hose.
Re check the air pressure and adjust
if necessary. With air ow into your
apparatus you are now ready to enter the
work area.
DOFFING YOUR HELMET
CLICK
!WARNING! NEVER remove your apparatus while you are in the work areas as
this may result in serious injury or death.
Figure 4.4 Figure 4.5
APPARATUS SETUP AND USE CONTINUED

15
The covers can be removed from the
padding and washed in a conventional
washing machine or with light detergent
and water.
The side padding is mounted on a hinge
and can be removed by pulling away
from the helmet.
CLEANING, DISINFECTING AND STORAGE
As the NOVA 3 Supplied Air apparatus
has a limited service life, a regular
inspection and replacement programme
must be conducted. Before using the
Apparatus all parts should be inspected
for damage or wear and tear. Replace
all worn or damaged parts immediately.
Use only parts and components that are
part of the EN14594, EN12941 and AS/
NZS 1716 approved apparatus assembly.
Refer to Parts and Accessories section on
pages 20- 23 part numbers.
!WARNING!
Do not clean this apparatus with
volatile chemicals.
HELMET AND LININGS
Figure 5.1 Figure 5.2
To disinfect the apparatus we
recommend using Domestic Grade
Disinfectant Wipes. Domestic grade spray
disinfectants may also be used inside the
helmet.

16
To remove the Head Liner, rst remove
the 4 clips (a) then lift out. To clean, rinse
in a light detergent and water, or place in
a conventional washing machine. Do not
clean with volatile chemicals.
The inside of the helmet can be wiped
clean with a liquid detergent.
Remove Head Liner padding from the
head liner, the padding can be washed
or disposed. The padding is secured with
hook fasteners.
Remove rear Pad
a
Figure 5.3
Figure 5.5
Figure 5.4
Figure 5.6
CLEANING, DISINFECTING AND STORAGE
(CONTINUED)

17
LENSES AND LENS GASKETS
AIR SUPPLY HOSE
BREATHING TUBE ASSEMBLY
Check Inner Lens Gasket (NV3-721) and
the Inner Lens Frame (NV3-723) for splits,
cracks or wear and tear. Replace any
damaged or worn parts immediately
with RPB® Safety genuine parts. The
Inner Gasket and Inner Lens fame can be
sponged with warm water and a gentle
detergent, rinsed and air dried.
The air supply hose should be inspected
for cuts, cracks, blisters and signs of
abrasion. Make sure the ttings are rmly
crimped to the hose and air cannot
escape. Make sure the hose has not
been crushed or kinked. Replace the
hose immediately if there are any signs
of damage. Do not run water through
the inside of the hose. Clean the Quick
Disconnect Couplings with an air blow
down gun to remove any sand or dirt
that may jam the coupler.
Inspect the Breathing Tube (NV2021B) for
splits or excessive wear. Check that the
tting are secured into the tube and are
not allowing any air to escape. Replace
the tube as soon as signs of damage
or excessive wear become evident. Do
not remove the foam that is inside the
Breathing Tube as it reduces the noise
level of the incoming air.
!WARNING!
USE ONLY RPB® SAFETY AIR
SUPPLY HOSES.

18
VISOR ASSEMBLY
There is an Allen Key mounted in the
padding connector. Rotate the Alen
Key out of the holder then pull down to
remove.
To remove the Visor, undo the hinge
lock (NV3-727-2) and slide back, this will
expose the hinge pin to remove the Visor.
The Hinge Mount (NV3-727) and Latch
Mount (NV3-728) can be removed using
the Allen Key.
Figure 5.7
Figure 5.8 Figure 5.9
CLEANING, DISINFECTING AND STORAGE
(CONTINUED)

19
STORAGE
After you have used the apparatus,
hang it up by the hand strap in a clean
environment, this will help keep the
inside free of contaminants.
After the apparatus components have
been cleaned and inspected, place them
in a plastic bag or an airtight container.
Store apparatus parts away from
excessive heat, dust, cold, moisture and
harmful chemicals.
Figure 5.10 Figure 5.11
NOTE:
The respirator equipment must be stored in a temperature range of -10°C to +45°C and
relative humidity less than 90%.

20
Air Supply Hose
Fig 7.7
PARTS AND ACCESSORIES
!WARNING! Use only parts and components that are part of the EN14594, AS/
NZS 1716 approved apparatus assembly. The use of non RPB® parts voids the
EN14594, AS/ NZS 1716 approval of the entire apparatus assembly.
Helmet Components
Figure 7.2
Padding System
Figure 7.6
Visor and Lenses
Figure 7.3
Apparatus Capes
Figure 7.5
Filtration & Monitoring
Please refer to RPB Catalog
Breathing Tube &
Flow Control Devices
Figure 7.4
Figure 7.1
Other manuals for Nova 3
4
Table of contents
Other RPB Security Sensor manuals
Popular Security Sensor manuals by other brands

Zublin
Zublin SG360P Dimm operating instructions

AJAX
AJAX FireProtect 2 Jeweller manual

STEINEL PROFESSIONAL
STEINEL PROFESSIONAL IS 2180-2 Information

IntelliSense
IntelliSense FlexGuard FG-1625SN-ADT installation instructions

Summit Treestands
Summit Treestands Seat-O-The Pants Instruction booklet

Mirion Technologies
Mirion Technologies ACCURAD PRD operating manual