RS PRO DS 2 User manual

Instruction manual
DS 2
EN

1
Please take time to read this manual carefully before operation.
Persons who are not familiar with this manual should not use this
dehumidifier.
We strongly recommend keeping this manual in a safe place for future
reference.
Page
Specification 2
How it works 3
Where to position 4
Before use 5-8
Parts 9
Programming features 10-11
Operation 12-13
Drainage 14-15
Maintenance 16
Trouble shooting 17
Contents

2
Disposal
This product should be taken to our local recycling centre for
safety treatment. Waste electrical and electronic products must
not be disposed of with household waste.
Specification
Above is measured under RT 30 oC , RH 80%.
The data marked with * may vary for technical reasons. For greater
precision, please refer to the rating label placed on the product.
Current & Fuse : F2L250V or T2L250V

3
This is a compressor free dehumidifier which operates without refrigerant.
It has an almost consistent rate of water extraction at all temperatures and
is more efficient than compressor based dehumidifiers when used at low
temperatures below 5°C.
The operation theory exists in the Dehumidify Wheel (a chemically
impregnated rotating wheel). Damp air from the environment is drawn
through the unit where it comes into contact with the wheel. The chemical
on the wheel removes the moisture from the air and warmed by the heating
elements inside.
As the wheel rotates to a different position, the heater drives the water from
the chemical wheel and the water is condensed through heat exchange
system and removed to water tank.
How it works

4
Excess moisture will
travel throughout your
home, For this reason,
the dehumidifier should
be positioned, so that
it can draw this moist
air towards it from
all over the home.
When positioning the
dehumidifier, ensure
that it is placed on a
level surface and that
there is a minimum of
20 cm (8") of space on
either side of the unit
to allow for efficient
airflow. Heater advice
for Dryer function. The
distance between air
vent & clothes must be
kept at least 40cm to
avoid water drop into
machine and cause
damage.
Suitable to use in basement, kitchen, living room etc.
Where to position

5
Before use
Caution!
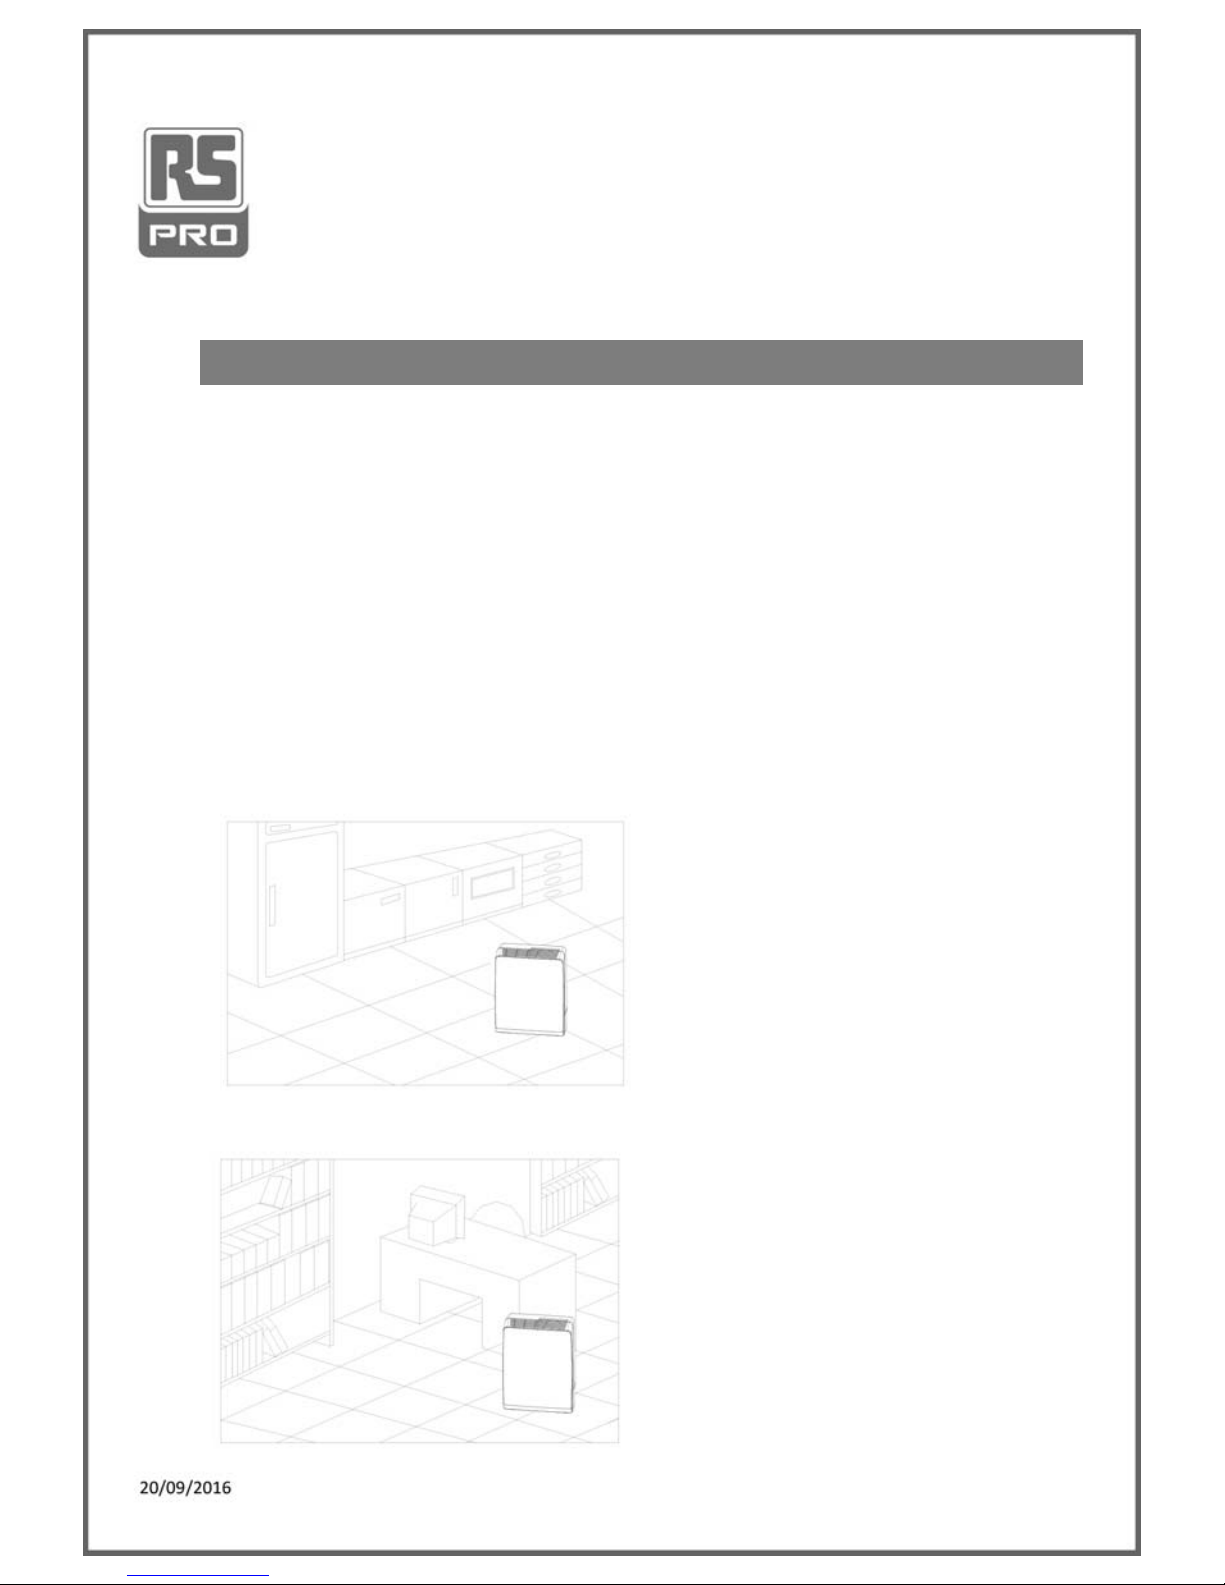
Operate this unit on a firm, flat surface to avoid water leak. Ensure that
it is kept upright at all times (including transport and store).
Do not place on soft surfaces.
Ensure that there is at least 300mm between the sides of the appliance
and any flammable materials.
Ensure that there is at least 900mm from the top of the appliance and
any flammable materials.
The unit contains a chemical substance. The unit will emit a
chemical smell during the 1st hour of operation without any dangerous
consequences.
The unit features an anti-tip safety device that will switch the unit off if it
was tipped during operating.
Only connect the unit to a properly installed and easily accessible socket
so that you can quickly pull the plug in an emergency.
DO NOT OBSTRUCT THE AIR INTAKES AND EXHAUSTS.
FOR INDOOR USE ONLY.
DO NOT EXPOSE THE UNIT TO DIRECT SUNLIGHT.
DO NOT USE IN CABINET, CLOSET, BOATS, CARAVANS OR
SIMILAR LOCATIONS.
DO NOT USE THE UNIT IN BATHROOMS, SWIMMING POOLS,
WASHROOMS OR SIMILAR WET AREAS.
DO NOT USE THE UNIT CLOSE TO A BATHTUB, SHOWER, SINK
AND THE LIKE.
Do not use the appliance in locations where paint, petrol or other
flammable liquids are used or stored.

6
Do not allow the appliance to fall over when there is water in the bucket.
AVOID THE UNIT FROM SPLASH. DO NOT LET ANY LIQUID ENTER
THE UNIT.
DO NOT PLACE A CONTAINER WITH LIQUID ON TOP OF THE UNIT.
THE CONDENSED WATER IS NOT FOR DRINKING EITHER FOR
HUMAN OR ANIMALS.
DO NOT USE BUG SPRAYS OR OTHER FLAMMABLE CLEANSERS
ON THE UNIT.
Do not lay the cord under carpets/rugs so that you can regularly check
its condition.
DO NOT TOUCH THE PLUG OF THE UNIT WITH WET HANDS.
Never use the cord of the unit as a carrying strap.
Before moving the unit, first switch off, then unplug and empty the water
tank. Basically, it takes around 2 minutes to stop the unit and this allows
the heater to cool down.
Always unplug the unit from the mains and wait for at least one hour
before carrying out any maintenance, transport or cleaning of the unit.
Always switch the unit off and pull the plug out of the socket:
If you are not using the unit.
Before you clean the unit.
Before you assemble the accessories.
If a fault occurs.
In the event of a storm.
AVOID OVER-TWISTING, -COILING, -PULLING THE POWER CORD,
NEVER USE NYLON OR IRON WIRE TO TIDE THE POWER CORD.
¥
¥
¥
¥
¥

7
DO NOT USE EXTENSION CORDS.
IF THE SUPPLY CORD IS DAMAGED, IT MUST BE REPLACED BY
AN ELECTRICIAN OR SIMILARLY QUALIFIED PERSON, TO AVOID
HAZARD.
THE MAINS SUPPLY MUST CONFORM TO THE SPECIFICATION
SHOWN ON THE RATING PLATE AT THE BACK OF THE UNIT.
THE APPLIANCE SHALL BE INSTALLED IN ACCORDANCE WITH
NATIONAL WIRING REGULATIONS.
NEVER REACH TO RETRIEVE THE UNIT IF IT HAS FALLEN IN
WATER. IN SUCH CASE, IMMEDIATELY PULL THE PLUG. HAVE THE
UNIT CHECKED BEFORE USING IT AGAIN.
THIS APPLIANCE IS NOT INTENDED FOR USE BY PERSONS
(INCLUDING CHILDREN) WITH REDUCED PHYSICAL,
SENSORY OR MENTAL CAPABILITIES, OR LACK OF EXPERIENCE
AND KNOWLEDGE , UNLESS THEY HAVE BEEN GIVEN
SUPERVISION OR INSTRUCTION CONCERNING USE OF THE
APPLIANCE BY A PERSON RESPONSIBLE FOR THEIR SAFETY.
CHILDREN SHOULD BE SUPERVISED TO ENSURE THAT THEY DO
NOT PLAY WITH APPLIANCE.
SUGGEST TO SEND THE UNIT FOR PROFESSIONAL
MAINTENANCE PERIODICALLY.
ONLY A LICENSED PROFESSIONAL IS ALLOWED TO DISMANTLE
OR MODIFY THE APPLIANCE.

8
DO NOT USE YOUR DESICCANT UNDER THE FOLLOWING:

9
Parts

10
Programming Feature
1. MODE BUTTON By pressing this button, you can set the working
mode of the machine to be:
LOW (MUTE dehumidifying): When the ambient humidity < set
humidity, the unit will run in LOW fan speed (without Heater).
:KHQWKHDPELHQWKXPLGLW\VHWKXPLGLW\WKHXQLWZLOOUXQLQ/2:
fan speed & WITH Heater.
HIGH785%2GHKXPLGLI\LQJ:KHQWKHDPELHQWKXPLGLW\VHW
humidity, the unit will run in HIGH fan speed & WITH Heater.
When the ambient humidity < set humidity, machine will run in
HIGH fan speed (without Heater).
DRYER: ALWAYS ON with HIGH fan speed and HEATER.
2. HUMIDITY BUTTON
• Press HUMIDITY button to set the room humidity you need: continuous
dehumidifying , 40%, 50%, 60% or 70% The relative indicator will light
on.
• If the humidity button is not set, the unit will work in the pre-set
humidity: 50%.

11
3. TIMER BUTTON
• Press TIMER button to set the working hours you desired.
As you press the button, the LED window will show the number you
chose (starting from 0, 1 to 24 in a cycle)
• When the timer is activated, the TIMER Symbol would light on and
the setting time would appear 8 seconds on the LED. After that, LED
returns to room humidity again.
• When the set time has been reached, the machine will turn off
automatically. If the timer button is not pressed, the unit will work
continuously for 24 hours.
4. POWER (ON/OFF) BUTTON . Press this button to start or turn off the
machine. While the power is on, the power indicator should light on.
5. MUTE OPERATION INDICATOR while the MUTE function is chosen,
this operation indicator will light on.
6. TURBO OPERATION INDICATOR while the TURBO function is
chosen, this operation indicator will light on.
7. CLOTHES DRYER OPERATION INDICATOR while the CLOTHES
DRYER function is chosen, this operation indicator will light on.
8. HUMIDITY DISPLAY WINDOW display the room humidity
(35~95%RH). While press “TIMER” button, it shows the setting time,
after 8 seconds, return to room humidity.
9. HUMIDITY SETTING INDICATORS continuous de-humidifying ,
40%, 50%, 60%, 70%
10.TIMER INDICATOR This indicator will light up, if the timer is set or in
operation.
11.POWER (ON/OFF)/CHECK INDICATOR When the unit is in
normal operation, this indicator will light in blue. And, in the following
conditions, the power indicator will BLINK to warn you:
The unit was tipped over.
The fan is dissipating the heat (after the power is off, the unit will keep
dissipating the heat for 2 minutes to cool down the unit).
12.WATER FULL INDICATOR It turns to RED when water tank is full or
the tank is not in proper position.

12
1. Plug the unit into a correct mains socket. (Please refer to the rating
label at the rear of the unit.)
2. Press button POWER to turn on the unit. The unit will start to work in
continuous mode.
3. Press button HUMIDITY to set the room humidity you need: continuous
de-humidifying , 40%, 50%, 60% or 70%
4. Press button MODE to choose the ventilation speed, MUTE, TURBO or
DRYER.
5. Press button TIMER to set the working hour you need (1~24 hours).
6. To turn off the unit, press button POWER again.
IMPORTANT!
1. After switching off the unit, it takes at least 2 minutes to OFF the
unit completely, this allows the heater to cool down. During the
cool-down, the power indicator will blink for warning. DO NOT
DISCONNECT THE PLUG DIRECTLY FOR QUICK-OFF.
2. Do not operate the unit without the AIR FILTER.
3. For safety purpose, the heater will break for 2 minutes after running
for 8 hours continuously, then re-start, whatever the set time has
been reached or not.
During the break, the fan keeps working for heat-dissipating.
To turn off the unit, press the “POWER” button (the set time will
be cleared).
When the water tank is full, the set time will be cleared, too.
If the time was not set, the machine will shut off automatically after
24 hours.
Operation

13
4. While using DRYER mode for clothes, please keep the unit AT LEAST
40CM away from the objects (ex. the clothes) and ensure no water will
drip into the air vent of unit. Please refer to the illustration as below for
the minimal distance from each direction (Note : can’t be used in the
cloth closet ).
5. This unit is equipped with tilt switch for overheat protection. While
the unit is tipped, the unit will stop automatically, the POWER indicator
will turn into RED and the unit will beep 3 sounds for warning. After
repositioning the unit upright, press POWER button to re-start.
6. Self-Diagnosis: If the room sensor, humidity sensor or tip-over device
is out of function, the unit will beep 3 times for warning, the POWER
indicator would turn into RED and the unit will turn OFF..

14
While the water tank is full, the unit will stop working for self-protection and:
The water full indicator will light on.
The unit will buzz 10 beeps to remind you. * To stop the buzz, you may
press ON/OFF button to turn off the unit
To empty the tank, please follow the steps:
1. Hold the unit with one hand to make it stand firmly.
2. Pull out the tank squarely from the unit.
3. Grasp the water tank handle, remove the cover of the tank, empty the
water from the drain.
4. After the tank was empty, return the water tank to its position, make
sure it is properly positioned, so the 'water full' sign can go out and your
dehumidifier is operating again.
Please note, if the water tank has not been positioned well, the water full
indicator will turn into red and the unit will keep buzzing.
Drainage

15
CONTINUOUS DRAINAGE
When the dehumidifier is operated in very high humidity, the water tank
will require more frequent drainage. In this condition, it may be more
convenient to set the unit up for continuous drainage with the following
procedures:
1. Cut off the cover of the continuous drain at the unit back.
2. Unplug the water plug.
3. Connect the drain hole with a water tube of inner diameter 12mm.
* Please note, the water tube is not supplied with the unit.
4. Pull out the water tank, plug the dropping gate inside the unit with the
water plug taken from the continuous drain.
5. Return the water tank to its position..

16
Maintenance
Always unplug the unit from the mains and wait for at least one hour before
carrying out any maintenance or cleaning of the unit.
CLEANING THE BODY
Use soft cloth to wipe the unit clean.
Don't ever use volatile chemicals, gasoline, detergents, chemically treated
clothes, or other cleansing solutions. These all could possibly hurt the
cabinet.
CLEANING THE FILTER
Draw out the air filter from the rear of the unit.
For dust filter (washable filter) –
1. Use a vacuum cleaner or tap the filter
lightly for easy cleaning. If the filter is
particularly dirty, use warm water with a
small amount of medium strength.
2. Make sure the filter is completely dry
before replacing.
3. Do not expose the filter to sunlight.
For active carbon filter –
This filter is not washable. Its life span is variable and depends on the
ambient conditions where the appliance is used. The filter should be
checked periodically (about every 6 months) and replaced if necessary.

17
STORAGE
If not use the unit for an extended period of time. Please:
Turing the unit off, unplug and tidy AC cord.
Completely empty the water tank and wipe it clean.
Cover the unit and store where it will not receive direct sunlight.
Trouble shooting

18
Schuko VDE version plug transfer to BS plug:

Modell Nr. DS 2
2
Table of contents
Languages: