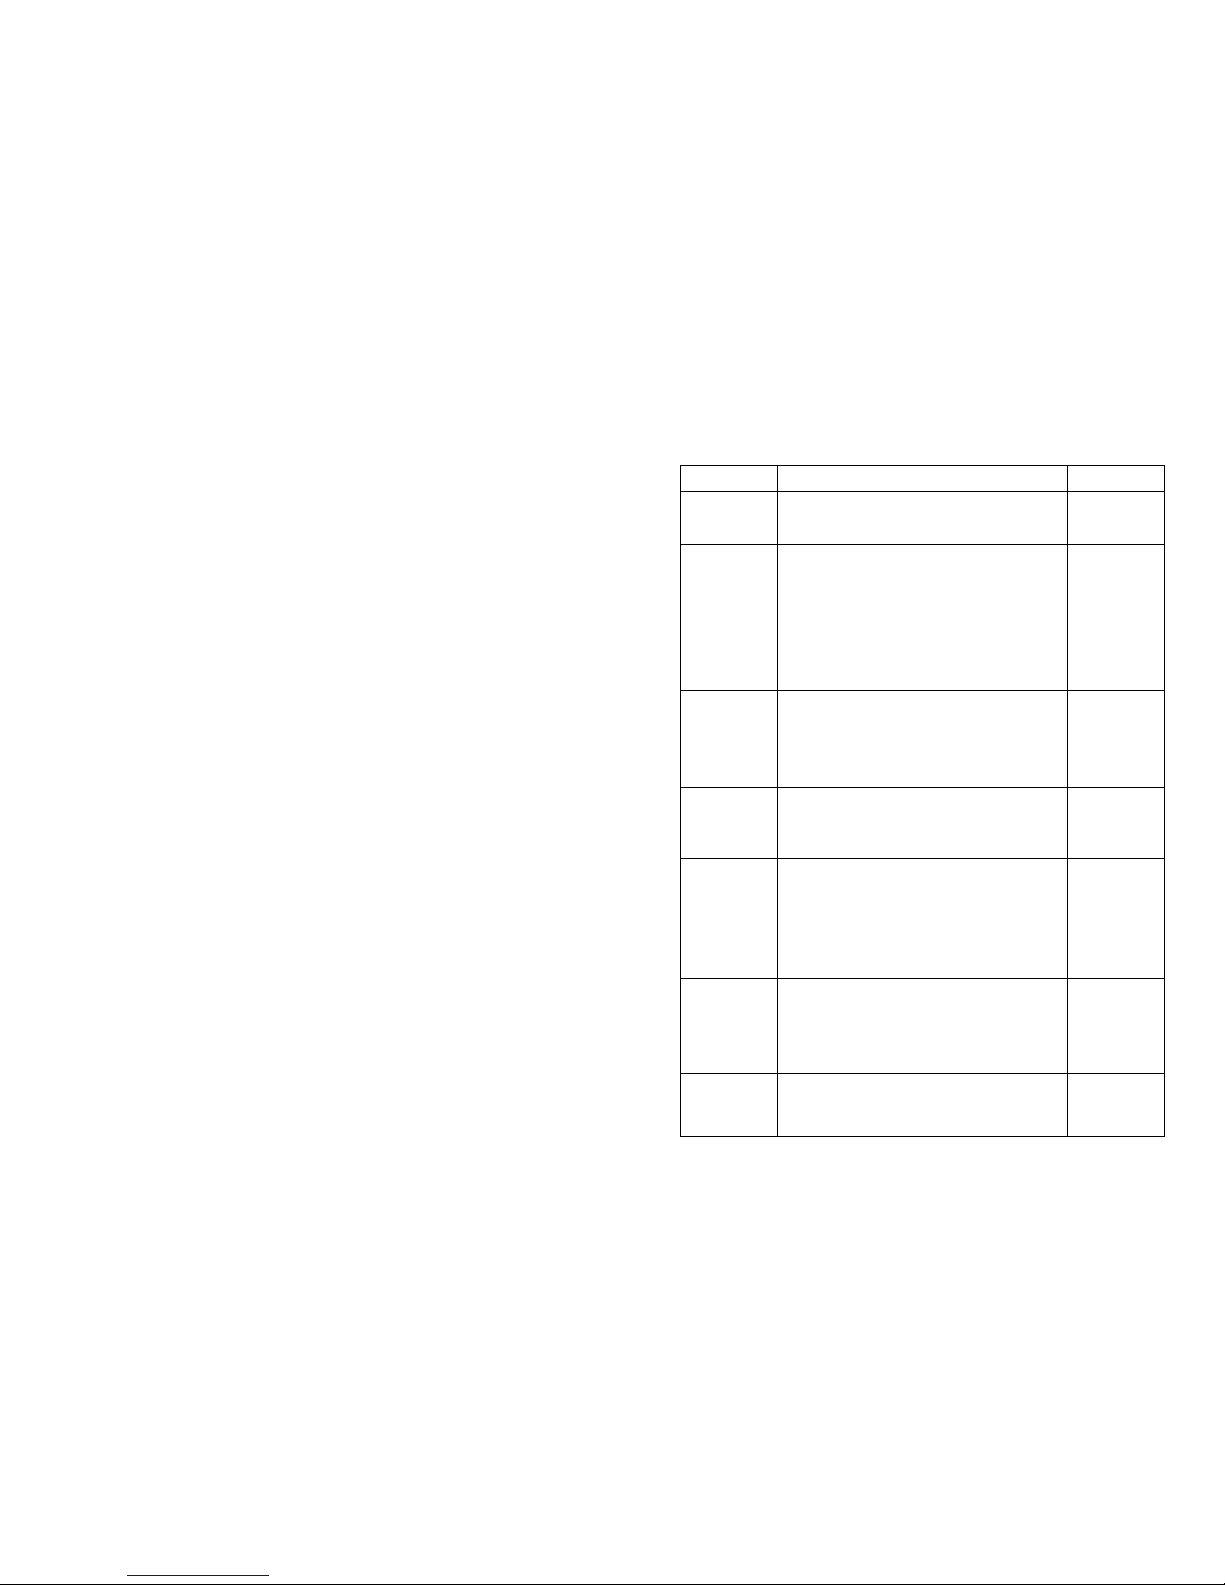
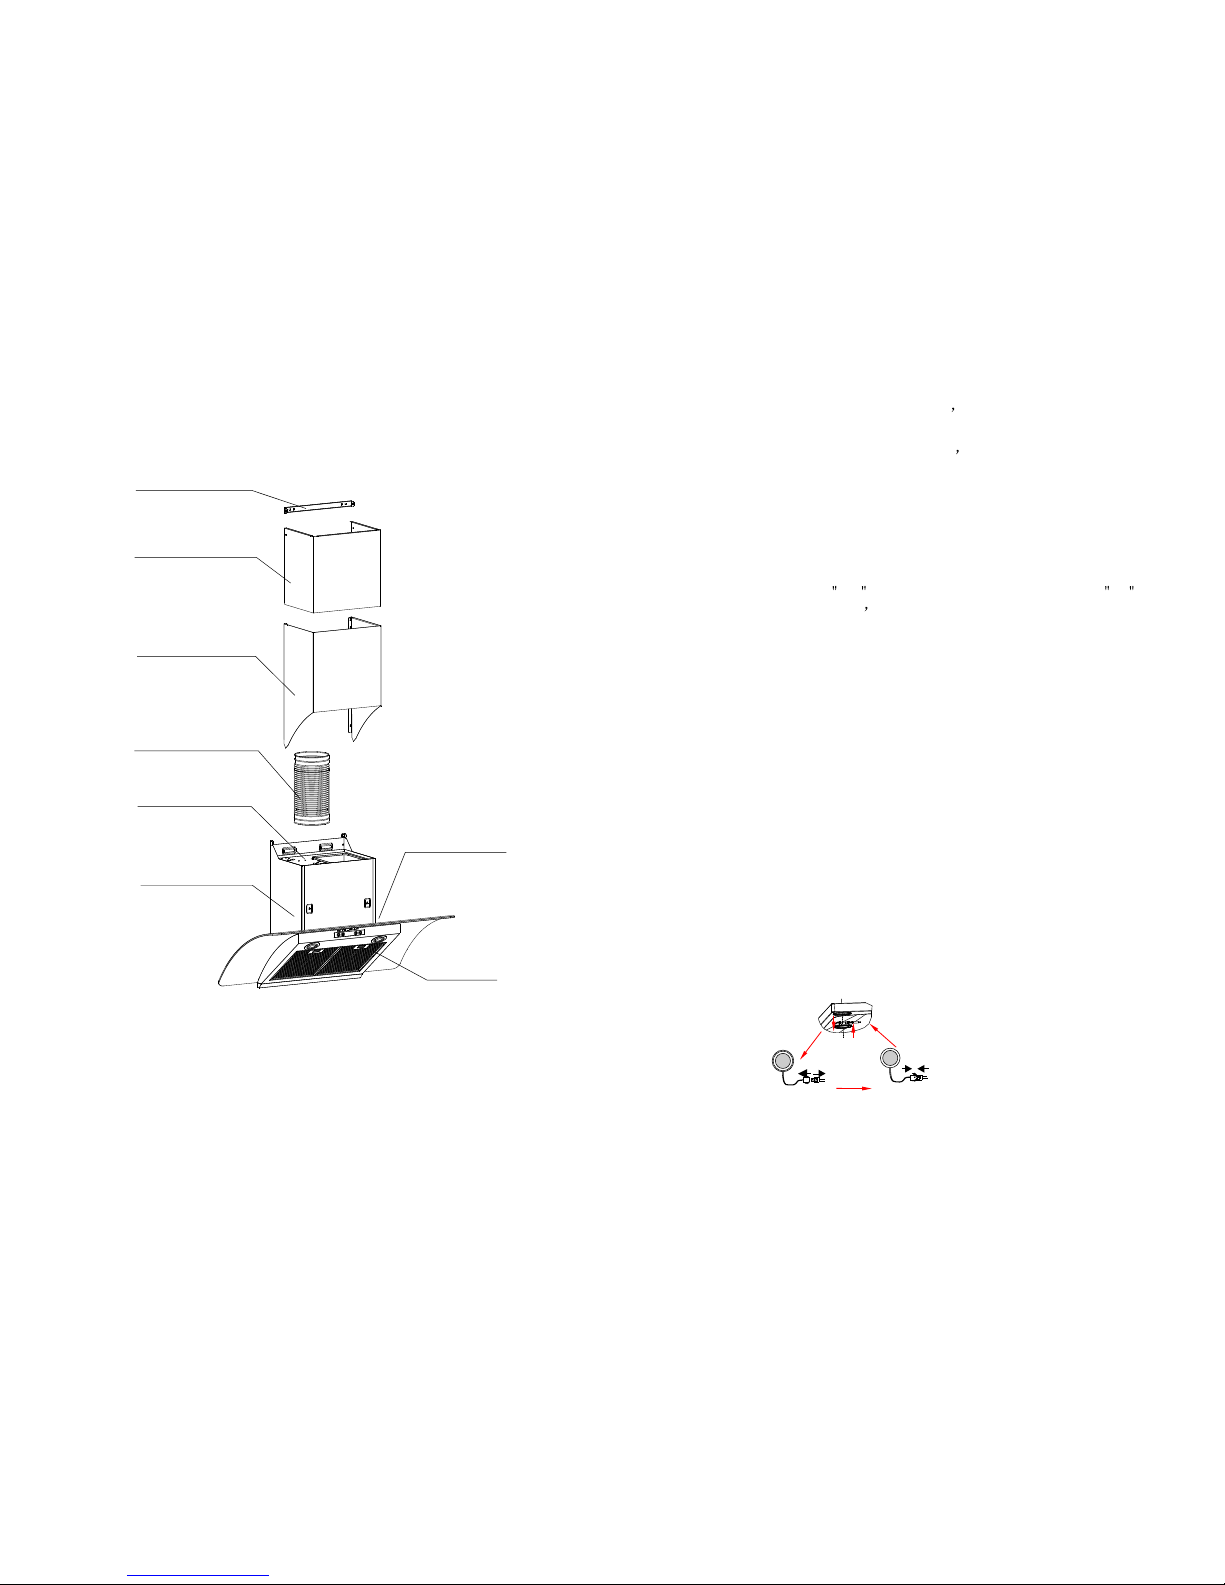
Rubine MWM-KAFFEE-90SS User manual

COOKER HOOD
MWM-KAFFEE-90SS
MWM-BREZZA-90SS

14
TROUBLE SHOOTING
CAUTION: Disconnect the power supply before servicing.
PROBLEM
CAUSE/METHOD OF REPAIRING
REQUIRED
TOOL(S)
Damaged power
supply
If the power supply is damaged, please call
technician for repair.
"+" type
Screwdriver
Sharp Pincers
Lamp works
but the motor
does not run
a) Remove the vane guard and rotate the vane by
hand. If the vane cannot move smoothly, the core
or bearings of the motor may be damaged. In this
case, replace with a new motor.
b) If the motor stops running and has a bad odor
after a moment of operation, the motor wires may
be burnout. Replace the motor.
c) If the starting wire (yellow) is disengaged from
the condenser, it needs to be rewired.
d) If the condenser is damaged, replace with a new
one.
"+" type
Screwdriver
Lamp works
but the motor
does not run
a) Take off the filter and check the connection
between air inlet and wind chamber is sealed or
not.
b) Check the connection between air exhaust pipe
and wind chamber leaks oil or not. If YES, please
fill it up with the varnish or the thinner.
"+" type
Screwdriver
Vibrating hood
a) If the motors were not firmly screwed, screw tigh
-ten them up.
b) If the vane is damaged or unbalanced, replace
with a new one.
"+" type
Screwdriver
Weak suction
a) The distance is too far between the Cooker Hood
and the Gas Cooker.
b) There are many windows (doors) cause wind con
-vection is too strong.
c) Because of the Cooker Hood is set upon the win
-dow, the best solution is that put one three-ply
board on the back of the Cooker Hood for covering
the hollow of window.
"+" type
Screwdriver
Tilting hood
a) Adjust the height of the model where is hang on
the ceiling.
b) If the model tilt forward, lock into the wall with
wood screw again (the screw peep out around 0.5
~1 cm from the wall), or check the screws for fix
-ing the model are loose or not.
"+" type
Screwdriver
Bulb does not
light
Just screw off the lamp shade and replace with a new
bulb,then put the lamp shade back.
"+" type
Screwdriver

Glove
13
Please notethat thisproduct ismarked withthis symbol:
According to Wasteof Electrical and Electronic Equipment
(WEEE) directive, WEEE should be separately collected and
treated. Ifat any timein futureyou needto disposeof this
product, Pleasedo NOTdispose ofthis productwith household
waste. Please send this product to WEEE collecting points where
available.
Read and save this instruction manual
CONTENTS
Specifications.................................................................... 1
Dimensions ....................................................................................1
Parts Diagram .......................................................................2-3
Installation Requirements....................................................4
Installation Procedures.......................................................5-9
Operating Instructions.... .........................................................9
Maintenance...............................................................10-11
Important Safety Instructions...........................................12-13
Trouble Shooting........................................................14
Put on protective
glove before you start to
clean the hood. Remove the
components gently when
cleaning.
Never wash the
control switch with water
or any kind of liquid.
Liquid might cause
electrical problem to
the hood.
Cleaning of the motor
fan should be undertaken
by a qualified person. Be careful
to avoid any distortion
of the fan when
cleaning.
Never pull theplug
out of thepower supply with
wet hand, toavoid the
possibility of electric
shock.
Disconnect the
cooker hood from the
power supply if this appliance
is not in use for
a long period time.

12
IMPORTANT SAFETYINSTRUCTIONS:
Manual
1
DIMENSIONS
Model No.:
Total power: 194W 254W
Speed motor: 250W
L
Voltage: 220V 240V
Frequency: 50Hz
Filter: 6-Layer filter
Control:
MWM-KAFFEE-90SS MWM-BREZZA-90SS
190W
LED ights: 2 2W
Sensor touch control
210
232
245
613
MWM-KAFFEE-90SS
MWM-BREZZA-90SS
304
260
182
558
500
895
369
275
505
610¡«955
Do not connect the air
outlet to chimney flues or
combustion gas ducts.
Do not leave bare
flames under this hood
In case of any
damage to power cable,
replace the broken cable with
a new one by qualified person.
Replacement of the bulb
should be undertaken by a
qualified electrician or a
competent person. Always
use the bulb no more
than 2W.
Do clean the hood
correctly in accordance
with instruction stated failing to do
so might cause the possibility
of fire related accidents.
SPECIFICATIONS
Dear consumer,
Thank you for your purchase of our product. To ensure you use theappliance with the
best effect, pleaseread thisinstruction manual with care before using andsave it for
future reference.
The manufacturer declinesall responsibilities fordamage to person(s) or thing(s)
caused by non-observanceof the aboveprescriptions or by interference with
any part of the appliance orby the useof non-original spares
!
284
730¡«1060
301
890
414
443

6. Take out the charcoal filter like arrowhead s direction( if you have
installed charcoal filter).
8. Use hexangular screwdriver to loose the blower fix screws.
9. Take out the fan.
7. Take out the motor fix cover like arrowhead s direaction.
10. The same way to take out the other fan.
Note: Left motor fixed cover and fan have a little difference from right
side ,there is a letter R on the right side cover and a letter L
on the left side cover.Don t assemble it in wrong side.
11.After clean, please assemble it like the opposite ways of loose it.
11
PARTS DIAGRAM
Duct bracket
Outer duct cover
Exhaust pipe
Air outlet
Blower box
Tempered
glass canopy
Filter
Inner duct cover
2
MWM-KAFFEE-90SS
Caution: Lamp unit may be hot! Wait until unit is cool
Use the same type of the light bulb!
To replace LED lamp
Make sure all control switches are off, and the cooker hood is unplugged.
Pls follow instructions below:
Warning: Make sure the bulb is cool before you touching
1.Take out the filters, and cut off the wire connection.
2.Press the spring according to the arrow direction,
to take off the bulb cup.
3.Replace the old bulb with a new
12V d.c2W
4.Put on the new bulb in reverse
direction, then fix the spring and wires.

MWM-BREZZA-90SS
3
10
Duct bracket
Outer duct cover
Exhaust pipe
Inner duct cover
Blower box
Tempered
glass canopy
Filter
Air outlet
Motor fix cover
Fan
Charcoal filter
Fan fixed screws
1. Take out the filters.
2. Loose the wire insert
and power supply wire.
3. Loose earth wire.
4. Loose blower fixed
screws.
5. Take out the blower assembly.
Blower assembly
Wire inset
Power supply
wire
Earth wire
Blower fixed screws
CLEAN THE BLOWER ASSEMBLY OF MWM-BREZZA-90SS
3. Clean the filter once a week or according to usage. Press the buckle of
the filter slightly, take off the filter and put it into warm soapy water
using mild detergent, lightly brush the filter with soft brush. Place the
filter back after it is dry.
4. Clean the motor fan and other internal parts twice a year or according to
usage by a QUALIFIED PERSON.
5. DO NOT clean motor with water or other liquid.
MAINTENANCE
1. Use only mild soap or detergent solutions to clean the cooker hood surface.
Dry surfaces using soft cloth.
2. Use a stainless steel cleaning solution to bring the glow back onto a
stainless steel finish.
Caution: Never put your hand into the area housing
while the fan is operating.
For the optimal level of operation, clean the cooker
hood surface, fan and aluminum filter regularly.

49
OPERATION INSTRUCTION
Light
Touch this button
one time,the lamp
will be lighted.
Touch again,the
lamp will extinguish.
1. Touch this button
one time when the
hood is working, it
will prolong working
time one minute.
2. Touch two times,it
will turn off at once.
Motor On/Off
Timer/Clock
Timer
Clock
When the hood stay Off,
keep touching this button
3 seconds,and then the
hood stay clock set.
1.When the hood
working,touch this
button one time ,it
can set time as timer,
touch each one more
time can add one min,
The longest time you
can set is 60 mins.
2.When the hood non-
working,touch this
button for 3 seconds,
it shows on
the digital display,
you can use to
set hour and
to set minute ,just
like a clock.
Fan
Fan:
Touch this button,
the motor works in
high speed; Touch
this button again,
the middle speed
runs; Touch the
button thrice, the
low speed runs; The
motor stops after
touching it quartic.
Step 9:
CHARCOAL FILTER INSTALLATION
FOR MWM-KAFFEE-90SS
Match the charcoalfilter to theblower
cover and rotatecharcoal filter toward
the direction ofarrow.
Blower cover
Charcoal filter
Screw
Step 8:
Extend the air outlet of the exhaust
pipe out-of-door. Try to make the
bend of the exhaust pipe is more
than 120
LEVEL
300~350mm
Fig.1 Fig.2 Fig.3
Fig.4
LEAN
2. Install the cooker hood right above the hob.The recommended distance
between the hob and the lower edge of the cooker hood is minimum
300mm and maximum 350mm. (Fig. 2)
3. In order to get the optimum performance, do not elongate the exhaust
pipe too long, avoid over-bending of exhaust. Ensure the
connection is airproof. (Fig. 3)
4. After hanging the unit on the wall, ensure the hood is level and vertically
straight.(Fig. 4)
5. The air outlet must not be connected to chimney flues or combustion gas
ducts. The air outlet must be under no circumstances, be connected to
ventilation ducts in which fuel-burning appliances are installed.
INSTALLATION REQUIREMENTS
1. Do not install the cooker hood where there are many doors or windows
in order to avoid to affecting the exhaust efficiency of the hood caused
by air convection. (Fig. 1)
MWM-KAFFEE-90SS

182
260
283
40
5
Step 1:
Match the holes of outer duct
cover and blower box, fix the outer
duct cover to the blower box using
8pcs M4 10 screw provided with
the fixing tool. As the direction of
illustrated.
Outer duct cover
Step 2:
According to the size of the holes.
Drill 2 holes in level in the wall
with 8mm in diameter and 75~85mm
in depth. Press the 2 expanding tube
provided into the holes. Tighten the
2 wood screws of 5x60mm which
supply together with the hood to the
expanding tube, make sure it is fixed
enough and can not move.
Step 3:
Hang the cooker hood to the 2 wood
screws. Tighten the 2wood screws
from the position of filters to the
expanding tube. If the hood have
little acclivitous, use the adjustable
screws to adjust it to level.
Wood Screw
5x60
Expanding Tube
Hook
A
A
Adjustable screw
210
232
245
613
INSTALLATION PROCEDURES
INSTALLATION FOR MWM-BREZZA-90SS
8
Step 4:
Matching the holes of outer duct
cover and blower box, fix the outer
duct cover to the blower box using
8pcs M4 10 screw provided with
the fixing tool. As the direction of
illustrated.
Inner duct cover
Outer duct cover
3
2
Step 6:
Hang the entire hood unit onto the
hook, ensure the hood is level and
vertical.
Step 7:
1. Draw the inner duct cover up to
the suitable high, mark on the wall
two keyhole of the outer duct cover
bracket with pen .
2. Put down the inner duct cover
gently, drill the keyholes in 75-85
mm depth on the horizontal level
using 8mm drill.
3. Press the expanding tube provided
into the holes.
4. Matching the inner duct cover with
the holes, tighten the inner duct
cover with two 5x60 wood screw
provided
Step 5:
Drill holes in the wall using a 8 mm
drill bit.Use three screws to fit the hook
on the wall in the screw holes 1,2,3 .
Then use one M4X10 screw fit the
appliance on the screw hole 4 to make
sure the appliance is fixed and can not
be moved!
Wood Screw
5x60
Expanding Tube
Hook
5x60
Wood Screw
Expanding Tube
5x60
Wood Screw
Expanding Tube
1
4
Safety warning
Hood may have very sharp edges; please wear protective
gloves if it is necessary to remove any parts for installing,
cleaning or servicing.

Step 3:
Insert the inner duct cover into the
outer duct cover.
Inner duct cover
Outer duct cover
Step 1:
Take out of the cooker hood from
the carton and put it on a horizon
-tal work table gently. Fix the exh-
aust pipe into the shutter,make sure
the shutter and exhaust pipe are
connected tightly.
Exhaust pipe
Bracket
Inner duct
cover
M4 Screw
Step 2:
Match the bracket to the holes
of the inner duct cover and fix it
well with M4 screws.
Match the bracket to the holes
of the Outer duct cover and fix it
well with M4 screws.
Step 8:
Extend the air outlet of the exhaust
pipe out-of-door. Try to make the
bend of the exhaust pipe is more
than 120
INSTALLATION FOR MWM-KAFFF-90SS
7
Step 4:
Take out of the cooker hood from
the carton and put it on a horizon-
tal work table gently. Fix the
reducer pipe into the air outlet of
the inner duct, and then fix the
exhaust pipe into the top of reducer,
make sure is connect the reducer
tightly.
Exhaust pipe
Air outlet
6
Step 7:
1. Draw the inner duct cover up to
the suitable high, mark on the wall
two keyhole of the outer duct cover
bracket with pen .
2. Put down the inner duct cover
gently, drill the keyholes in 75-85
mm depth on the horizontal level
using 8mm drill.
3. Press the expanding tube provided
into the holes.
4. Matching the inner duct cover with
the holes, tighten the inner duct
cover with two 5x60 wood screw
provided
5x60
Wood Screw
Expanding Tube
5x60
Wood Screw
Expanding Tube
Step 6:
Insert the inner duct cover into the
outer duct cover.
Step 5:
Matching the bracket to the holes
of the inner duct cover and fix it
well with M4 screws.
Matching the bracket to the holes
of the Outer duct cover and fix it
well with M4 screws.
Bracket
Inner duct
cover
M4 Screw
Inner duct cover
Outer duct cover
This manual suits for next models
1
Table of contents
Other Rubine Ventilation Hood manuals

Rubine
Rubine MCH-EBANO-90BL User manual

Rubine
Rubine RCH-NOVARA-90SS User manual

Rubine
Rubine RCH-THORA-SS User manual

Rubine
Rubine RCH-LESTE-BL User manual

Rubine
Rubine RCH-IA90SV-GX User manual

Rubine
Rubine SLIM HOOD User manual

Rubine
Rubine RCH-ASPIRA-90SS User manual

Rubine
Rubine RCH-19WM-RS90 User manual

Rubine
Rubine MWM-DIAMOND-90SS User manual

Rubine
Rubine RCH-GEMELLO-RS90 User manual