4
7
INSTALLATION PROCEDURES
SAFETY WARNING
HOOD MAY HAVE VERY SHARP EDGES;PLEASE WEAR
PROTECTIVE GLOVES IF IT IS NECESSARYTO REMOVE ANY
PARTS FOR INSTALLING, CLEANING OR SERVICING.
Step 1:
Fix the position of the cooker hood
in accordance with the recommend-
ed height between 650mm to 700mm
from the hob and the lower edge of
the hood.
Step 2:
According the space between the hole
A&B,drill 2 holes in level on the wall
with 8mm in diameter and 60-70mm
in depth. Press the 2 expanding tube
provided into the holes. Tighten the 2
wood screws of 5x60mm which
supplied together with the hood to the
expanding tube.Make sure it is fixed
enough and cannot be move.Hang the
cooker hood on the 2 wood screws,
make sure it is to be level and stable.
10mm
650-700mm
Wood Screw
5x60
Expanding Tube
Hook
243mm
362mm
B
A
OPERATION INSTRUCTION
F
E
D
C
B
G
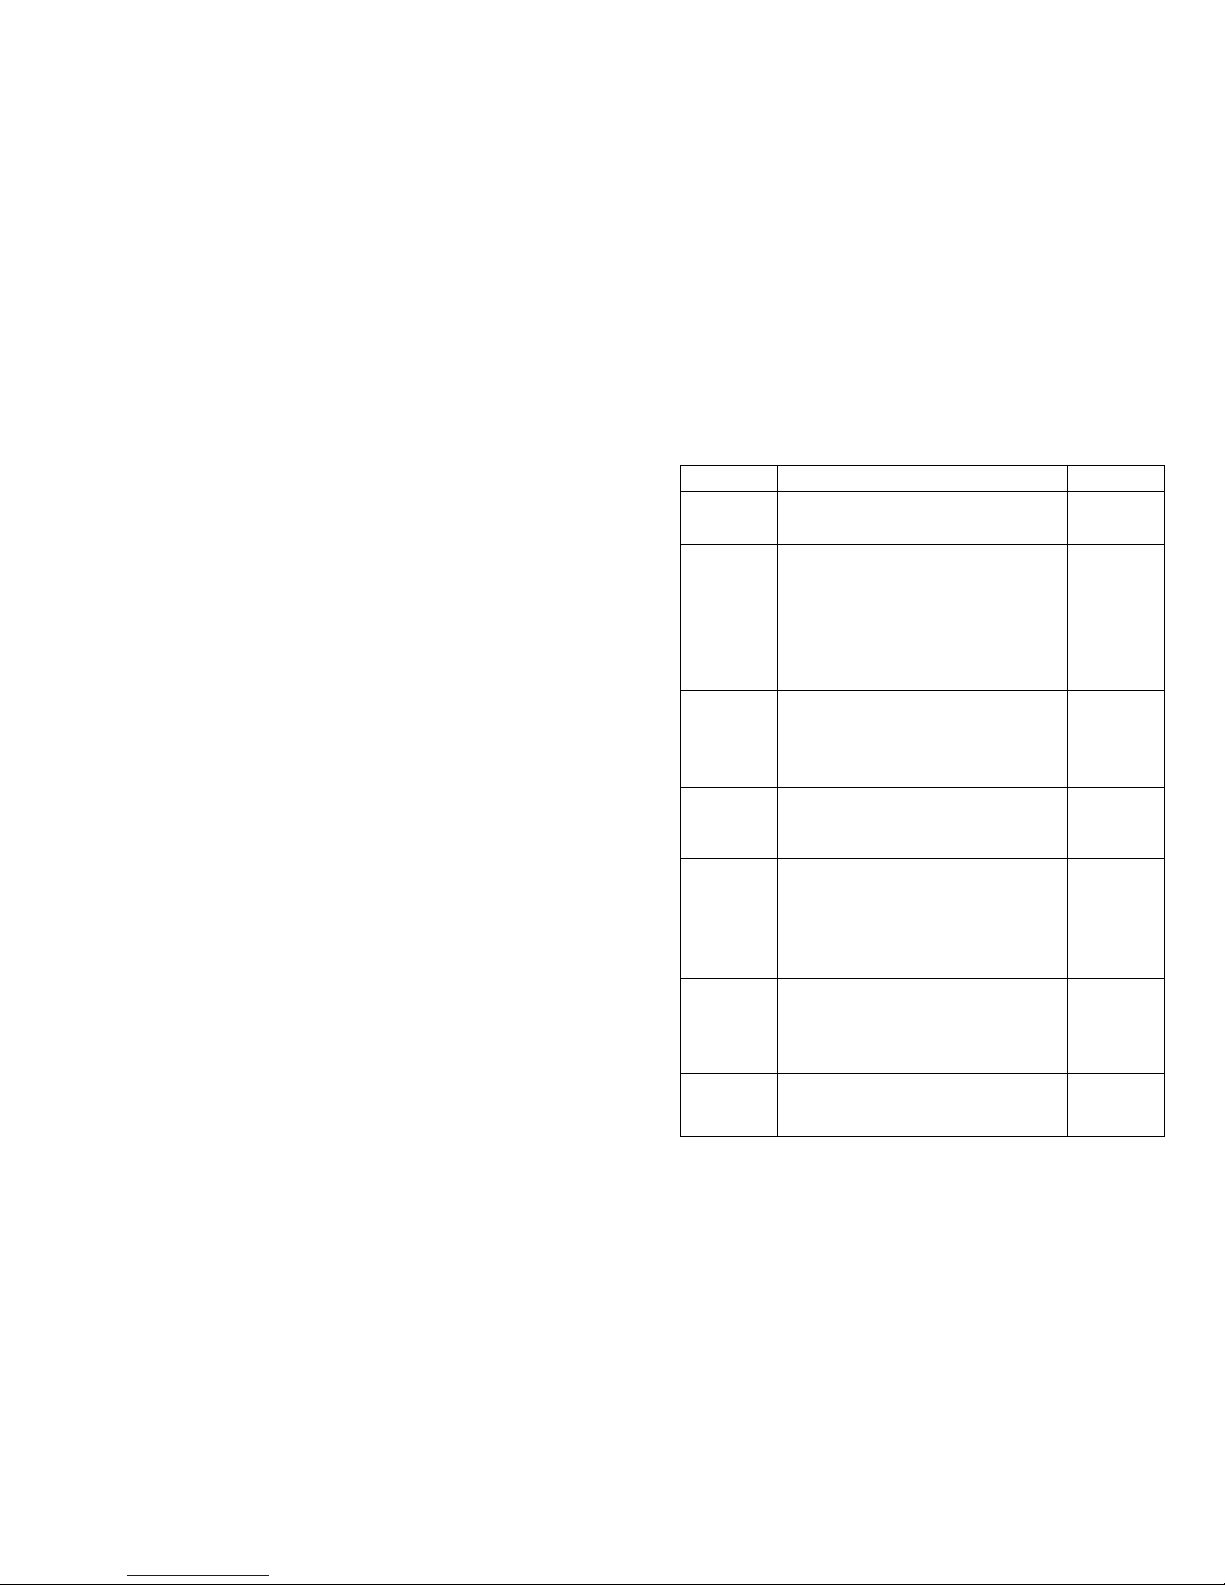
This switch is highly-sensitive touch control, use your figure touch the key-press
slightly to operate it. And this switch with gas sensor and heater sensor function.
A: Receiver: point the remote control at thereceiver when used.
B: Timer: Touchthis button onetime, you could starting a
countdown from 1minute. It couldadd 1 more minute if you
touch it again,the Maximum timeyou could set is 60 minutes.
C: Speed: Touch this botton, the hood would startingat Hight
speed, touch itagain, the Middlespeed runs, touch it thrice, itis
Low speed.And the motorstops after being touched four times.
D: Auto: The screen of the switch willshow"AUTO" after 1
minute, if youtouch this buttononce. Then the hood is in
automatic state. Itmeans that thesmoke&heat sensor is
working then. Touch this button again,the hood willreturn to
the normal state.When inautomatic state, themotor and the
lamps will turnon automatically ifthe somke or the temperature
in kitchen nearthe hood increaserapidly.And it would turn off
automatically when thesmork or/and thetemperature decreased.
(PS: When the hood isin automatic state,other buttons of
the switch andthe remote controlare both could not be operated.)
E: Lighting: Touch this button onetime, the lampswill turn on.
Touch it again, thelamps will turnoff.
F: Motor On/Off:Touch this button one time when thehood is working, it will prolong
working 1 minute.Touchit twice, the hood will trunoff.
G: Clock: When the hood is not working, touch thisbutton for 3seconds, then you could use
button C toset the hour, and the button D tothe second.
Note:
1.The control has electron already, please pull out the plastic paper before you use the remote control.
2.The longevity of electron is about one year. Dispose of weak electron properly, never throw them
into fire.
3.Point your remote control at the receivers without any block.
4 The remote control can operate up to 4meter away from the hood, if you are directly facing the
front of the hood. Operating distance diminishes as you move to the side of Hood.
A
B
C D E F
Step 4:
Take out the cooker hood from
the carton and put it on a horizon-
tal work table gently. Fix the reducer
pipe into the air outlet of the inner
duct, and then fix the exhaust pipe
into the top of reducer,make sureit is
connected to the reducer tightly.
Exhaust pipe
Air outlet