manuals.online logo
Brands
  1. Home
  2. •
  3. Brands
  4. •
  5. RUDNICK
  6. •
  7. Indoor Furnishing
  8. •
  9. RUDNICK Home Master Assembly instructions

RUDNICK Home Master Assembly instructions

This manual suits for next models

1

Other RUDNICK Indoor Furnishing manuals

RUDNICK ALP 89 User manual

RUDNICK

RUDNICK ALP 89 User manual

RUDNICK CABINET ALP 13 User manual

RUDNICK

RUDNICK CABINET ALP 13 User manual

Popular Indoor Furnishing manuals by other brands

Regency LWMS3015 Assembly instructions

Regency

Regency LWMS3015 Assembly instructions

Furniture of America CM7751C Assembly instructions

Furniture of America

Furniture of America CM7751C Assembly instructions

Safavieh Furniture Estella CNS5731 manual

Safavieh Furniture

Safavieh Furniture Estella CNS5731 manual

PLACES OF STYLE Ovalfuss Assembly instruction

PLACES OF STYLE

PLACES OF STYLE Ovalfuss Assembly instruction

Trasman 1138 Bo1 Assembly manual

Trasman

Trasman 1138 Bo1 Assembly manual

Costway JV10856 manual

Costway

Costway JV10856 manual

moss DESIGN Caisson Credenza Assembly instructions

moss DESIGN

moss DESIGN Caisson Credenza Assembly instructions

Aquaglide FULL DECK 15.0 owner's manual

Aquaglide

Aquaglide FULL DECK 15.0 owner's manual

AREBOS AR-HE-SW30 user manual

AREBOS

AREBOS AR-HE-SW30 user manual

Till-Hilft Fulda 87005.330 Assembly instructions

Till-Hilft

Till-Hilft Fulda 87005.330 Assembly instructions

Twoey Outside 2010 quick start guide

Twoey Outside

Twoey Outside 2010 quick start guide

Hettich Easys 200 operating instructions

Hettich

Hettich Easys 200 operating instructions

The bedboss RELAX 404 Series owner's manual

The bedboss

The bedboss RELAX 404 Series owner's manual

Oeseder Möbelindustrie Bern 991 720 Assembly instructions

Oeseder Möbelindustrie

Oeseder Möbelindustrie Bern 991 720 Assembly instructions

Costway HW68469 user manual

Costway

Costway HW68469 user manual

Next ALIX A27743 Assembly instructions

Next

Next ALIX A27743 Assembly instructions

BROSA Hans Assembly guide

BROSA

BROSA Hans Assembly guide

Prodigg MINIKA PBA015T-FUR installation manual

Prodigg

Prodigg MINIKA PBA015T-FUR installation manual

manuals.online logo
manuals.online logoBrands
  • About & Mission
  • Contact us
  • Privacy Policy
  • Terms and Conditions

Copyright 2025 Manuals.Online. All Rights Reserved.

www.rudnick.com.br
Home Master 1,80/
Master Entertainment
1525
1800
450
Instrucciones de montaje
Instructions of assembly
Instrucao de Montagem
Móveis de Qualidade
1,5h
Estilete/ /Cuter Stiletto Martillo/Hammer
Desarmador
phillips de cruz/
Philips Screwdriver
Tiempo para
montar
el mueble/
Assemble time
Personas necesarias
para realizar el montaje
/People
needed to assemble
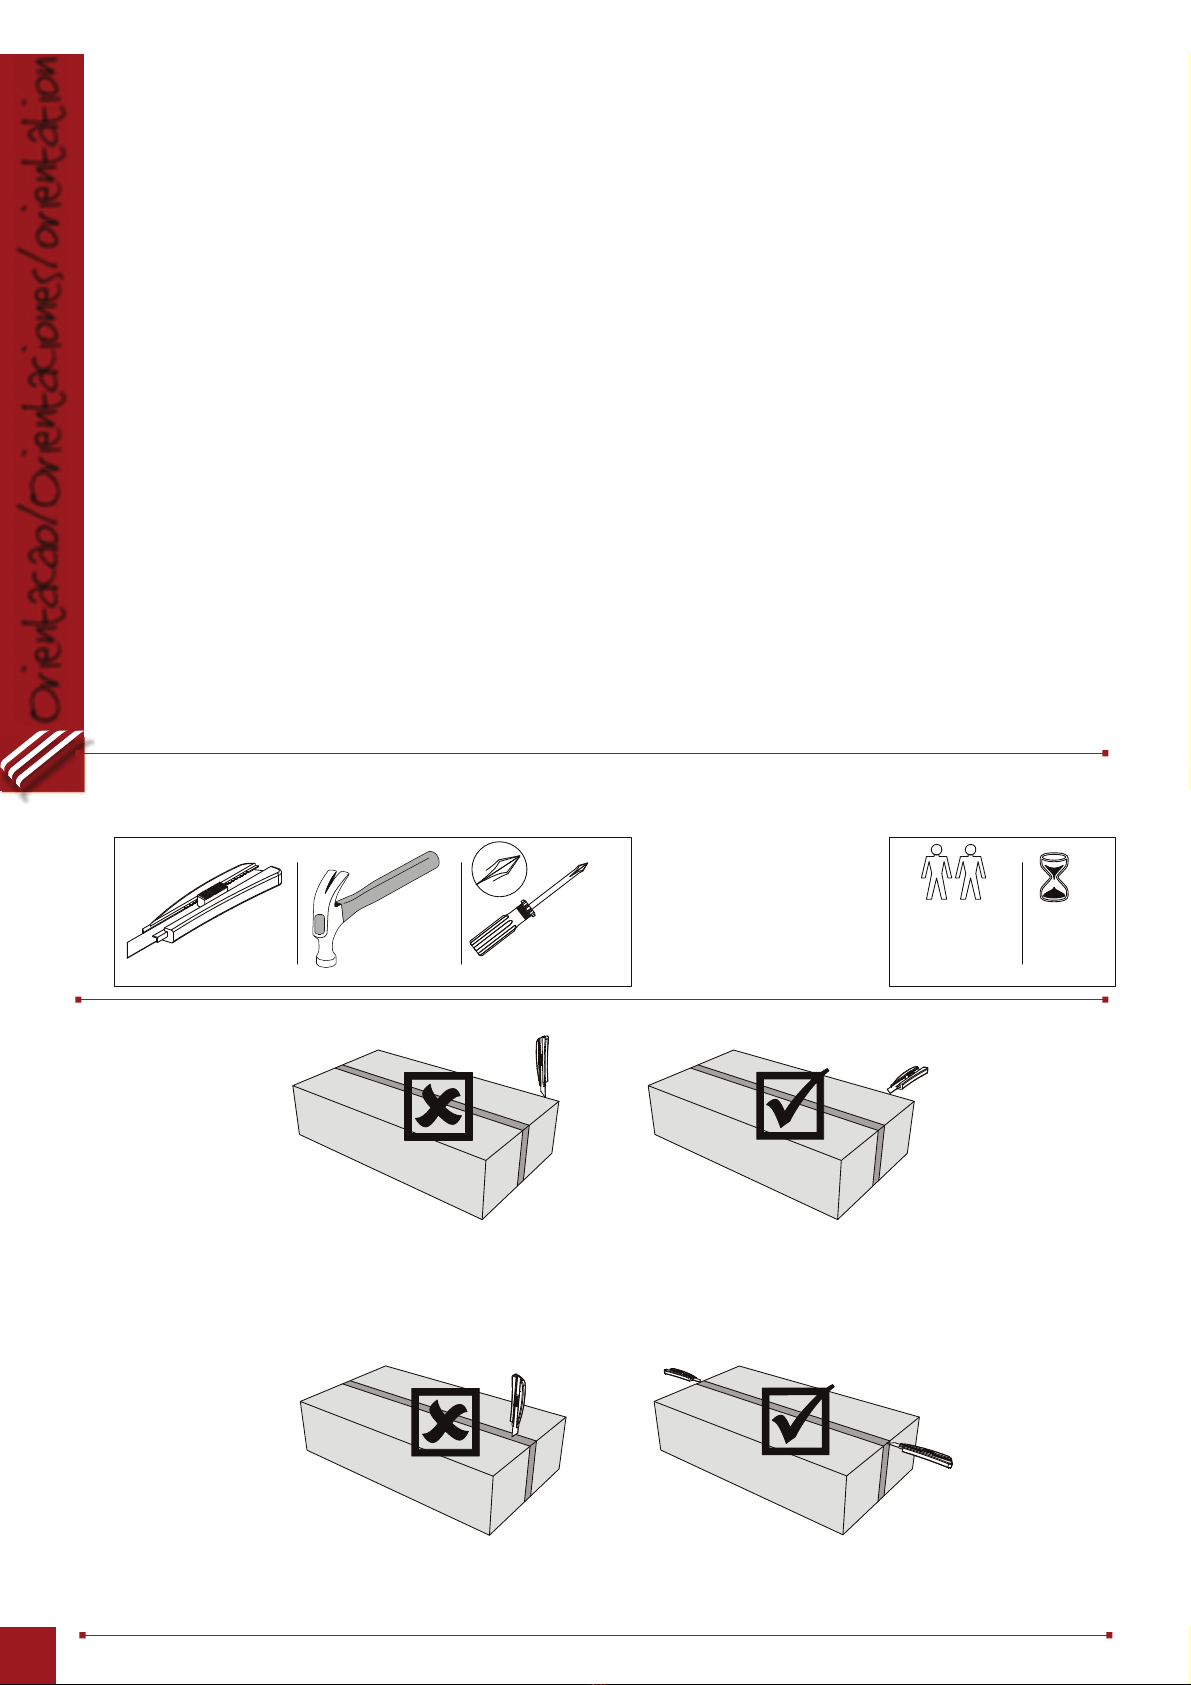
Abra as caixas que acondicionam as peças do produto. Veja:/ /Abra las cajas como indica la foto abajo: Open the boxes as per the draw follow:
Para romper la pelicula plastica que cubre la caja del producto, NUNCA utilize el cuter en forma vertical como la (Fig. A),
la posicion correcta es con el cuter en posicion horizontal (Fig. B) para evitar daños a las piezas del mueble./
To open the plastic film that recover the product, do not use the stiletto on the vertical position as per "A" draw.
Put the stiletto on the horizontal position as per "B" draw, to avoid damages on the product.
Para abrir la s cajas, NUNCA utilize el cuter en forma vertical como la (fig. C). La posicion correcta es con el cuter en posicion horizontal (Fig. D).
Para evitat daños a las pezas del mueble.
To open the boxes, do not use the stiletto as per "C" draw. Tear the protect bands with the stiletto on the horizontal position as per "D" draw.
Fig. A Fig. B
Fig. C Fig. D
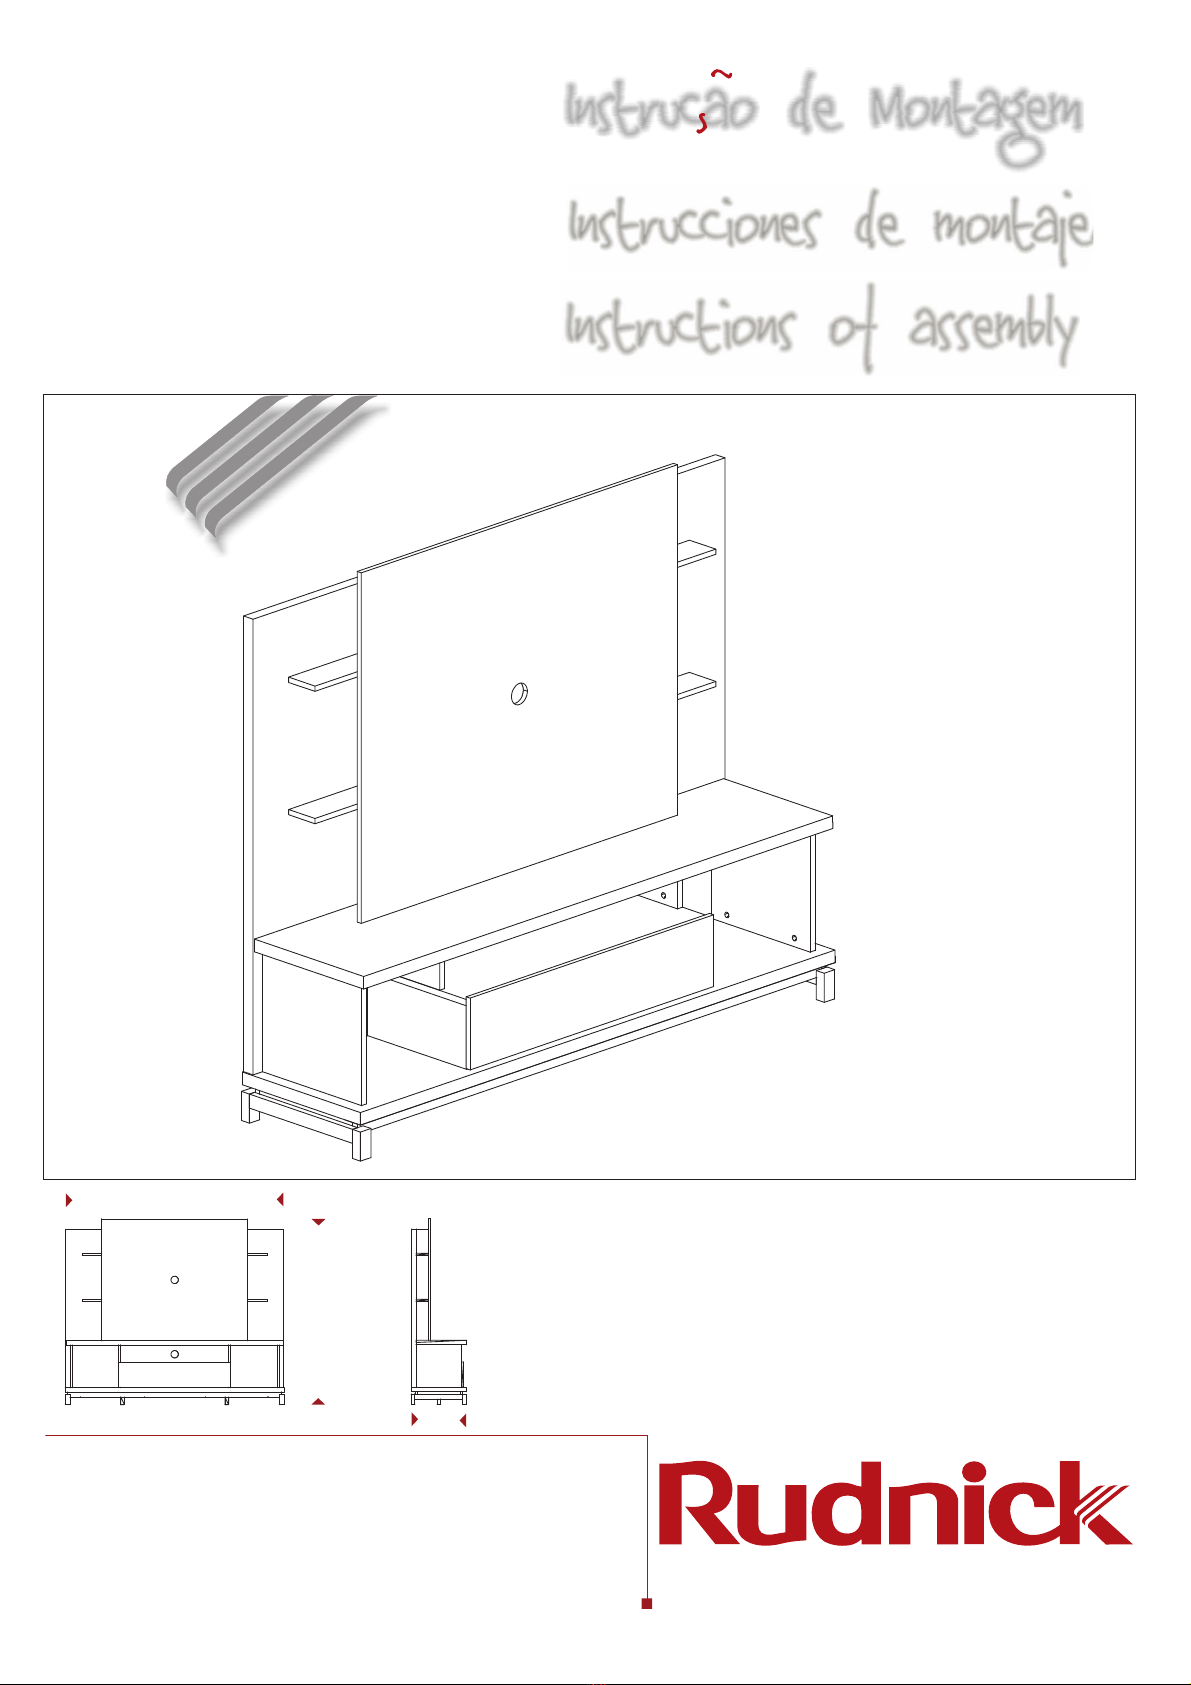
Para que o produto que você acaba de adquirir possa ficar igual ao que você viu na loja, é muito importante que sejam seguidas as
instruções contidas neste manual.
Através deste manual, a montagem de seu móvel é assistida passo-a-passo. Assim fica fácil e seguro realizar a tarefa.
Through
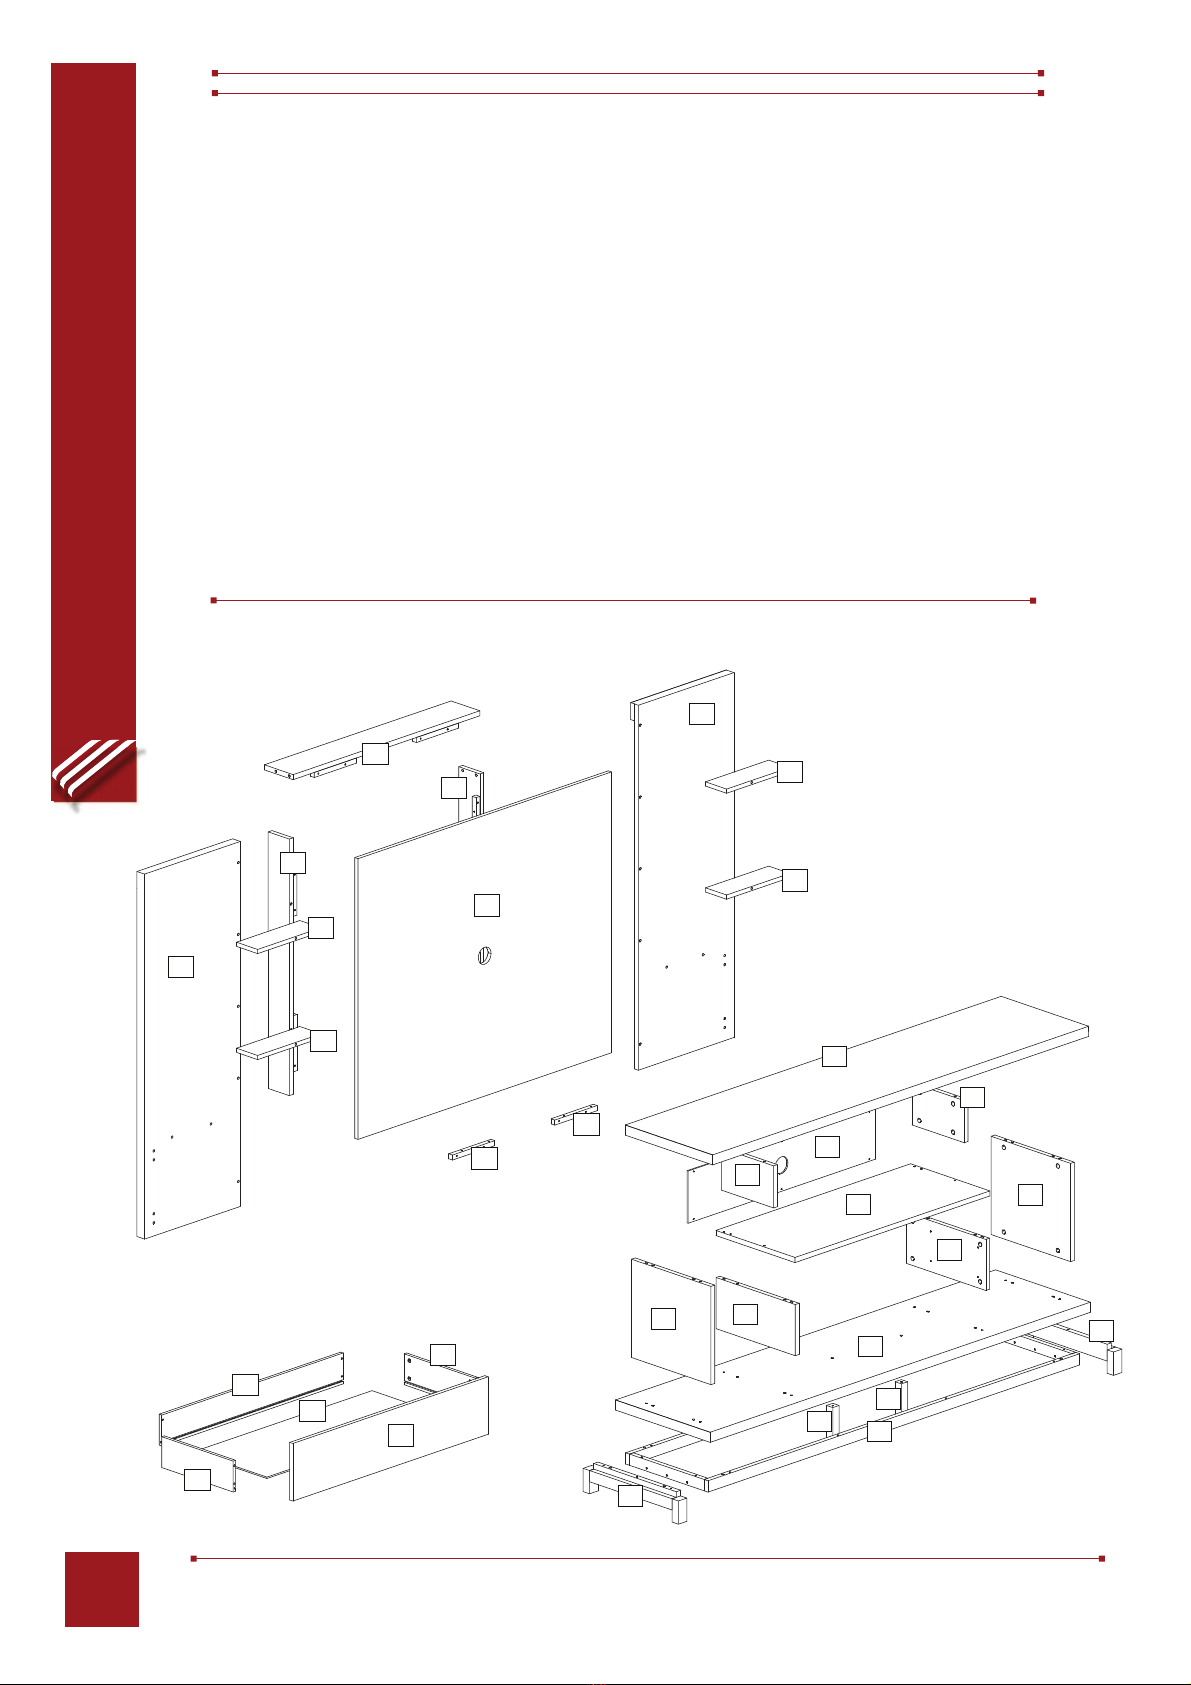
Antes de iniciar a montagem do móvel, recomendamos que você providencie um local limpo e sem tráfego de pessoas, para que você
possa organizar os materiais e ferramentas para a montagem. Inicie a montagem do móvel sobre os papelões da embalagem ou sobre
um cobertor. Protegendo sempre as peças para não riscá-las.
Empeze la montage del mueble sobre los cartones de la embalage u sobreuna manta, haciendo la proteccion para no dañalas.
Start the assemble of the furniture on the cartons of the packager or blanket. Saving always
the pieces to not scratch.
Lembres-se que a boa imagem e qualidde do produto RUDNICK depois de saírem da loja dependem da atenção, organização, capricho,
cuidado e criatividade dos montadores.
Acuerdese que la buena image y calidad del producto Rudnick despues de salir de la tieda depende de la atencion, organizacion, antojo,
cuidado y criatividad de los montadores.
Remeber the Rudnick product good image and quality after leave the store depend attention, organization, whim, carefully and creativity of
assembler.
MPORTANTE!
Depois de finalizada a montagem, entregue o manual do produto ao cliente.
IMPORTANTE!
Despus de acabada la montage, entregue el manual del producto para el cliente.
IMPORTANT!
After finalize the assemble, handing over the product manual guide with the customer.
Para que el producto que usted acaba de adquirir debe de fijarse que las piezas sean todas como lo indica el manual es muy importante que
sean seguidas todas las intrucciones contenidas en este manual.
Atravez de este manual, sera asistido paso a paso el montaje de su mueble y asi es mas facil y seguro realizar esta tarea.
Antes de iniciar el montaje de su mueble busque un lugar amplio y limpio para que pueda oraganizas las piezas y herramientas para el montaje.
It's important that you follow all the instructions of this manual for the better assemble so your product will end up just like to one you
saw in the store.
this manual, the assemble of your furniture is attended step-for-step. Therefore it´s easy and safe realize this work.
Before begining the assemble, we recommentation that you chose a clean place and without people traffic, for you to organize the
materials and the tools for the assemble.
Para a montagem do móvel serão necessárias algumas ferramentas, não fornecidas com o produto./
Para el montaje del mueble sera necesario usar unas herramientas, no incluidas con el producto.
For the furniture assemble will be necessary some tools, that are not included in the product.
Martelo/
Chave Phillips/
Para romper a película plástica que recobre a caixa do produto, NUNCA utilize o estilete na posição vertical (Fig A.).
Posicione o estilete horizontalmente (Fig. B) para evitar danos às peças do móvel./
Para abrir as caixas, NUNCA utilize o estilete como na Fig. C. Rompa as fitas protetoras com o estilete na posição horizontal como na Fig. D./
Orientacao/Orientaciones/orientation
2
PORTUGUÊS/ /ENGLISHESPAÑOL
Componentes/Components
Code/Código N. Componentes Quant.Component/ Qty/Cuant/
T03350 01 Tampo/ 01
T03352 02 Fundo / 01
Y00196 03 Rodapé Montado/ 01
O00708 04 Pé montado/ 02
T03354 05 Tampo Intermediário/ 01
L01535 06 Lateral / 02
O00709 07 Pé central/ 02
D00689 08 Divisão Superior 02
D00690 09 Divisão Inferior 02
G01300 10 Lateral gaveta/ 02
E02274 11 Frente gaveta/ 01
G01296 12 Traseira gaveta/ 01
U00579 13 Fundo gaveta/ 01
F01516 14 Traseira/ 01
P06117 15 Painel Central 01
F01514A 16 Traseira Esquerda/ 01
F01514B 17 Traseira Direita 01
X03696 18 Travessa Lateral 02
X03760 19 Tampo Superior 01
J01153B 20 Prateleira Lateral Direita 02
J01153A 21 Prateleira Lateral Esquerda 02
S00643 22 Cleat 02
Tapa/
Fondo /B
Traviesa base/
Tapa/
Lateral
Lateral cajones/
Frente cajones/
Trasera cajones
Fondo cajones/
Trasera/
Top
ottom
Skirtingboard
Top
Side
Drawer side
Drawer front
/Drawer back
Drawer bottom
Back panel
1
8
8
69
9
6
5
14
2
3
77
4
4
15
16
17
18
19
22
20
20
21
21
18
12
10
11
10
13
22
Componentes/Components
A
36
16
06
04
20
06
04
24
B
G
K
H
I
J
C
T
U
E
F
D
L
O
P
Qty/Cuant/Quant.
Code/Código
accessory/accesorio/acessório
7,0 x 50
18402000
12100082 Cola/
pegamento/
glue/ 01
10500005 24
Ø8x30
18300569
18200261
18401118
18401999
18401119
18200306
18200401
18401787
18200134
18200138
18200344
18200143 4,0 x 30
4,5 x 45
4,5 x 60
Suporte
3,5 x 12
3,5 x 20
6,0 x 10
Qty/Cuant/Quant.
Code/Código
accessory/accesorio/acessório
12
24
01
Q
R
S
Tapa furo/
Tapa furo/
cubierta/
cubierta/
cover cap
cover cap
18301280
18301321
18302549
M02
18300149
Corrediça /
guía/
slider/
Chave Allen/
01
01
N
I
L
L
L
L
L
L
L
L
L
L
L
L
18400926
18400282
Guia de cabo/
guía/
handle guide /
01
Passo/Paso/Step
1º 2º
L
02
32
08
08
32
Tambor/
Tambor/
cilinder rastex/
cilinder rastex/
Dispositivo de fixação/
Parafuso/
/
tornillo/
screw rastex
Parafuso/
/
tornillo/
screw rastex
18
2X
2X 6
9
3
Tubo Aspiral
Utilizar a régua abaixo para medir os componentes.
100
90
80
70
60
50
40
30
20
10
0
medidas em mm
I
II
L
L
L
L
18
I
I
I
I
I
I
I
I
Montagem/Montaje/Assembly
02
Passo/Paso/Step
03
P
04
Passo/Paso/Step
asso/Paso/Step
C
C
C
CC
C
C
C
CC
C
C
2
3
12
H
H
H
H
11
H
H
H
H
I
I
I
I
15
II
I
II
I
5
1
H
I
T
T
T
BB
T
B
B
B
T
4
42
3
Montagem/Montaje/Assembly
Passo/Paso/Step 05
06
Passo/Paso/Step
07
Passo/Paso/Step
A+P
A+P
7
7
7
7
I
I
I
I
I
I
I
I
I
K
K
K
KK
K
K
K
K
9
9
6
6
5
2
P
A
B
T
R
RR
R
R
R
R
RR
Montagem/Montaje/Assembly
Passo/Paso/Step 08
09
10
P
P
asso/Paso/Step
asso/Paso/Step
I
I
I
I
I
D
D
D
D
N
N
8
8
K
K
K
1
KK
K
KK
K
K
K
K
K
R
R
RR
R
R
RR
R
RRRR
Montagem/Montaje/Assembly
12
11
Passo/Paso/Step
Passo/Paso/Step
A+P
A+P
A+P
A+P
A+P
A+P
16
17
18
18
19
P
A
K
K
K
K
K
K
A+P
A+P
A+P
A+P
A+P
A+P
A+P
A+P
A+P
A+P
A+P
ATENÇÃO!
Na peça 16 fixar
apenas este parafuso.
A+P
16
16
17
17
18
18
P
A
Montagem/Montaje/Assembly
14
13
Passo/Paso/Step
Passo/Paso/Step
C
C
C
C
KK
KK
20
21
A+P
P
A
As Prateleiras são Opcionais.
Para fixar as prateleiras,
é necessário vazar as furações.
A+P
A+P
A+P
A+P
A+P
A+P A+P
A+P A+P
B
BB
BB
B
BB
20
21
22
22
22
B
B
19
B
B
Montagem/Montaje/Assembly
16
15
Passo/Paso/Step
Passo/Paso/Step
K
K
15
21
21
21
15
K
15
B
B
B
BB
BBB
B
B
B
B
B
B
B
B
B
B
BB
BB
Q
Q
Q