Rudolf Riester Riester I User manual

Loupes
Operating Manual
Binocular loupes

CONTENTS
1. Introduction
2. Your Loupe specification
3. How to set up your Loupes
4. Your working angle
5. How to adjust Loupes fitted to a headband
6. How to fit and remove Loupes from a frame or headband
7. How to fit the Loupe “Flip up” lever
8. How to fit and adjust the Loupe headstrap
9. Frame adjustments
10. Protective or +1D caps
11. Side shields
12. Care of your Riester loupes
13. Ordering spares and accessories
14. Optician guidance notes
As part of our continued product development we reserve the right to amend specifications at any
time without prior notice.

A NOSE PADS
B TELESCOPE LOCKING KNOBS
C TELESCOPE
D P.D. BAR
E HINGE
F HINGE PINS
G HINGE TIGHTENING SCREWS
H BACKPLATE
I NECKCORD
J TOGGLE
K SIDE SHIELDS (REMOVEABLE)
L REMOVEABLE PROTECTIVE CAPS

Fig. 1
1. INTRODUCTION
Thank you for choosing Riester Surgical Loupes.
As well as giving you the highest optical quality, our stringent manufacturing controls ensure that you
will obtain many years of trouble free use from your Loupes.
Before attempting to work with your Loupes and in order that you obtain the best from them, we
recommend that you take the time to carefully read through these user notes.
It is important that if you normally wear spectacles, your prescription is fitted into the Loupe frames.
Guidance notes for your optician are included at the rear of this section, please take these notes with
you to your optician should you require prescription lenses to be fitted.
2. YOUR LOUPE SPECIFICATION
When you receive your new Riester Surgical Loupes please check that the contents are as ordered:
The magnification and working distance of the Loupes is marked on the Loupe bar (e.g. 3.5x 42cm /
16”).
The frame size is marked on the inside of the frame arm.
As well as a pair of Loupes and a frame, a full loupe outfit will comprise of the following additional
components:
Loupe flip lever
Headstrap
Lens cloth
User notes on CD
Case
3. HOW TO SET UP YOUR LOUPES
The aim in using Riester Surgical Loupes is to achieve a clear, circular, binocular view (Fig. 1) at your
chosen magnification and working distance without any shadows or double images.

To achieve the best from your Riester Loupes, they must be correctly aligned both horizontally and
vertically with your visual axis (Figs. 2 and 3).
To obtain this, your loupes may require some minor adjustments. The most common are:
ADJUSTMENT METHOD
Vertical alignment (height) = Pinch or open frame pads
(Fig 4 & 5)
Horizontal alignment (PD) = Slightly loosen locking knobs (interpupillary distance)
and slide telescope along bar (Fig 7)
Fig. 2 Fig. 3
Fig. 4 Fig. 5
Fig. 7

SETTING UP
Look through your loupes at a target that is the correct working distance away. Look through first with
one eye closed, and adjust the alignment until a perfect image appears. Repeat this with the other
eye. Alternate closing the left and right eye to check binocularity and make fine adjustments. Once
you are satisfied that you have the best possible image, tighten the telescope locking knobs.
IMPORTANT
All Riester Surgical Loupes are accurately aligned and set for precise binocular vision. Under
no circumstances should adjustment be made by rotating or holding the telescopes, as this
may cause the telescopes to misalign and create double vision.
Examples of what is seen when looking through a poorly aligned telescope are shown below in the
column headed “Image Quality”. The cause of the poor alignment is shown alongside in the column
headed “Telescope position” and the action to achieve precise alignment shown alongside that in the
column headed “action”.
The corrective actions outlined below should be followed for each individual telescope.
IMAGE TELESCOPE ACTION
QUALITY POSITION
Too high Open frame pads
Too low Pinch frame pads
Too far left Slide telescope to the right in the direction of the
shadow
Too far right Slide telescope to the left In the direction of the
shadow

4. YOUR WORKING ANGLE
Correctly fitted loupes can help reduce back and neck pain. Spend a few moments ensuring your
loupes are at the optimal angle to suit you.
Adjust the angle and height of your loupes by adjusting the hinge (Fig. 6).
5. HOW TO ADJUST LOUPES FITTED TO A HEADBAND
If you have ordered your Riester Loupes for fitting to a headband, the following notes will help you to
“set up” the Loupes correctly.
Put the headband on and position CENTRALLY on your head with the padded band just above your
eyebrows, adjusting both top and back bands for security and comfort. Position the telescopes in
approximately the correct position in front of your eyes. Slightly loosen both adjustment knobs so that
the telescopes can be moved easily. Vertically align each telescope. (Fig. 8)
Fig. 6
Fig. 8

Align each telescope as outlined earlier by sliding along the bar. (Fig. 7)
N.B. If you are using your Loupes in conjunction with a fibre-optic headlamp, first adjust the
Loupes as described above. The light may then be adjusted to illuminate the specific area you are
viewing through your Loupes.
6. HOW TO FIT AND REMOVE LOUPES FROM A FRAME OR HEADBAND
Riester loupes allow you to easily fit or remove them from a frame or headband. This allows you to
switch between loupes of different magnifications without having to purchase an additional frame.
To fit Riester Loupes to the hinge, hold the Loupe PD bar and push the Loupes onto the hinge pins
through the holes on the PD bar. To remove, hold the loupe P.D bar and hinge and wriggle the
Loupes away from the pins. (Fig. 9)
UNDER NO CIRCUMSTANCES SHOULD THIS BE DONE BY HOLDING THE
TELESCOPES
If your Loupe frames are fitted with prescription lenses, you may find it necessary to position your
Loupes on the front stop of the Loupe pins to prevent the telescope from touching the lenses,
particularly when the curvature of high powered lenses prevent the Loupes from being angled fully
downward.
Fig. 7
Fig. 9

7. “FLIP UP”
Riester Surgical Loupes are mounted on a specially designed hinge, permitting the telescopes to be
flipped up out of view when not required
(Fig. 10).
To avoid touching the non-sterile Loupes, a sterilisable Loupe flip lever is provided with each pair
of Loupes (spares are also available). When magnification is required again, the Loupes may be
returned to their original preset working angle. The Loupe flip lever is fitted by pushing onto the
Loupe bar (Fig. 11) and removed by twisting off.
Fig. 10
Fig. 11

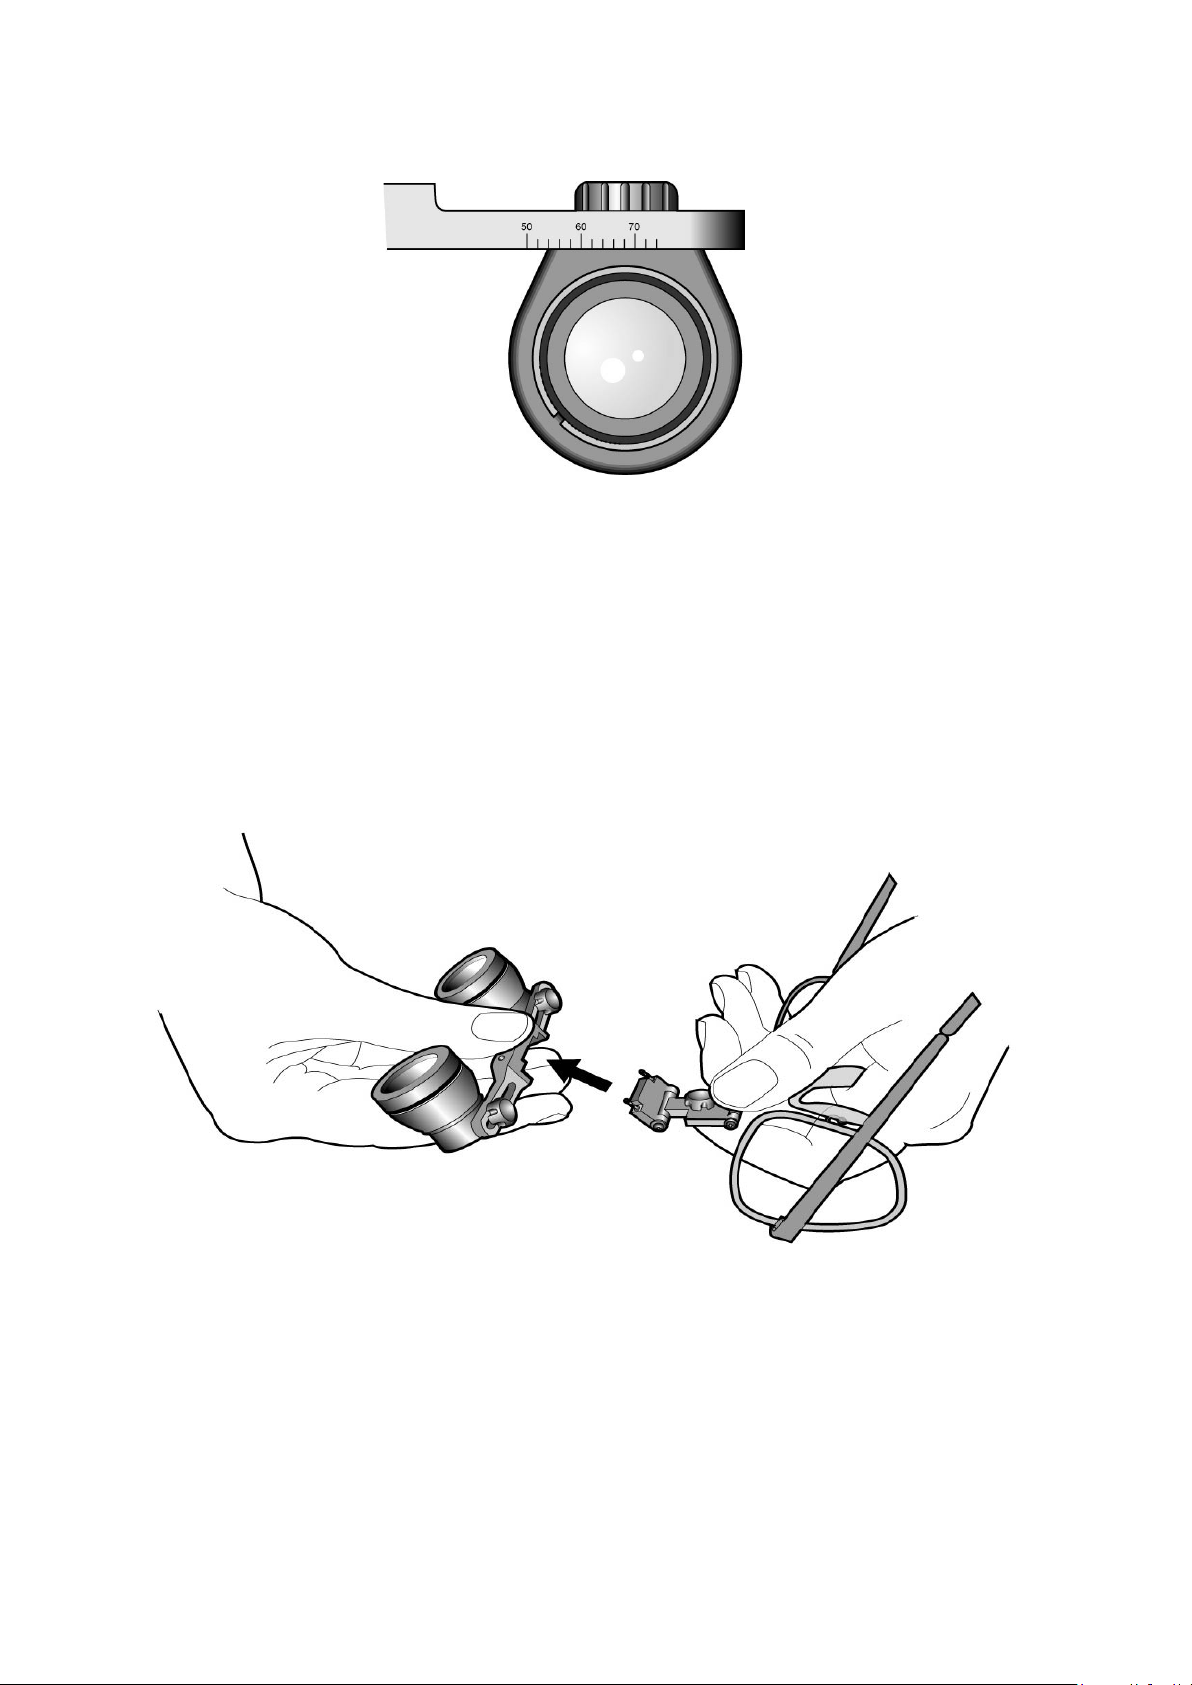
Over a period of time the hinge tension may slacken slightly and require adjustment. Using a small
crosshead or Phillips screwdriver, adjust the hinge screw to the required tension as shown (Fig. 12).
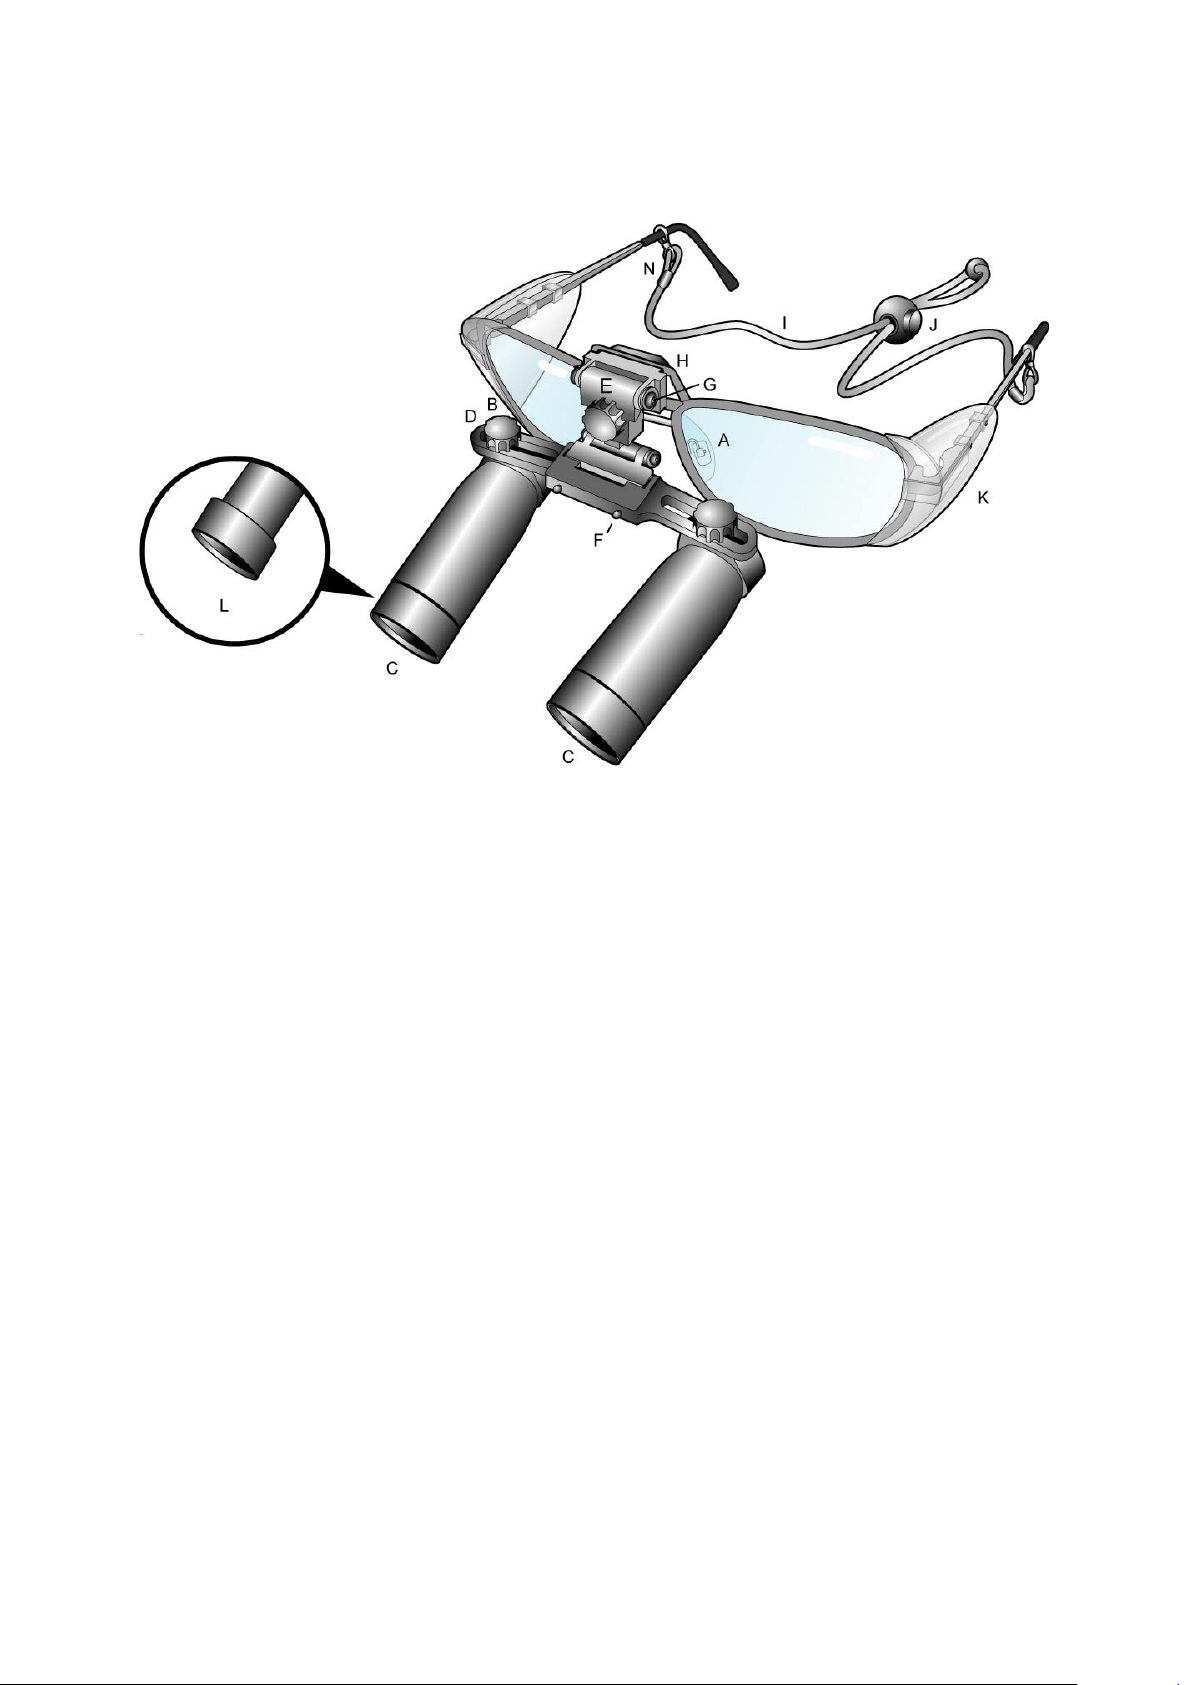
8. THE LOUPE HEADSTRAP
RiesterSurgical Loupes are supplied with the headstrap already fitted (spares are available). The
use of the headstrap is strongly recommended for added security and to ensure that the Loupes are
close to your eyes for the widest field of view.
Simply fit the headstrap over the ends of the loupe side arms. When wearing the loupes use the
toggle to tighten the strap.
9. FRAME ADJUSTMENTS
The length of the Loupe side arms may be altered by bending the end section to provide a
comfortable fit..A qualified optician should do any other adjustments required to the frame.
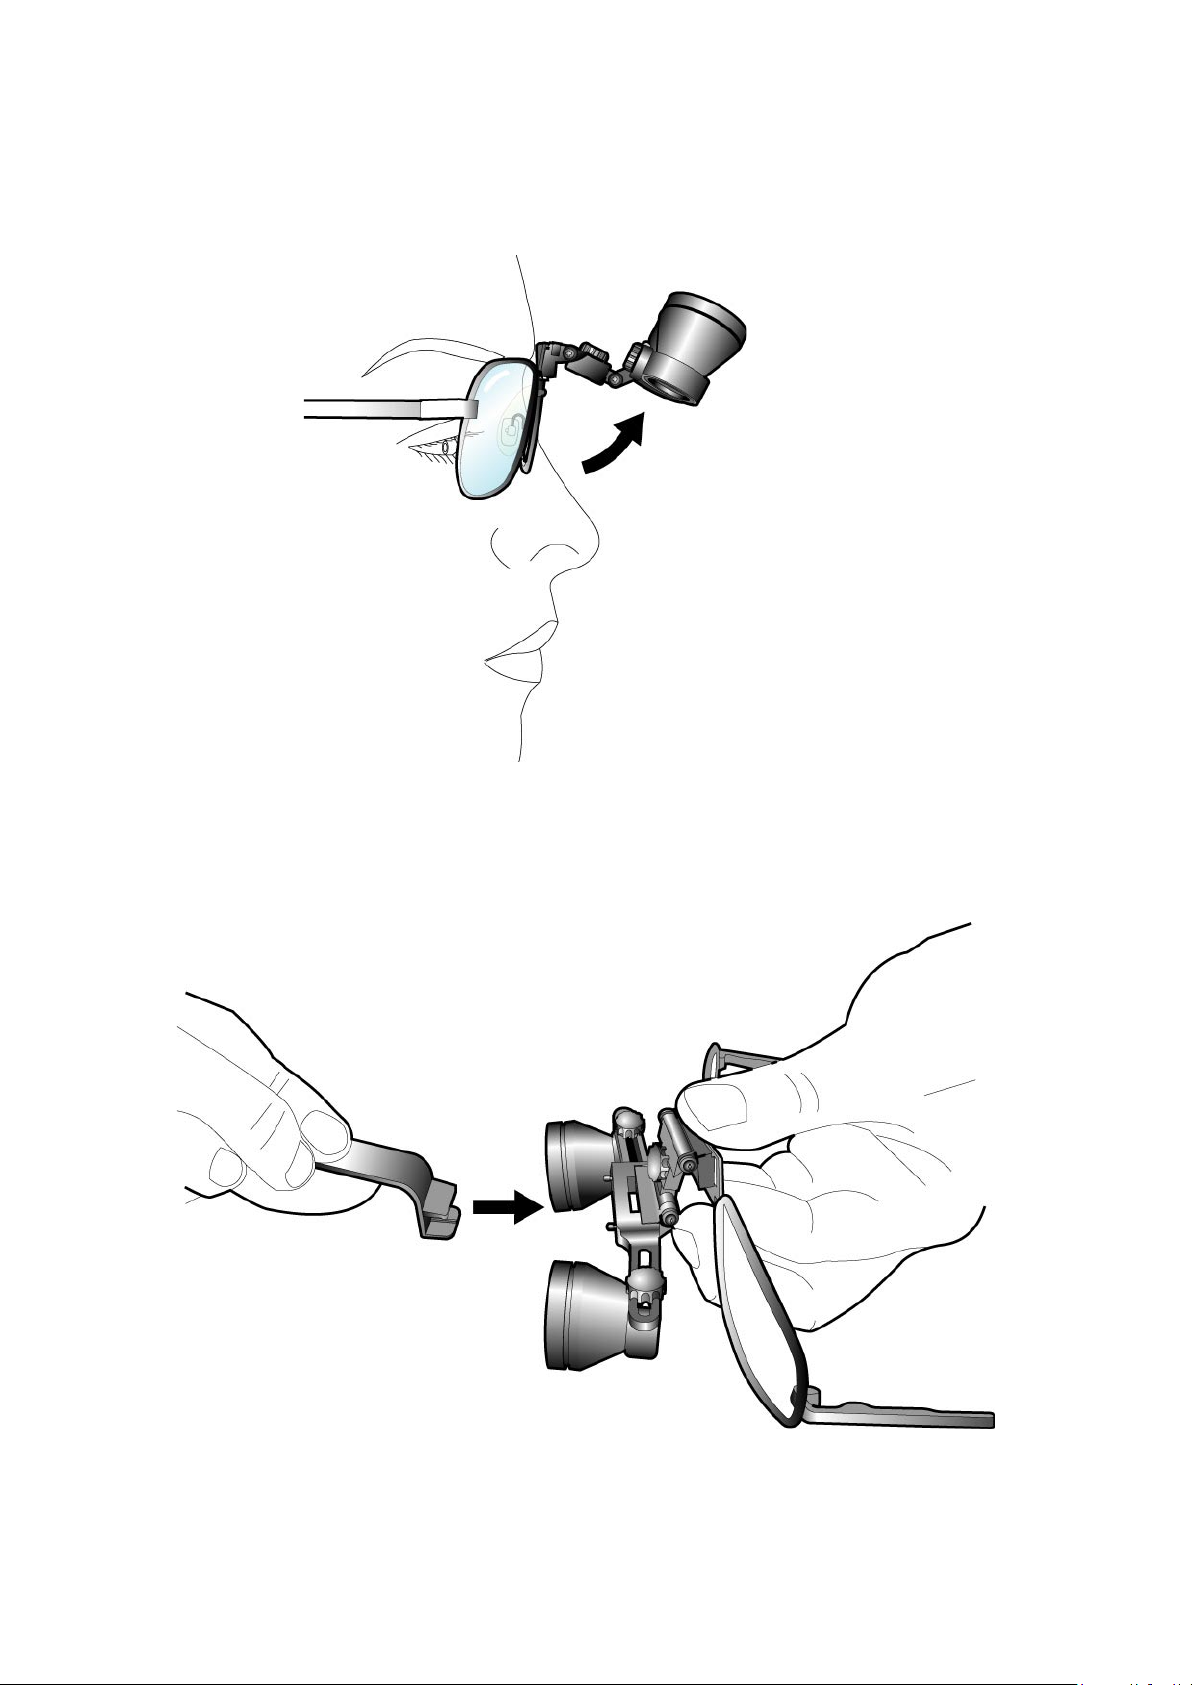
10. PROTECTIVE AND +1D CAPS.
All Riester loupes are supplied with protective caps. These are designed to be a push fit. We
recommend these be worn at all times to help protect the lenses. Lens caps may be washed or
autoclaved as necessary.
+1D lens caps can be ordered separately. They reduce the working distance and are useful if you
need to work in two different positions. They are also a push fit.
11. SIDE SHIELDS
Riester Surgical Loupes are supplied with (removable) side shields already fitted for added protection.
12. CARE OF YOUR RIESTER LOUPES
Riester Surgical Loupes are precision made optical instruments and will give many years of trouble
free use if properly cared for. Under no circumstances should the telescopes be autoclaved or
immersed in any form of cleaning fluid.
Fig. 12

13. ORDERING SPARES AND ACCESSORIES
The following spares and accessories may be ordered from any authorised Riester distributor or
Riester directly, quoting the part number below:
12760 Protective caps for Super Vu Galilean System
12761 Protective caps for Super Vu Hi-Res Galilean System
12762 + 1D Close-up and Distance caps for Super Vu Galilean System
12763 + 1D Close-up and Distance caps for Hi-res Galilean System
12765 K-L.E.D. System with charger
12770 Black spectacle frame without loupe
12771 Brow band without loupe

14. OPTICIAN GUIDANCE NOTES
The set of Riester surgical loupes have been supplied to your customer with Plano lenses fitted. We
hope that the following notes on lens fitting and frame adjustments will help you, help your customer
obtain the best from their loupes.
There are two types of binocular telescopes used in Riester loupes:
Galilean based on a Galilean optical system
Panoramic based on a Keplerian telescope system incorporating a roof prism.
Prescription fitting
First establish the following facts; -
1. The type of loupe (i.e. Galilean or Panoramic).
2. The magnification.
3. The working distance or focal length (noted on the loupes).
4. Your customers interpupillary distance, taking the working distance/ focal length of the loupe into
consideration.
It is important to fit the frame as close as possible to the eyes so that your customer can obtain the
widest field of view.
Any distance prescription should be fitted with centers to coincide with the loupe IPD setting.
If fitting bifocals, care should be taken to fit the bifocal segment either below or above the rim of the
telescope (Fig 12) never in between. If the near vision ADD is more than +2D the bifocal segment
should be fitted below the lower rim of the telescopes to avoid shortening the focal length of the
telescopes and causing double vision.
Varifocals are not suitable for fitting to Riester loupes.
Fig. 12

In most cases the Bifocal ADD should be the same as the normal prescription. However, some
surgeons prefer the ADD to be of a power that produces a working distance similar to that of the
loupe telescopes. This avoids constant accommodation as they alternatively look through the
loupe and alongside for orientation. Others prefer a weaker ADD for easier focussing onto surgical
instruments outside the operative area. Discuss this matter with your customer to ascertain which
option is best suited to their needs.
ALL lenses should be plastic
Once your customers loupes have been glazed, it may be necessary to place the loupes on the front
stop of the loupe pins to prevent the telescopes from touching the lenses, particularly where the
curvature of high powered lenses prevent the loupes from being angled fully downwards.
CORRECT FITTING OF RIESTER LOUPES
When you have glazed your customers correction into the loupe frame, we would be grateful if
you could offer further assistance to help them “set up” the loupes correctly so that they can
obtain the best from them. Full fitting instructions are given earlier.

Loupes
Rudolf Riester GmbH
Postfach 35 • DE-72417 Jungingen
Deutschland
Tel.: +49 (0)74 77/9270-0
Fax: +49 (0)74 77/927070
info@riester.de • www.riester.de
Riester bietet eine große Produktauswah in den
Bereichen
Blutdruckmessgeräte l Instrumente für H.N.O., Ophthalmologische Instrumente l
Dermatologische Instrumente l Thermometer l Stethoskope l Stirnspiegel, Stirn-
lampen, Untersuchungslampen l Laryngoskope l Gynäkologische Instrumente l
Perkussionshämmer l Stimmgabeln l Produkte zur Blutstauung I Lungendruck-
messgeräte l Dynamometer lDruckinfusionsgeräte l Veterinärmedizinische Instru-
mente l Arztkoffer/ -taschen
Die detai ierten Beschreibungen der Produkte finden Sie unter der jewei-
igen Rubrik im Gesamtkata og (Best. Nr. 51231-50). Oder gehen Sie on ine
unter www.riester.de.
Riester offers a arge se ection of products in the areas of
Blood pressure measuring devices I Instruments for ENT, Ophthalmological in-
struments I Dermatological instruments I Thermometers I Stethoscopes I Head
mirrors, Head lights, Examination lights I Laryngoscopes I Gynaecological instru-
ments I Percussion hammers I Tuning forks I Products for blood stasis I Pulmonary
pressure measuring devices I Dynamometers I Pressure infusion instruments I Ve-
terinary instruments I Doctor’s cases and bags
Detai ed descriptions of the products can be found in the respective sec-
tions of the omnibus edition cata ogue (Order No. 51232-50). Or on ine
under www.riester.de.
99301 Rev. A 2009-05· Änderungen vorbehalten · Subject to alterations · Sous réserve de modifications · Sujeto a modificaciones · озможны изменения · Con riserva di apportare modifiche
Интернет- магазин Rudolf Riester
+7 (495) 509-41-88 http://www.ri-med.ru
Table of contents
Popular Binoculars manuals by other brands

Kite Optics
Kite Optics BINO APC STABILIZED 42 Manual and warranty

Leica
Leica TRINOVID HD Series instructions

Ork Hunter
Ork Hunter NIGHT B-1 v1.0 user manual

Bushnell
Bushnell 260140 instruction manual

Nikon
Nikon Action EX 7x35CF Product guide

American Technologies Network
American Technologies Network Night ScoutVX user guide