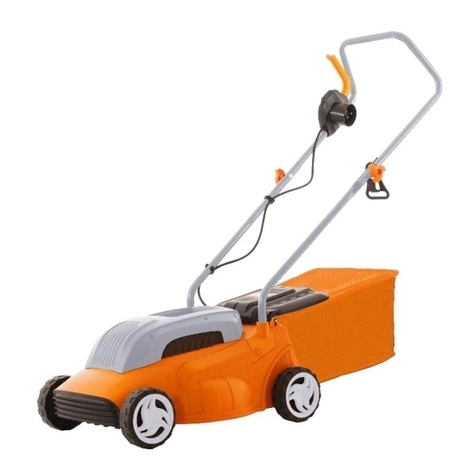
Ruris RXR300 User manual

EN
Robotic lawn mower
RXR300 RXR500

EN
Content
1. Introduction.....................................................................................4
2. Safety instructions..........................................................................5
2 .1 Safety features of the Robotic lawn mower .....................................................7
2.2 Labels on the machine.....................................................................................9
2.2 Protection against lightning ............................................................................11
3. Technical data..............................................................................12
4. General presentation....................................................................14
5. Installation guide ..........................................................................17
5.1 Perimeter islands ...........................................................................................17
5.2 Boundary wire................................................................................................19
5.3 Charging Station ............................................................................................24
5.4 Protective cover of the charging station..........................................................27
5.4 charging Information.......................................................................................33
5.5 Starting the Robotic lawn mower and testing the installation..........................34
6. Commissioning.............................................................................36
6.1 Control Panel .................................................................................................36
6.2 Starting the Robotic lawn mower ...................................................................37
6.3 Setting working time.......................................................................................38
6.4 Charging ........................................................................................................38
6.5 Change of PIN code.......................................................................................39
6.6. Firmware update...........................................................................................40
6. 7 Rain sensor...................................................................................................41

EN
3
6.8 mowing the lawn in several areas...................................................................42
7. Maintenance.................................................................................48
8. Troubleshooting............................................................................52
8.1 Troubleshooting: Charging station..................................................................52
8.2 Troubleshooting: Robotic lawn mower ...........................................................52
9. Declarations of conformity............................................................57

EN
4
1. INTRODUCTION
Dear Customer!
Thank you for your decision to purchase a RURIS product and for your
trust in our company! RURIS has been on the market since 1993 and
during all this time it has become a strong brand, which has built its
reputation by keeping promises, but also by continuous investments
aimed at helping customers with reliable, efficient and quality solutions.
We are confident that you will appreciate our product and enjoy its
performance for a long time. RURIS does not offer its customers only
machines, but complete solutions. An important element in the
relationship with the customer is the counselling both before and after
the sale, as RURIS customers have at their disposal a whole network
of partner stores and service points.
To enjoy the purchased product, please read the user manual carefully.
By following the instructions, you will be guaranteed a long use.
The RURIS company is continuously working on the development of its
products and therefore reserves the right to modify, among other things,
their form, appearance and performance, without having the obligation
to communicate this in advance.
Thank you once again for choosing RURIS products!
Customer information and support:
Phone: 0351.820.105
e-mail: [email protected]

EN
5
2. SAFETY INSTRUCTIONS
Read the user manual carefully before use. Keep it for future reference.
Instructions
a. Read the instructions carefully. Familiarize yourself with the Robotic lawn mower 's
commands.
b. Do not allow persons unfamiliar with these instructions or children to operate the
robot.
c. The operator or user is responsible for accidents or dangers caused to other people
or their property.
Training
a. Make sure the installation of the automatic perimeter delimitation system is done
correctly according to the instructions.
b. Periodically check the area where the appliance is used and remove all stones,
sticks, wires and other foreign objects.
c. Periodically check the blades, blade screws and cutting assembly for wear or
damage. Replace worn or damaged blades and screws in sets to maintain balance.
Use
a. Do not place hands or feet near or under rotating parts of the robot.
b. Do not lift or carry the Robotic lawn mower while the engine is running.
c. Turn off the power button:
- Before removing a blockage
- Before checking, cleaning or working on the Robotic lawn mower.
Do not leave the Robotic lawn mower unattended if you know there are pets, children or
people near it.
In addition, when using the Robotic lawn mower:
a) Mow the lawn in daylight or good artificial light.
b) Avoid using the Robotic lawn mower on wet grass.

EN
6
c) Do not use the Robotic lawn mower when you are barefoot or wearing open sandals.
Always wear safety shoes and long pants.
d) Be extremely careful when turning the Robotic lawn mower towards you.
e) Always start the Robotic lawn mower as directed with your feet away from the
blade(s).
Maintenance and storage
a. Keep all nuts, bolts and screws tight to ensure proper, safe operation of the Robotic
lawn mower .
b. For safety, replace worn or damaged parts.
c. Be sure to use original parts when replacing damaged ones.
d. Make sure the batteries are charged using the correct charger recommended by the
manufacturer. Improper use of the charger may result in electric shock, overheating or
leakage of corrosive liquid from the battery.
e. In case of electrolyte leakage, rinse with water / neutralizing agent, seek medical help
in case of contact with eyes, etc.
f. Service of the Robotic lawn mower will be done in accordance with the manufacturers'
instructions.
g. Do not open or damage the battery.
h. Make sure the battery is charged using the correct charger recommended by the
manufacturer. Improper use may result in electric shock, overheating or leakage of
corrosive liquid from the battery.
Care and special instructions
1. Always turn off the main power switch of the Robotic lawn mower before clearing
blockages, checking and cleaning the machine or before replacing the cutting blade.
Never attempt to repair or adjust the Robotic lawn mower while it is in operation.
2. In case of abnormal vibration, stop the Robotic lawn mower and check if the blades
are damaged. Replace worn or damaged blades to maintain balance. If the vibration
continues, contact an authorized RURIS service.
3. Use protective gloves when inspecting or servicing the blade.
4. Do not perform maintenance while barefoot or wearing open sandals. Always wear
suitable work shoes and long trousers.

EN
7
5. Replace worn or damaged parts for your safety.
6. Use only original equipment and accessories. It is not allowed to modify the original
design of the Robotic lawn mower . All modifications are done at your own risk and will
void the warranty.
7. Keep all nuts and bolts tight to ensure the Robotic lawn mower is in safe operating
condition.
8. Attention! When there is a risk of electric shock, disconnect the perimeter wire from
the base station and disconnect the plug from the power source.
Battery charger
1. The outlet must be installed near the equipment and must be easily accessible.
2. The external cable of this unit cannot be replaced; if the cable is damaged, the unit
must be completely replaced.
4. Do not open the charger cover. For safety reasons, only qualified service personnel
are allowed to open any equipment.
5. Protect the equipment from moisture.
6. Disconnect the equipment from the power source before cleaning. Use a damp cloth.
7. The equipment must be placed on a stable surface.
8. If the charger is not used for a long period of time, disconnect it from the power
source.
9. If one of the following situations occurs, the equipment must be checked by qualified
service personnel:
- The plug is damaged.
- Liquid has entered the equipment.
- The charger has been exposed to moisture.
- The charger has been dropped and/or is damaged.
- The charger shows obvious signs of breakage.
- The charger is not working well or you cannot make it work according to this user
manual.
2 .1 SAFETY FEATURES OF THE ROBOTIC LAWN MOWER
1. Anti-theft/disabling device

EN
8
The device's anti-theft/disable feature will prevent anyone from using the Robotic lawn
mower unless they have the code. You will be prompted to enter a four-digit code of your
choice to use as your personal security code.
2. Lift sensor
If the Robotic lawn mower is raised from the ground more than 10 mm, the blade will
immediately stop rotating.
3. Tilt sensor
If the Robotic lawn mower is tilted, the blade will stop immediately.
4. Obstacle sensor
The Robotic lawn mower detects obstacles in its path during operation. If the Robotic
lawn mower collides with an obstacle, the Robotic lawn mower will stop and turn in
another direction.
5. Rain sensor
The Robotic lawn mower has a rain sensor and it will stop working.
6. Emergency stop button
Pressing the STOP button will stop the Robotic lawn mower and the blade immediately.
7. Main switch
Pressing the main power switch stops all operation. It is necessary to switch it off before
lifting the Robotic lawn mower for any maintenance.
8. Sealed battery
The battery that powers the Robotic lawn mower is completely sealed.
9. Base station/ perimeter switch and perimeter wire

EN
9
The Robotic lawnmower cannot operate without a perimeter wire installed and activated
through the basestation. If the wire is not connected correctly or is damaged, the Robotic
lawn mower will stop working.
2.2 LABELS ON THE MACHINE
WARNING - Read the instructions for use before using the Robotic lawn
mower. The machine can be dangerous if used incorrectly. Read and
understand these instructions for use.
WARNING - Keep a safe distance from the Robotic lawn mower during
operation. Keep hands and feet away from rotating blades. Never put your
hands or feet near or under the Robotic lawn mower .
WARNING –Stop the Robotic lawn mower before lifting it when performing
maintenance operations. Make sure the main power switch is in the "OFF"
position before performing any inspection and/or maintenance.
WARNING - Do not climb on the Robotic lawn mower.
CAUTION - Do not touch the rotating blades
Careful! Do not wash under the Robotic lawn mower with a water jet.
Return used batteries to your local dealer, collection point or recycling point.
Noise level value.

EN
10
Protection against splashing water
CE mark The product meets the requirements and regulations established
by the European Community.
Protection class III
Removable power supply unit
Safety alert
CAUTION –To reduce the risk of injury, read the user manual
Protection class II
3.15A time delay fuse
Short-circuit proof safety isolation transformer
Main unit power switch
volt
Do not expose to rain or wet conditions.

EN
11
Li-Ion batteries.
Do not leave the boundary wire box behind the charging station.
Do not dispose electrical equipment, industrial electronics and
components in household waste! Information on WEEE. Considering the
provisions of GEO 195/2005 - regarding environmental protection and
GEO 5/2015. Consumers will consider the following indications for
handing over electrical waste, specified below:
- Consumers have the obligation not to dispose of electrical waste and electronic
equipment (WEEE) as unsorted municipal waste and to collect this WEEE separately.
- The collection of these named wastes (WEEE) will be carried out through the Public
Collection Service within each county and through collection centers organized by
economic operators authorized for the collection of WEEE. Information provided by the
Environmental Fund Administration www.afm.ro or the journal of the European Union.
- Consumers can hand in WEEE free of charge at the previously specified collection
points.
2.2 PROTECTION AGAINST LIGHTNING
Do not place the charging station under tall trees.
During lightning strikes, unplug the charging station and disconnect the boundary wire if
possible.
Important:
Do not use the Robotic lawn mower in adverse weather conditions (rain, lightning).

EN
12
3. TECHNICAL DATA
Model
RXR300
RXR500
Engine type
Brushless electric
engine
Brushless electric
engine
Li-ion battery
voltage
20V
20V
Li-ion battery
capacity
2Ah
2Ah
Connection type
-
Bluetooth
Charging time
80 min
80 min
Work time
110 min
110 min
Engine RPM
3100 rpm
3100 rpm
Cutting width
180 mm
180 mm
Cutting height
20mm-60mm
20mm-60mm
Blade type
3-edged blade
3-edged blade
Maximum climb
angle
20°
20°
Full speed
0.4 m/s
0.4 m/s
Maximum area
300 sqm
500 sqm
Warranty
24 months
24 months

EN
13
The Robotic lawn mower is suitable for a maximum grass height of 60 mm. In taller
grass, the Robotic lawn mower may stop. Cut the lawn to less than 60mm using a
brushcutter.

EN
14
4. GENERAL PRESENTATION

EN
15
1. STOP button
2. Control panel
3. Robot body
4. Rain sensor
5. Height adjustment knob
6. Front wheel
7. Disc blades
8. Rear wheel
9. Main switch
10. Battery cover
11. USB cover
12. Blades (3 pcs + 3 pcs)
13. Charging pin
14. Charging Station/Base Station
15. Charger
16. Fixing nails (for boundary wire)
17. Fixing nails (for charging station)
18. Measuring ruler
19. Boundary wire
20. Cable connector
21. Allen key
The principle of operation of the Robotic lawn mower
The Robotic lawn mower chooses its direction randomly, which means it will mow your
lawn completely, leaving no uncut part behind in the area you have fenced off with the
boundary wire. Once it detects the properly installed boundary wire, it will turn and head
in another direction, inside the area. Any objects you want to protect within the boundary,
such as a pond, trees, garden furniture or flower beds, can be demarcated using
boundary wire. It must form a complete circuit loop. If the Robotic lawn mower encounters
an obstacle within its working area, such as a person, tree or pet, it will stop, move
backwards and turn to mow in another direction. If you have a corridor inside your lawn,
it will be able to penetrate inside it if it is at least 1.2 meters wide (80 cm between the
boundary wires) and max. 8 meters long. (Fig. 2A)

EN
16
(Fig. 2A)
Propeller cutting mode
If the Robotic lawn mower comes in contact with the boundary wire more than 5 times, it
will enter the 3-circle propeller mowing mode. This spiral cutting function will help improve
the efficiency of mowing surface coverage. (Fig. 2B)
(Fig. 2B)
Protect your pond, trees, garden
furniture or flower beds with the
boundary wire
Length
Width

EN
17
Cutting height adjustment
The Robotic lawn mower has cutting height adjustment settings between 20mm and
60mm. If the grass is larger than 60 mm, cut the grass to max. 60 mm, otherwise the
working load of the robot will be too high and the cutting efficiency will decrease. Use a
regular brushcutter. Once the installation is complete, the cutting height can be adjusted
to the appropriate height. Always start in a high cutting position and work your way down
to the desired height.
Note: Do not attempt to raise or lower the cutting height while the Robotic lawn mower is
mowing the lawn.
5. INSTALLATION GUIDE
This chapter explains how to install the Robotic lawn mower, please read it before starting
the installation.
Introduction
Make a sketch of your lawn, including all obstacles and how they need to be protected.
It makes it easier for you to find a good position for the charging station and correctly
place the boundary wire around the perimeter of your garden for bordering bushes, flower
beds, etc. You will also need a few tools such as a rubber mallet and pliers.
5.1 PERIMETER ISLANDS
1. Use the boundary wire to delimit areas within the workspace by creating islands around
obstacles that cannot withstand a collision, for example, flower beds and fountains. In
addition, fence off all shock-sensitive objects and garden ponds (Fig.3A).
2. Continue unwinding the wire, moving from the edge towards the object to be protected.
3. Secure the perimeter wire clockwise around the protected objects.
4. Fence off the island completely and go back to where you left the lawn edge.

EN
18
5. The wires leading and returning to the island must be parallel and at a maximum
distance of 1 cm between them, without them crossing. Therefore, fix both wires, to and
from the island, using the fixing nails. (Fig.3B)
6. The minimum distance between the islands must be 1 m. Otherwise, delimit the two
objects together as a single island (Fig.3C).
3a
Figure 3B 3c
Note! It is forbidden to cross/intersect the boundary wire (Fig.4).
<1cm
1 m

EN
19
5.2 BOUNDARY WIRE
If you plan to aerate your garden lawn, choose one of the two installation methods for
the boundary wire: you can combine both installation methods.
- Ground installation
Attach the boundary wire to the lawn with the nail adjuster. This makes it possible to
adjust the boundary wire during the first weeks of operation.
Lay the boundary wire firmly on the ground through the grass and secure it to the
ground using the nails provided. Make sure that the Robotic lawn mower cannot cut
the perimeter wire!
- Installation in the ground
Insert the boundary wire into the ground, so that it cannot be cut by other lawn
maintenance equipment (scarifier/ aerator), up to a maximum depth of 5cm.
Install the boundary wire fixing pins at a maximum distance of 1 meter between them.
(Fig. 5)

EN
20
Important!
Hard or dry soil can cause the nails to break when you drive them in. Water the lawn if it
is very dry before installing the boundary wire.
Note: A cut boundary wire is not covered by warranty.
Installation of the wire in the corners
Avoid placing the perimeter wire at right angles (90°) in the corners. To ensure that the
Robotic lawn mower does not go too far over the perimeter wire, lay the wire at two
small angles.
Other manuals for RXR300
1
This manual suits for next models
1
Table of contents
Other Ruris Lawn Mower manuals

Ruris
Ruris RXR300 User manual

Ruris
Ruris RXR1550 User manual

Ruris
Ruris SF7A106 User manual

Ruris
Ruris RXM1000 User manual

Ruris
Ruris RX311S User manual

Ruris
Ruris DAC 100XL User manual

Ruris
Ruris RX300S User manual

Ruris
Ruris RXM777 User manual

Ruris
Ruris RX200S User manual

Ruris
Ruris Scythe DAC 777K User manual