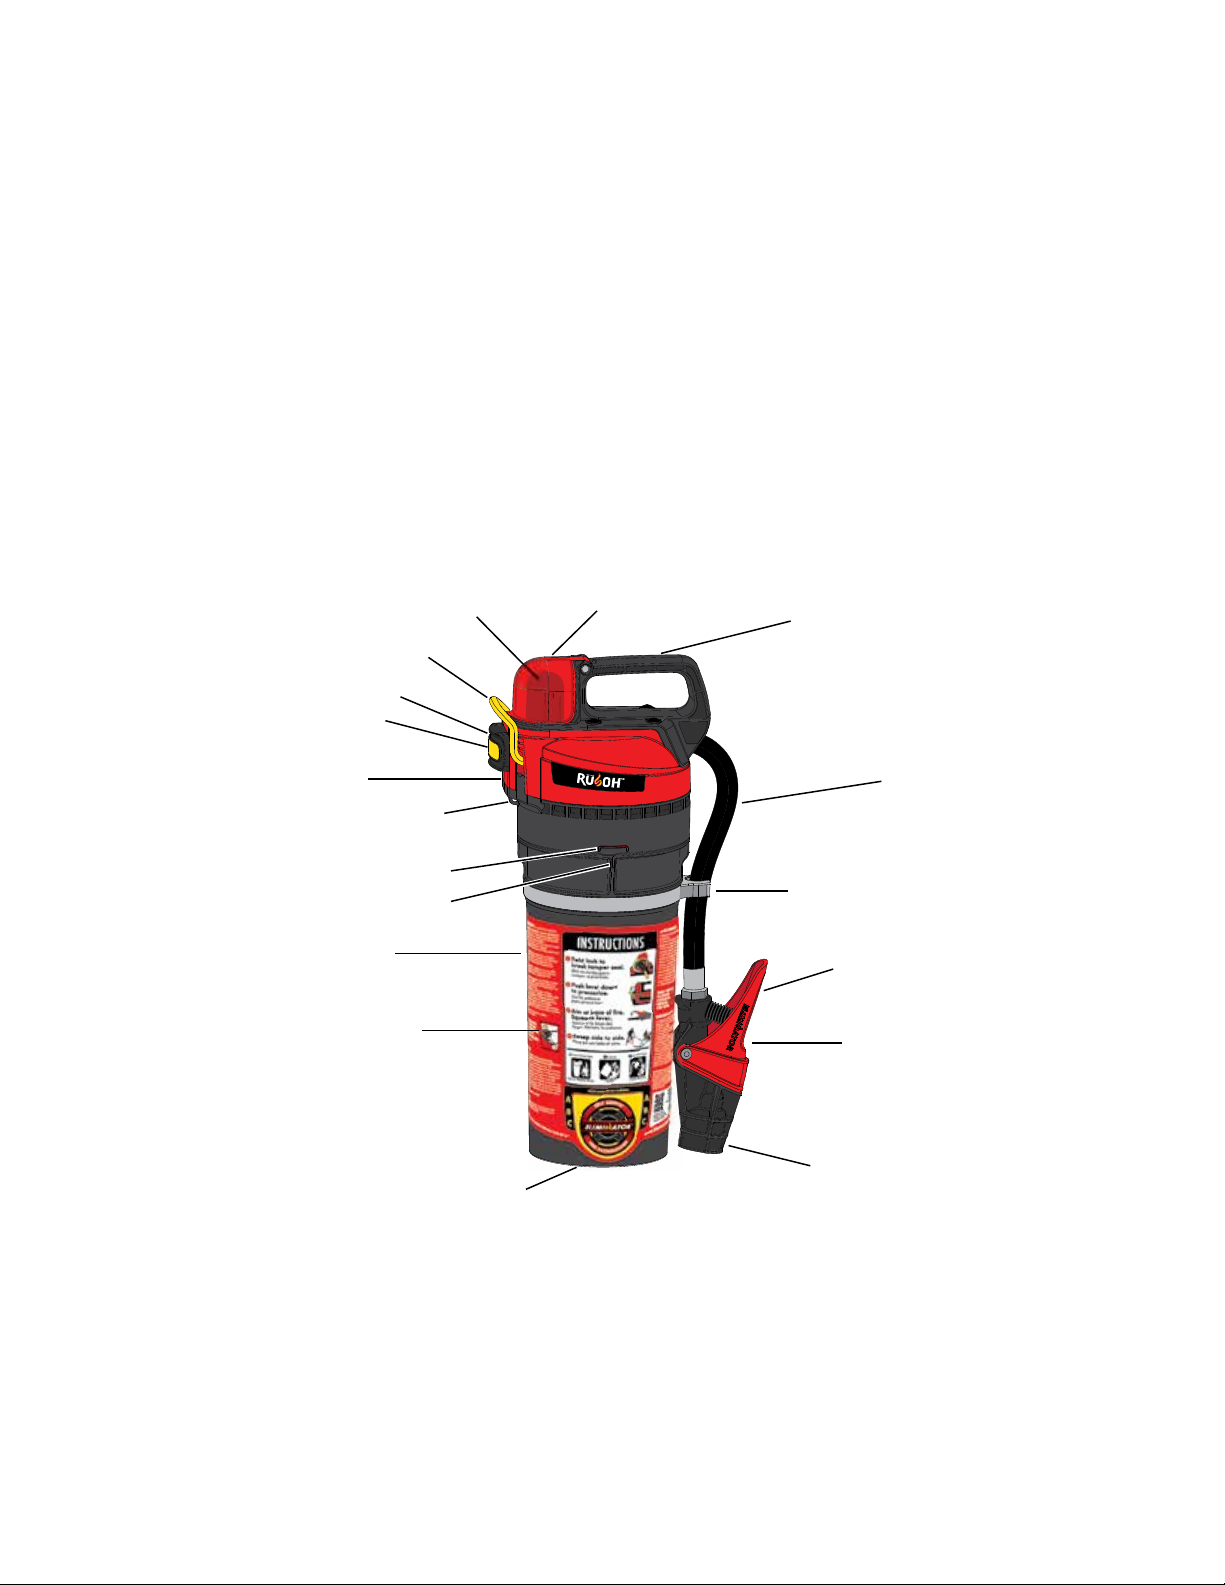
8
Fig. V
Fig. T
Fig. S
Location of year
of manufacture
(ex. MFR 20##)
Punctured CO2
cartridge
Unpunctured
CO2cartridge
Fig. R
CO2
cartridge
gasket
Fig. U
IMPORTANT: If wheel cannot be turned by hand, the agent cartridge should be
replaced.
The uf ng procedure can be done with the unit removed from the wall mount and
inverted (Fig. Q), or it can be done while the extinguisher is hanging on the wall
mount by simply swinging the agent cartridge out from the wall (Fig. R).
NOTE: If inspecting multiple extinguishers, instead of turning each Rusoh™ wheel
by hand, you may wish to purchase a uf ng wrench (see page 10) or use a power
driver (cordless drill) to uff the agent. If using a uf ng wrench, place the wrench
over the wheel and turn it in either direction about 3 full rotations. If using a
power driver, use a 1.25-inch (32-mm) socket and set the slip torque to 8 foot-
pounds maximum.
5. Squeeze the ribbed sides of the red CO2 cartridge cover and lift it open.
Remove CO2 cartridge by twisting cartridge clockwise. A strap wrench or
adjustable pliers may be needed if the cartridge is snug.
NOTE: The CO2 cartridge has reverse threads, so it turns opposite of normal
threaded components.
NOTICE: If an adjustable pliers is used to loosen the CO2 cartridge, place a
cloth over the cartridge before using the pliers. This will protect it from marring
from the teeth of the pliers.
6. After removal, inspect the CO2 cartridge and verify that it has not been punc-
tured (Fig. S). If the CO2 cartridge is unpunctured, skip to step 7 below.
If the CO2 cartridge is punctured, discard it (see Disposal Procedure on page
9). The extinguisher must be reloaded. Follow the Eliminator® Reloading
Procedure supplied with each Eliminator® Reloading Kit.
7. Ensure lock is in the horizontal (locked) position (Fig. U).
Lift up red CO2 cartridge cover. Use a ashlight to verify the red CO2 cartridge
gasket is in place in bottom of threaded opening (Fig. T).
Reinstall CO2 cartridge by rotating it counterclockwise (reverse threads)
about 8 full rotations until tight. The use of a strap wrench is recommended.
NOTE: If extinguisher is mounted in a bracket PN 40-393 or PN 40-404, use
a strap wrench (Fig. U) to turn the CO2cartridge an additional ¼ turn past
hand tight.
8. Ensure the agent cartridge is securely attached to the discharge head. The
red alignment rib on the agent cartridge should be within the red alignment
marking on the discharge head (Fig. O, page 7). If it is not, it is recommended
that you follow the Reloading Procedure supplied with the Eliminator®
Reloading Kit to determine if the agent cartridge needs to be replaced.
9. Replace tamper seal if it is damaged or missing (Fig. N, page 7).
NOTE: An extra tamper seal is supplied with the mounting hardware.
10. Review the manufacture year (MFR 20##) marked on the agent cartridge,
discharge head, and valve nozzle (see locations shown in Fig. V). Discard
the extinguisher after 12 years, according to the Eliminator®Disposal
Procedure (see page 9), and replace with a new Eliminator® extinguisher
immediately.
11. Secure the hose by pushing it into the hose clip until it snaps into position.
12. Position the extinguisher back on wall mount. For compact storage, grasp
the hose with one hand and the valve with the other and rotate the valve
counterclockwise until the valve lever faces the wall, as shown in Fig. H,
page 5.
13. Initial inspection tag and indicate date annual inspection was completed.