3
WARNING!
• Before removing the CO2 cartridge, ensure the fire extinguisher is not pressurized. Removing the CO2cartridge
from a pressurized extinguisher could result in agent discharge and/or serious injury.
• The CO2cartridge is under high pressure. Do not puncture or damage the CO2cartridge. Puncturing or damaging
the CO2 cartridge could result in serious injury or death.
• Do not heat or locate the CO2cartridge near a heat source, such as an engine or stove. This could result in a
rupture, which could result in serious injury or death.
• Discharge from the CO2cartridge is very cold and can cause frostbite.
III. Replacing Rusoh™ Flufng Wheel
Tools required: handheld screwdriver with T25 tamper-resistant TORX* bit
1. Invert the agent cartridge. While holding the Rusoh™ wheel stationary with one
hand, use a handheld screwdriver with a T25 tamper-resistant TORX* bit to loosen
and remove the screw that retains the wheel to the agent cartridge (Fig. F).
NOTE: The screw is locked in place with adhesive; the initial torque to loosen the
screw will be high. Remove and recycle the damaged wheel.
2. Place the new Rusoh™ wheel onto the bottom of the inverted agent cartridge,
tting the cross-shaped cutout over the corresponding cross-shaped hole in the
wheel (Fig. F).
3. Using the provided screw and washer, secure the wheel to the agent cartridge with
a handheld screwdriver (Fig. F).
NOTICE: Overtightening can result in the stripping of screws.
4. Ensure the Rusoh™ wheel rotates properly by ufng the agent cartridge (refer
to the Annual Inspection procedure in the Owner’s Manual or on the extinguisher
instruction label).
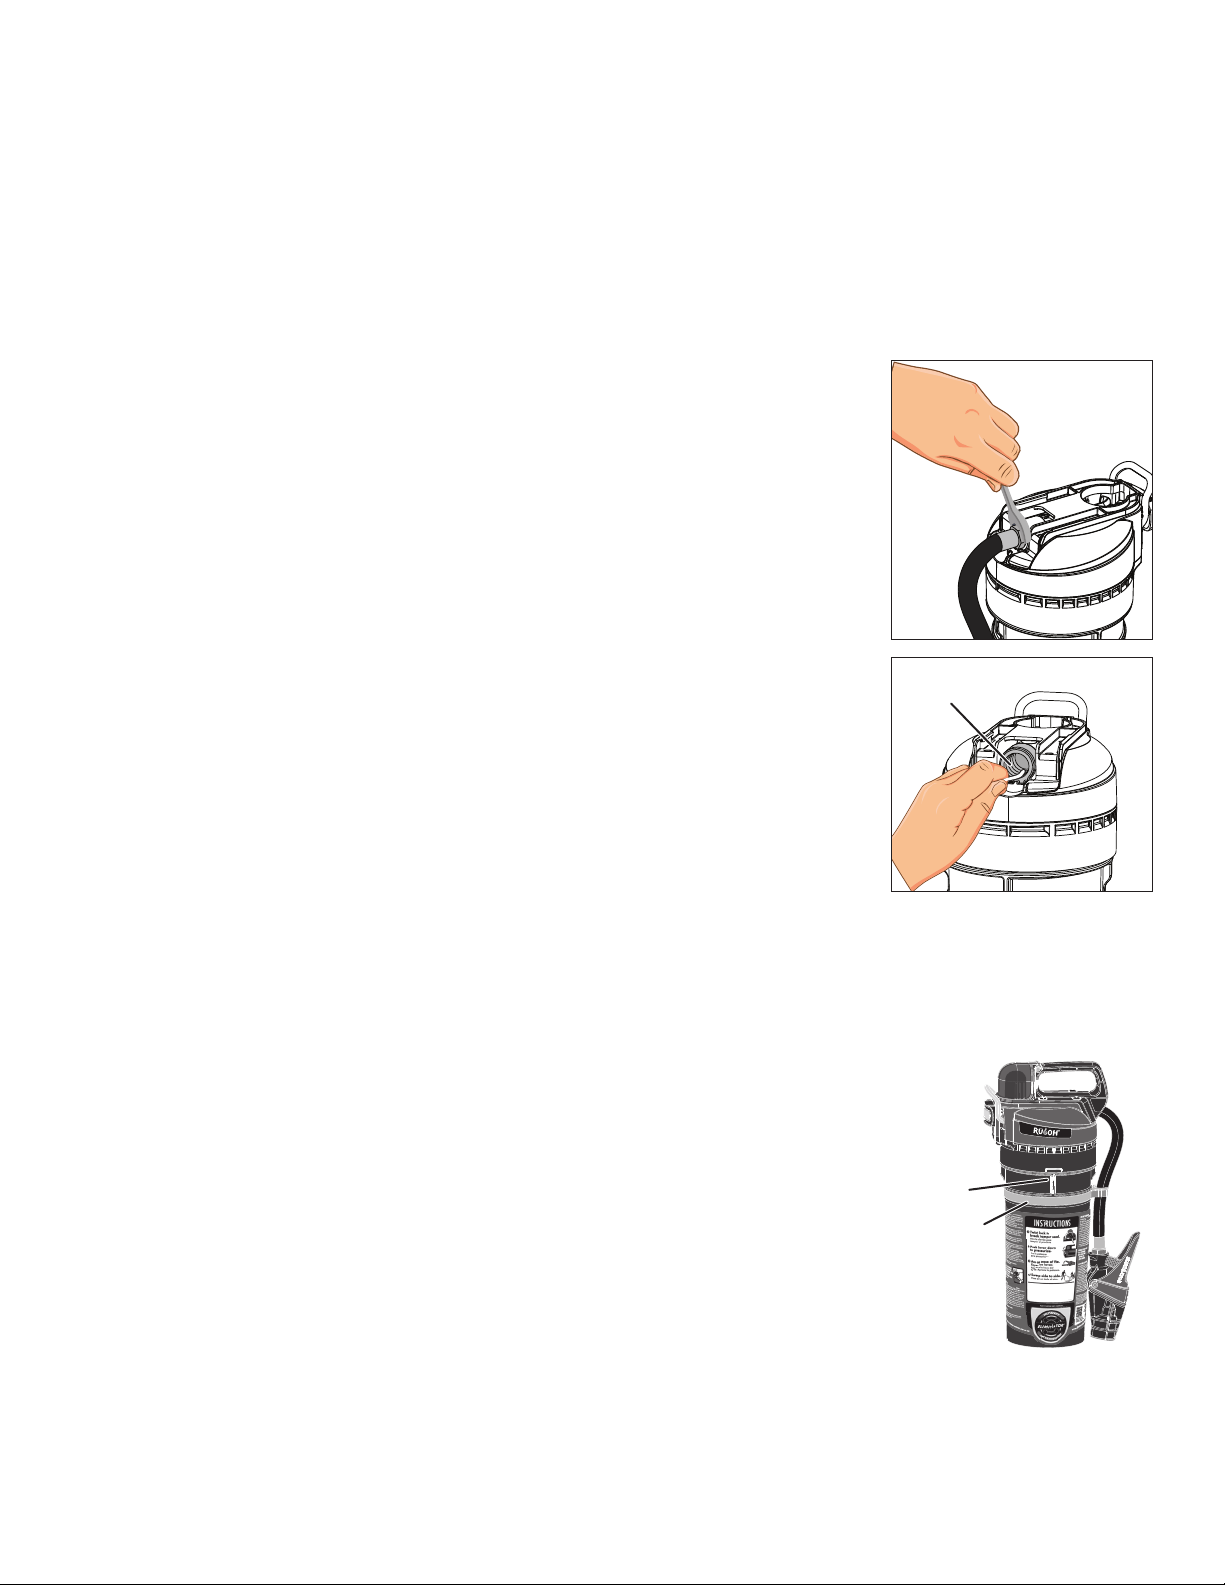
IV. Replacing Handle Assembly
Tools required: power screwdriver, T25 tamper-resistant TORX* bit, adjustable pliers, rubber mallet
1. To ensure the extinguisher is not pressurized, aim the nozzle upwards into a large
garbage bag. Then slowly squeeze the hose valve lever (Fig. G). The valve lever
should be easy to squeeze and should return to its original position. Replace the
valve assembly if it does not function as stated.
2. Squeeze the ribbed sides of the red CO2cartridge cover and lift it open. Remove
the CO2cartridge by twisting it clockwise. A strap wrench or adjustable pliers may
be needed if the cartridge is snug.
NOTE: The CO2cartridge has reverse threads, so it turns opposite of normal
threaded components.
NOTICE: If an adjustable pliers is needed to loosen the CO2cartridge, place a
cloth over the cartridge before using the pliers. This will prevent the teeth of the
pliers from marring the cartridge.
3. Remove the four screws that secure the handle to the extinguisher using a power
screwdriver with a T25 tamper-resistant TORX* bit attached.
4. Slide the old handle towards the hose. Recycle the damaged parts.
NOTE: The handle is designed to t tightly in the grooves. It may be necessary
to lightly tap the handle assembly with a rubber mallet in the removal direction to
help ease the handle out of the grooves (Fig. H).
5. Slide the new handle assembly into the grooves. The assembly will click and the
screw holes will align when fully seated into position.
TORX* is a registered trademark of Acument Intellectual Properties, LLC.
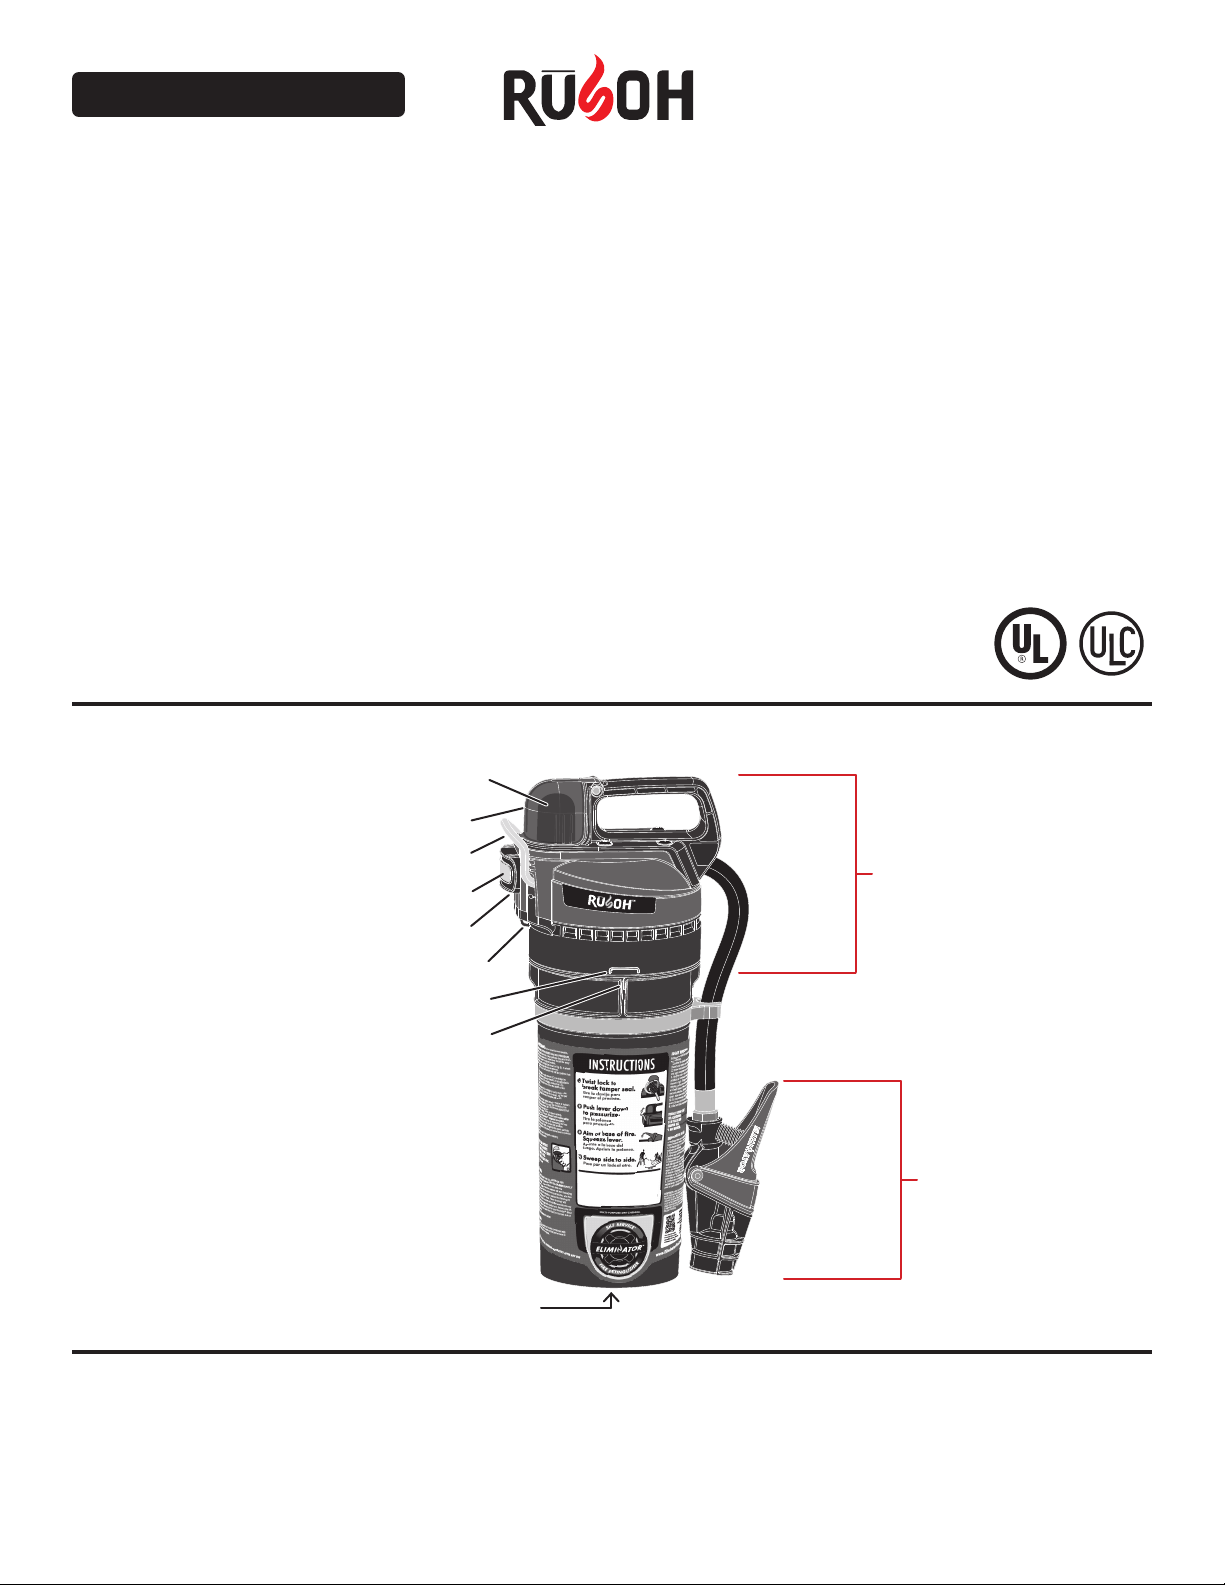
Handle assembly
Fig. G
Fig. H
If necessary,
tap here with a
rubber mallet.
Fig. F
Rusoh™
uffing
wheel