RW RWHT20 User manual

RWHT20
THIS MANUAL COVERS
DO NOT USE APPLIANCE WITHOUT
READING THIS FIRST
CORDLESS HEDGE TRIMMER
INSTRUCTION MANUAL
PLEASE RETAIN

8
Fig. 1
1
23
6
10
4
5 7
9
Fig. 3 Fig. 4 Fig. 5
Fig. 2
1. Cutter rail
2. Hand guard
3. Steady grip with button switch
4. Handle with button switch
5. Battery charger
6. Battery pack
7. Cutter guard
8. 2x screws for hand guard
9. 2x screws for steady grip
10. Lock for handle

Fig. 15
Fig. 6 Fig. 7 Fig. 8
Fig. 9 Fig. 10 Fig. 11
Fig. 12 Fig. 13
Fig. 14 Fig. 15

INTENDED USE
This cordless hedge trimmer is designed for cutting garden hedges in home gardens. Use for any
other purpose is considered improper use. The manufacturer and supplier are not responsible for any
damage that results from improper use. The operator is solely responsible for assuming all risks in
these situations.
Do not over-work the machine beyond its intended capacity. It works better and more safely when
operated within the specied range of performance.
When using the equipment, a few safety precautions must be observed to avoid injuries and damage.
Please read the complete operating instructions and safety regulations with due care. Keep this manual in
a safe place, so that the information is available at all times. If you give the equipment to any other person,
hand over these operating instructions and safety regulations as well. We cannot accept any liability for
damage or accidents which arise due to a failure to follow these instructions and the safety instructions.
SAFETY INSTRUCTIONS
• When transporting or storing the trimmer always ensure that the blade covers are securely tted.
• Use the tool only for its intended purpose.
• Always hold the tool by the insulated grip in case you accidentally cut through unseen wiring in hedges
or shrubs that may be live.
• Keep all parts of the body away from the cutting blades. Do not remove material you have cut or hold
material that is being cut when the trimmer is on, both hands should be holding the tool.
• Make sure the trimmer is o before clearing any jammed material and is on the ground it is important
that total concentration is observed failing to do so could result in serious personal injury.
• Always carry the tool by the handle with the power o.
• Before commencing ensure that your surroundings are clear of any obstacles including fallen branches
and anything that you may trip on.
• Ensure that bystanders especially children are kept at a safe distance from the working area.
• Use personal protection equipment.
• Never wear loose clothing shorts or jewellery whilst using the trimmer and wear closed in solid shoes or
preferably boots with good grip.
• Never use the trimmer whilst standing on a ladder.
• Do not over reach. Always keep a rm footing and maintain your balance during operation, always dis-
tribute it’s weight evenly on your body to reduce the possibility of strain.
• Do not use this tool in rain or wet conditions that could make the working area slippery.
• Avoid using this tool close to any power lines and keep a safe working distance from overhead power
cables.

• Keep a diligent eye on what you are cutting and also on the ground where you are moving around to
prevent tripping over material you have removed. Take regular breaks and clear all debris before recom-
mencing.
• Do not use the tools in the presence of ammable materials such as gases liquids or dry dusty environ-
ments, the operation of the trimmer creates sparks which could ignite these elements. Check the area
before commencing work.
• Do not use the trimmer if the switch fails to turn it on and o. Any machine that cannot be controlled with
its switch is potentially dangerous and must be checked by a qualied electrician and repaired if neces-
sary.
• Store idle power tools out of reach of children and do not allow persons unfamiliar with the power tool or
these instructions to operate the power tool.
• Maintain the tools by checking for misalignment or binding of moving parts. Also check for any damage
to all parts of the trimmer.
• Keep the trimmers cutting surfaces clean and sharp. Well maintained and sharp cutting edges are less
likely to bind and are easier to control.
• Have your tool serviced regularly by a qualied specialist.
• Do not use power tools while you are tired or under the inuence of drugs, alcohol or medication.
• To prevent the risk of electric shock, protect the battery charger from rain and moisture.
• Recharge the battery only with the charger provided. A charger that is suitable for one type of battery
pack may create a risk of re when used with another battery pack.
• Before each use, check the battery charger, cable and plug for signs of damage. If the battery charger
is damaged, do not use it or try to repair it, instead take it to your local qualied specialist.
• To prevent the risk of re, do not operate the battery charger on ammable surfaces (e.g.... paper, tex-
tiles etc.) or in combustible environments.
• Make sure the power rating on the charger plug matches the outlet.
• Never modify the charger plug in any way.
• Do not use any adaptor plugs with earthed (grounded) power tools. Unmodied plugs and matching
outlets will reduce the risk of electric shock.
• Never use the power cable for carrying, pulling or unplugging the charger.
• When you are not using the trimmer remove the battery and store in a safe dry place. The correspond-
ing safety information can be found in the enclosed booklet.
Danger!
Read all safety regulations and instructions. Any errors made in following the safety regulations and
instructions may result in an electric shock, re and/or serious injury.
Keep all safety regulations and instructions in a safe place for future use.
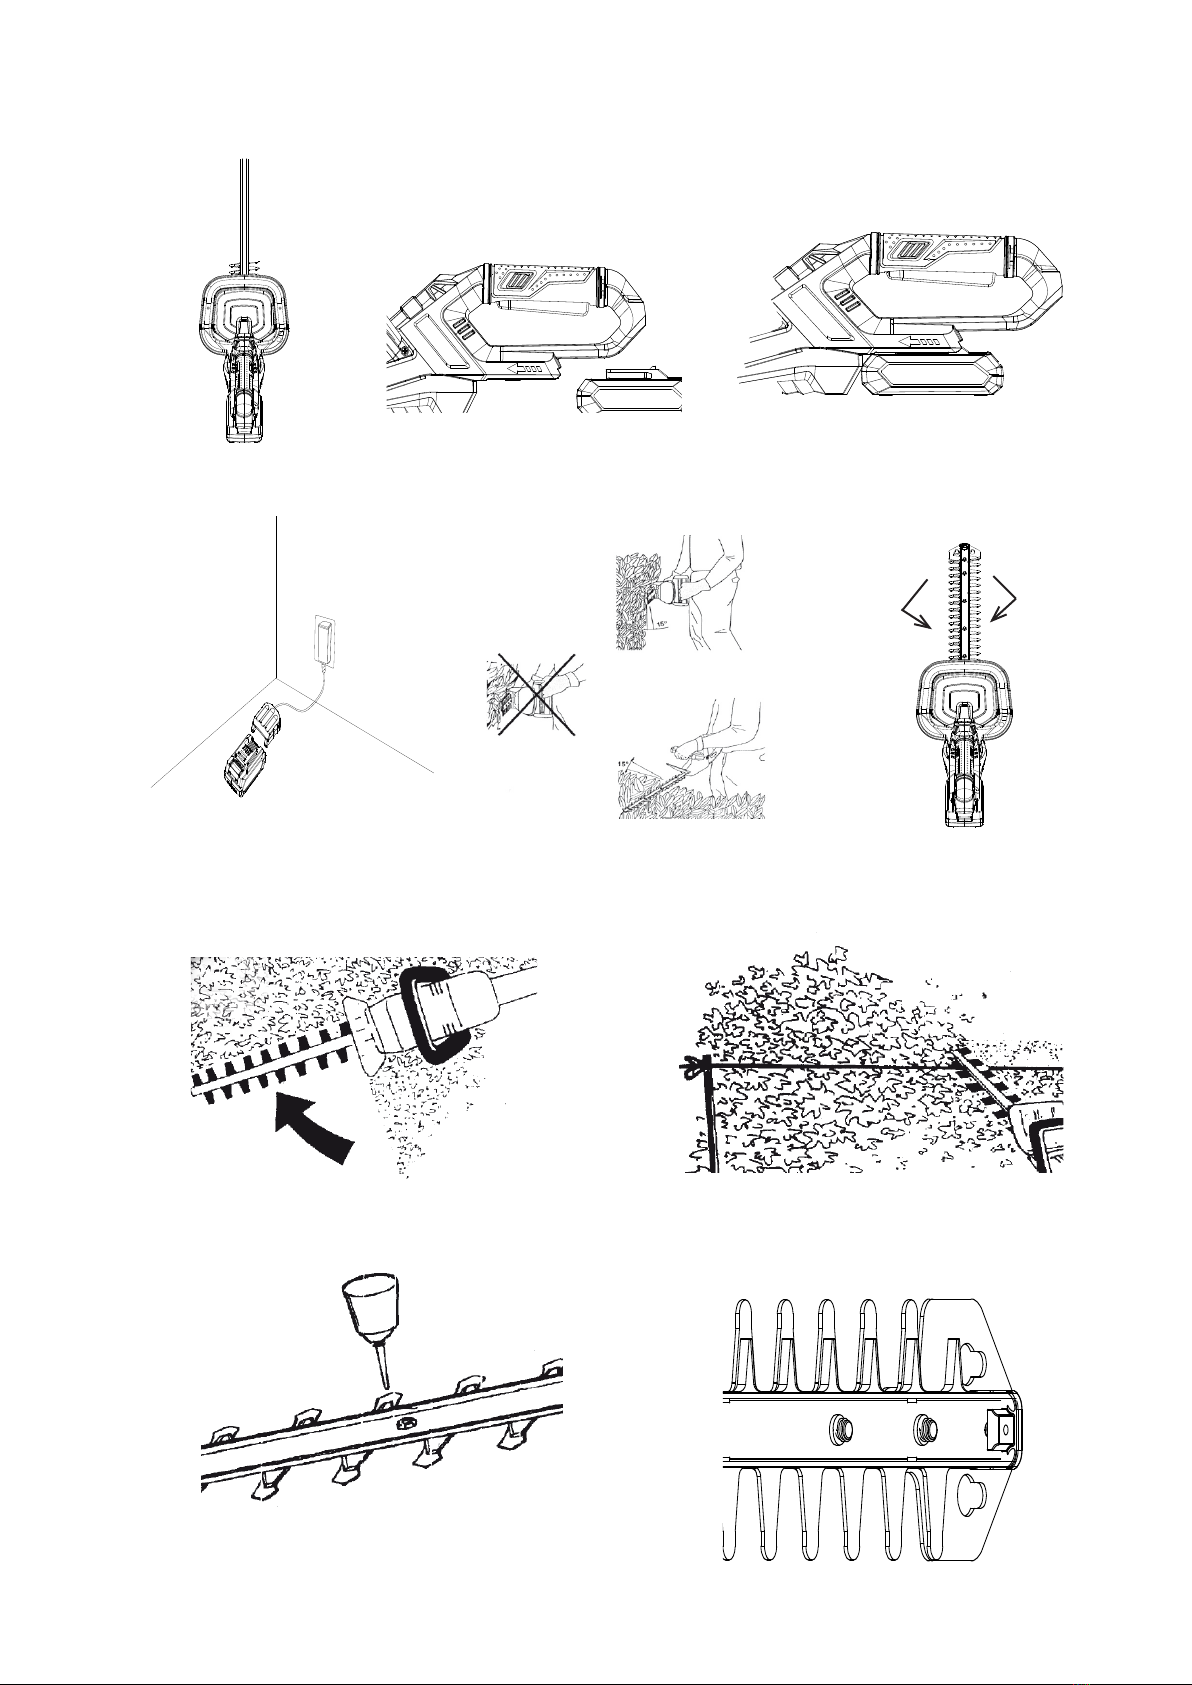
Explanation of the warning signs on the machine (Figure 16)
1. Warning!
2. Do not expose the hedge trimmer to rain or wet conditions!
3. Read the instructions for use before use!
4. Wear eye protection and ear plugs!
SUPPLIED ITEMS
Items supplied
• Open the packaging and take out the equipment with care.
• Remove the packaging material and any packaging and/or transportation braces (if available).
• Check to see if all items are supplied.
• Inspect the equipment and accessories for transport damage.
• If possible, please keep the packaging until the end of the guarantee period.
• Hedge trimmer
• Cutter guard
• Battery
• Charger

• Hand guard with 2 screws
• Steady grip with 2 screws
• Original operating instructions
• Safety instructions
PRODUCT SPECIFICATIONS
Cutting length ......................................... 520 mm
Tooth spacing ........................................... 15 mm
Cutting thickness max. ............................. 11 mm
Cuts/min ...................................................... 2200
Protection class ................................................III
Charging time .............................................. 3-5 h
Sound pressure level, LpA ........................79 dB
Sound power level, LWA ............................90 dB
K uncertainty .................................................3 dB
Interchangeable battery ......20 V d.c. / 2000 mAh
Vibration ahv ......................................... ≤ 2.5 m/s²
K uncertainty ..............................................1.5 m/s²
The machine may exceed 85 dB (A). The operator will require noise protection measures if this is the case.
The noise was measured in accordance with EN 60745-1. The value of the vibrations emitted by the handle
was determined in accordance with EN 60745-1.
The specied vibration value was established in accordance with a standardized testing method. It may
change according to how the electric equipment is used and may exceed the specied value in exceptional
circumstances.
The specied vibration value can be used to compare the equipment with other electric power tools.
The specied vibration value can be used for initial assessment of a harmful eect.
Keep the noise emissions and vibrations to a minimum.
• Only use appliances which are in perfect working order.
• Service and clean the appliance regularly.
• Adapt your working style to suit the appliance.
• Do not overload the appliance.
• Have the appliance serviced whenever necessary.
• Switch the appliance o when it is not in use.
• Wear protective gloves.
ASSEMBLY
1 Fitting the hand guard
Attach the hand guard (Fig.1/Item 2) in the direction of the arrow as shown in gure 3. Next, fasten this with
the 2 screws (Fig. 2/Item 8) as shown in Fig. 4.
2 Assembly of the steady grip
Attach the steady grip (Fig. 1/Item 3) in the direction of the arrow as shown in Fig. 5.
Then fully tighten the screw (Fig. 6/Item 9).
3 Swivel handle
The hedge trimmer is tted with a rear swivelling handle. It can be swivelled 90° to the left and right. To do
so, pull the slide (Fig. 7/Item 10) in the direction indicated by the arrow and turn the handle.
To return the handle to its original position you must pull the slide (Fig. 7/Item 10) in the direction indicated
by the arrow again. The handle should be turned through 90° for vertical cuts.
4 Installing the battery (Fig. 8)
Press the side push lock buttons of the battery pack as shown in Fig. 8 and push the battery pack into the
mount provided. When the battery pack is positioned as in Fig. 1, make sure that the push lock buttons
latch in place! To remove the battery pack, proceed in reverse order.

5 Charging the battery (Fig. 9)
1. Take the battery pack out of the equipment. Do this by pressing the side push lock buttons.
2. Check that your mains voltage is the same as that marked on the rating plate of the battery charger. In-
sert the power plug of the charger into the mains socket outlet. The green LED will then begin to ash.
3. Insert the battery pack into the battery charger .
4. In section, Charger indicator you will nd a table with an explanation of the LED indicator on the charger.
The battery pack can become a little warm during the charging. This is normal.
If the battery pack fails to charge, check:
• Whether there is voltage at the socket outlet
• Whether there is good contact at the charging contacts
To ensure that the battery pack provides long service, you should take care to recharge it promptly.
You must recharge the battery pack when you notice that the power of the cordless hedge trimmer
drops. Never fully discharge the battery pack. This will cause it to develop a defect.
STARTING AND STOPPING
Switching ON/OFF.
The hedge trimmer is equipped with a two-handed safety switch. The machine works only when the switch
on the steady grip (Fig 1 / Item 3) is pressed with one hand and the switch on the handle (Fig 1 / Item 4) is
pressed with the other hand. If either switch is released, the cutters will stop moving. Please watch out for
the cutters as they slow down to a standstill.
Notes on working practice
• A hedge trimmer can be used to cut shrubs and bushes as well as hedges.
• To obtain the best cutting results, hold the hedge trimmer so that the cutter teeth are at an angle of ap-
prox. 15° in relation to the hedge (see Fig 10).
• The twin-bladed cutters rotate in opposite directions, thus enabling cutting in both directions (see Fig
11).
• It is recommended to tie a guide line of string or the like along the hedge so that you cut the hedge to a
level height. Cut o all branches which protrude beyond the guide line (see Fig 12).
• Cut the sides of the hedge with curve-shaped movements from the bottom up (see Fig 13).
MAINTENANCE
Blades can cause injury. Before any work on the machine itself, remove the battery from
machine.
Never clean the hedge blades in water (especially running water), as there is a risk of personal injury
and damage to the blades
• The cutters should be cleaned and lubricated at regular intervals in order to ensure best performance at
all times. Remove deposits with a brush and apply a thin lm of oil (Figure 14).
• There are no parts inside the equipment which require additional maintenance.
• For storage, the hedge trimmer can be hung up on a nail, screw or similar in a borehole on the im-
pact-guard, with blade guard mounted (Fig. 15)
To ensure long and reliable service:
• Visually check the condition of the cutting edges of the cutting blade before each use. Check the tight-
ness of the blade bolts.
• Check for obvious defects such as loose, dislodged or damaged blade, loose xings and worn or dam-
aged components.
• Always clean the cutting blade after operation using a soft, dry cloth. During longer cutting jobs, we
recommend periodically lubricating the cutting blade with protective spray.

• To obtain good cutting results, always make sure the blades are sharp.
• Check that covers and guards are undamaged and correctly tted. Carry out necessary maintenance
or repairs before using.
• If the hedge cutter should happen to fail despite the care taken in manufacturing and testing, repair
should be carried out by an authorised customer service agent.
Note
• Wear gloves when handling or cleaning the cutting blade.
• Ensure that the blade is covered with the blade guard supplied whenever the tool is not in use.
CLEANING AND STORAGE
Ensure battery is removed before storage. Ensure it is not stored in contact with metallic objects
that may cause short-circuiting.
• Clean the exterior of the machine thoroughly using a soft brush and cloth. Do not use water, solvents or
polishes.
• Remove all debris, especially from the ventilation slots.
• Always lubricate the cutting blade with protective spray before storage.
• After use, cover the blades with the guards provided.
• Charge the battery fully 3-5 hours before storing.
• During storage, charge the battery at least once every three months to protect it from damage.
• Store the machine in a dry, secure place out of reach of children.
• Do not place any other objects on top of the machine.
• The machine must not be stored over 40ºC or under direct exposure to sunlight.
• Do not store the machine in places with static electricity.
• When battery pack is not in use, keep it away from other metal objects like paper clips, coins, keys,
nails, screws, or other small metal objects that can make a connection from one terminal to another.
Shorting the battery terminals together may cause burns or a re.
Waste electrical products should not be disposed of with household waste. Please recycle where fa-
cilities exist. Check with your Local Authority or retailer for recycling advice.
This product contains a lithium-ion battery. Do not dispose of battery packs/batteries into
household waste, water or re. Battery packs/batteries must be collected, recycled or disposed of in an envi-
ronmentally friendly way. Please dispose of them properly at a public recycling facility.
Due to continuous product improvement, the manufacturer reserves the right to change the product speci-
cations without prior notice. Colours and contents may vary.
Table of contents
Other RW Trimmer manuals