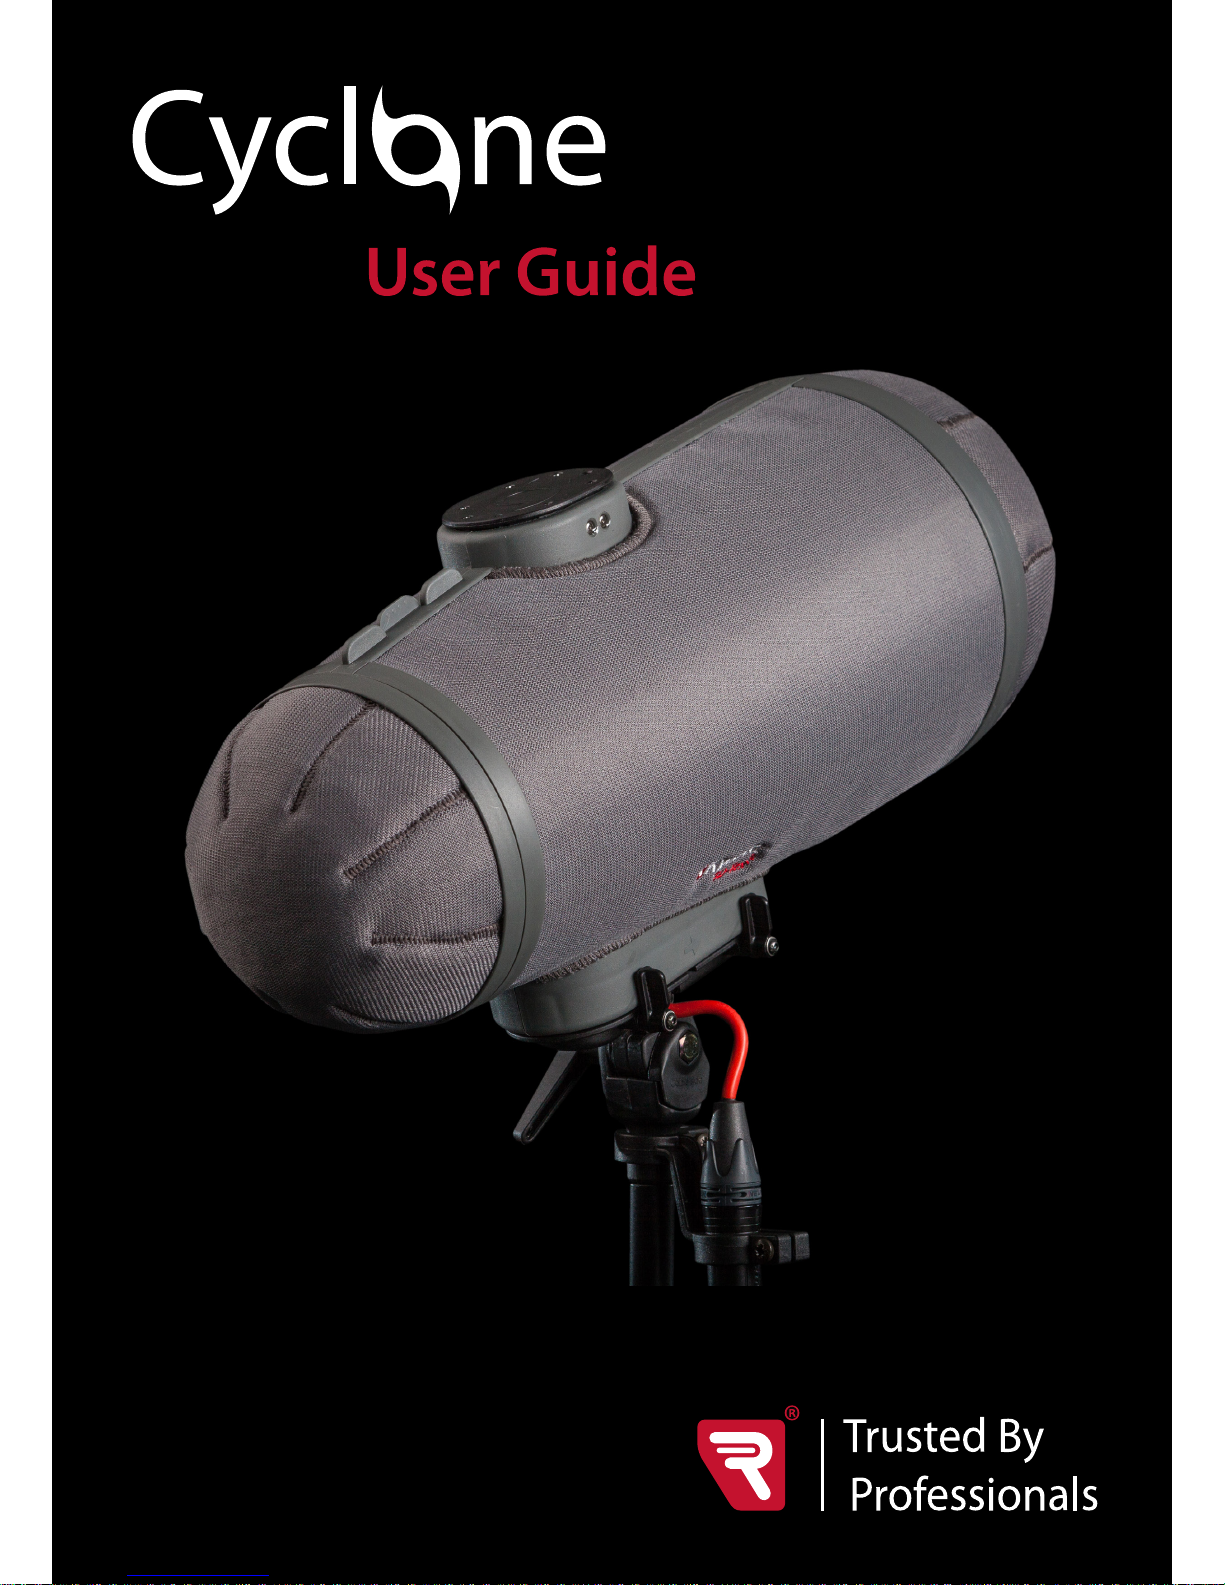
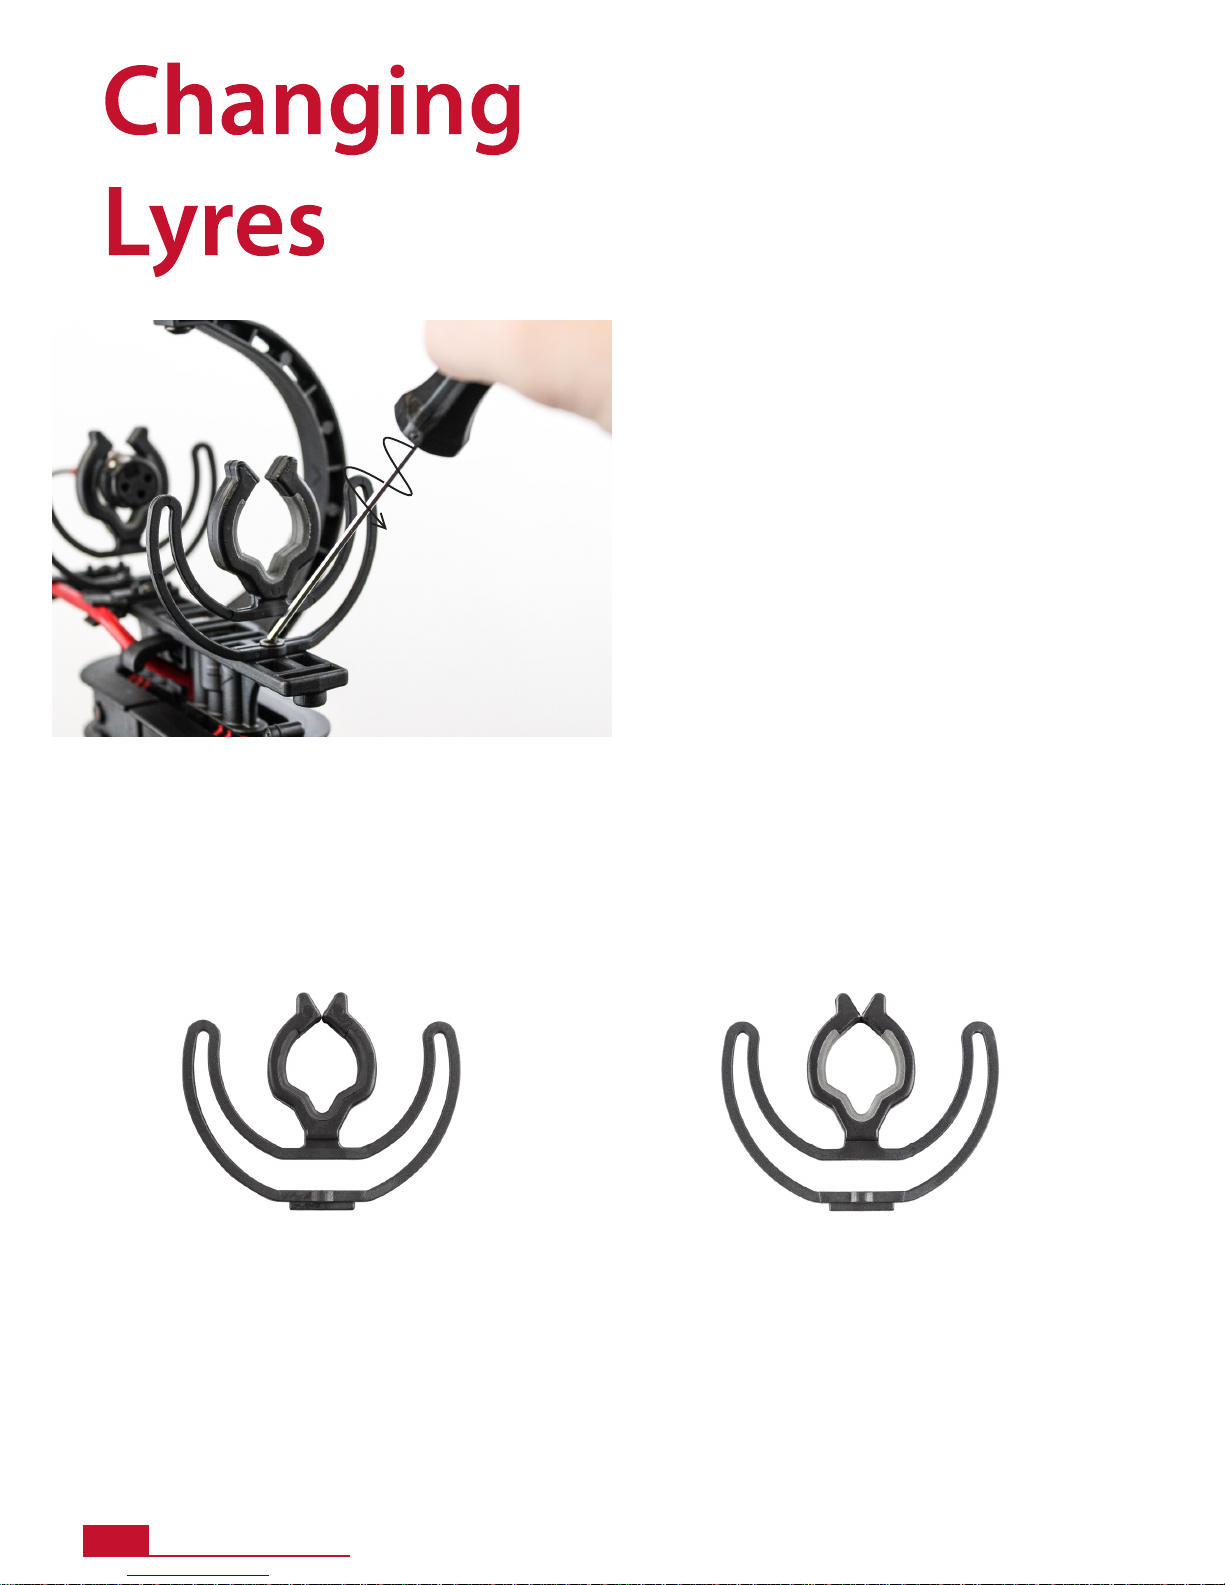
Rycote cyclone User manual


Introducing the all-new Cyclone product range, featuring next-generation wind and
handling isolation for discerning audio professionals. Cyclone is the premium microphone
windshield system with ground-breaking advancements for all-round performance
excellence.
This User Guide provides useful information about the Cyclone and how to use it. There are
3 sizes of Cyclone currently available: Cyclone Large; Cyclone Medium and Cyclone Small.
For the Cyclone Small, there are 3 model variants, however the only difference between
these 3 is the type of microphone connector that it comes fitted with, that is: XLR; LEMO or
MZL connector.
Most of the information in this User Guide applies to all 3 Cyclone sizes and to all model
variants. Where the information is specific to only one size or model, this will be indicated
as such. Where images or diagrams of the Cyclone Small are shown herein, they are of the
XLR model variant.
Cyclone Basket and Suspension 2
Removing Windshield from Suspension 3
Fitting a microphone 4
Fitting windshield to suspension 5
Removing and refitting the C-Arm 6
Changing Lyres 7
Offset Link and boom adaptor assembly 8
Removing the Offset Link 9
Reattaching the boom adaptor 10

Figure 1. Cyclone Basket
(Medium model shown)
1. Windshield, Right
2. Safety Catches
3. Boom Adaptor
4. Windshield, Left
5. Release Tabs
6. Basket Suspension (upper)
1
6
5
4
2
3
2
3
5
6
Figure 2. Cyclone Suspension
(Medium model shown)
Figure 3. Cyclone Small
Suspension
1. Lyre
2. Neutrik XLR 3-Pin Male
3. XLR Holder
4. 3-Pin female XLR
5. C-Arm
Microphone not included
1. Basket Suspension (upper)
2. Oset Link
3. Neutrik XLR 3-Pin Male
4. Boom Adaptor
5. Locking Lever
Microphone not included
1
3
4
5
1
3
4
2
5
2
Cyclone Basket
and Suspension
Cyclone Basket &
Suspension 2

1. Undo safety catches on both sides of the
windshield (four in total).
2. Whilst holding the windshield, use the
release tabs to separate the two sections of the
windshield system.
3. Pull right side of the windshield away to release
it from lower & upper suspension.
4. Pull left side of the windshield away to release
it from lower & upper suspension.
3
RemovingWindshield
from suspension
Cyclone Basket
and Suspension
The Cyclone is supplied fully assembled.The two windshield sections which make up the basket are held together
on the suspension assembly using magnets, and are further secured with four safety catches.

1. Fit the microphone connector to the
microphone (Short XLR connector shown).
2. Insert the microphone into the two Lyres® on
the suspension. Depending on the microphone
width, it may be easier to prize apart the Lyres
with your ngers.
3. The Lyres should be positioned to provide
as even support to the microphone as
possible.The Lyres can be moved into pre-set
positions along the microphone suspension.
You can nd more information about moving
the Lyres in the section‘Changing Lyres’.
4. Always allow a loop of cable (no tension).
Fitting Microphone 4

1. Ensure all the safetly catches are open (pointing
downwards) on both sides.
2. Fit left side of the windshield to upper & lower
suspension.The magnets in the suspension &
basket will ensure that they‘click’together.
3. Fit right side of the windshield to upper &
lower suspension.The magnets in the suspension
& basket will ensure that they‘click’together.
4. Lock the windshield to the suspension by
closing all four safety catches (pointing upwards).
Fitting windshield
to suspension
5

1. Whilst holding the C-Arm in one hand, use
your other thumb to simultaneously press down &
push the release tab and the C-Arm will pull out.
2. This can be a little sti, so a little wiggle may
be needed to release the C-Arm away from the
suspension.
3. To ret the C-Arm simply reverse the process
above. Make sure to fully push‘home’the C-Arm
to ensure that it is secure.
If the suspension is needed
in a restricted space, like a
ceiling shot, the suspension
can be used without
the C-Arm.
6
Removing &
Retting C-Arm
The C-Arm provides the upper suspension for the
windshield. If you want to use the Cyclone without the
windshield tted (e.g. indoor use) you can remove the
C-Arm completely to save weight and reduce overall
size.

7
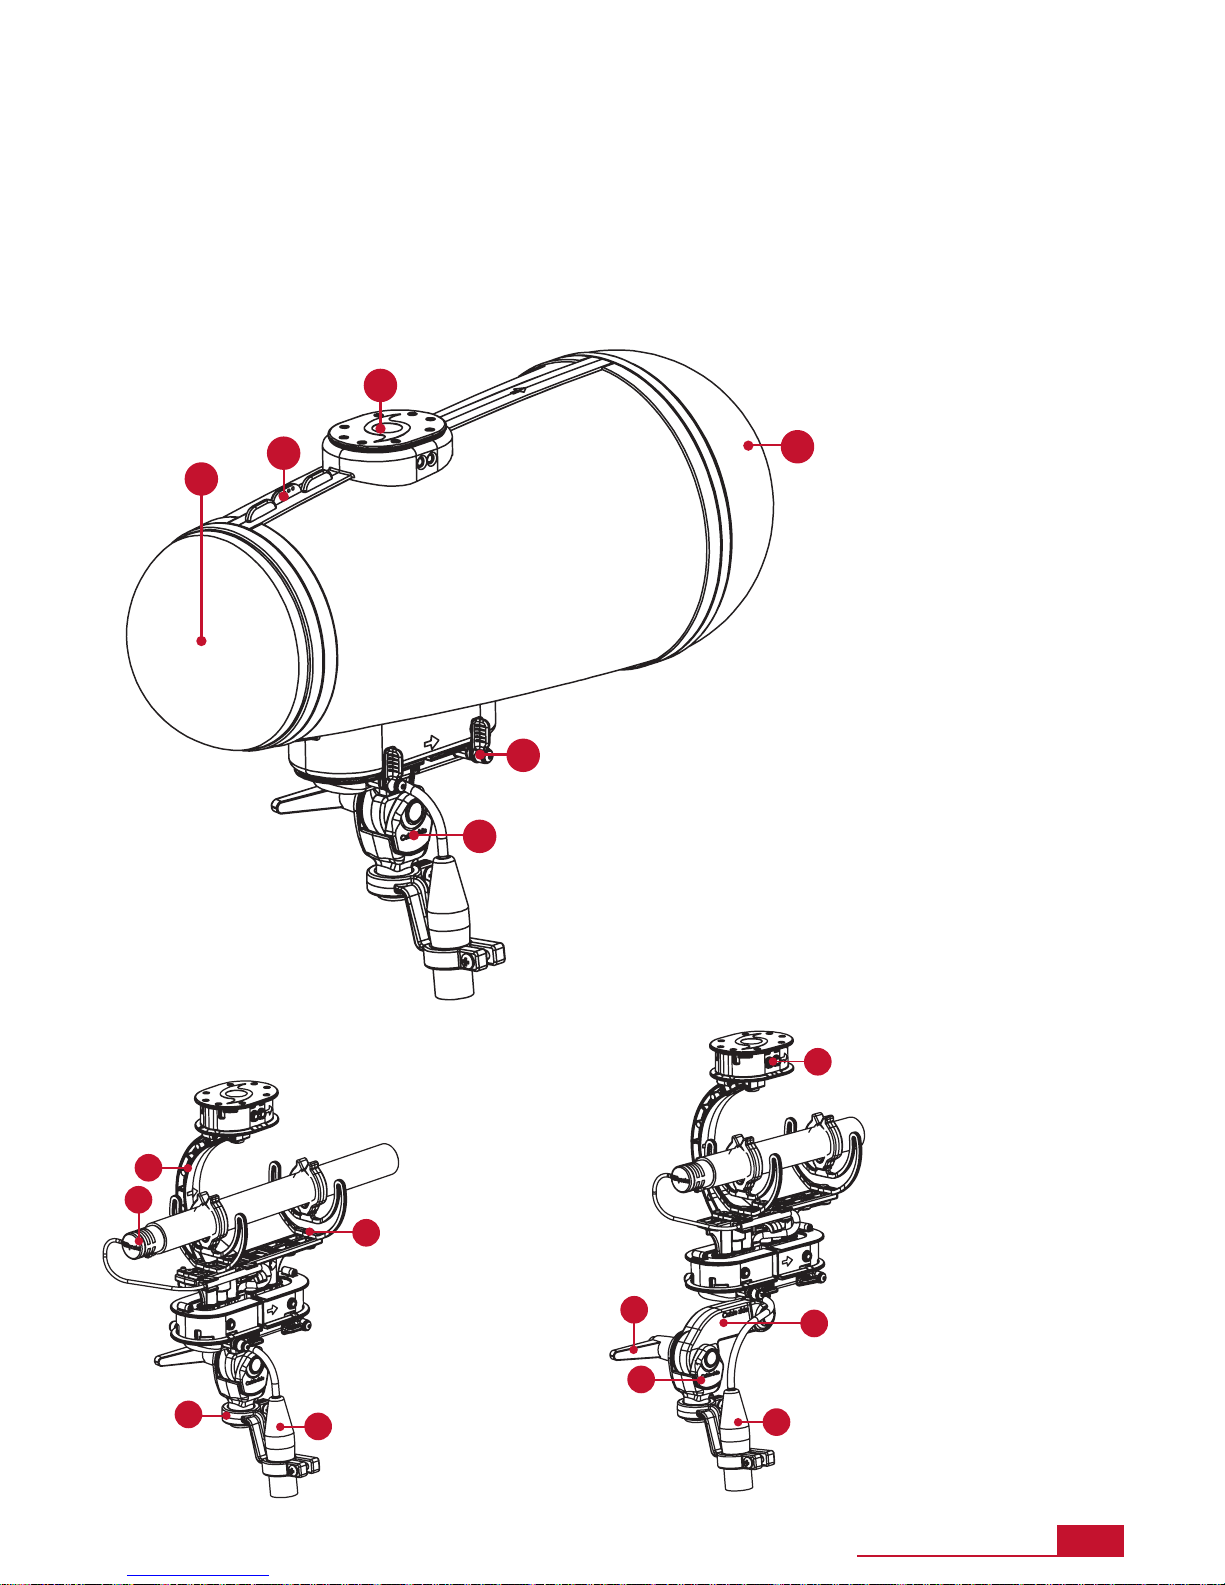
The Cyclone features Rycote patented Lyres®, which are
extremely robust, and virtually unbreakable, as they do not use
elastic or rubber components which are prone to wear and tear.
The Lyres have a soft-grip internal surface on the mic clip,
helping to prevent the mic twisting or slipping, and stopping
the clip scratching the surface of powder-coated microphones.
The Lyres are available in dierent hardness’s, with softer, more
compliant versions for light, short microphones and stier
hardness Lyres for longer or heavier microphones.
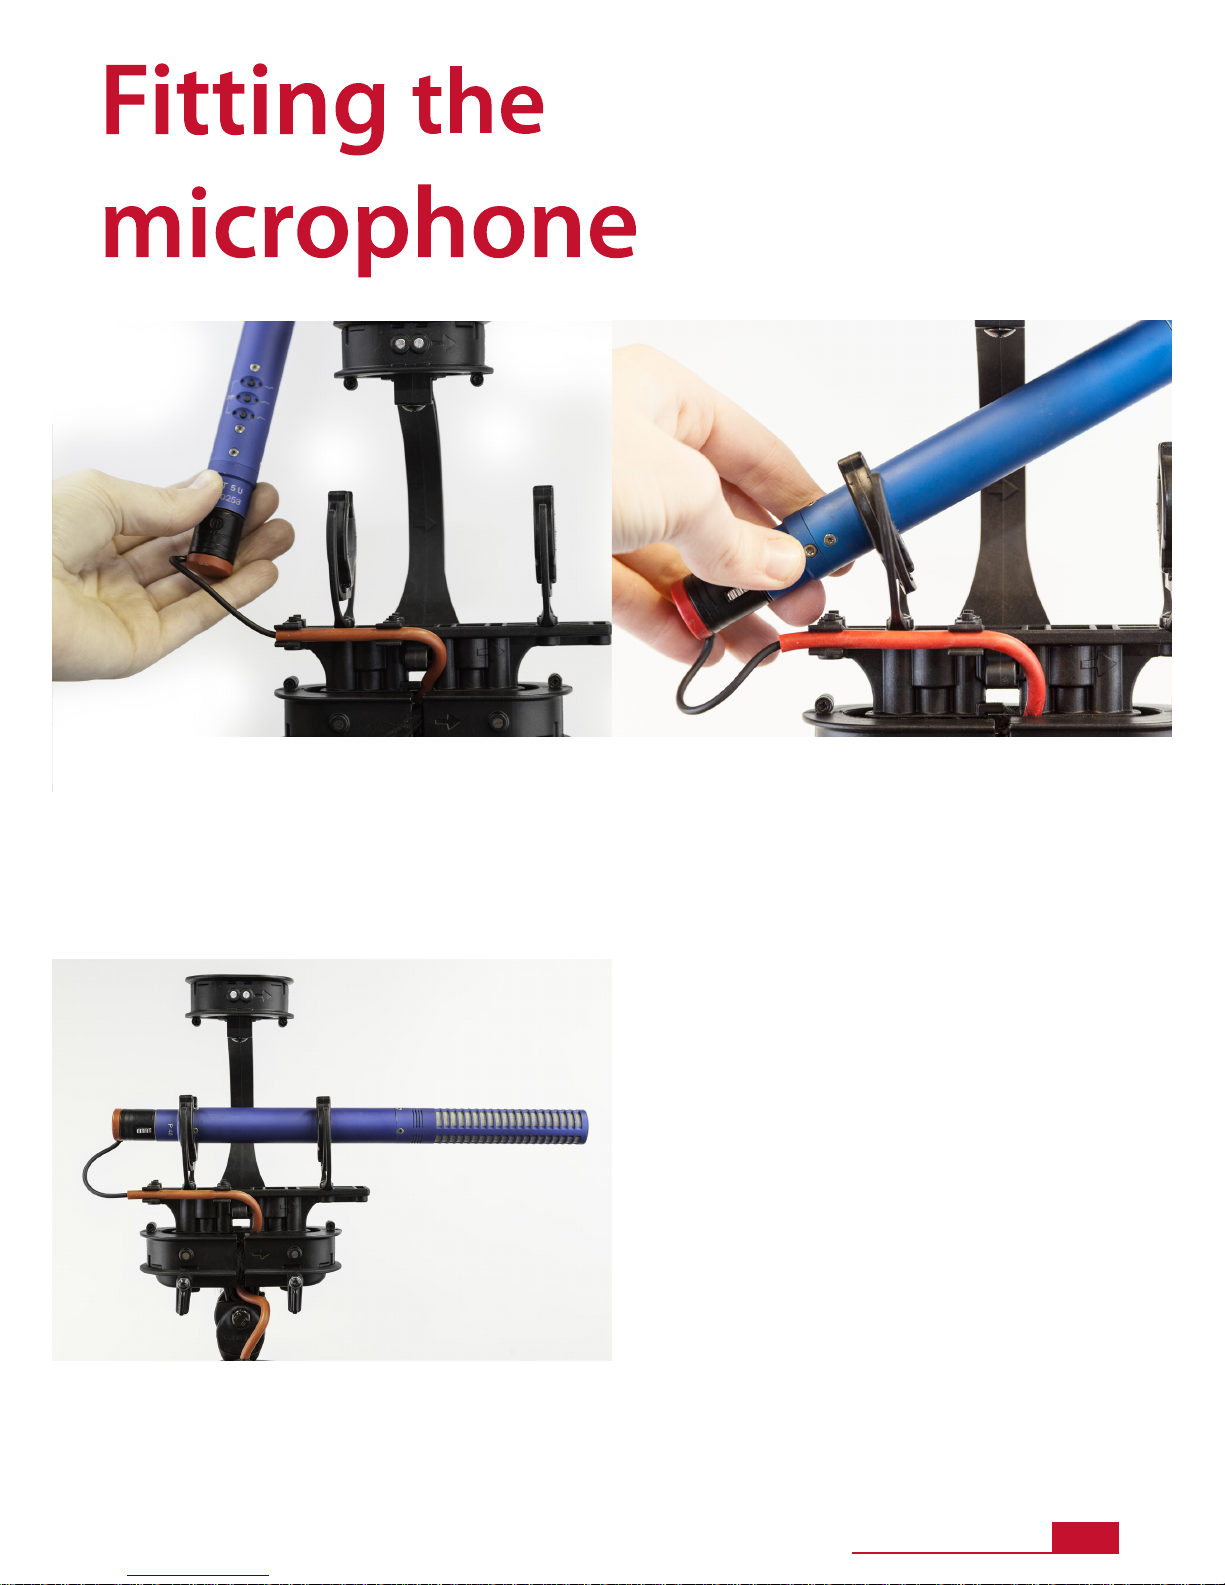
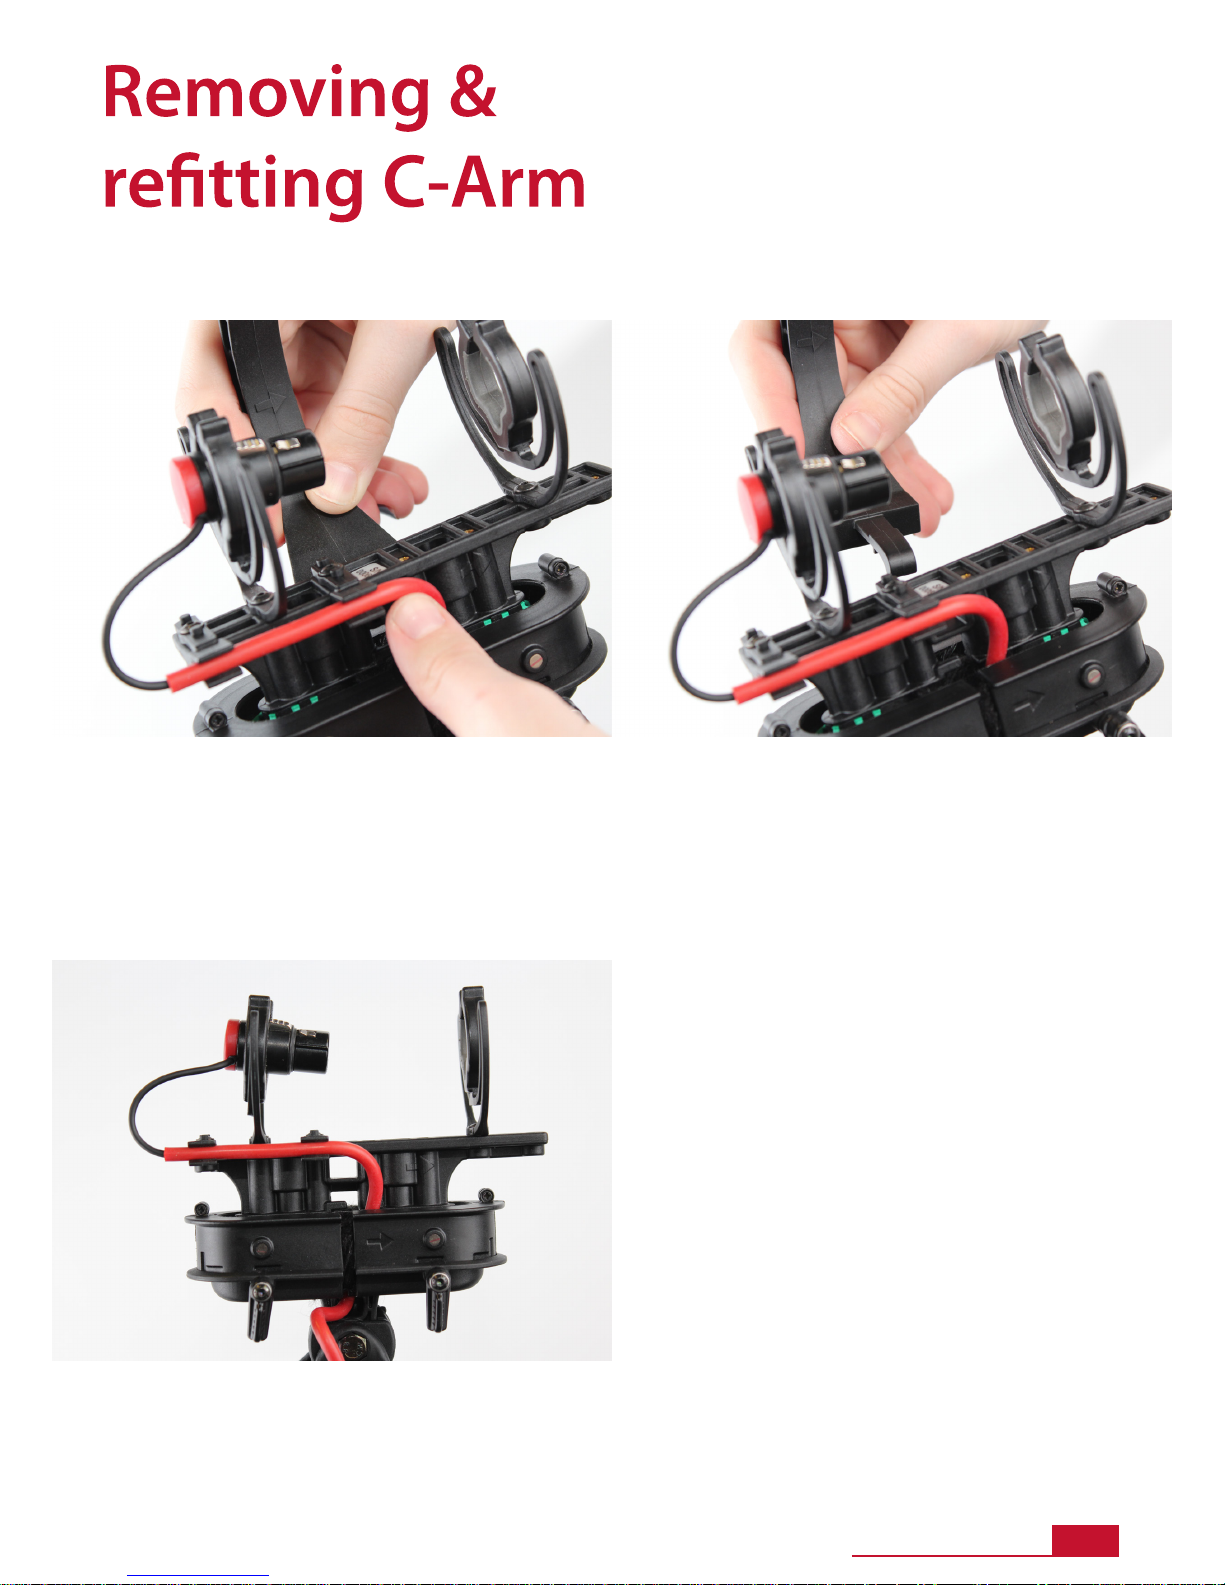
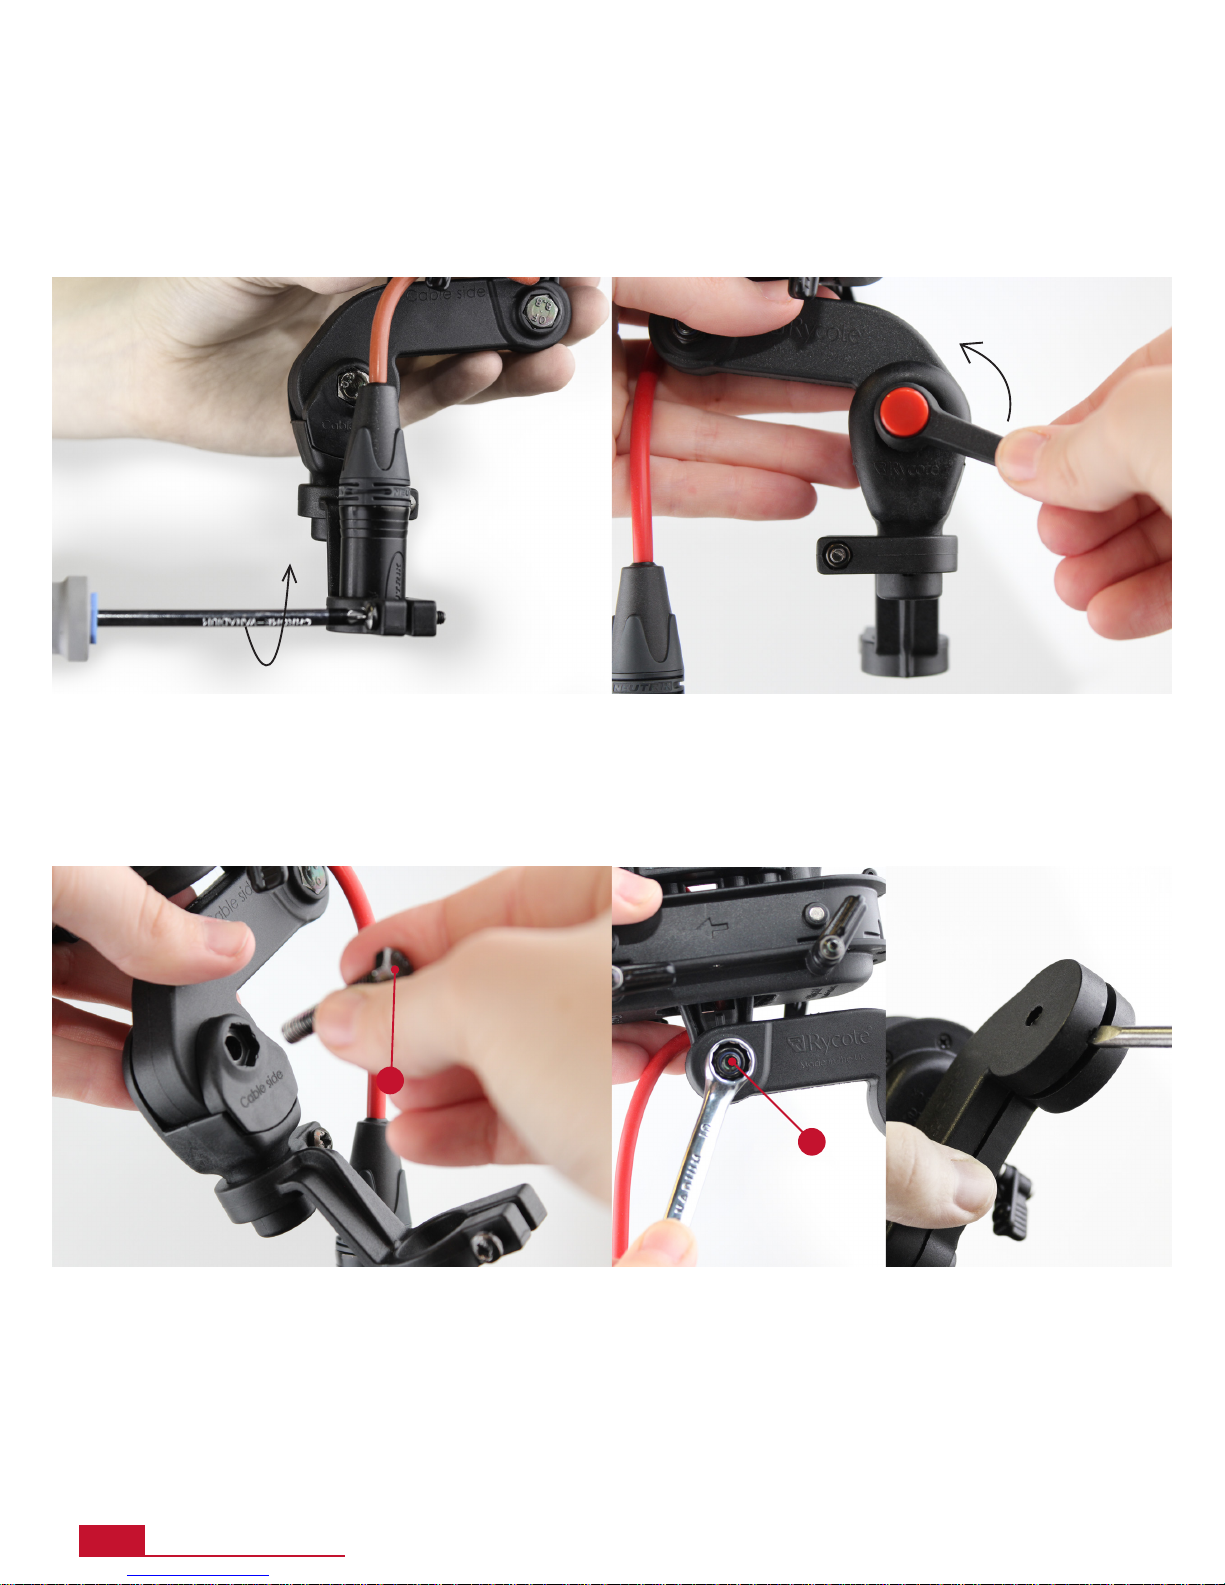
The Cyclone Lyres can be moved or replaced using the supplied
hex-key.
Cyclone Large and Cyclone Medium are pre-tted with a pair of Universal Lyres of 72 shore hardness. An additional pair of softer Lyres (62
shore rating), for lighter microphones are also included, which you can t instead of the pre-tted ones, should you wish.
Cyclone Small models are pre-tted with a pair of Universal Lyres of 62 shore hardness. No spare/additional Lyres are provided with the
Cyclone Small models.
Lyre – 62 Shore Lyre – 72 Shore
The lower the number, the softer the Shore hardness. So‘62 shore’is softer that‘72 shore’.The dierent Lyres can
be identied as follows:
62 shore - Black rigid part & Black Soft-grip
72 shore - Black rigid part & Grey Soft-grip
Changing Lyres

Oset Link & boom
adaptor assembly
3
4
5
6
7
8
1
2
Oset link & boom
adaptor assembly
1. Back Oset Link Plate
2. Front (Cable Side) Oset Link Plate
3. Oset Link
4. Lever Ratchet
5. Boom Adaptor
6. Rubber Washer
7. Boom Adaptor Plate & Bolt
8. XLR Holder
The Cyclone Small is tted with a detachable Oset Link
bracket, which provides mic-axis articulation for ideal
microphone placement.
8

You may prefer to use your Cyclone Small without the
Oset Link. If so, you can remove the Oset Link and
reattach the boom adaptor directly to the base of the
lower suspension assembly.The following instructions
show you how to remove the Oset Link and reattach the
boom adaptor.
1. Loosen screw on the XLR holder, using a Phillips
head screwdriver. Lift out & release XLR connector.
2. Rotate lever ratchet anti-clockwise and remove.
3. Push threaded end of bolt back through the
boom connector and remove bolt Acompletely.
Slide boom connector to remove it from the Oset
Link.
4. Using a 10mm spanner, undo & remove bolt
Bholding the Oset to the suspension.Then
prize apart the two halves of the Oset along it’s
length; this may be sti so use a small at-head
screwdriver (as shown).
B
A
9
Removing the
Oset Link
Removing the
Oset Link

3 4
1. Firstly connect the Oset Link plates to either
side of the suspension, ensuring that the smaller
cut-o plate* is on the cable side (* see Part #2
in‘Oset Link & boom adaptor assembly’section
above).
2. Slide the boom adaptor over the Oset Link
plates, making sure the‘cable side’of the adaptor
is on the cable side of the suspension (as shown).
Insert bolt Aback through boom adaptor.
3. Reattach the lever ratchet by winding on to bolt
in clockwise direction.
4. Re-insert XLR connector into XLR holder, as
shown. Re-tighten screw Cto secure.
10
Reattaching boom
adaptor
C
Reattaching the
boom adaptor

Rycote Microphone Windshields Ltd
Libby’s Drive, Slad Road, Stroud, Gloucestershire GL5 1RN, UK
Email: tech_support@rycote.com · Tel: +44 (0) 1453 759338
FOR MORE INFO
FOLLOW US ON:
www.rycote.com
04/2016
Trusted by
Professionals
Table of contents