Welcome
Thank you for choosing SA
loudspeakers.
System Audio A/S wants to enthral people with the
best possible musical reproduction.
A pair of SA loudspeakers will create a feeling of
being close to the artists. The SA home theatre will
drag the audience deeper into the action.
To achieve the best performance we recommend
that you careful read through this guide before
setting up your new SA loudspeakers.
More information is available on
www.system-audio.com
! important
check the serial number
The serial number is on a sticker on the underside
of the speaker plinth. On the SA mantra 10 /10AV
and SA aura 10 / 10AV it is located on the back of
the speaker. You may wish to note the serial
number down on your invoice and file it along with
your insurance policy. Please contact your dealer if
there is no serial number on the speaker.
warranty
System Audio A/S provides a two-year warranty
against production defects and a five-year warranty
on speaker units and crossover network. The
warranty does not cover misuse. Repairs and
service are done by the dealer or associated
workshop. Any changes made to the construction
will annul the warranty.
running in new loudspeakers
All new high quality loudspeakers need a certain
period of running-in time. As SA uses long-stroke
bass driver with natural rubber surrounds our
loudspeakers needs at least 50 - 100 hours of
actual music playing at decent sound level. You
will notice a gradual improvement in sound quality.
No parcular precauons need to be taken during
those hours.
! important
Always let the product reach room temperature
before plugging it in. Condensation may arise in
the electronic circuitry when moving the speaker
from cold to warm surroundings. Such moisture
may damage the speaker’s components. Never
use the product in damp settings.
Foreign bodies must not be inserted into the bass
reflex ports of the speaker.
Avoid touching the speaker elements.
contents of the package
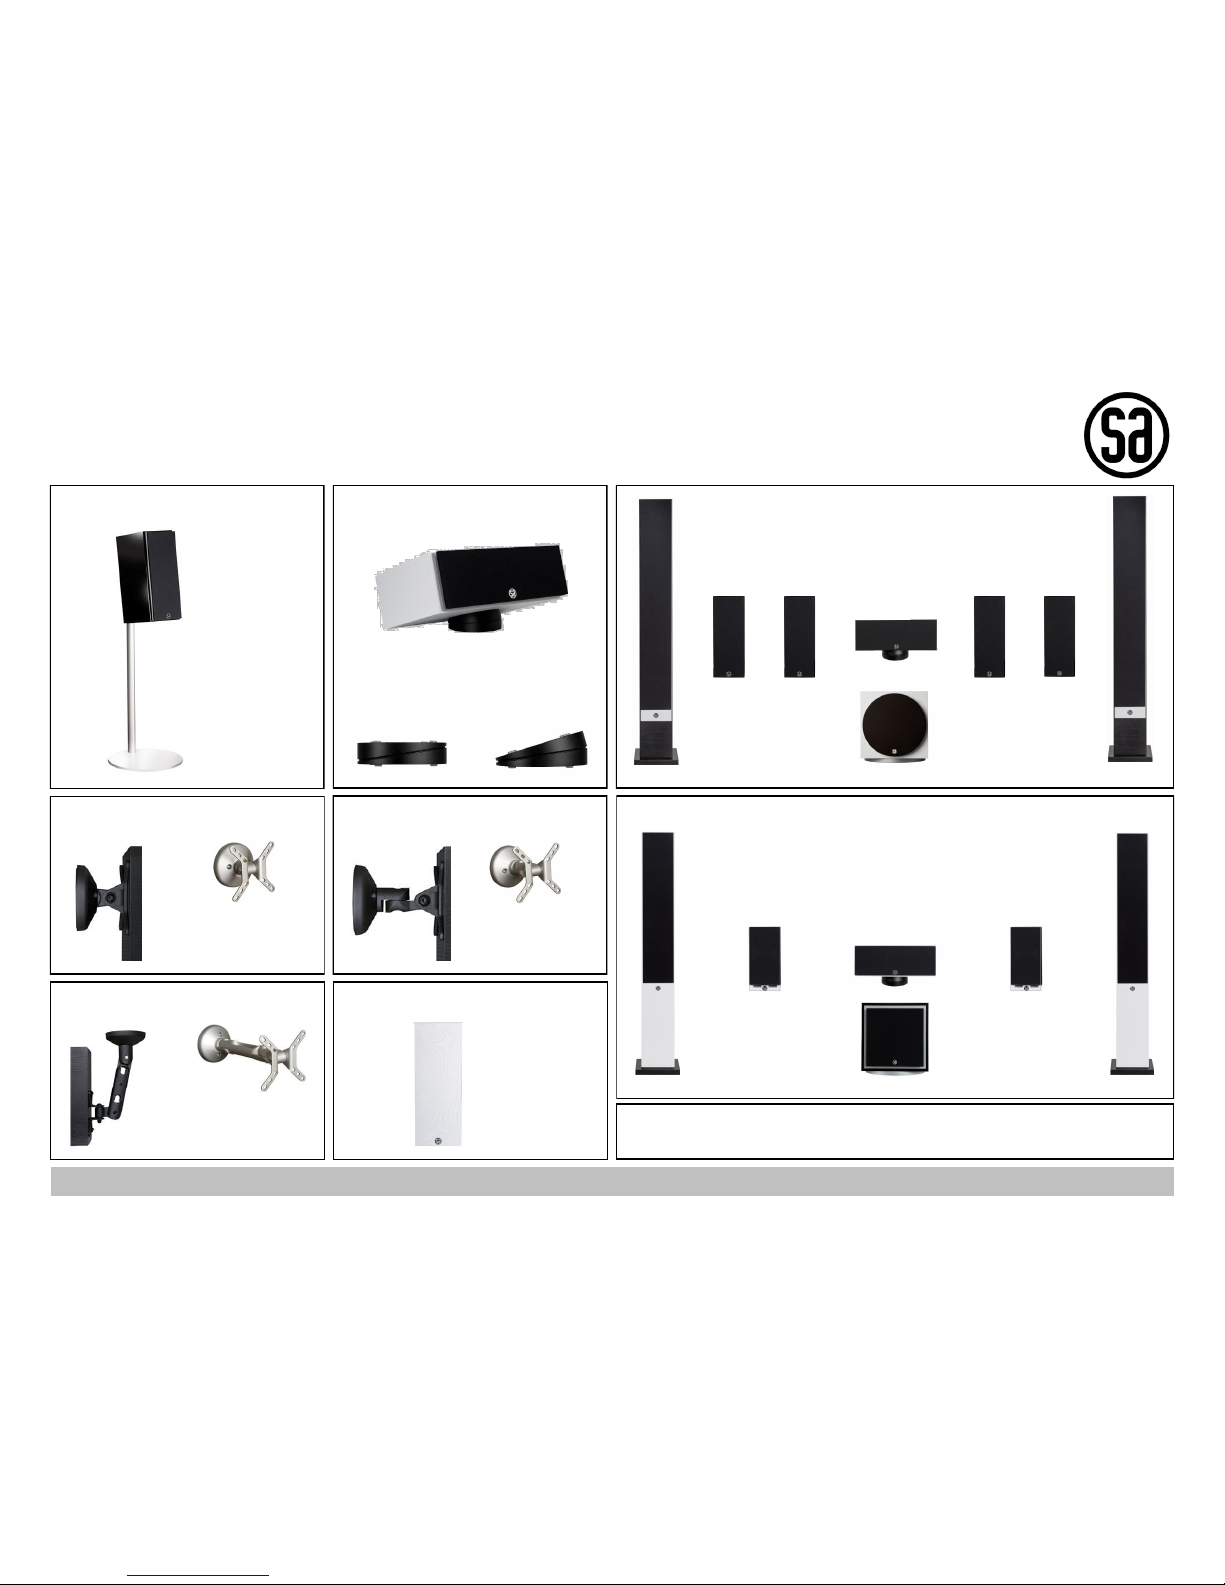
SA mantra 50 / 70 and SA aura 50 / 70
1 x SA mantra loudspeaker
1 x front grille
4 x rubber feet
4 x 6 mm spikes with locknuts
4 x spike protectors
SA mantra 10 / 10AV and SA aura 10 / 10AV
1 x SA mantra loudspeaker
1 x front grille - stereo or AV
SA aura 1
2 x SA aura 1
2 x front grilles
! important
Spikes and rubber feet are placed in holes in the
styrofoam. Make sure you remove them before
putting away the packing materials.
If any part is missing please contact your dealer as
soon as possible.
set up - floor standing loudspeakers
The SA mantra 50 / 70 and SA aura 50 / 70 are
designed to stand on the floor. The speakers can,
and should, be placed 30 – 50 cm away from a
solid wall. The distance may be increased or
decreased depending on the acoustics of the room
and what kind of sound you want.
After the 50-hour run-in period and appropriate
adjustments, the speakers should be mounted on
spikes or rubber feet.
spikes. If the speakers are placed on a soft
underlay, e.g. a carpet, we recommend that you
use spikes. The spikes supplied have locknuts so
the speakers can be adjusted as appropriate. It is
important that the speakers are completely
vertically upright and do not move from side to
side. If necessary, spend plenty of time adjusting
spikes and locknuts to make sure the speaker rests
evenly on all 4 spikes. Once you have finished
adjusting them, tighten the nuts.
rubber feet. If the speaker is positioned on a solid
underlay, e.g. a wooden floor, we recommend that
you use the rubber feet. They break the link with
the floor, which often causes vibrations.
You can also use spikes and protect you floor with
the provided protectors. Please notice that the
speakers are likely to glide on a smooth surface
when using the protectors.
To make positioning easier you might want to wait
with the mounting of spikes or rubber feet until after
the right position for the speakers are found.
set up - compact loudspeakers
The SA mantra 10 / 10AV and SA aura 1,10 / 10AV
are designed to be mounted on floor stands, table
stands, wall brackets or ceiling brackets. We
recommend using the original SA stands and
brackets - se page 4.
SA mantra 10 / 10AV and SA aura 1, 10 / 10AV
can also be placed directly on bookshelves. For
optimal performance there must be free air
passage too the reflex port on the rear. Allow 10
cm. behind the speaker and on one side of the
speaker.
sound quality
hours 100 200 300 400 500
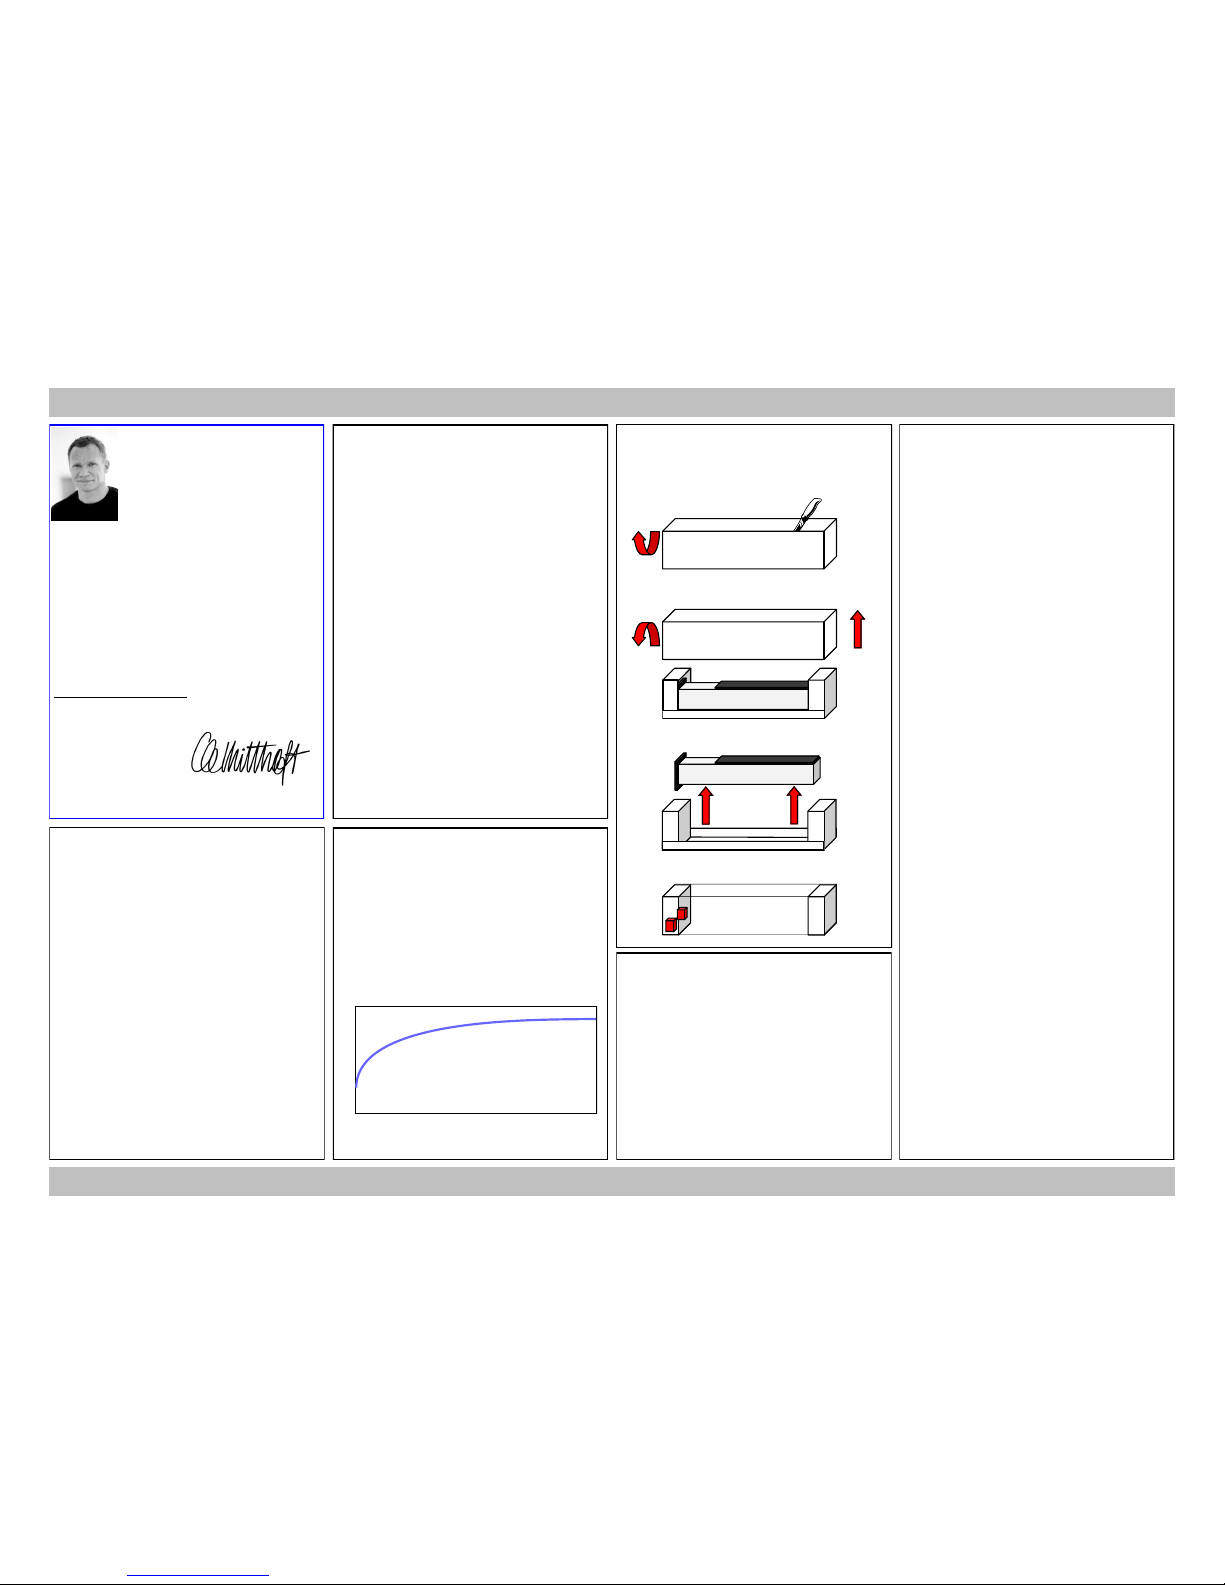
unpacking
1Place the carton bottom-up
cut the tape with a knife
2Turn the carton around and lift off the top
3Lift the loudspeaker out of the bottom part
4Remove all accessories from the carton
www.system-audio.com
www.system-audio.com
www.system-audio.com
2