manuals.online logo
Brands
  1. Home
  2. •
  3. Brands
  4. •
  5. Safavieh Furniture
  6. •
  7. Indoor Furnishing
  8. •
  9. Safavieh Furniture Errington MED9000A User manual

Safavieh Furniture Errington MED9000A User manual

Other Safavieh Furniture Indoor Furnishing manuals

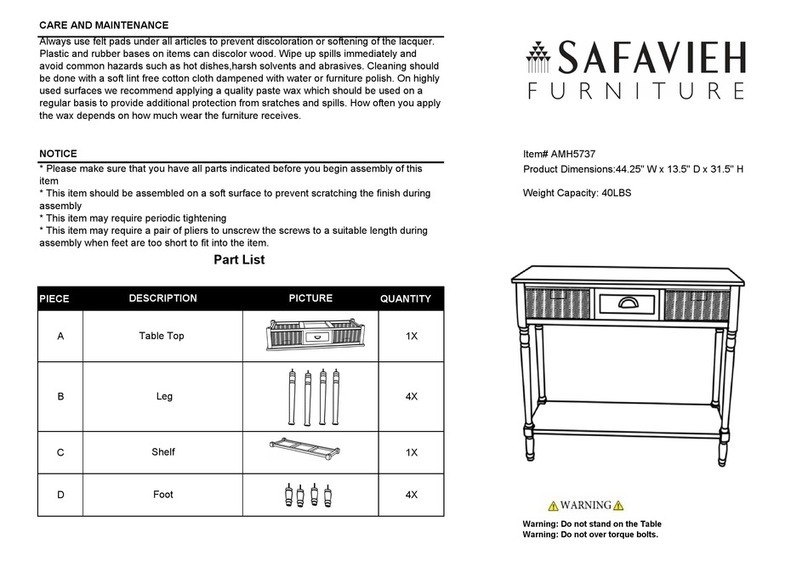
Safavieh Furniture Rosalia FOX2589A User manual

Safavieh Furniture

Safavieh Furniture Rosalia FOX2589A User manual

Safavieh Furniture FOX2556 User manual

Safavieh Furniture

Safavieh Furniture FOX2556 User manual

Safavieh Furniture AMH8321A User manual

Safavieh Furniture

Safavieh Furniture AMH8321A User manual

Safavieh Furniture DSK5710 User manual

Safavieh Furniture

Safavieh Furniture DSK5710 User manual

Safavieh Furniture Landers ACC5708 User manual

Safavieh Furniture

Safavieh Furniture Landers ACC5708 User manual

Safavieh Furniture MED2200 User manual

Safavieh Furniture

Safavieh Furniture MED2200 User manual

Safavieh Furniture BCH1000 User manual

Safavieh Furniture

Safavieh Furniture BCH1000 User manual

Safavieh Furniture Malcolm CNS5713 User manual

Safavieh Furniture

Safavieh Furniture Malcolm CNS5713 User manual

Safavieh Furniture AMH5733 User manual

Safavieh Furniture

Safavieh Furniture AMH5733 User manual

Safavieh Furniture FOX7513 User manual

Safavieh Furniture

Safavieh Furniture FOX7513 User manual

Safavieh Furniture AMH5723 User manual

Safavieh Furniture

Safavieh Furniture AMH5723 User manual

Safavieh Furniture AMH6549A User manual

Safavieh Furniture

Safavieh Furniture AMH6549A User manual

Safavieh Furniture Emmerich COF4218 User manual

Safavieh Furniture

Safavieh Furniture Emmerich COF4218 User manual

Safavieh Furniture Layce DSK5704D User manual

Safavieh Furniture

Safavieh Furniture Layce DSK5704D User manual

Safavieh Furniture Endora AMH5707 User manual

Safavieh Furniture

Safavieh Furniture Endora AMH5707 User manual

Safavieh Furniture BST1405 User manual

Safavieh Furniture

Safavieh Furniture BST1405 User manual

Safavieh Furniture MCR1002 User manual

Safavieh Furniture

Safavieh Furniture MCR1002 User manual

Safavieh Furniture Bali SEA8035 User manual

Safavieh Furniture

Safavieh Furniture Bali SEA8035 User manual

Safavieh Furniture Tonya AMH4122A User manual

Safavieh Furniture

Safavieh Furniture Tonya AMH4122A User manual

Safavieh Furniture AMH6636 User manual

Safavieh Furniture

Safavieh Furniture AMH6636 User manual

Safavieh Furniture COF4208 User manual

Safavieh Furniture

Safavieh Furniture COF4208 User manual

Safavieh Furniture Randell AMH6609 User manual

Safavieh Furniture

Safavieh Furniture Randell AMH6609 User manual

Safavieh Furniture Ray BST1402 User manual

Safavieh Furniture

Safavieh Furniture Ray BST1402 User manual

Safavieh Furniture FOX8515 User manual

Safavieh Furniture

Safavieh Furniture FOX8515 User manual

Popular Indoor Furnishing manuals by other brands

Regency LWMS3015 Assembly instructions

Regency

Regency LWMS3015 Assembly instructions

Furniture of America CM7751C Assembly instructions

Furniture of America

Furniture of America CM7751C Assembly instructions

PLACES OF STYLE Ovalfuss Assembly instruction

PLACES OF STYLE

PLACES OF STYLE Ovalfuss Assembly instruction

Trasman 1138 Bo1 Assembly manual

Trasman

Trasman 1138 Bo1 Assembly manual

Costway JV10856 manual

Costway

Costway JV10856 manual

moss DESIGN Caisson Credenza Assembly instructions

moss DESIGN

moss DESIGN Caisson Credenza Assembly instructions

Aquaglide FULL DECK 15.0 owner's manual

Aquaglide

Aquaglide FULL DECK 15.0 owner's manual

AREBOS AR-HE-SW30 user manual

AREBOS

AREBOS AR-HE-SW30 user manual

Till-Hilft Fulda 87005.330 Assembly instructions

Till-Hilft

Till-Hilft Fulda 87005.330 Assembly instructions

Twoey Outside 2010 quick start guide

Twoey Outside

Twoey Outside 2010 quick start guide

Hettich Easys 200 operating instructions

Hettich

Hettich Easys 200 operating instructions

The bedboss RELAX 404 Series owner's manual

The bedboss

The bedboss RELAX 404 Series owner's manual

Oeseder Möbelindustrie Bern 991 720 Assembly instructions

Oeseder Möbelindustrie

Oeseder Möbelindustrie Bern 991 720 Assembly instructions

Costway HW68469 user manual

Costway

Costway HW68469 user manual

Next ALIX A27743 Assembly instructions

Next

Next ALIX A27743 Assembly instructions

BROSA Hans Assembly guide

BROSA

BROSA Hans Assembly guide

Prodigg MINIKA PBA015T-FUR installation manual

Prodigg

Prodigg MINIKA PBA015T-FUR installation manual

Whittier Wood Furniture McKenzie 3504AFGACa quick start guide

Whittier Wood Furniture

Whittier Wood Furniture McKenzie 3504AFGACa quick start guide

manuals.online logo
manuals.online logoBrands
  • About & Mission
  • Contact us
  • Privacy Policy
  • Terms and Conditions

Copyright 2025 Manuals.Online. All Rights Reserved.

NOTICE
PREPARATION
* Please make sure that you have all parts indicated they are in good condition before you
begin assembly of this item. Refer to part list and hardware list below for guidance .
* This item should be assembled on a soft surface to prevent scartching the finish during
assemby.
* This item may require periodic tightening.
* If you are having difficulty, our friendly customer care team is always here to help . Please
email [email protected]
* Before beginning assembly of product , make sure all parts are presnt . Compare parts with parts
contents list and hardware contents list.
* If any part is missing or damaged, do not attempt to assemble the pdoduct.
* Estimated Assembly time : 10 minutes
* Tools Required for Assembly (included): Allen key
CARE AND MAINTENANCE
*Spot clean using a mild water-free solvent. Only a professional cleaner should undertake a
complete overall cleaning.
*The use of steam or water-based cleaners may cause excessive shrinking or staining.
The legs and hardware are located inside the door
Hw3 Allen key 4 mm
1X
2X
Flat washer 16 mm
Allen bolt 12x6 mm
A
B
Hw1
Hw2
Cabinet
Leg
8X
8X
1X
PIECE QUANTITY
DESCRIPTION PICTURE
Item# MED9000A
Product dimensions: 45.2"L* 15.75"W*17.7"D
WARNING
Weight Capacity - 110 LBS
Warning : Do not stand on media
Warning : Do not over torque bolts.
The legs and hardware are located inside the door
Item# MED9000A
Product dimensions: 45.2"L* 15.75"W*17.7"D
WARNING
Weight Capacity - 110 LBS
Warning : Do not stand on media
Warning : Do not over torque bolts.
NOTICE
* Please make sure that you have all parts indicated and are in good condion before you begin assembly
of this item. Refer to part list and hardware list below for guidance .
* This item should be assembled on a so surface to prevent scratching the finish during assembly.
* This item may require periodic ghtening.
* If you are having difficulty, our friendly customer care team is always here to help . Please
email customersupport@safavieh.com
* Before beginning assembly of product , make sure all parts are present . Compare parts with parts
* If any part is missing or damaged, do not aempt to assemble the product.
* Esmated Assembly me : 10 minutes
* Tools Required for Assembly (included): Allen key
CARE AND MAINTENANCE
*Spot clean using a mild water-free solvent. Only a professional cleaner should undertake a
complete overall cleaning.
*The use of steam or water-based cleaners may cause excessive shrinking or staining.
PREPARATION
contents list and hardware contents list.
Part List and Hardware List
Hw3 Allen key 4 mm
1X
2X
Flat washer 16 x 8 mm
Allen bolt 6 X 1 X 12 mm
A
B
Hw1
Hw2
Cabinet
Leg
8X
8X
1X
PIECE PIECE DESCRIPTION PICTURE QUANTITY
A
B
B
8X
STEP2 PUT THE WASHERS (H2) ON THE ALLEN
BOLT (H1) IN THE ORDER SHOWN IN THE
PICTURE
STEP3 INSERT ALLEN BOLT WITH WASHER INTO
THE BOTTOM PANEL HOLE AS SHOWN AND
TIGHTEN WITH ALLEN KEY(H3).
STEP1 OPEN THE ZIPPER ON THE INSIDE OF THE
DRAWER AND TAKE OUT LEGS AND HARDWARE
The legs and hardware are located inside the door
PREPARATION
* Before beginning assembly of product , make sure all parts are present . Compare parts with parts
* If any part is missing or damaged, do not aempt to assemble the pdoduct.
* Esmated Assembly me : 10 minutes
* Tools Required for Assembly (included): Allen key
contents list and hardware contents list.
* If you are having difficulty, our friendly Customer Care team is always here to help. Please email customersupport@safavieh.com
STEP2
PLACE THE MEDIA UPSIDE DOWN ON A CLEAN SURFACE . ALIGN LEG (B) HOLES WITH THE MEDIA SIDE HOLES, INSERT ALLEN BOLT
Hw3
Hw1
Hw2
8X
A
B
B
STEP3 REPEAT STEP 2 FOR ,OTHER SIDE LEG, FLIP THE MEDIA UPRIGHT WITH HELP.
(Hw1), WITH WASHER (Hw2) AND TIGHTEN WITH ALLEN KEY (HW3).
A
Hw1
Hw2
Hw3
Hw1
Hw2
PREPARATION
* Before beginning assembly of product , make sure all parts are present . Compare parts with parts
* If any part is missing or damaged, do not aempt to assemble the product.
* Esmated Assembly me : 10 minutes
* Tools Required for Assembly (included): Allen key
contents list and hardware contents list.
* If you are having difficulty, our friendly Customer Care team is always here to help. Please email customersupport@safavieh.com
Leg
STEP1
Unwrap the legs & take out legs.
Hardware
Open the hardware pouch & take out hardware.
A
B
B
STEP2
Place the media upside down on a clean surface.
Align legs on both sides of media unit as per side holes
present on either side of media.
STEP3
Put the washer on the Bolt in the order shown in
picture.
Hw2
STEP4
Insert Allen Bolt (Hw1) with Washer (Hw2)
ghten with Allen Key (Hw3).Don’t over ghten.
Hw1 Hw3
Hw2 Hw1
Hw2
Hw1
Hw3
STEP5
Repeat step 4 for, other side leg, flip the media upright with help.
OLD
PREPARATION
* Before beginning assembly of product , make sure all parts are present . Compare parts with parts
* If any part is missing or damaged, do not aempt to assemble the product.
* Esmated Assembly me : 10 minutes
* Tools Required for Assembly (included): Allen key
contents list and hardware contents list.
* If you are having difficulty, our friendly Customer Care team is always here to help. Please email customersupport@safavieh.com
STEP4 ATTACH TIP PROTECTOR INTO BACK OF TOP BOARD USING SCREW
The unit needs to be secured against wall using p an p kit.
Please Consult your local hardware store to get advice of appropriate screw and fischer
according to your wall type. Drill pre-holes on wall as shown in fig(1) for the p protector.
Repeat the step with same distance of both p protector aached in step
Insert fischer to each hole on the wall using hammer.
Secure the Tip Protector using Screw.
Make a loop by inserng the provided Fastener / Cable es into both p protector on wall
and on backside of product, with the grids surface facing inside of loop.
Fasten the cable es unl posion of product as close as possible to wall.
Repeat on the other side.
Grids Surface
STEP6
The unit needs to be secured against wall using p an p kit. Please
Consult your local hardware store to get advice of appropriate screw and
Fischer according to your wall type.
Drill pre-holes on wall as shown in fig(1) for the p protector. Repeat
STEP7
the step with same distance of both p protector aached in step. Insert fischer
to each hole on the wall using hammer as shown in fig(2) .
Secure the Tip Protector using Screw as shown in fig(3).
Make a loop by inserng the provided Fastener / Cable es into both p
protector on wall and on backside of product, with the grids surface facing
inside of loop as shown in fig(4).
Repeat on the other side.
Fasten the cable es unl posion of product as close as possibleto wall as
5
shown in fig(5).