manuals.online logo
Brands
  1. Home
  2. •
  3. Brands
  4. •
  5. Safe-t-Cover
  6. •
  7. Enclosure
  8. •
  9. Safe-t-Cover HCF600DS Series User manual

Safe-t-Cover HCF600DS Series User manual

ASSEMBLY INSTRUCTIONS
READ CAREFULLY
SAFE-T-COVER
1-800-245-6333
HCF600DS-2
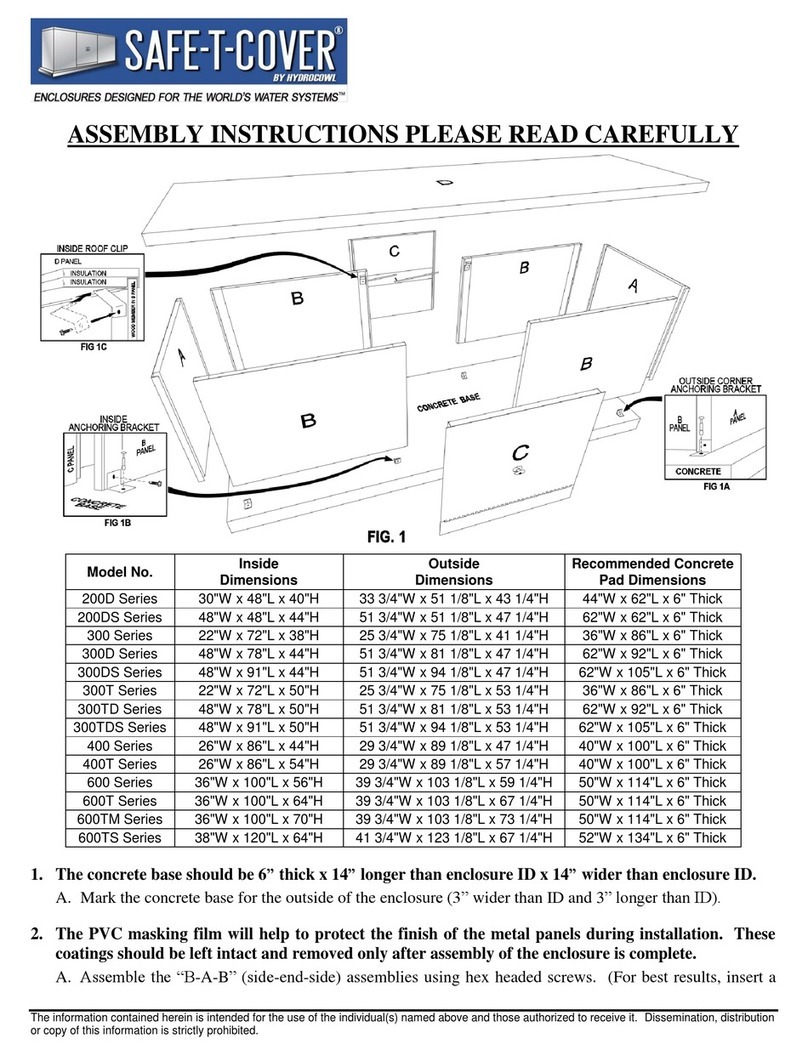
1. Center a 6" thick concrete base around installed BFP.
A. Place expansion material around riser pipe and place conduit for electrical power before placing
concrete. CONCRETE SHOULD BE FINISHED ABSOLUTELY LEVEL, FLAT AND
SMOOTH. Allow concrete to cure.
B. Mark concrete with outside dimensions of enclosure. Center enclosure around BFP.
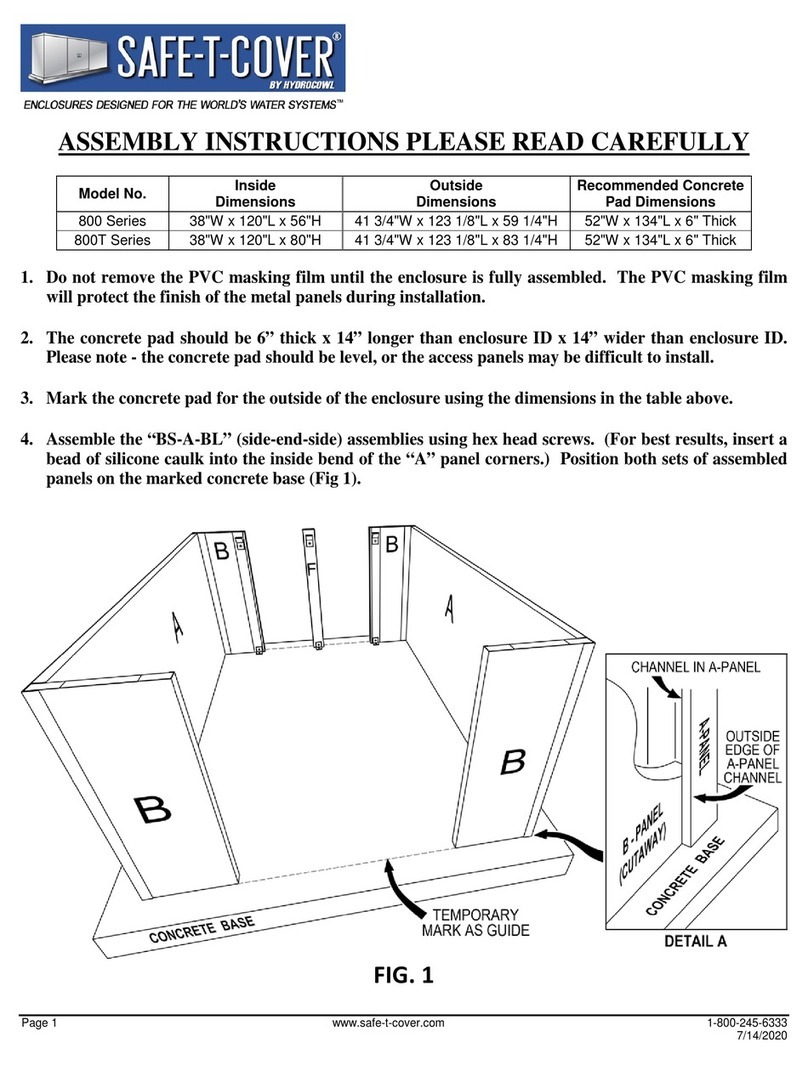
2. Lay “Al & A2” panels face down. Using three (3) hexhead screws fasten panels together thru holes
provided on inside of panels. (Make sure panels are pulled close together before tightening screws). (For
best results, insert a bead of silicone caulk into inside angle on “A1” panel.)
A. Using four (4) hexhead screws for each section assemble each "A-B" (end and side)
section thru holes provided. Set on marked concrete base (FIG 2).
3. Set "D1" (roof) panel on "A-B" section. Using three (3) hexhead screws fasten "D1" (roof) to "A-B"
section thru holes provided (FIG 1).
A. Using one (1) hexhead screw for each, install an Inside Roof Clip in the middle at the top inside of the
“A” panel (end) and roof section. (FIG 1C).
B. Repeat 3 and 3A for other “D1” and “A-B” section.
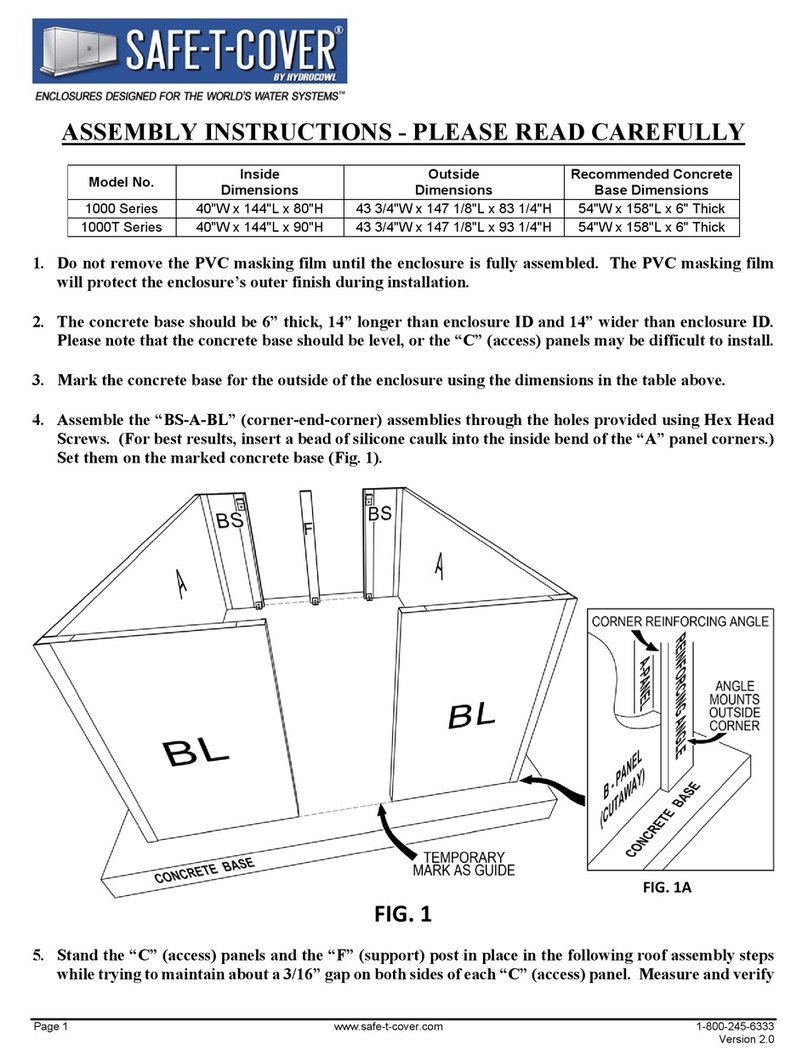
4. Position “D2” (roof) middle panel between “D1”(roof) end panel and set in place. “Temporarily” place “F”
(center) posts in position. On inside place an Inner Roof Connection Bracket over the two 2x4 connections of
“D1” and “D2”. Using hexhead screws provided, fasten Inner Roof Connection Bracket in place. (Fig 1E).
SAFE-T-COVER
1-800-245-6333
HCF600DS-3
5. A. Using one (1) hexhead screw attach Outside SS Corner Anchoring Brackets to "A-B" sections. Using
one (1) anchor for each bracket fasten to concrete (FIG 1A). Fasten Outside SS Corner Anchoring Brackets
at both corners on one side.
B. Using one (1) hexhead screw for each bracket attach Inside Alumiunm Anchoring Brackets to "B"
panels on the inside bottom at concrete. Using one (1) anchor for each bracket fasten bracket to concrete
(FIG 1B). Fasten Inside Aluminum Anchoring Brackets to both “B” panels and concrete on one side.
C. Insert Inside Roof Clips in “D1” (roof) panel at “B” panel. Using one (1) hexhead screw for each clip
attach to “B” panel. (Fig 1C).
D. Using one (1) hexhead screw for each bracket attach Inside Aluminum Anchoring Bracket to “A”
panel on inside at bottom. Using one (1) anchor for each bracket attach bracket to concrete (Fig 1B).
6. Repeat Steps 5, 5A,5B, 5C and 5D on other side of enclosure.
7. Place “F” post in the center. Install Inside Aluminum Anchoring Brackets (Fig 1B) at bottom of “F” posts
and Inside Roof Clips (Fig 1C) at top of “F” posts.
8. Using hexhead screws install Roof Cover Plate (Fig 1D) at “D1-D2” roof seams.
9. Set "C" door panels and lock in place. (Solid "C" panel to be the ACCESS DOOR PANEL).
10. Provide ground-fault interrupter device in electrical circuit according to applicable codes. Install heater as
per manufacturer's instructions and governing local and national codes.
11. For maximum protection it is suggested that the area between the bottom of the enclosure and the concrete
base be caulked with the exception of the "C" panels. DO NOT CAULK THE BOTTOM OF THE
"C" DOOR PANELS.
REMOVE MASKING FILM IMMEDIATELY
AFTER INSTALLATION
If these panels get wet when the film is still on, water will
irreversibly stain the panels. Summertime heat will bake the
film on the panels.
SAFE-T-COVER
1-800-245-6333
HCF600DS-4
CONTENTS
Model No. 600DS-Series
2- “A1” (end) Panels
2- "A2" (end) Panels
4- "B" (side) Panels
1- "C" (drain door) Panel
3- "C" (solid access) Panel
2- "D1" (roof ) Panels
1- "D2" (roof) Panel
2- “F” Panels
4- Outside SS Corner Anchoring Brackets (2 ½” x 2 ½”)
8- Inside Aluminum Anchoring Brackets (3” x 3”)
8- Inside Roof Clips
4- Roof Cover Plates
2- Inner Roof Connection Brackets
12- Anchors 3 ¾”
66- Screws
1- Magnetic Chuck
TOOLS NEEDED
Hammer
Drill
3/4” Wrench

Other Safe-t-Cover Enclosure manuals

Safe-t-Cover 1000S-AL User manual

Safe-t-Cover

Safe-t-Cover 1000S-AL User manual

Safe-t-Cover 1000TD-AL User manual

Safe-t-Cover

Safe-t-Cover 1000TD-AL User manual

Safe-t-Cover 1000TS-AL User manual

Safe-t-Cover

Safe-t-Cover 1000TS-AL User manual

Safe-t-Cover 800 Series User manual

Safe-t-Cover

Safe-t-Cover 800 Series User manual

Safe-t-Cover 1000 Series User manual

Safe-t-Cover

Safe-t-Cover 1000 Series User manual

Safe-t-Cover 200D Series User manual

Safe-t-Cover

Safe-t-Cover 200D Series User manual

Safe-t-Cover 1000D-AL User manual

Safe-t-Cover

Safe-t-Cover 1000D-AL User manual

Popular Enclosure manuals by other brands

Corsair 110R manual

Corsair

Corsair 110R manual

HPE J2000 Flash Installing and configuring

HPE

HPE J2000 Flash Installing and configuring

Akasa A-RA08-A2B installation manual

Akasa

Akasa A-RA08-A2B installation manual

Emprex ME1 user manual

Emprex

Emprex ME1 user manual

AMX RDA-ENC2 Specifications

AMX

AMX RDA-ENC2 Specifications

Cooler Master ATCS 840 installation guide

Cooler Master

Cooler Master ATCS 840 installation guide

Aluratek AHDDU100F product reference card

Aluratek

Aluratek AHDDU100F product reference card

EFX FDMUS05U installation instructions

EFX

EFX FDMUS05U installation instructions

NUTAQ PicoDigitizer250x quick start guide

NUTAQ

NUTAQ PicoDigitizer250x quick start guide

Asus Vento 7700 user guide

Asus

Asus Vento 7700 user guide

Supermicro SC847E1C Series user manual

Supermicro

Supermicro SC847E1C Series user manual

L-Acoustics KIVA SB15M Rigging manual

L-Acoustics

L-Acoustics KIVA SB15M Rigging manual

Macpower & Tytech Freshman user manual

Macpower & Tytech

Macpower & Tytech Freshman user manual

Apevia X-PIONEER user manual

Apevia

Apevia X-PIONEER user manual

GEOMETRIC FUTURE Model 6 user guide

GEOMETRIC FUTURE

GEOMETRIC FUTURE Model 6 user guide

Icy Dock ToughArmor manual

Icy Dock

Icy Dock ToughArmor manual

ADIC Tape Array 5 user guide

ADIC

ADIC Tape Array 5 user guide

National Instruments NI 9919 installation guide

National Instruments

National Instruments NI 9919 installation guide

manuals.online logo
manuals.online logoBrands
  • About & Mission
  • Contact us
  • Privacy Policy
  • Terms and Conditions

Copyright 2025 Manuals.Online. All Rights Reserved.