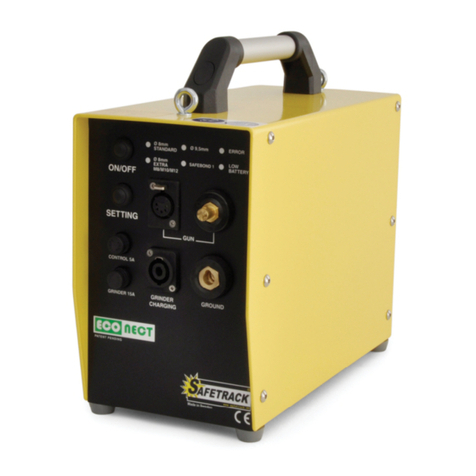
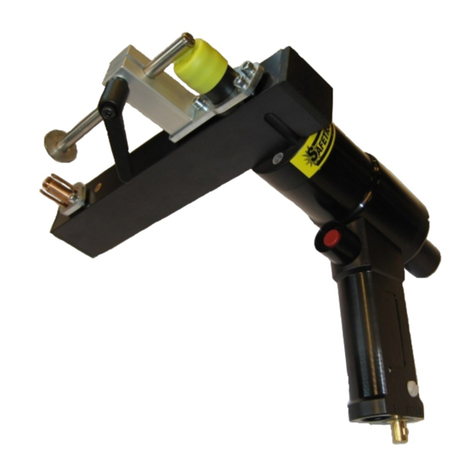
SAFETRACK ECONECT SAFE 94350 User manual

IN-021-09
Safetrack Baavhammar AB
Möllebergavägen 339-24, 245 93 Staanstorp, Sweden
Phone. +46 (0)40 44 53 00
[email protected] www.safetrack.se
USER MANUAL
Safety, Operation and Maintenance
Safely connecting the world!
Electronic
PinBrazing unit

2
Safety symbols and signal words, as shown below, are used to emphasize all operator,
maintenance and repair actions which, if not strictly followed, could result in a
life-threatening situation, bodily injury or damage to equipment.
This is the safety alert symbol. It is used to alert you to
potential personal injury hazards. Obey all safety messages
that follow this symbol to avoid possible injury or death.
This safety alert and signal word indicate an imminently
hazardous situation which, if not avoided, will result in death
or serious injury.
This safety alert and signal word indicate a potentially
hazardous situation which, if not avoided, could result in
death or serious injury.
This safety alert and signal word indicate a potentially
hazardous situation which, if not avoided, could result in
death or serious injury.
This signal word indicates a potentially hazardous situation
which, if not avoided, may result in property damage.
This signal word indicates a situation which, if not avoided,
will result in damage to the equipment.
This signal word indicates a situation which, if not avoided,
may result in damage to the equipment.
Always observe safety symbols.
They are included for your safety and for the protection of the tool.
LOCAL SAFETY REGULATIONS
Enter any local safety regulations here. Keep these instructions in an area accessible to the
operator and maintenance personnel.
______________________________________________
______________________________________________
______________________________________________
______________________________________________
______________________________________________
______________________________________________
______________________________________________
______________________________________________
SAFETY SYMBOLS
DANGER
WARNING
CAUTION
CAUTION
NOTICE
IMPORTANT

3
Tool operators and maintenance personnel must
always comply with the safety precautions given in
this manual and on the stickers and tags attached to
the tool and hose.
These safety precautions are given for your safety.
Review them carefully before operating the tool and
before performing general maintenance or repairs.
Supervising personnel should develop additional
precautions relating to the specic work area and
local safety regulations. If so, place the added
precautions in the space provided in this manual.
This tool will provide safe and dependable service if
operated in accordance with the instructions given
in this manual. Read and understand this manual
and any stickers and tags attached to the tool before
operation.Failure to do so could result in personal
injury or equipment damage.
• Do not operate a damaged, improperly
adjusted, or incompletely assembled tools.
• To avoid personal injury or equipment
damage, all tool repair, maintenance and
service must only be performed by authorized and
properly trained personnel.
• Do not exceed the rated limits of the tool or use
the tool for applications beyond its design capacity.
• Always keep critical tool markings, such as labels
and warning stickers legible.
• Always replace parts with replacement parts
recommended by Safetrack.
• Operator must start in a work area without
bystanders. The operator must be familiar with all
prohibited work areas such as excessive slopes,
dangerous terrain conditions, and rail trac.
• Establish a training program for all operators to
ensure safe operation.
• Do not operate the tool unless thoroughly trained
or under the supervision of an instructor.
• Always wear safety equipment such as goggles,
ear, head protection, and respiratory protection at all
times when operating the tool.
• Do not inspect or clean the tool while the battery
power source is connected. Accidental arcing can
cause serious injury.
• Do not load brazing pins or ceramic rings while the
battery power source is connected. Accidental arcing
can cause serious injury.
• Do not use the tool while it is connected to a
battery charger.
• Ensure battery charging is only done in a dry
environment. Charging batteries in the rain or near
standing water presents an electrocution hazard.
Read the safety and operation instructions provided
with the battery charger before using the battery
charger.
SAFETY PRECAUTIONS

TABLE OF CONTENTS
4
SAFETY SYMBOLS 2
SAFETY PRECAUTIONS 3
TABLE OF CONTENTS 4
TECHNICAL SPECIFICATION 5
PROTECTION/CLEANING/STORAGE 6-7
OPERATION 8-11
BATTERY CHARGING 8
GRINDING 9
PREPARING THE ECONECT UNIT 10
PINBRAZING 11
TROUBLESHOOTING 12
MAINTENANCE 13-15
GENERAL MAINTENANCE 13
ECONECT SPECIAL FUNCTIONS 14
S15 BRAZING GUN 15
CHECKING/CALIBRATING LIFT HEIGHT 16-17
ACCESSORIES & SPARE PARTS 18-19
PINBRAZING MATERIALS 20
REPAIRS/RETURNS 21
NOTEPAD 22
CE DECLARATION OF CONFORMITY 23
Read the instructions carefully
before using the pinbrazing unit.
IMPORTANT
WARRANTY
Units 12 months, batteries 6 months.
Valid only when using original parts, batteries and chargers supplied or approved by Safetrack®.
The warranty will expire if the equipment was used or has been used with non-original
spare parts, consumables or not used in accordance with the instructions.
Website: www.safetrack.se
E-Mail: [email protected]
SERIOUS INJURY OR DEATH COULD RESULT FROM
THE IMPROPER REPAIR OR SERVICE OF THIS TOOL.
REPAIRS AND / OR SERVICE TO THIS TOOL MUST ONLY BE DONE
BY AN AUTHORIZED AND CERTIFIED DEALER.
WARNING

SAFE 94350 DELIVERED WITH
ECONECT SAFE 94452
S15 Gun SAFE 91015
Tool kit SAFE 91250
Ground device SAFE 80730
Grinder SAFE 593070
Tool case SAFE 95240
Carrying Harness SAFE 9523
Protective eyewear SAFE 8043
Grinding pin/stone SAFE 8025
Carbide burr SAFE 8014
ON/OFF
Pin setting
Fuse for electronics
Ground
Grinding / charge
Gun control
Gun power
Battery indicator
Error Indication
Selected setting.
TECHNICAL SPECIFICATION
Voltage 39V DC
No. of brazings/charge 40-60
Unit weight incl.batteries 9,8 Kg
Dimensions LxWxH (mm) 321x153x280
Temperature range -20 °C to +55 °C
Fuse for grinding /
charge
TECHNICAL SPECIFICATION
5
Check that all parts
have been received!

GENERAL OPERATIONS
6
GENERAL PROTECTION
Use only recommended repair and replacement parts and materials specied in the spareparts
list section of this manual.
Use only recommended accessories also specied in the spareparts list section of this manual.
Do not use the Electronic PinBrazing unit for applications it was not designed for.
Use the carrying handle to transport the unit from location to location.
CLEANING
Establish a routine to keep the unit as free from dirt as possible: –daily, or at each shift change,
for example.
PinBrazing unit exposed to rain, sand, or grit-laden air should be cleaned prior to each use.
Keep tool labels and stickers legible.
PREOPERATION PROCEDURES
Before putting a new ECONECT PinBrazing unit into initial service, or after an extended period
of being unused, perform a visual inspection for bent, broken, cracked, missing or worn
components.

BATTERY OPERATIONS
7
STORAGE OF UNIT AND BATTERIES
Store the Electronic PinBrazing unit in a place where it is protected from the elements,
abrasive dust, and damage.
The batteries must be stored in a clean and dry location, and preferably in a
temperature-controlled environment.
Units are shipped with the batteries not fully charged. Please charge the unit before use.
The batteries must be given a freshening charge once every year if the unit is not in use.
Failure to observe these conditions may result in greatly reduced capacity and service life.
Only charge the unit indoors at room temperature.
Failure to follow the instructions in the battery charger operation manual can result in
battery explosion and serious bodily injury. To reduce the risk of battery explosion, read and
understand the safety and operation instructions in the battery charger operation manual, the
instructions published by the battery manufacturer, and the instructions in this manual before
attempting to charge the batteries.
Use only battery charger specially made for pin brazing units (36V DC) approved by Safetrack.
WARNING
NOTICE

Connect the charger to the grinder / charging outlet on the unit then to the mains.
The battery is fully charged after about 1 hour (if completely discharged).
After charging is completed the charger can be disconnected.
The battery shall be charged every 6 months, if the unit is not in use.
Blinking signal* Error description Troubleshooting
1 x Blinking,
2 sec pause
No battery or defect battery. Please check charger cable and connector
for damage and the 15A fuse on Econect.
2 x Blinking,
2 sec pause
Battery voltage is too high.
3 x Blinking,
2 sec pause
Battery temperature is
under 0°C or over 45°C.
Please let the unit cool or heat to the right
temperature, charging will start
automatically.
5 x Blinking,
2 sec pause
Device temperature is
too high.
Please turn o the charger and give it
some time to cool down.
1. Infrared-LED, For factory programing only.
2. Mains, indicating that mains are connected and the charger is on.
3. Red Error-LED, indicating dierent errors by ashing, see chart 1.
4. Yellow Charging-LED, indicating when the charger is charging the battery.
5. Green Full-LED, indicating when battery is fully charged.
1 2 3 4 5
* Blinking signals in continuous loop.
Chart 1.
CHARGING THE BATTERY CAN ONLY BE CARRIED OUT BETWEEN 0°C to +45°C
NOTICE
CHARGING THE BATTERY
8
If the batteries are left uncharged, they may be damaged.
CAUTION

GRINDING
9
Always use eye protection when grinding and brazing.
CAUTION
Note, use only SAFETRACK´s grinding wheel specially made for
brazing, other type of wheels will leave a surface not suitable for
brazings. Keep the grinding wheel clean and free from oil etc.
NOTICE
Before brazing, the braze area must be cleaned of rust, corrosion, paint, pits, or other
contamination at the points where the brazing is going to be done and on an area close to the
brazing for placement of the grounding cable.
Cleaning is accomplished with a grinder to ensure clean, bare metal.
1. Grind the brazing and ground area until you have
an even and clean surface.
2. Attach the ground magnet on the same work piece
where the pinbrazing should be done. Try to attach
the magnet within 0,5 m from brazing area.
3. Move the grinder all time when grinding to get an
even surface.
Connect the grinder. If unit was supplied with battery power grinder, make sure that the batteries
are charged. Se manufactures instruction for the grinder on charging the grinder batteries.
Brazing
Ground
Brazing

The build-in heating element automatically heat up the batteries. (Heating time)
Possible amount of brazings (see specied brazing pin)
Heating time and number of brazings
0
10
20
30
40
50
60
70
-20 -15 -10 -5 0 5 10 15
Amount of brazings and heating time
Temperature °C
STANDARD 8mm
EXTRA SILVER
9,5mm
SAFEBOND 1
HEATING TIME
10
If the temperature of the battery is below 12ºC, the ERROR will ash
and the battery will be heated.
When battery has right temperature ERROR will stop ashing and unit is ready to use.
NOTICE
PREPARING THE ECONECT UNIT

7
PINBRAZING
11
1. Connect the brazing gun (power and trigger) cable & ground device to the unit.
2. Select brazing pins and ceramic rings to match the specications of the bonding cable you
selected.
3. Check that the pin holder and ring holder on the gun are the correct sizes for the brazing pins
and ceramic rings you selected. If the sizes are incorrect, the pin holder and ring holder can be
changed, se maintenance of S15 gun on page 12.
4. Insert the brazing pin into the pin
holder. The rounded tip should be
facing away from the gun.
5. Insert the ceramic ring into the ring
holder. The serrated edge should be
facing away from the gun.
6. Press on/o button and select the right pin type by pressing the ”setting” button.
The unit will remember what setting was used last.
7. Hold the gun rmly with both hands as shown and pull the trigger
just once. The electronic will by itself nish the brazing process.
8. Hold the gun in place for 3-4 sec after the brazing while the
brazing cools down.
9. Remove the gun straight backwards without pulling the trigger!
10. After the brazing has cooled, knock the shank o the brazing
pin using a hammer.
The brazing is completed.
NOTE:
If the brazing is aborted too early “ERROR” will turn on.
The brazing should be redone for a good result.
The error lamp will turn o after 8 seconds.
Use a new ceramic ring for each new brazing.
The battery indicator “LOW BATT” ashes when the batteries are almost discharged.
When the “LOW BATT” is constantly lit the batteries are discharged and
no more brazings can be done. Charge the battery.
IMPORTANT

TROUBLESHOOTING
12
ERROR INDICATIONS ON THE UNIT:
ERROR led is lit
- The temperature of the battery is over +55 °C.
Action: Wait until the light goes out, then the temperature dropped and it is
possible to braze again.
ERROR led ashes
- The temperature of the battery is below +10 °C.
Action: Leave the unit on, the built-in heating element will heat up the battery.
Wait until light goes out and the temperature has risen, and it is possible to braze.
ERROR and LOW BATTERY led ashes
- The temperature of the battery is below +10 °C and the battery is almost discharged.
Action: Charge the batteries.
ERROR Led is lit after a braze
- The pin brazing was not complete.
Action: The braze should be remade to achieve good results.
The Led turns o after 8 seconds.
ERROR Led glows
- Failure of a sensor in the unit.
Action: The unit should be sent for repair.
LOW BATTERY Led ashes
- Battery is almost discharged.
LOW BATTERY led is lit
- Battery are discharged.
Action: Charge the batteries.
Nothing happen when you press the buttons
- The electronics may have gotten stuck.
Action: Remove control 5A fuse for a short time, put it back again.
The brazing never stops
- The electronics may have gotten stuck.
Action: Remove the gun and the ground magnet from the rails and
disconnect them from the unit as soon as possible.
Remove the control 5A fuse, check that nothing has been damaged
before putting the fuse back.

7
GENERAL MAINTENANCE
13
EQUIPMENT
- Always make sure the batteries are fully charged.
- Check the cables from time to time for damage.
- Check the contact surface on the ground magnet to ensure a good connection.
- Make sure that the brazing pin with the ferrule passes easily in the gun, centered.
BRAZING PINS AND FERRULES
- Keep them dry.
RAILBONDS AND CABLE LUGS
- Keep them free from oxidation.
- Keep them free from contamination like: Grease, oil.
- Make sure that they are not damaged.
SETTING RIGHT LIFT HEIGHT
The S15 brazing gun self adjust to the same lift height every time.
See separate instructions (page 16-17) if adjustment for the gun is necessary.
PIN HOLDERS
Squeeze the ngers on the pin holder together each time you feel that the brazing pin goes in
too easy when mounting them into the pin holder. This is important since all the current goes
thru the pin holder to the brazing pin. If the ngers are too loose the pin holder will be damaged
and must be replaced.
REPLACE THE FUSES:
Push and unscrew anti-clockwise to remove fuse holder.
Replace fuse and mount fuse holder.
NOTE!
Control: 5A fuse
Grinder: 15A fuse
• Check that the pin holder is not burnt and holds the pin tightly. If not, remove the ring holder,
clean all the parts and squeeze the ngers of the pin holder together.
• Check the cables on the gun from time to time for damage. Replace as required.
• Check that the lift level is correct with lift the level tool.
• Always store the tool in a clean dry space, safe from damage or pilferage.
• Always keep critical equipment markings, such as warning stickers and tags legible.
• Equipment repair should be performed by experienced personnel only.
• Do not use the equipment for applications for which it was not intended.
In addition to the Safetrack Precautions in this manual,
observe the following for equipment protection and care.
NOTICE

14
SPECIAL FUNCTIONS
1. BATTERY INDICATOR
Press and hold the “SETTING” button,
and then push the “ON/OFF” button.
“LOW BATTERY” LED will light.
Release the buttons.
The LEDs on the front panel show the
charge status of battery.
2. LIFT HEIGHT CONTROL
First follow step 1 above.
Press “SETTING” and the lights start ashing, at this point, you can check the lifting height of the gun.
3. PRESS “SETTING” one more time and you go back to battery indicator.
Part No. For brazing pin With Ring Holder
9211 (A) 8-9,5 mm 9202 for 8-9,5 mm pins
9213 (B) M8 threaded 9204 for M8, M10 and M12 pins
9215 (C) M10 threaded
9217 (D) M12 threaded
PIN & RING HOLDER OPTIONS
ECONECT SPECIAL FUNCTIONS & PIN/RING HOLDER OPTIONS

7
MAINTENANCE ON S15
15
3. Check that the ring holder is the right type. You can remove
it by hand and its ease of removing can be adjusted with the
small screw on the side of the gun (see photo).
4. Load the gun with the appropriate pin & ferrule.
Check that the axle moves easily with the pin and ferrule
installed by pushing back and forward on the pin with your
nger (see photo).
If the pin does not move easily, change either pin holder or
ring holder. If it still does not move easily the axle is damaged
and must be sent for repair.
1. Check that all cables and lugs are without damages
and properly tighten in gun and unit.
2. Check that the right pin holder is tted in the gun.
Make sure the pin holder is tight on the gun,
otherwise a spark can destroy the axle.
Use a wrench to hold the nut from turning and tighten
the pin holder as shown in the picture.
Do not allow the main shaft to turn, only turn the pin holder
to tighten.
Use one 8 mm and one 10 mm wrench for 8-9,5 mm and
M8 pin holders.
Two 10 mm wrenches for M10 and M12 pin holders.
The pin holder must also have a tight grip on the brazing pin,
otherwise you can have a contact fault or a spark can arise
and destroy the pin holder. To get a tighter t, push the pin
holder ares closer together with your ngers.
Make sure, never twist the axle when mounting the pin holder!
IMPORTANT
PERIODICAL MAINTENANCE ON S15 AUTOMATIC GUN

CHECKING LIFT HEIGHT
16
1. On the PinBrazing unit Econect, press and hold
“SETTING” and press ”ON/OFF”.
When “LOW BATTERY” is lit, release buttons.
Press “SETTING” and the leds will start to blink.
In this mode it is able to check the lift height.
2. Insert the brass part of the tool in the pin holder and t
the plastic part in to the ring holder.
3. Press the trigger on the gun and watch the brass rod.
IMPORTANT!
Press the tool completely against the gun when
triggering the gun. Otherwise the gun may
be damaged!
IMPORTANT!
Hold the gun so the tool is horizontal.
4. The lift level is calibrated when the brass rod is in
same level as the outer plastic sleeve.
Tolerance ±0,2 mm.
If the brass rod stick out more than 0,2 mm, then the gun
needs to be calibrated, see point 4 on the next page.
If the brass rod goes in more than 0,2 mm, then the gun
needs to be calibrated, see point 5 on the next page.
See next page (17) for instructions on how to calibrate the
PinBrazing gun S15.
The normal lift height is 2 mm. This is very important for the arc and energy amount.
Too high lift height increase the risk of a “cold brazing”, too low lift height reduce the
time and increase misres.
IMPORTANT
Lift level tool: SAFE 91245

7
CALIBRATE LIFT HEIGHT
17
1. On the PinBrazing unit Econect, press and hold
“SETTING” and press ”ON/OFF”.
When “LOW BATTERY” is lit, release buttons.
Press “SETTING” and the leds will start to blink.
In this mode it is able to check the lift height.
2. Insert the brass part of the tool in the pin holder
and t the plastic part in to the ring holder.
See instruction point 2 on page 16.
3. Take o the plastic plug with the needle in the
upper small hole in the front of the gun.
IMPORTANT!
Never adjust in the hole where the big plug is!
4. When lift height is too low:
Use the 3 mm hexagon allen wrench and adjust the
screw in the small hole counter-clockwise about 1/4 of
a turn then check with the lift level tool as in page 16.
5. When lift height is too high:
Use the 3 mm hexagon allen wrench and adjust the
screw in the small hole clockwise about 1/4 of a turn
then check with the lift level tool as in page 16.
If all is ok, t the plug in the hole again.
If not ok, send for repair.
Calibrate lift height on a S15 gun.
Only calibrate if the gun is maladjusted.

18
PART PART NUMBER
S15 Brazing gun 91015
S15 Angle brazing gun 910151
Pin holder A 8-9,5 mm 9211
Pin holder B M8 9213
Pin holder C M10 9215
Pin holder D M12 9217
Ring holder 8-9,5 mm 9202
Ring holder M8/M10/M12 9204
Extended Pin/Ring holder set, 8-9,5 mm 9227
Extended Pin/Ring holder set, M8 9229
Gun cable 2,7 m 9230-S15
Gun cable extension 5 m 9235-S15
Gun tool set 91250
Battery charger, stationary use, 36V 7A 8048
Battery charger, car use 12V/36V 2A 80561
Ground Switchable magnet 2,7 m 80730
Switchable magnet (no cable) 9035
Ground grip 2,7 m 8071
Cordless Grinding machine 593070
Grinding Pin/Stone 8025
Carbide burr, Type C 8014
Carbide burr, Type C Extended 8014XL
Fuse holder 91197
Fuse 200mAT (on circuit board) 91180
Fuse 1AT 91182
Fuse 15AT 91181
Accessories case 95240
Carrying harness 9523
Protective eyewear 8043
ACCESSORIES AND SPARE PARTS
For more information, please visit www.safetrack.se.

ACCESSORIES AND SPARE PARTS
7
19
Heavy Duty Case
Inside fits the following (not included):
• Grinding Machine
• Grounding Device
• PinBrazing Gun including cable
• Protective Eyewear
• Carrying Harness
• 2 tins (for Brazing pins & Ferrules)
Dimensions: 459x319x160 mm
Weight: 3,4 kg
Part no: 95240
Grinding Machine 18V
• Long-nose type
• Round collet nut reduces risk of damage on workpiece
• Restart function with warning light
• Rubber protection for heat insulation and grip
Technical information:
• Maximum wheel size 38 mm
• Speed (rpm) 25 000
• Incl. 2x 18V Li-Ion battery, 220V charger and case.
Dimensions: 402x82x118 mm
Weight: 2,0 kg (5.61 kg for the cpl. package)
Part no: 593070
Carbide burr Type C
Tungsten carbide,
double diamond cut burr.
Suitable for Steel, Hardened Steel,
Stainless Steel, Cast Iron, Titanium,
Nickel, Copper / Copper Alloys.
Dimensions: 6 mm shank, 12
mm head diameter, 25 mm head
length, 70 mm overall length.
Part no: 8014
Grounding Device 300A
Switchable grounding
magnet complete with
cable and connections.
Length: 2,7m
Weight: 1,22 kg
Part no: 80730
Back Carrying Harness
Carry the Econect unit on your back.
Complete with Holster.
Weight: 3,5 kg
Part no: 93690
Insulation Bag for Econect
Increased capacity in even colder weather.
Part no: 937005
Angle Head Gun
The angle gun makes it
possible to pinbraze on the
web between two close rails
in for example a switch or
crossing, both at the head
and the web of the rail.
Weight: 1,7 kg
Part no: 910151
Grounding Grip
Used for grounding of non-magnetic ma-
terials such as manganese rails, for pipes
or for avoiding to grind the grounding
spot and save some battery capacity.
Weight: 1,7 kg
Part no: 8071
Charger for Econect
Powerful stationary charger for
PinBrazing unit Econect.
36V/230V
Weight: 2 kg
Part no: 8048
Car Charger for Econect
Used for charging the
PinBrazing unit Econect
through the cars 12V
outlet.
Weight: 1 kg
Part no: 80561

SAFETRACK BAAVHAMMAR AB
Möllebergavägen 339-24, 245 93 Staanstorp, Sweden
Phone. +46 (0)40 44 53 00
PINBRAZING MATERIAL
20
Rail bonds & connectors
Brazing pins & ferrulesT-connectors Pinbrazing clamps
Installation examples
10011 (8mm)
10101 (8mm X)
10131 (9,5mm)
10641 (M8)
10741 (M10)
10561 (M12)
2003
2009
2012
Other manuals for ECONECT SAFE 94350
1
This manual suits for next models
1
Table of contents
Other SAFETRACK Welding System manuals